Freeing a Xiaomi Humidifier from the Cloud
I recently moved into a new apartment which I used as an opportunity to make our home a little smarter. As a big open source supporter I built my smart home platform with Home Assistant of course.
Unfortunately, there are still far too few products that are directly compatible with Home Assistant. Especially in the area of humidifiers where I only found products that rely on a proprietary app or cloud from the manufacturer. Something that I would like to avoid at all costs. For one thing, such dependence is a certain form of planned obsolescence, as the product becomes useless as soon as the app loses its compatibility with new smartphone operating system versions or the manufacturer’s cloud is no longer operated.
Therefore, it was important for me to find a smart humidifier that integrates directly with my Home Assistant setup. To achieve this goal, I identified two options:
- Add sensors / actuators to a classic humidifier to make it smart.
- Replace the firmware of a smart humidifier with my own source code.
I decided to use the second approach, because it required less effort, since I would have had to implement my own firmware anyway.
Next, I was faced with the task of finding a suitable humidifier whose firmware I could easily replace. I specifically looked for devices that contained an ESP8266 or ESP32 microcontroller from Espressif, because for these I could easily create a new firmware with ESPHome.
ESPHome is a system that allows you to control your ESP8266/ESP32 through simple but powerful configuration files and remotely control it through home automation systems.
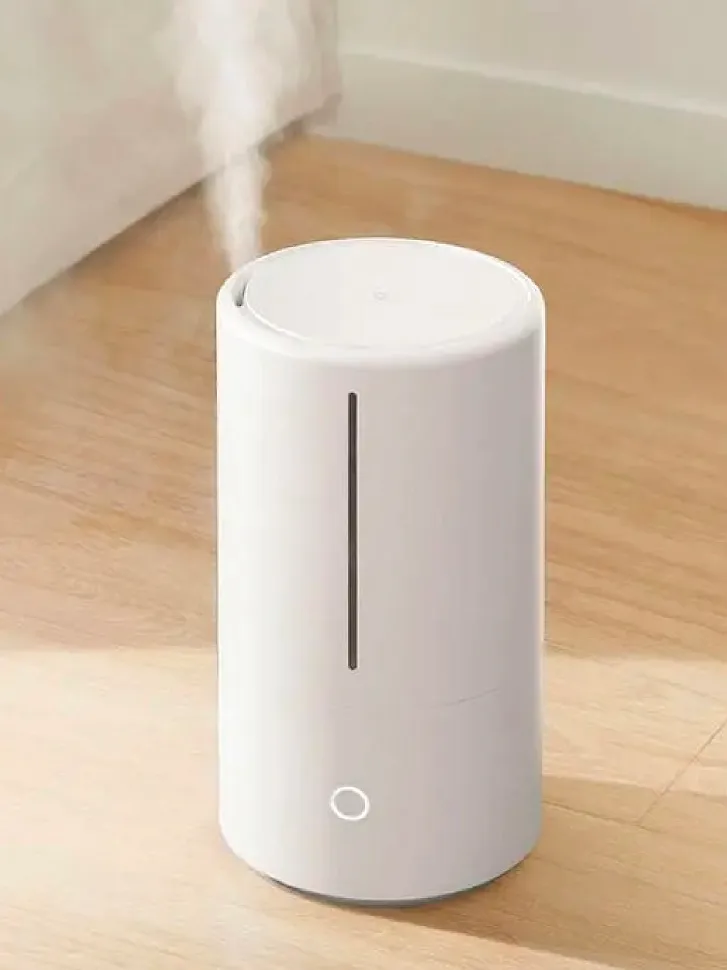
Thanks to Sören Beye /Hypfer , I quickly became aware of the Xiaomi Mi Smart Antibacterial Humidifier, as Sören himself wrote his own firmware for this humidifier.
Unfortunately, his original version of the customized firmware ( /Hypfer/esp8266-deerma-humidifier ) is no longer compatible with the current version of the producr, as Xiaomi has modified the internal communication protocol.
Therefore, I decided to re-implement the firmware based on ESPHome as an “external component”.
You can find the code for this component here: /stv0g/esphome-config/components/xiaomi_deerma_humidifier
How to Hack your own Humidifier
Section titled “How to Hack your own Humidifier”This section is going to walk you through the process of modifying your own Xiaomi Humidifier.
-
Find the correct model
The internal Mi Model ID of the supported device is
deerma.humidifier.jsq. The Model on the packaging beingZNJSQ01DEM. -
Disassembly
There are 4 Philips-head screws hidden under the rubber foot ring which can be easily pealed of. Its usually find to remove the rubber only in areas where the screws are located. That way you can easily reattach it later.
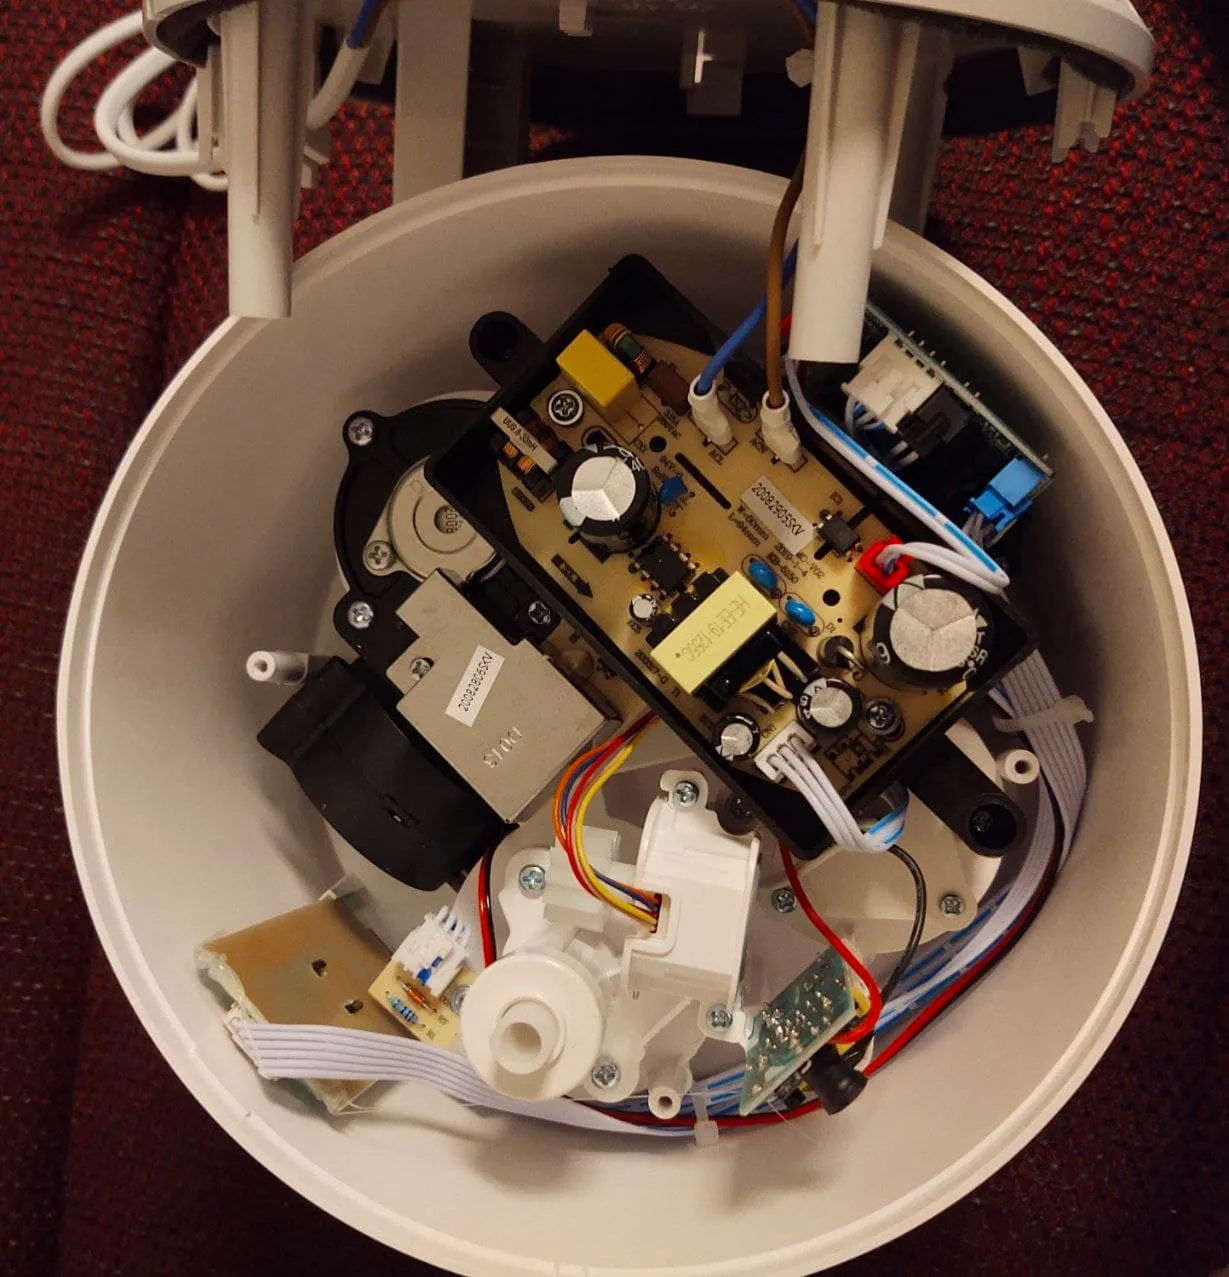
Internals of the Humidifier. 
Bottom view of Humidifier. Screws are behind rubber foot ring. In the inside, you will find a small Wifi module attached to the back of the housing. Remove the module and solder on the wires as shown in the picture below.
-
Wire UART
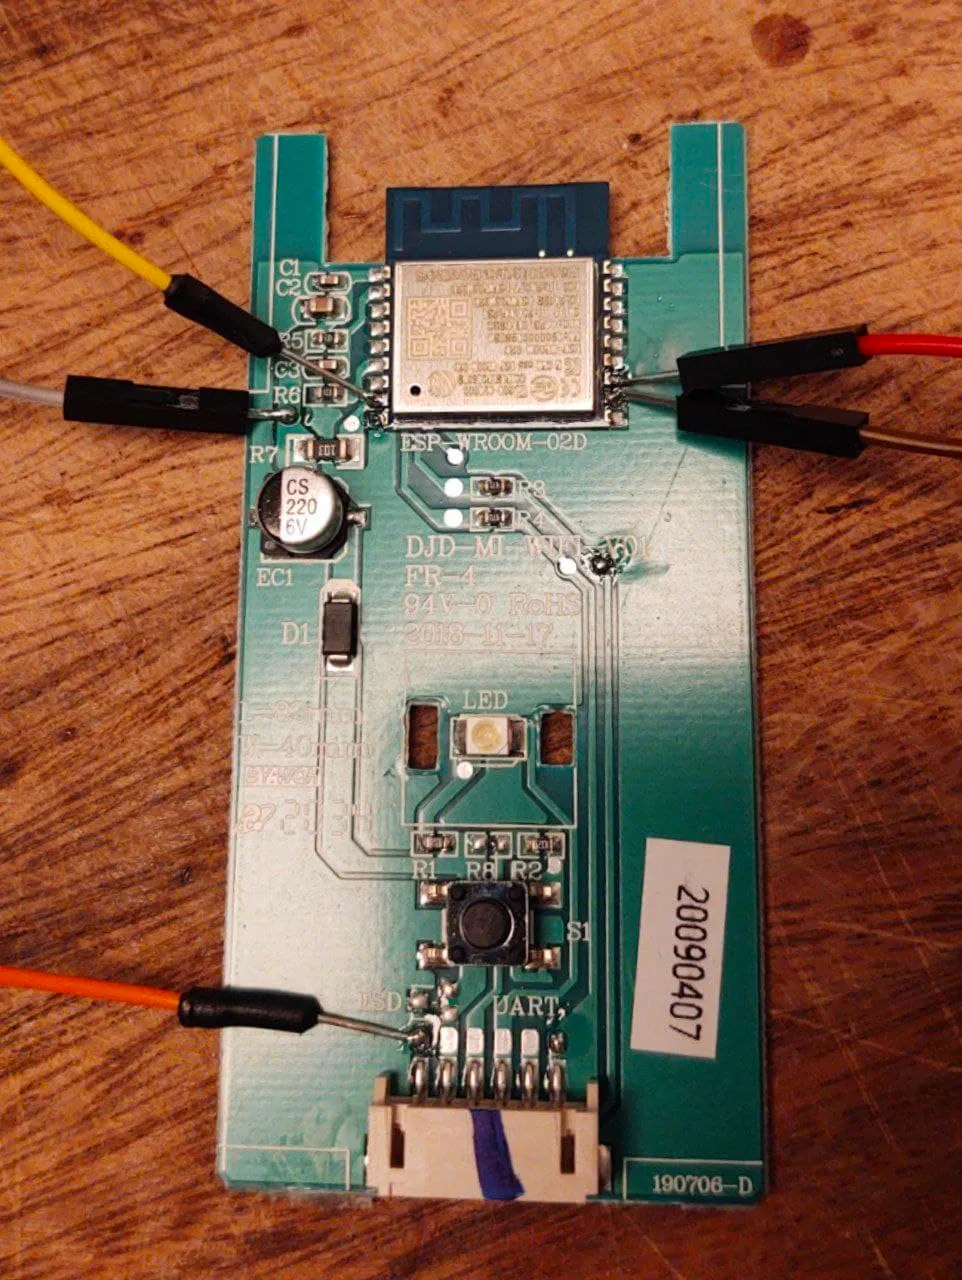
Wifi board featuring an ESP-WROOM-02 module. In the last picture, the colors of the wires correspond to the following:
- Orange: GND
- Grey: VCC (3.3 Volt!)
- Yellow: GPIO0
- Brown: RX
- Red: TX
In order to flash the module, you will need to tie
GPIO0to GND and attach a 3.3V serial adapter to theRX,TXpins. I recommend to also to disconnect the module from the humidifier and power it via your Serial to USB adapter via theVCCpin.To flash the ESP8266 chip you can either use ESPHome’s build-in web flasher or
esptool.py. -
Create backup of original firmware
But before we flash the new firmware, I recommend to first make a backup of the original Xiaomi firmware by running:
Terminal window esptool.py \--chip esp8266 \--baud 230400 \--port /dev/tty.usbserial-31310 \read_flash 0x0 0x200000 xiaomi-deerma-humidfier-original-2mb.bin -
Flash new firmware
Afterwards, we can flash the new firmware:
Terminal window esptool.py \--chip esp8266 \--baud 230400 \--port /dev/tty.usbserial-31310 \write_flash 0x0 deerma.bin