Just like the venerable Dnsmasq AVM’s FRITZ!OS uses hostnames learned from its DHCP leases and makes them resolvable via its internal DNS server.
Unfortunately, this feature in FRITZ!OS has some limitations:
The name of the DNS Zone is hard coded to fritz.box and can not be adjusted. Hence, the resolvable names have the following schema: myhostname.fritz.box
The internal DNS server only supports recursive DNS looks. It does not act as an authoritative DNS server. Hence the local zone can not be delegated.
AXFR zone transfers are not supported.
My solution to these shortcomings is Fritz-DNS which:
Is a small tool written in the Go programming language.
Is a small authoritative DNS server which serves A / AAAA resource records for local hosts connected to an AVM Fritz Box home WiFi router.
Can be used in a hidden master configuration as it supports AXFR zone transfers.
Uses the custom extension (X_AVM-DE_GetHostListPath) of the TR-064 Hosts SOAP-API as documented here to retrieve a list of local hosts.
Supports the generation of AAAA (IPv6) resource records based on the hosts MAC addresses using 64-Bit Extended Unique Identifier (EUI-64) and a configured unique local address (ULA) prefix.
Does not yet support PTR resource records (to be implemented…)
Ich möchte Stadtpolitik in Aachen für alle verständlich machen.
Mein aktuellstes Projekt aachen-transparent.de ermöglicht es, die öffentlichen Informationen aus dem städtischen Ratsinformationssystem modern und benutzerfreundlich aufzubereiten.
Dazu habe ich das bereits existieren Open-Source Projekt Meine-Stadt-Transparent erweitert und für die Bedürfnisse in Aachen angepasst.
Screenshot von aachen-transparent.de.
Aachen Transparent ist ein Projekt, dass ich ehrenamtlich im Rahmen des Open Data Labs Aachen ins Leben gerufen habe.
Es versucht einige der Unzulänglichkeiten des Ratsinformationssystems der Stadt Aachen zu umgehen.
Dazu nutzt es dessen öffentliche OParl Schnittstelle um die dort hinterlegten Informationen über eine moderne Oberfläche zugänglich zu machen.
WireGuard is a communication protocol and free and open-source software that implements encrypted virtual private networks (VPNs), and was designed with the goals of ease of use, high speed performance, and low attack surface.
I’ve been using it in my home lab setup since about 2020.
When, in the end of 2021, it was finally merged into the Linux mainline with release 5.9, I started to replace my former Tinc-VPN setup with it.
Tinc-VPN is another great open source VPN solution.
Unfortunately, its development has stalled over the last years which motivated me to look for alternatives.
In contrast to WireGuard, Tinc runs as a user-space daemon and uses tun / tap devices which adds a significant processing overhead.
Like WireGuard, it is also using UDP for tunneling data, but falls back to TCP in situations where direct datagram connectivity is not feasible.
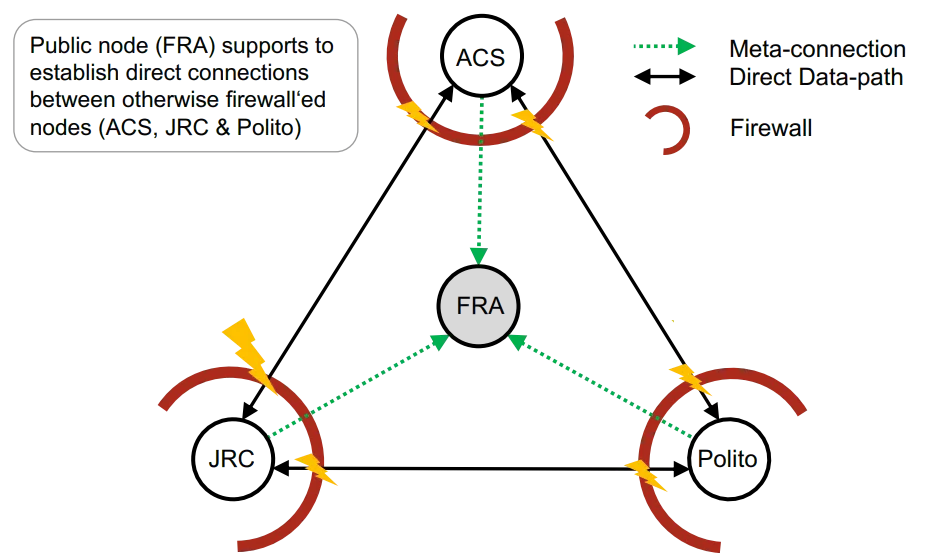
Another big advantage of Tinc is its ability to form a mesh of nodes and to route traffic within it when direct P2P connections are not possible due to firewall restrictions.
At the same time, this mesh is also used for facilitating direct connections by signaling endpoint addresses of NATed hosts.
Tinc's mesh capability.
This mesh functionality made Tinc quite robust against the failure of single nodes as usually we could route traffic via other paths.
That said, it is worth noting that this setup does will not bring back some of the beloved features of Tinc.
Both meshing, the peer and and endpoint discovery features of Tinc are currently and will never be supported by WireGuard.
Jason A. Donenfeld the author of WireGuard focused the design of WireGuard on simplicity, performance and auditability.
Hence advanced features like the ones mentioned will only be available to WireGuard by additional agents / daemons which control and configure WireGuard for you.
Examples for such are Tailscale, Netmaker and Netbird.
The setup presented in this post is a so called active / standby configuration consisting of two almost equal configured Linux servers running both WireGuard and the keepalived daemon.
As the name suggest only one of those two servers will by actively handling WireGuard tunneling traffic while the other one stands by for the event of a failure or maintenance of the active node.
Before get started some requirements for the setup:
2 Servers running Linux 5.9 or newer.
A working Wireguard configuration.
A local L2 network segment two which both servers are connected.
Upstream connectivity without NATing via gateway connected to the network segment (usually provided by your internet or hosting provider).
An unused address to be used as Virtual IP (VIP) which roamed between the two servers by VRRP.
An important point is here the assumption that we are running both servers in the same switched network segment as this is a requirement for VRRP.
We are also assuming that the upstream gateway performs no NATing.
This guide covers only IPv6 addressing.
However all steps can be also adapted or repeated for a dual stack or IPv4-only setup.
Similarly, a reciprocal configuration file is needed on the client side which skip here for brevity.
Before proceeding, we activate the interface on both servers:
Terminal window
systemctlenable--nowwg-quick@wg1
wgshowwg1# Check if interface is up
Configuring Keepalived
Create a configuration file for keepalived at /etc/keepalived/keepalived.conf
global_defs {
enable_script_security
script_user root
}
# Check if the server the WireGuard interface configured
vrrp_script check_wg {
script "/usr/bin/wg show wg1"
user root
}
vrrp_instance wg_v6 {
interface eno1
virtual_router_id 52
notify /usr/local/bin/keepalived-wg.sh
state BACKUP # use BACKUP for Server B
priority 99 # use 100 for Server B
virtual_ipaddress {
2001:DB8:1::1/64
}
track_script {
check_wg
}
}
Create a notification script for keepalived at /usr/local/bin/keepalived-wg.sh
#!/usr/bin/env bash
TYPE=$1
NAME=$2
STATE=$3
PRIO=$4
WGIF=wg1
case${STATE}in
MASTER)
iplinksetupdev${WGIF}
;;
BACKUP|FAULT|STOP|DELETED)
iplinksetdowndev${WGIF}
;;
*)
echo"unknown state"
exit1
esac
Now start the keepalived daemon:
Terminal window
chmod+x/usr/local/bin/keepalived-wg.sh
systemctlenable--nowkeepalived
Testing the fail over
In our configuration, Server A has a higher VRRP priority and as such will be preferred if both servers are healthy.
To test our setup, we simply bring down the WireGuard interface on Server A and observe how the VIP gets moved to Server B.
From the WireGuard peers perspective not much changes.
In fact no connections will be dropped during the fail-over.
Internally, the clients WireGuard interface renegotiate the handshake.
However, that step is actually not observable by the user.
Run the following commands on Server A while alongside test the connectivity from the client side through the tunnel via ping -i0.2 2001:DB8:2::1:
Terminal window
# Check that keepalived has moved the VIP to interface eno1
ipaddrshowdeveno1
# Bring down the Wireguard interface
wg-quickdownwg1
# Keepalived should now have moved the VIP to Server B
In my personal network, I operate a Interior Gateway Protocol (IGP) to dynamically route traffic within and also towards other networks.
Common IGPs are OSPF, ISIS or BGP.
In my specific case, both Servers A & B run the Bird2 routing daemon with interior and exterior BGP sessions.
So how does the WireGuard HA setup interoperates with my interior routing? Quite well actually.
As my notify script (keepalive-wg.sh) will automatically bring up / down the interface, the routes attached to the interface will be picked up by Bird’s direct protocol.
I am also planning to extend my WireGuard agent cunīcu (/cunicu/cunicu ) to support the synchronization of WireGuard interface configurations between multiple servers.
Surprisingly, the setup works by using Keepalived and does not require any iptables or nftables magic to rewrite source IP addresses.
I’ve seen some people mentioning that SNAT / DNAT would be required to convince WireGuard to use the virtual IP instead of the server addresses.
However, in my experience this was not necessary.
Another concern has been that the backup Wireguard interface still might attempt to establish a handshake with its peers.
This would quite certainly interfere with the handshakes originated by the current master server.
However, also this has not been proven to be the case.
I assume the fact that our notify script brings down the WireGuard interface on the backup server causes them to cease all communication with its peers.
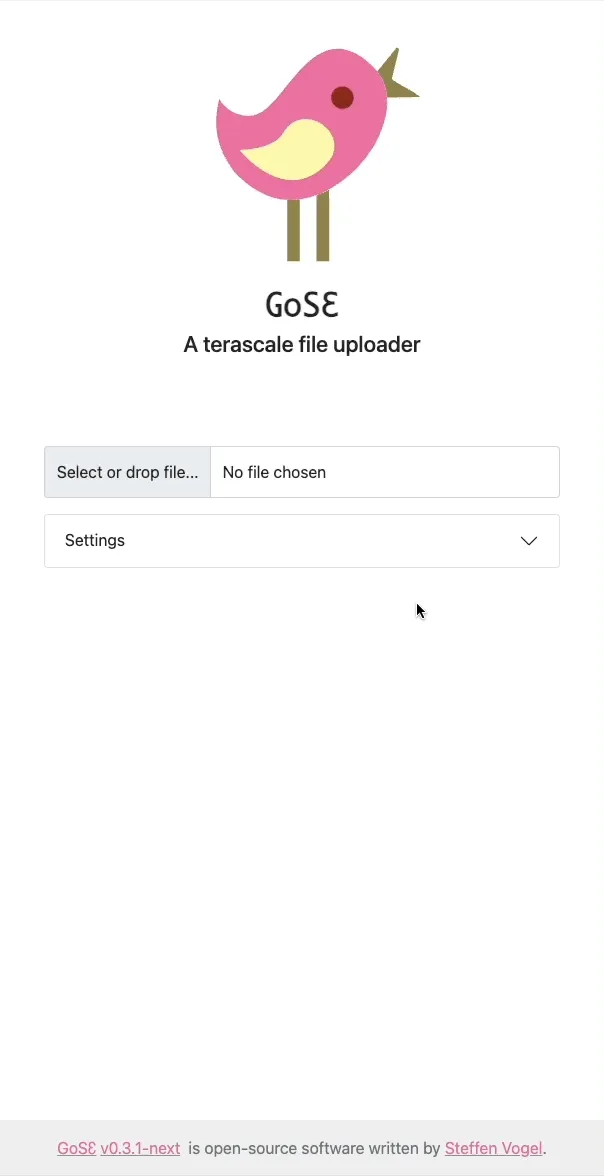
GoSƐ is a modern and scalable file-uploader focusing on scalability and simplicity.
It is a little hobby project I’ve been working on over the last weekends.
The only requirement for GoSƐ is a S3 storage backend which allows to it to scale horizontally without the need for additional databases or caches.
Uploaded files a divided into equally sized chunks which are hashed with a MD5 digest in the browser for upload.
This allows GoSƐ to skip chunks which already exist.
Seamless resumption of interrupted uploads and storage savings are the consequence.
And either way both upload and downloads are always directed directly at the S3 server so GoSƐ only sees a few small HTTP requests instead of the bulk of the data.
Behind the scenes, GoSƐ uses many of the more advanced S3 features like Multi-part Uploads and Pre-signed Requests to make this happen.
Users have a few options to select between multiple pre-configured S3 buckets or enable browser & mail notifications about completed uploads.
A customizable retention / expiration time for each upload is also selectable by the user and implemented by S3 life-cycle policies.
Optionally, users can also opt-in to use an external service to shorten the URL of the uploaded file.
Currently a single concurrent upload of a single file is supported.
Users can observe the progress via a table of details statistics, a progress-bar and a chart showing the current transfer speed.
GoSƐ aims at keeping its deployment simple and by bundling both front- & backend components in a single binary or Docker image.
GoSƐ has been tested with AWS S3, Ceph’s RadosGW and Minio.
Pre-built binaries and Docker images of GoSƐ are available for all major operating systems and architectures at the release page: /stv0g/gose (Releases) .
GoSƐ is open-source software licensed under the Apache 2.0 license.
I consider the current state of GoSƐ to be production ready.
Its basic functionality is complete.
However, there are still some ideas which I would like to work on in the future:
I spent some time over the last months to improve the security of servers and passwords.
In doing so, I started to orchestrate my servers using a configuration management tool called Ansible.
This allows me to spin-up fresh servers in a few seconds and to get rid of year-old, polluted and insecure system images.
Ansible loves Yubico.
My ‘single password for everything’ has been replaced by a new password policy which enforces individual passwords for every single service.
This was easier than I previously expected:
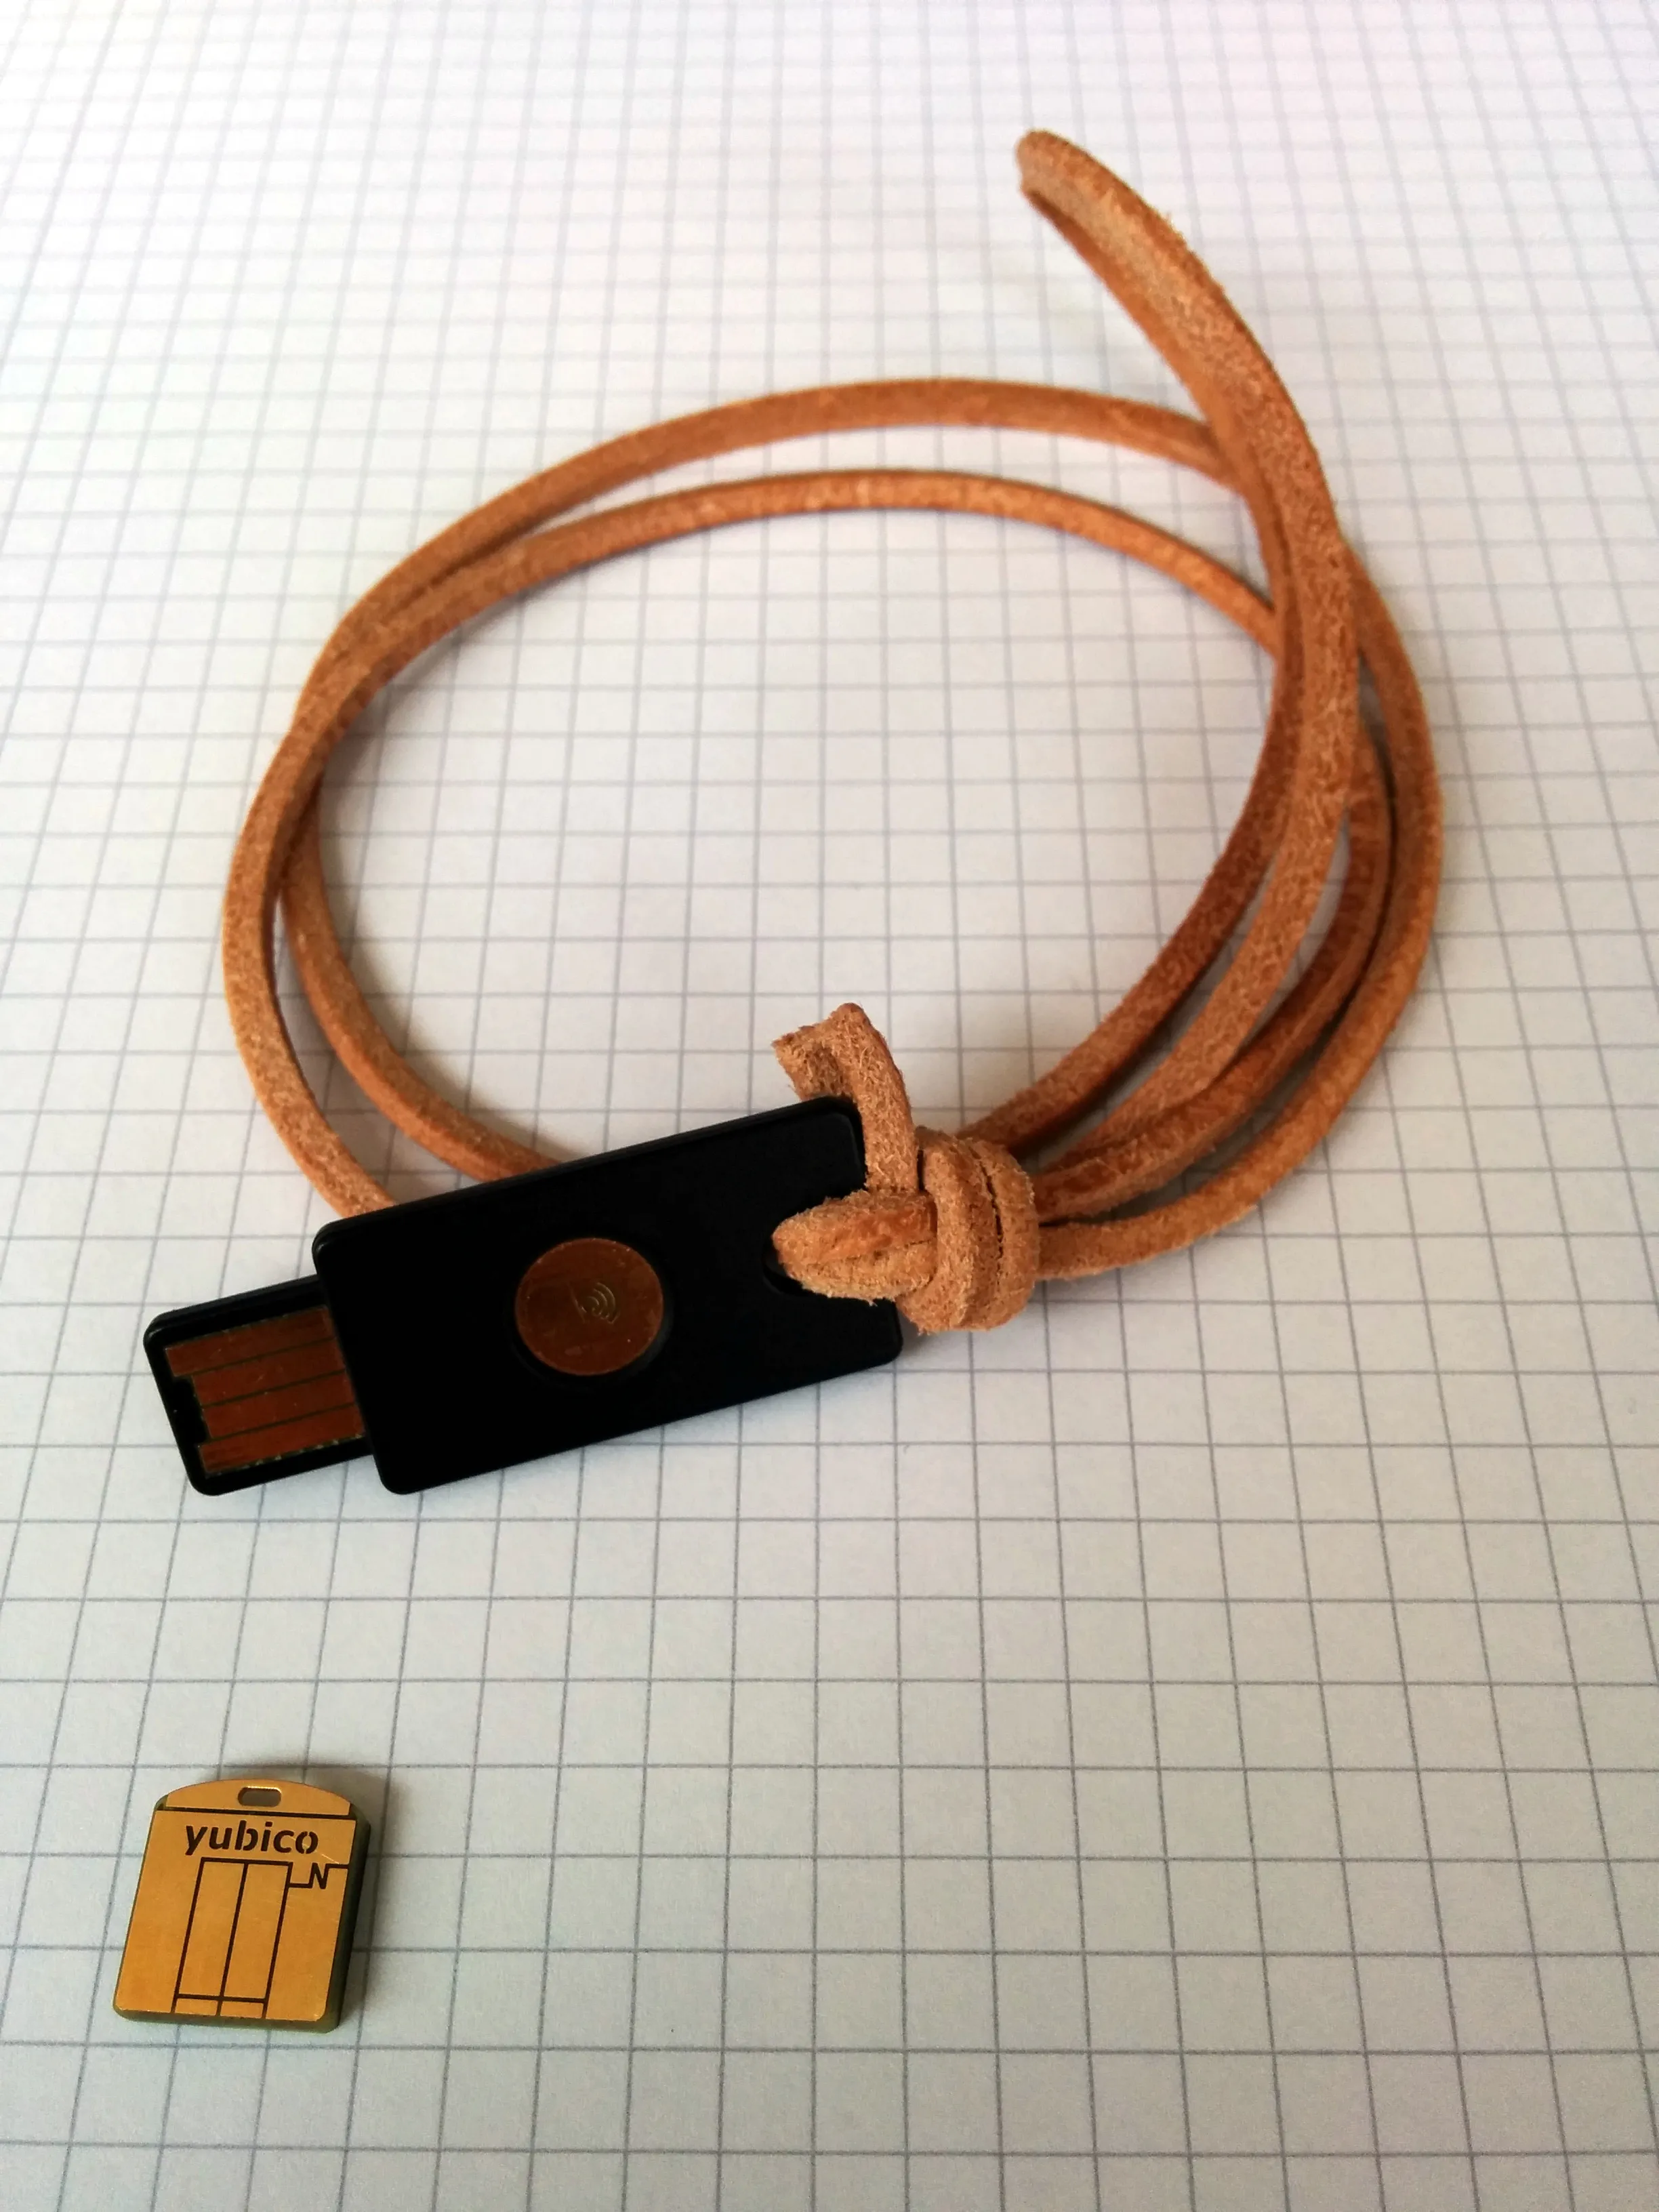
To unlock the ‘paranoid’ level, I additionally purchased a Yubikey Neo token to handle the decryption of my login credentials in tamper-proof hardware.
‘pass’ is just a small shell script to glue several existing Unix tools together: Bash, pwgen, Git, xclip & GnuPG (obeying the Unix philosophy).
The passwords are stored in simple text files which are encrypted by PGP and stored in a directory structure which is managed in a Git repository.
Yubikey Neo und Neo-n.
There are already a tons of tutorials which present the tools I describes above.
I do not want to repeat all of it.
So, this post is dedicated to solve some smaller issues I encountered.
I wrote a C++ header file to facilitate the co-operation of those two libraries.
This file enables the conversion / casting of OpenCV and Qt types e.g.:
/stv0g/calcelestial ist ein kleines Linux-Tool zum Berechnen von Auf- und Untergangszeiten sowie der Position sämtlicher Planeten unseres Sonnensystems.
Es ist der Weiterentwicklung von /stv0g/sun , das ursprünglich als kleines Bash-Skript für meinen Router startete.
Mittlerweile ist das Tool zu einem weit umfangreicherem Werkzeug gewachsen, welches nicht mehr nur die Auf- und Untergangszeit der Sonne berechnen kann:
Es sind mit dem Mond, Mars, Neptun, Jupiter, Merkur, Uranus, Saturn, Venus und Pluto eine Menge neuer Planeten dazugekommen.
Auch kann nun die Position dieser Himmelskörper zu jedem beliebigen Zeitpunkt oder dem Auf- und Untergang berechnet werden.
Nun bin ich selber kein kleiner Hobby-Astronom, sodass ich diese ganzen Berechnungen aus dem Ärmel schütteln könnte.
Stattdessen nutze ich die Bibliothek libnova.
libnova benutzt die sehr genauen Algorithmen “Variations Séculaires des Orbites Planétaires” (kurz VSOP-87), die Pierre Pratagnon 1987 entwickelte.
Ich sitze im Zug nach Hause.
Gerade komme ich von der letzten Vorlesung des zweiten Semesters: Informatik.
Eigentlich bin ich auf dem Weg in die Semester-”Ferien”, ständen da nicht für den nächsten Monat noch 4 Klausuren in meinem Kalender 😉.
Informatik, Grundlagen des Digitalrechners.
Klingt eigentlich recht trocken.
Trotzdem ist es klar mein Favorit unter den Fächern dieses Semesters.
Als Ergänzung zur Vorlesung richtete unser Professor einen kleinen Wettbewerb aus.
Mein Beitrag zum Students Englightment Award ist ein Compiler Frontend für den GNU Compiler der Atmel AVRs.
Teil der Vorlesung war die Einführung des Mikrocontrollers ATMega8 von Atmel und dessen Programmierung mit Assembler.
Dabei lernten wir zuerst die Schaltungstechnischen Grundlagen und die Minimierung von Schaltnetzen.
Anschließend sind wir auf den Aufbau der Zentralen Recheneinheit eingegangen (Steuerwerk, ALU).
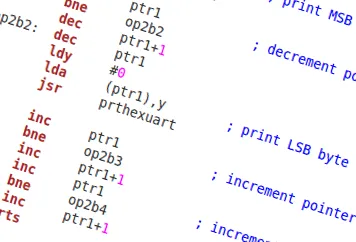
transcode kompiliert & assembliert ANSI C und Assembler in Maschinencode und umgekehrt.
Dabei wird mit Hilfe von Debugging Informationen ein Bezug zwischen Zeilen im C-Code und den Mnemonics hergestellt.
Durch Auswählen von Zeilen werden Bezüge direkt durch Hervorhebungen dargestellt.
Für die Darstellung des Maschinencodes lässt sich zwischen binär, dezimal & hexadezimaler Form wählen.
Micha und Steffen haben, wie viele Bastler, im Laufe der Zeit viele kleine Tools entwickelt, die bei mehr oder weniger alltäglichen Problemen helfen.
Wir fanden, dass sie zu schade sind, um willkürlich verteilt auf verschiedenen Festplatten herum zu liegen und schließlich in Vergessenheit zu geraten.
Uns fehlte oft die Übersicht und eine angemessene Dokumentation.
Oder wir wollten bestimmte Projekte einfach nicht auf unseren eigenen Websites veröffentlichen.
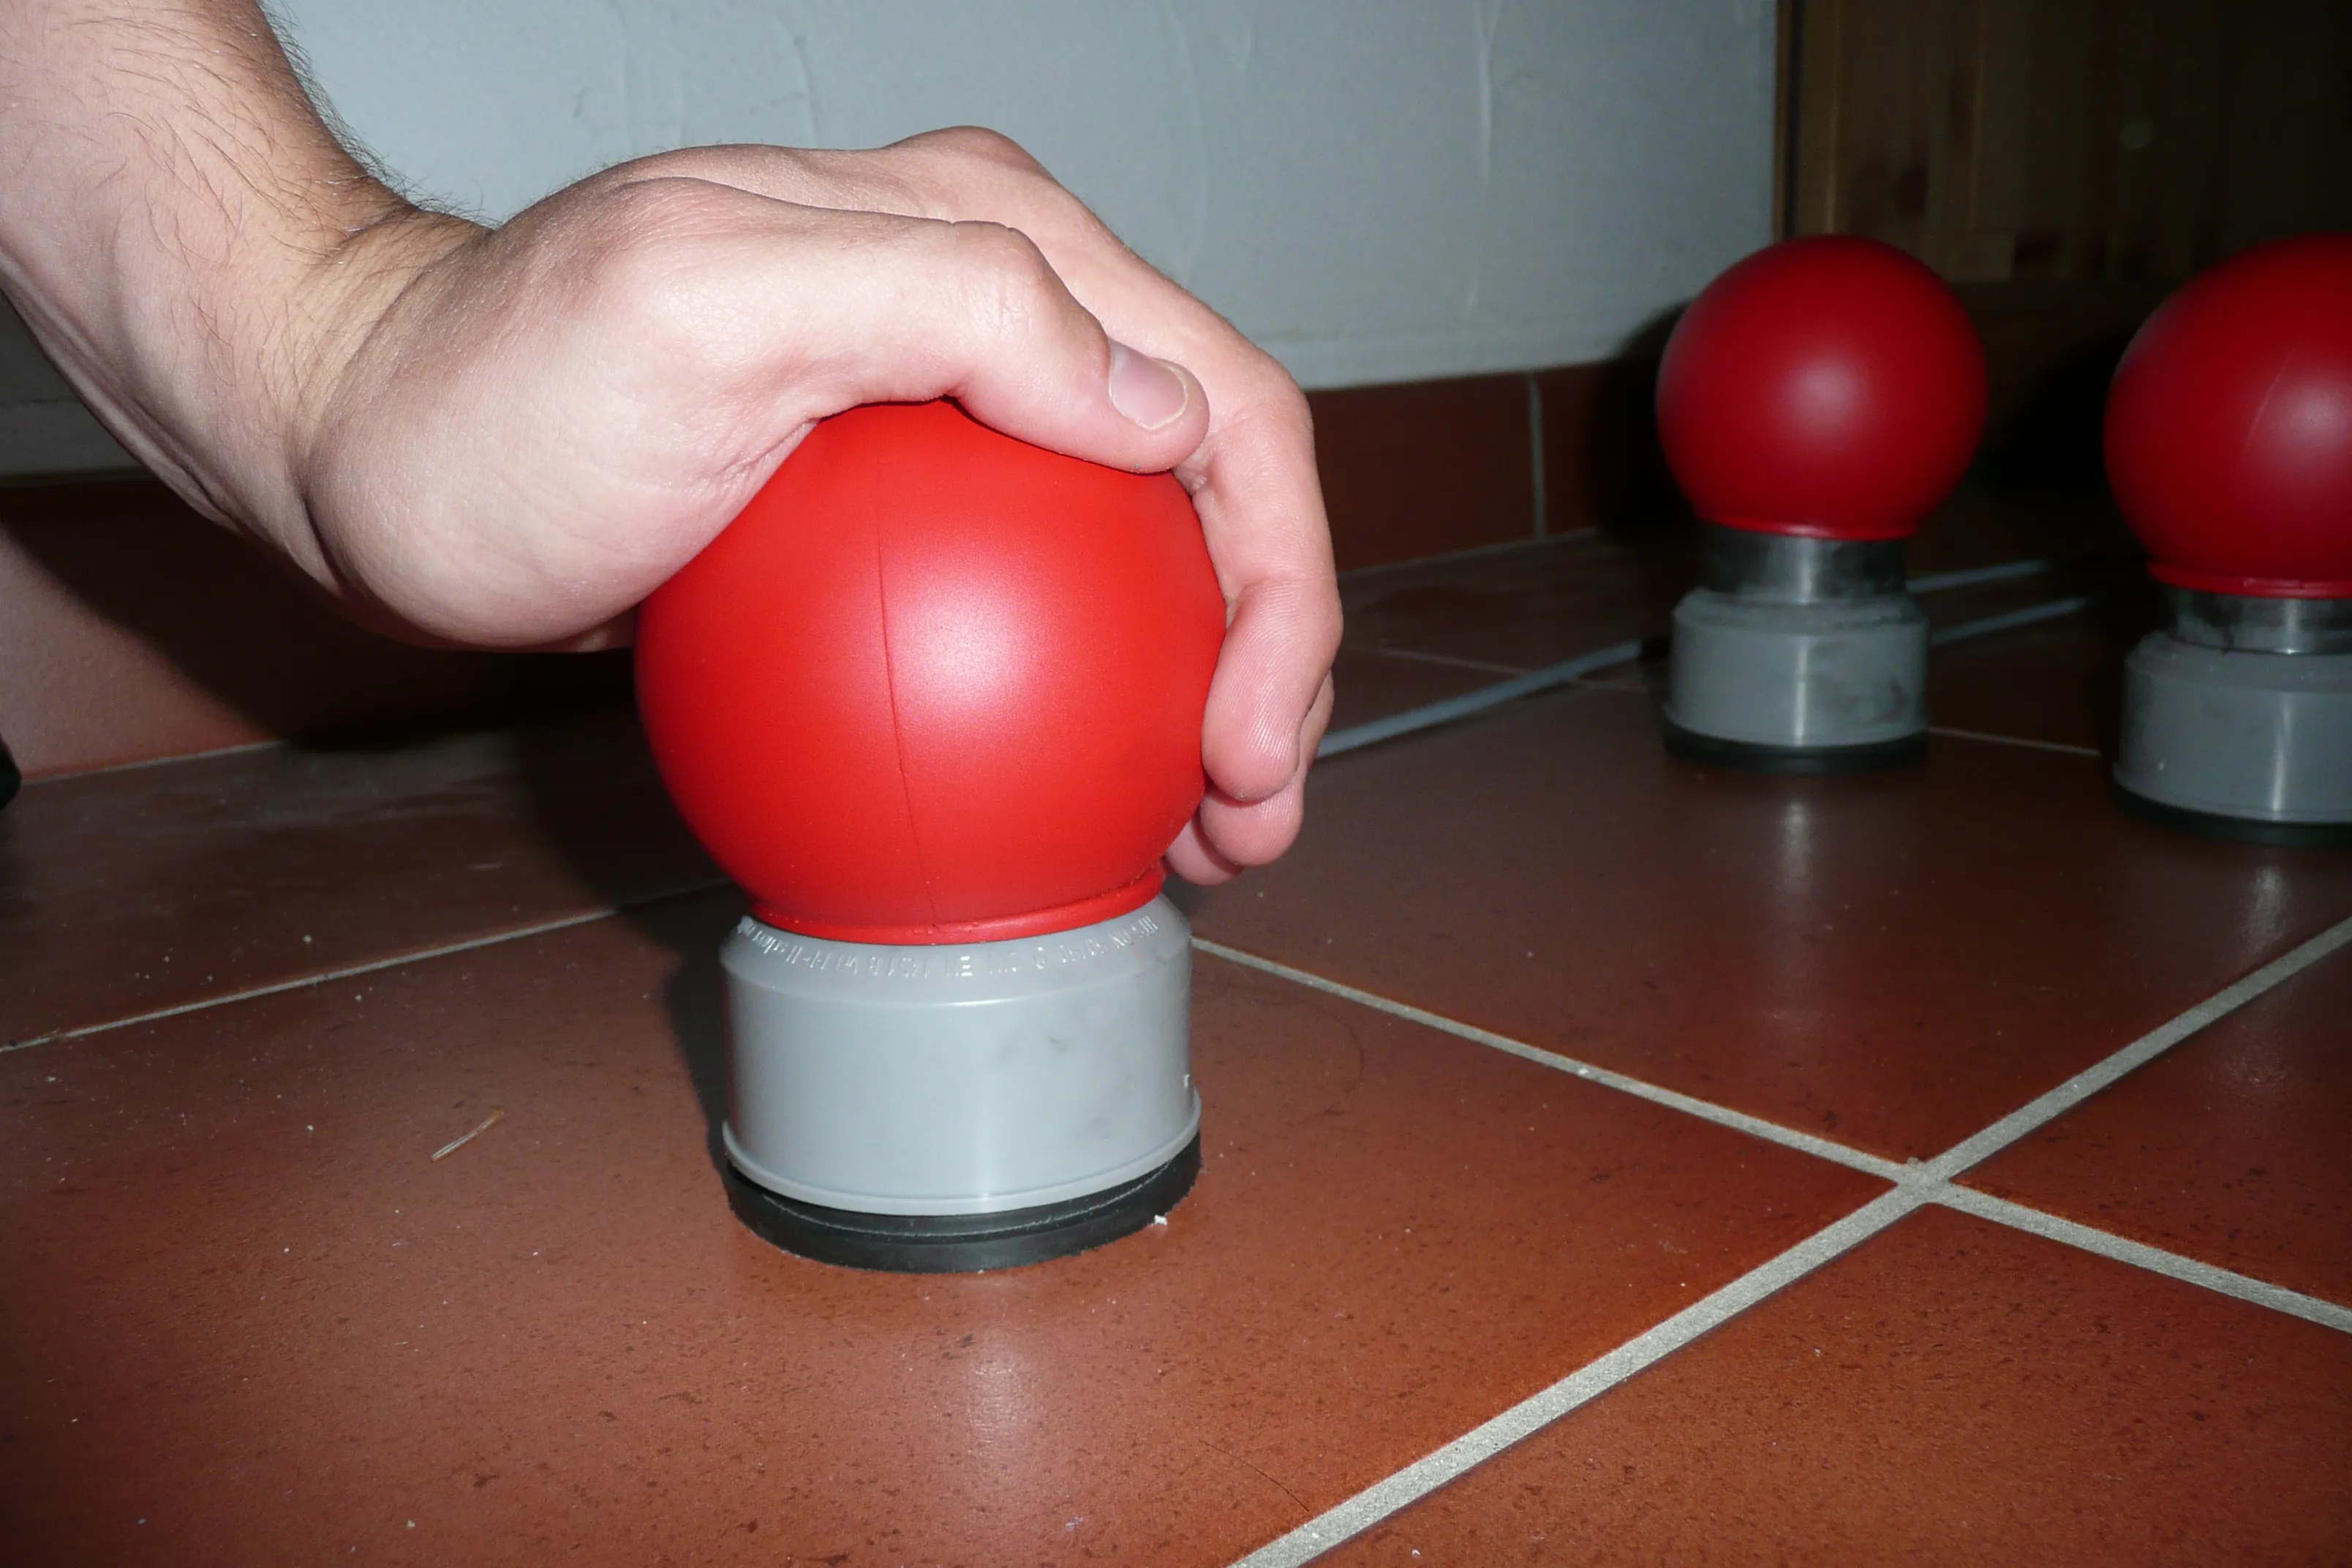
Für die einige Spiele unseres Abi-Scherzes benötigten wir Buzzer wie man sie aus den TV-Shows “Schlag den Raab” oder “Familien Duell” kennt.
Als Techniker war es meine Aufgabe diese zu besorgen.
Schnell stellte ich fest, dass diese gewöhnlichen Buzzer, die eigentlich für den industriellen Einsatz bestimmt sind, für unseren Ramen viel zu teuer waren.
Bei Preisen von circa 50 € pro Buzzer brauchten wir eine Alternative.
Ich entschied mich den kompletten Buzzer inklusive Elektronik selbst zu bauen.
Die Auswertung wird hierbei von einem Computer übernommen.
Die Buzzer simulieren eine USB-Tastatur mit nur einer Taste.
Dank des Projekts V-USB, ein Software USB Stack für Atmel AVR Mikrokontroller, der auch das USB-HID Protokoll beherrscht, konnte die Platine recht übersichtlich gehalten werden.
Es wird nur ein TinyAVR45 und etwas “Vogelfutter” benötigt 😊.
Die Mikrokontroller Firmware konnte ich leicht abgewandelt von Flip übernehmen.
Der Taster an sich besteht aus zwei Plastik-Muffen und einer Plastikkugel aus dem Bastelbedarf, die rot lackiert wurde.
Ein Stoßdämpfer aus dem Modellbau sorgt für die nötige Rückstellkraft.
27515 Höhenmeter, 64 Liftfahrten, 162 km Abfahrten und 81 Km im Lift habe ich die vergangene Woche beim sonnigem Wetter im Großarl Tal auf Skiern zurückgelegt.
Als Betreuer begleitete ich zusammen mit zwei anderen Schülern die achten Klassen der Justus-Liebig Schule.
Vor fünf Jahren war ich damals selber in der achten Klasse in Großarl.
Seitdem hat sich viel verändert.
Glücklicherweise meist zum Positiven.
Zehn Tage waren wir im Jugendgästehaus Schornhof untergebracht.
Neben dem Skifahren konnten wir die Zeit gut nutzen um uns auf unser Abitur vorzubereiten.
Aber nun zu dem eigentlichen Inhalt dieses Beitrags: skiline.cc ist ein Dienst der die Skipassdaten aus fast 75 Skigebieten sammelt und grafisch aufbereitet.
Jeder Skipass besitzt eine eindeutige ID, mit der man sich auf der Website von skiline.cc anmelden kann.
Jede Liftfahrt wird am Drehkreuz registriert und gespeichert.
Durch die Kombination von Zeit, Ort und Skipass ID kann skiline.cc dann Höhenprofile und Skirouten der einzelner Skifahrer berechnen.
Fast schon mit einem Verkehrsleitsystem vergleichbar können die Betreiber so die Auslastung ihrer Skigebiete beobachten und entsprechend reagieren.
Präsentiert werden die Daten durch einfache Bilddateien.
Jeder Skitag wird mit einem Zeit/Höhen Diagram dargestellt.
Detailiertere Auswertungen (Ø Geschwindigkeiten, Tagesübergreifende Statistiken) sind leider nicht möglich.
Obwohl jedes Skigebiet in einer Karte verzeichnet ist, kann man sich leider nicht seine Skiroute in einer Karte anzeigen lassen 🙁.
Eine Integration von Projekten wie OpenPisteMap/OpenStreetMap wäre hier noch wünschenswert.
Leider wurde auf die Sicherheit weniger Wert gelegt.
Jeder der die ID eines Skipasses kennt, kann sich so im Internet dessen Tagesablauf anschauen.
Dies lässt sich auch nicht ohne weiteres verhindern.
Die Statistiken sind noch nicht einmal mit einem Passwort geschützt.
Eine Top 100 Liste der Skifahrer mit den meisten Höhenmetern rundet das Angebot ab.
Dieser Service ist ein Paradebeispiel für neue innovative Web 2.0 Dienste mit noch Potential in der Auswertung.
Schön das er (noch) kostenlos ist.
Skiline.cc Grafik. Leider habe ich nach unserem Servercrash meine original Bilder verloren. Hier ein kleiner Ersatz.
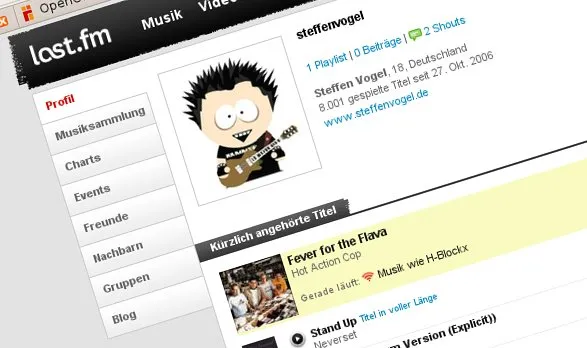
Anlässlich meines 8000. “gescrobbeltetn” Tracks auf www.last.fm habe ich mich entschlossen mal etwas über dieses Social-Music Netzwerk zu berichten.
Mein Last.fm Profil vom 9. Septemer 2008.
Last.fm auf dem Noxon 2 Audio.
Die Philosophie und der Aufbau von Last.fm ist in Wikipedia näher beschrieben.
Meistens höre ich die Radio Streams von Last.fm über mein Terratec Noxon 2 Audio.
Dieser Hardware Audiostreaming Client bietet standardmäßig keine Möglichkeit das proprietäre Streamingformat von Last.fm wiederzugeben.
Dazu ist eigentlich der Last.fm Player nötig.
Dieser ist für diverse Plattformen verfügbar (Mac, Linux, iPhone und Windows).
Nachdem ich mich im vorherigen Beitrag über die Verwendung des Noxon’s als Last.fm Client ausgelassen habe, werde ich mich diesmal tiefer in die Interna des Streaming Clients wagen.
Genauer geht es um das Ersetzten/Erweitern der vTuner Stations Liste und das Hinzufügen eigener Services in das “My NOXON” beziehungsweise “Podcasts” Menü.
Mein nun 30. Artikel ist das Resultat einer Idee aus meinem Spanien-Urlaub.
Es handelt sich um einen etwas anderen Login Prompt, der bei weitem nicht die nötige Sicherheit für kritische Anwendungen bietet, dafür aber von jedem “Insider” ohne vorherige Absprache zu lösen sein sollte.
Eigentlich ohne jeden Verwendungszweck hab ich einfach mal los entwickelt.
Rein rechnerisch müsste es 2^9 = 512 verschiedene Kombinationen geben.
Nehmt euch mal ne halbe Stunde Zeit und probiert alle Kombinationen aus .
Viel Spaß beim drauf los Probieren.
Ich will euch mal keine weiteren Hinweise geben.
Keine Angst! Es gibt einfachere Methoden.
Jeder, der es schafft, hat die Kombination auch schon einmal gesehen.
Für meine morgige Informatik-Klausur habe ich mich mal wieder an C++ gewagt um einen Algorithmus zu implementieren.
Die Hauptthemen der Klausur werden das n-Dame Problem und das Josephus Problem sein.
JS, PHP & CSS Frontend.
Für das n-Damen-Problem habe ich eine iterative Backtracking-Implementation in C++ geschrieben.
Zudem ist es auch mein erstes funktionsfähiges und komplexeres C++ Programm 😉.
Um euch meine Ergebnisse zeigen zu können, habe ich mich bei der PHP, JS & CSS Version meines Freundes Micha bedient und sie leicht angepasst.
Das PHP-Script ruft über den Backtick-Operator das C++ Programm auf und stellt es anschließen mit JS und CSS dar.
Um den Server zu schonen habe ich die maximale Feldgröße auf 13 beschränkt.
Das sind zu mindestens schon mal fünf Damen mehr als bei der PHP-Version.
Ohne die Beschränkung sind auch Problemgrößen bis 16 in einem angemessenen Zeitrahmen zu bewältigen.
An den Weltrekord (25 Damen) komme ich jedoch noch nicht 😉.
Einige dürften das Problem gut genug kennen: Viele File Hoster begrenzen den Download Traffic einer IP auf wenige hundert Megabytes pro Tag.
Um diese Begrenzung zu umgehen bedarf es einer neuen IP.
Hier zeigt sich der wohl einzige Vorteil der dynamischen IP Adressen für Privatkunden.
Die begrenzte Verfügbarkeit von IP Adressen zwingt die Access Provider die IP Adressen dynamisch aus einem Pool an die Router zu verteilen.
Bei einem erzwungenen Reconnect ändert sich die IP Adresse dann mindestens jeden Tag einmal.
Diese Dauer ist aber nur nach oben begrenzt.
Prinzipiell wäre es möglich seine IP Adresse jede 10 Minuten zu ändern.
Oder wenn das Download Limit des File Hosters erreicht wurde.
Dazu bedarf es normalerweise ein paar Klicks im Admin Menü des Routers.
Für das “Arcor-DSL WLAN-Modem 100” hinter dem sich ein Zyxel Prestige HW660 verbirgt habe ich folgendes Bash Script geschrieben.
Beim Aufräumen sind mir gerade meine ersten Zeilen Code auf den Mauszeiger gefallen.
In der fünften Klasse begann ich mit Quick Basic meine ersten Programmier Erfahrungen zu sammeln.
Meine erste Zeile dürfte wohl ein einfaches beep gewesen sein.
Danach ließ es mich nicht mehr so schnell los und ich schrieb zahlreiche kleine Programme in Quick Basic.
So war mein erstes umfangreicheres Programm eine Lichtorgel, die über den LPT-Port eine Relais-Karte ansteuerte und zahlreiche vorprogrammierte Abläufe wiedergab.
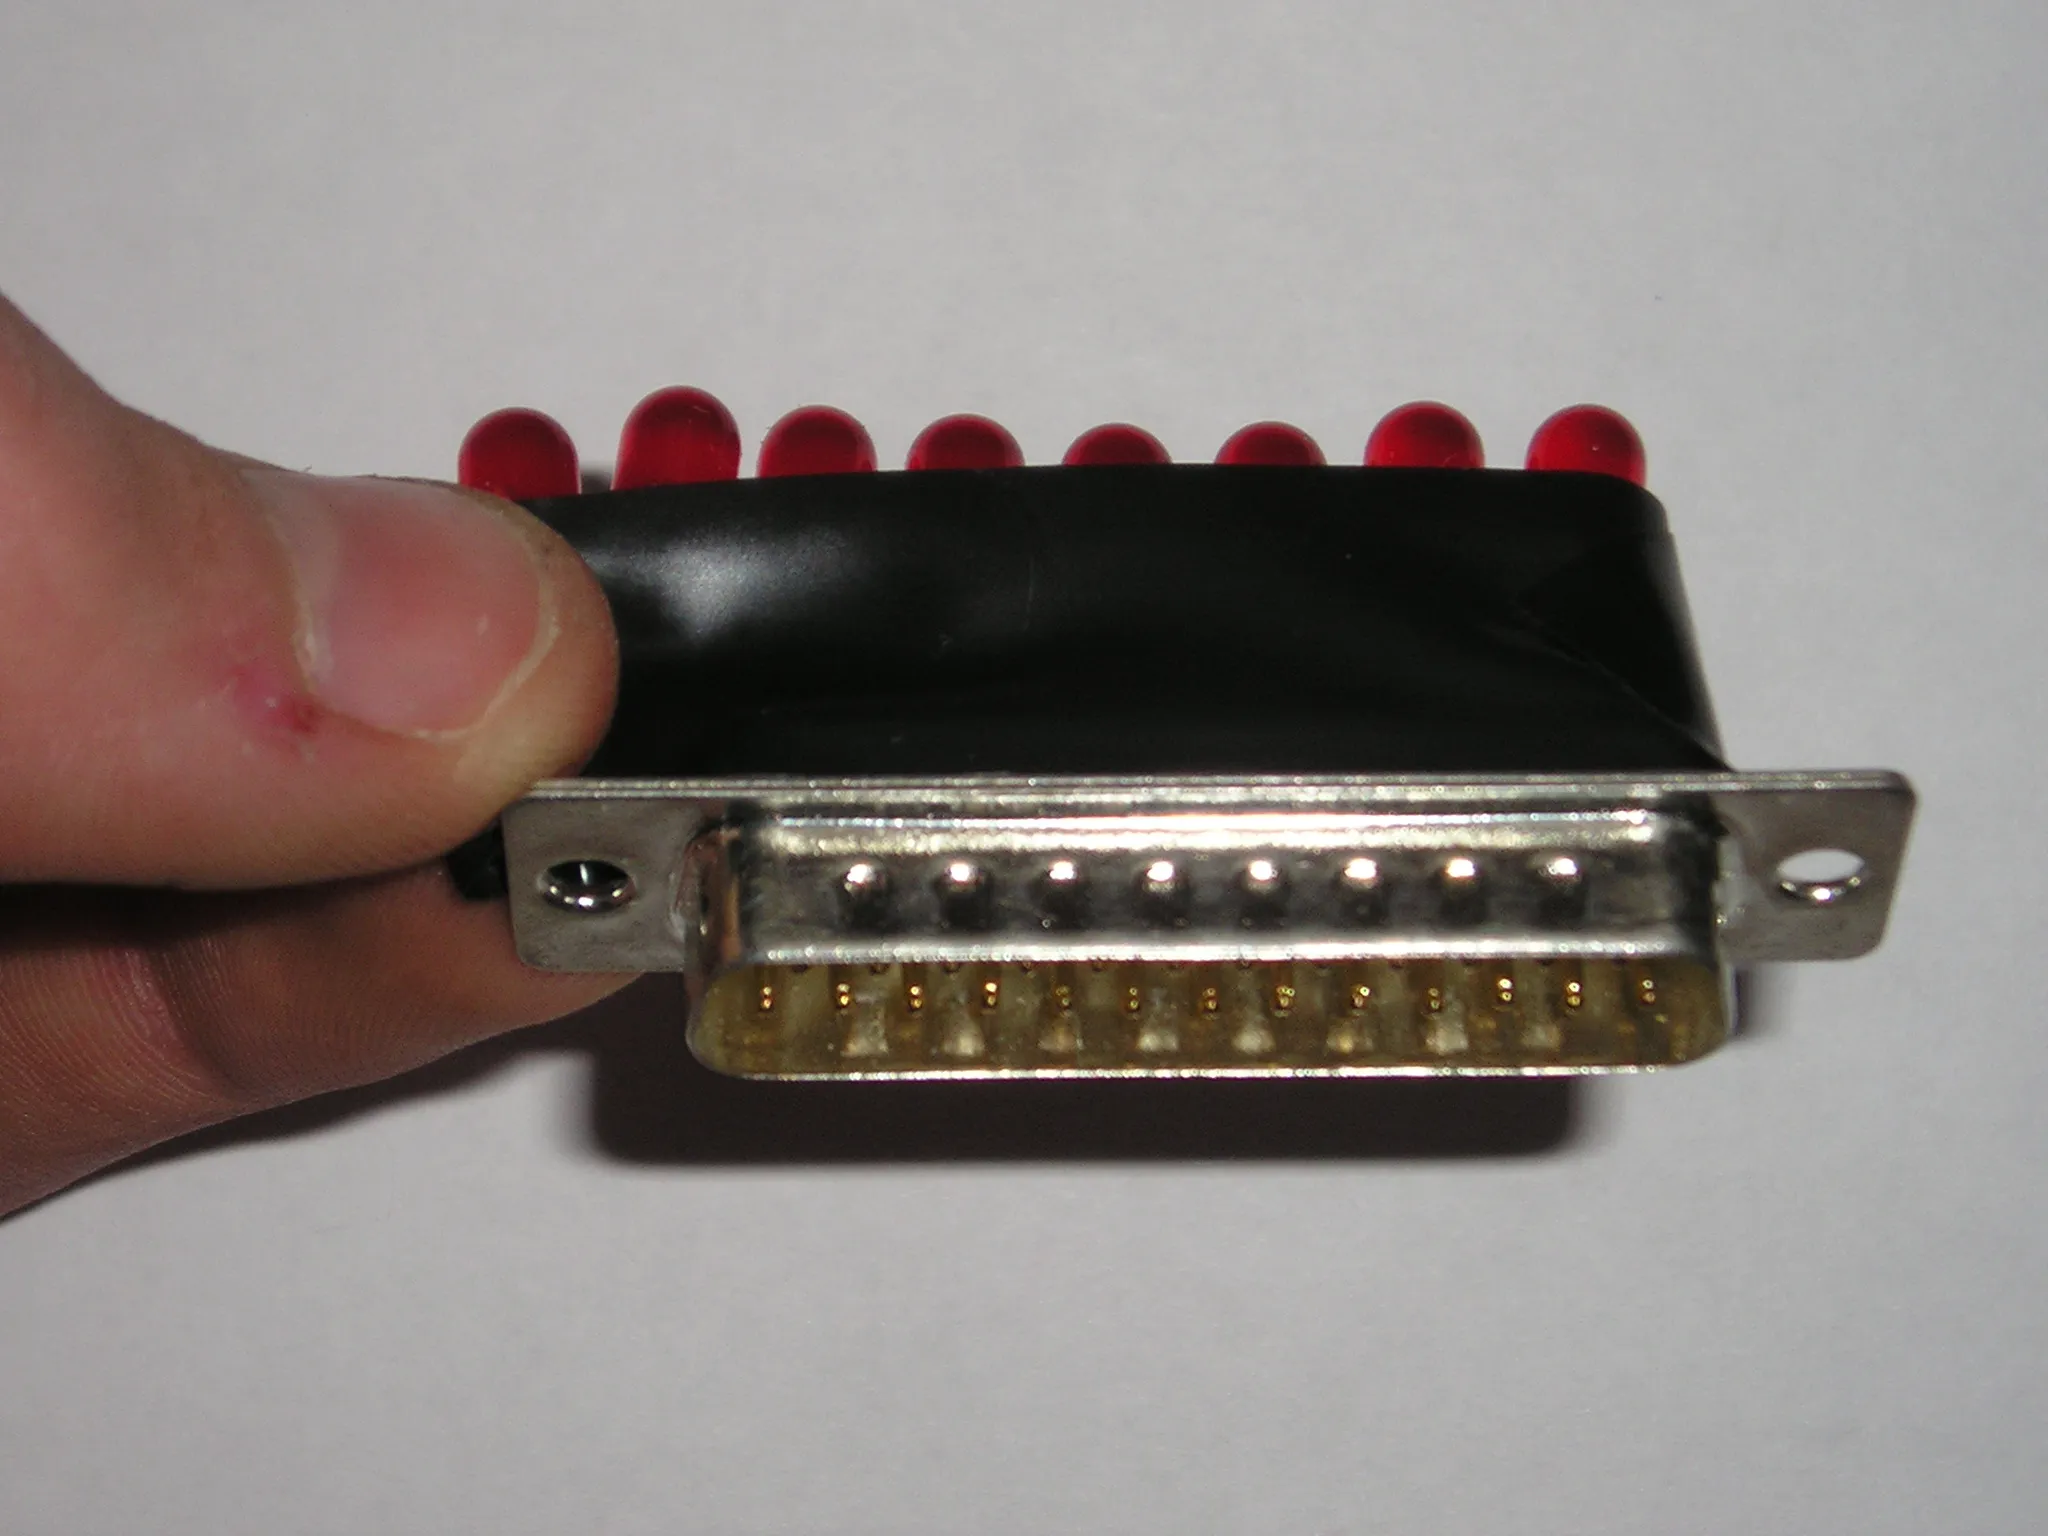
Zum Entwickeln habe ich mir eine kleines LPT LED Modul gebastelt:
Mein zweites Projekt war ein Programm zum Erfassen von Rundenzeiten.
Anfangs benutzte ich es für meine Carrera Bahn dann für mein RC-Car.
Je nach dem wurde die Zeit per Laserlichtschranke oder per Reed-Relais gemessen.
Anfangs wurden die Signale über eine umgebaute Tastatur eingelesen.
Später habe ich dann schließlich den COM-Port verwendet.
Das Programm wird teilweise noch heute für die Carrera Bahn benutzt und wird deswegen manchmal auch noch weiterentwickelt.
Die gemessenen Zeiten werden auf dem Bildschirm ausgegeben und zusätzlich in eine Datei geschrieben.
Auch eine Ampel ist integriert.
Diese kann ihre Signale auch akustisch und über den LPT-Port ausgeben.
Mit der entsprechenden Relais-Karte von der Lichtorgel lässt sich so eine größere Ampel realisieren.
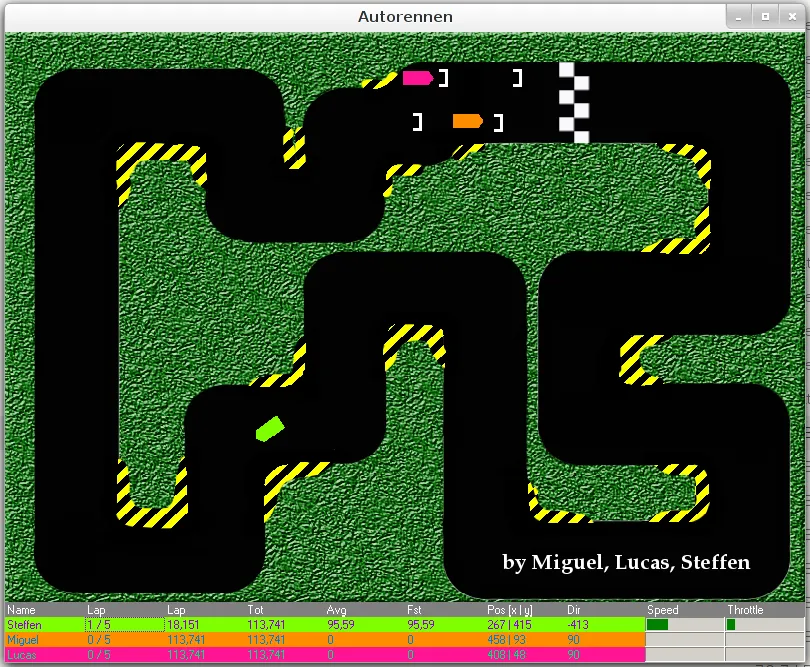
Als Abschluss des Informatik Grundkurses der elften Klasse möchte ich hier nun unsere Implementierung eines 2D Autorennspiels in Delphi vorstellen.
Anfangs bestand die Aufgabenstellung darin ein ein-dimensionales Rennspiel zu entwickeln, bei dem der Spieler mit den schnelleren Fingern gewinnt.
Also quasi ein einfaches Geschicklichkeitsspiel.
Anfangs sind wir daher nur auf einer Linie gefahren.
Aber wer hätte es gedacht? Nach einer Zeit wurde das ziemlich langweilig.
Und da wir noch genügend Zeit hatten, strukturierten wir unseren Code grundlegend neu und fügten die Simulation von Beschleunigung und Verzögerung hinzu.
Screenshot des 2D Autorennens.
Trotzdem sind wir noch nicht über die erste Dimension hinaus gekommen.
Nachdem nach der vierte Doppelstunde immer noch nicht alle fertig waren und wir schon dabei waren Extras und Cheats einzubauen, habe ich mich dann entschlossen in die zweite Dimension zu gehen.
Die kleine Physik-Engine behielten wir bei und fügten die Möglichkeit hinzu die Autos zu lenken.
Aber nun hatten wir ein Problem: wie wird die nun zwei-dimensionale Strecke begrenzt?
ine Strecke mit Canvas Objekten zu zeichnen war uns zu aufwendig und auch nicht gerade sehr schön.
Wir bedienten uns daher einer Technik die auch als “Colorcoding” bekannt ist: verschiedene Farben in einer Bitmap markieren, fahrbare Bereich und Barrieren.
Einen Rundenzähler und eine Konfigurationsdatei rundeten schließlich das Projekt ab.
Color Coding der Fahrbahn.
Wir legten diesmal viel Wert auf die objektorientierte Entwicklung des Codes, da dies das aktuelle Unterrichtsthema ist.
Ein Frontend für die Einstellungen sparten wir uns, um uns mehr auf die “Physik” konzentrieren zu können.
Die Einbindung eines INI-Files lernte ich nebenbei auch noch.
Das Autorenn Program ist also als Gegenstück zum Potenzübungs Program zu sehen.
Hierbei legten wir mehr Wert auf ein schönes GUI mit Hilfe und Installer.
Ihr könnt den Quellcode gerne für eure Projekte weiterverwenden.
Ich bitte jedoch um einen kurzen Kommentar und einen Hinweis im GUI, Danke