Skip to content

Linux

9 posts with the tag “Linux”

A highly available WireGuard VPN setup

WireGuard Logo

WireGuard is a communication protocol and free and open-source software that implements encrypted virtual private networks (VPNs), and was designed with the goals of ease of use, high speed performance, and low attack surface.

Tinc Logo
Tinc Logo.

I’ve been using it in my home lab setup since about 2020. When, in the end of 2021, it was finally merged into the Linux mainline with release 5.9, I started to replace my former Tinc-VPN setup with it. Tinc-VPN is another great open source VPN solution. Unfortunately, its development has stalled over the last years which motivated me to look for alternatives. In contrast to WireGuard, Tinc runs as a user-space daemon and uses tun / tap devices which adds a significant processing overhead. Like WireGuard, it is also using UDP for tunneling data, but falls back to TCP in situations where direct datagram connectivity is not feasible. Another big advantage of Tinc is its ability to form a mesh of nodes and to route traffic within it when direct P2P connections are not possible due to firewall restrictions. At the same time, this mesh is also used for facilitating direct connections by signaling endpoint addresses of NATed hosts.

Tinc's mesh capability
Tinc's mesh capability.

This mesh functionality made Tinc quite robust against the failure of single nodes as usually we could route traffic via other paths.

To counteract this shortcoming, this blog post will present a highly available WireGuard setup using the Virtual Router Redundancy Protocol (VRRP) as implemented by the keepalived daemon.

That said, it is worth noting that this setup does will not bring back some of the beloved features of Tinc. Both meshing, the peer and and endpoint discovery features of Tinc are currently and will never be supported by WireGuard. Jason A. Donenfeld the author of WireGuard focused the design of WireGuard on simplicity, performance and auditability. Hence advanced features like the ones mentioned will only be available to WireGuard by additional agents / daemons which control and configure WireGuard for you. Examples for such are Tailscale, Netmaker and Netbird.

The setup presented in this post is a so called active / standby configuration consisting of two almost equal configured Linux servers running both WireGuard and the keepalived daemon. As the name suggest only one of those two servers will by actively handling WireGuard tunneling traffic while the other one stands by for the event of a failure or maintenance of the active node.

VRRP Wireguard Setup
VRRP Wireguard Setup.

Before get started some requirements for the setup:

  • 2 Servers running Linux 5.9 or newer.
  • A working Wireguard configuration.
  • A local L2 network segment two which both servers are connected.
  • Upstream connectivity without NATing via gateway connected to the network segment (usually provided by your internet or hosting provider).
  • An unused address to be used as Virtual IP (VIP) which roamed between the two servers by VRRP.

An important point is here the assumption that we are running both servers in the same switched network segment as this is a requirement for VRRP. We are also assuming that the upstream gateway performs no NATing. This guide covers only IPv6 addressing. However all steps can be also adapted or repeated for a dual stack or IPv4-only setup.

Here are some of the specifics for my setup which need to be adapted by you:

  • Server Key (same use by both servers)
    • Private: YIEDx+A2ONo5+uv3mrk/p7ileL3T5QQ8hleQK0IYEEI=
    • Public: XGubrkGtuECdvoykKeUiNMigk2onfLCPfEo9Im+vmx8=
  • Peer Key (In this example we only have a single peer)
    • Private: OIbpWVIVVBOtWfwkmXkFRN7Q/jBdfYtsGt7j97aHx1Q=
    • Public: 3NGl6gTOGs6ai0RE91VmVFgF+N4gw1EBG11KOeiKJAg=
  • Public Server Subnet: 2001:DB8:1::/64
    • Gateway: 2001:DB8:1::1
    • Virtual IP: 2001:DB8:1::2
    • Server A: 2001:DB8:1:::3
    • Server B: 2001:DB8:1::4
  • WireGuard Tunnel Subnet: 2001:DB8:2::1/64
    • Server: 2001:DB8:2::1 (same used by both servers)
    • Peer: 2001:DB8:2::2
  • Interface names
    • Wireguard: wg1
    • Upstream: eno1
  1. Prepare servers

    We start of preparing the two servers by installing WireGuard and keepalived:

    Terminal window
    sudo apt install keepalived wireguard-tools iproute2

    Next we configure a WireGuard interface on both servers using exactly the same configuration file at /etc/wireguard/wg1.conf:

    [Interface]
    Address = 2001:DB8:2::1/64
    PrivateKey = YIEDx+A2ONo5+uv3mrk/p7ileL3T5QQ8hleQK0IYEEI=
    ListenPort = 51800
    [Peer]
    PublicKey = 3NGl6gTOGs6ai0RE91VmVFgF+N4gw1EBG11KOeiKJAg=
    AllowedIPs = 2001:DB8:2::2/128
    PersistentKeepalive = 25

    Similarly, a reciprocal configuration file is needed on the client side which skip here for brevity. Before proceeding, we activate the interface on both servers:

    Terminal window
    systemctl enable --now wg-quick@wg1
    wg show wg1 # Check if interface is up
  2. Configuring Keepalived

    Create a configuration file for keepalived at /etc/keepalived/keepalived.conf

    global_defs {
    enable_script_security
    script_user root
    }
    # Check if the server the WireGuard interface configured
    vrrp_script check_wg {
    script "/usr/bin/wg show wg1"
    user root
    }
    vrrp_instance wg_v6 {
    interface eno1
    virtual_router_id 52
    notify /usr/local/bin/keepalived-wg.sh
    state BACKUP # use BACKUP for Server B
    priority 99 # use 100 for Server B
    virtual_ipaddress {
    2001:DB8:1::1/64
    }
    track_script {
    check_wg
    }
    }
  3. Create a notification script for keepalived at /usr/local/bin/keepalived-wg.sh

    #!/usr/bin/env bash
    TYPE=$1
    NAME=$2
    STATE=$3
    PRIO=$4
    WGIF=wg1
    case ${STATE} in
    MASTER)
    ip link set up dev ${WGIF}
    ;;
    BACKUP|FAULT|STOP|DELETED)
    ip link set down dev ${WGIF}
    ;;
    *)
    echo "unknown state"
    exit 1
    esac

    Now start the keepalived daemon:

    Terminal window
    chmod +x /usr/local/bin/keepalived-wg.sh
    systemctl enable --now keepalived
  4. Testing the fail over

    In our configuration, Server A has a higher VRRP priority and as such will be preferred if both servers are healthy. To test our setup, we simply bring down the WireGuard interface on Server A and observe how the VIP gets moved to Server B. From the WireGuard peers perspective not much changes. In fact no connections will be dropped during the fail-over. Internally, the clients WireGuard interface renegotiate the handshake. However, that step is actually not observable by the user.

    Run the following commands on Server A while alongside test the connectivity from the client side through the tunnel via ping -i0.2 2001:DB8:2::1:

    Terminal window
    # Check that keepalived has moved the VIP to interface eno1
    ip addr show dev eno1
    # Bring down the Wireguard interface
    wg-quick down wg1
    # Keepalived should now have moved the VIP to Server B
    ip addr show dev eno1

In my personal network, I operate a Interior Gateway Protocol (IGP) to dynamically route traffic within and also towards other networks. Common IGPs are OSPF, ISIS or BGP. In my specific case, both Servers A & B run the Bird2 routing daemon with interior and exterior BGP sessions.

So how does the WireGuard HA setup interoperates with my interior routing? Quite well actually. As my notify script (keepalive-wg.sh) will automatically bring up / down the interface, the routes attached to the interface will be picked up by Bird’s direct protocol.

I am also planning to extend my WireGuard agent cunicu ( /cunicu/cunicu ) to support the synchronization of WireGuard interface configurations between multiple servers.

Surprisingly, the setup works by using Keepalived and does not require any iptables or nftables magic to rewrite source IP addresses. I’ve seen some people mentioning that SNAT / DNAT would be required to convince WireGuard to use the virtual IP instead of the server addresses. However, in my experience this was not necessary.

Another concern has been that the backup Wireguard interface still might attempt to establish a handshake with its peers. This would quite certainly interfere with the handshakes originated by the current master server. However, also this has not been proven to be the case. I assume the fact that our notify script brings down the WireGuard interface on the backup server causes them to cease all communication with its peers.
Gaining Root Access on Netgear Nighthawk Mobile 5G/LTE Routers

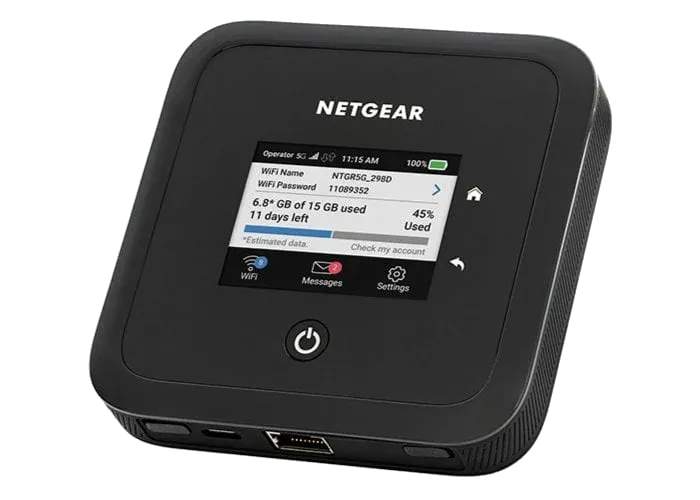
This blog posts covers the required steps to gain root access via Telnet on Netgear Nighthawk Mobile 5G/LTE Routers. Its the first post in a small series covering my experiences playing around with this device.

Last month I obtained one of Netgear’s latest mobile 5G routers, the Netgear Nighthawk M5 (model MR5200-100EUS) . Being one of the most expensive consumer 5G routers, I was lucky to get a fairly good second hand deal from eBay.

Netgear Nighthawk M5 mobile 5G/LTE Router
Netgear Nighthawk M5 mobile 5G/LTE Router.

Running a Xilinx hw_server as Docker Container

Dockerized Xilinx hw_server Setup
Dockerized Xilinx hw_server Setup.

This article describes the necessary steps to run a Xilinx hw_server as a Docker container.

Xilinx’s hw_server is a command line utility which handles JTAG communication between a Xilinx FPGA board and usually the Vivado IDE. It can be used to configure the FPGA bitstream, connect to the embedded logic analyzer cores (ILA) or perform debugging of processor cores via GDB and the Xilinx System Debugger (XSDB). The hw_server is usually used when those tasks shall performed remotely as the connection between Vivado or XSDB is established via TCP connection and allows us to run it on a remote system.

Running the hw_server as a Docker container has the benefit that its installation is simplified to starting a Docker container by running:

Terminal window
docker run \
--restart unless-stopped \
--privileged \
--volume /dev/bus/usb:/dev/bus/usb \
--publish 3121:3121 \
--detach \
ghcr.io/stv0g/hw_server:v2021.2

It also allows us to run the hw_server on architectures which are not natively supported by Xilinx such as the commonly used Aarch / ARM64 and ARMv7 architectures found in Raspberry Pis.

This is enabled by Dockers support for running container images for non-native architectures. I am using the aptman/qus Docker image ( /dbhi/qus ) to setup this user-mode emulation. The qemu-user-static (qus) image is a compilation of utilities, examples and references to build and execute OCI images (aka docker images) for foreign architectures using QEMU’s user-mode emulation.

Run the following commands to run the hw_server on a embedded device:

Terminal window
# Install docker
sudo apt-get update && sudo apt-get upgrade
curl -sSL https://get.docker.com | sh
# Start Docker
sudo systemctl enable --now docker
# Enable qemu-user emulation support for running amd64 Docker images
# *Note:* only required if your system arch is not amd64!
docker run --rm --privileged aptman/qus -s -- -p x86_64
# Run the hw_server
docker run --restart unless-stopped --privileged --volume /dev/bus/usb:/dev/bus/usb --publish 3121:3121 --detach ghcr.io/stv0g/hw_server:v2021.2

This setup has been tested with a Raspberry Pi 4 running the new 64-bit Debian Bullseye Raspberry Pi OS.

The pre-built Docker image for the hw_server of Vivado 2021.2 is available via:

/stv0g/xilinx-hw-server-docker (Packages)

Detailed instructions can be found at Codeberg: /stv0g/xilinx-hw-server-docker .

Encrypted credentials for Amazon AWS command line client

In this quick post I will show you how to use the password manager “password-store1 to securely store your credentials used by the Amazon Webservices command line client.

AWS CLI Logo
AWS CLI Logo.

The installation for Mac and Linux system is fairly easy:

Terminal window
pip install awscli

The credentials are stored as key-value pairs inside a PGP-encrypted file. Every time you call the AWS CLI tool, your keys will be decrypted and directly passed to the aws tool.

Use pass to add your keys in the store:

Terminal window
pass edit providers/aws

An editor opens. Use the following format:

User: stv0g
Access-Key: AKB3ASJGBS3GOMXK6KPSQ
Secret-Key: vAAABn/PMAksd235gAs/FSshhr42dg2D4EY3

Add the following snippet to your ~/.bashrc:

Terminal window
function aws {
local PASS=$(pass providers/aws)
local AWS=$(which aws)
# Start original aws executable with short-lived keys
AWS_ACCESS_KEY_ID=$(sed -En 's/^Access-Key: (.*)/\1/p' <<< "$PASS") \
AWS_SECRET_ACCESS_KEY=$(sed -En 's/^Secret-Key: (.*)/\1/p' <<< "$PASS") $AWS $@
}

Then use the cli tool aws as usual:

Terminal window
aws iam list-access-keys { "AccessKeyMetadata": [ { "UserName": "stv0g", ...`
  1. I covered password-store already a few times earlier: Use YubiKey and Password-store for Ansible credentials, Workshop: Security Token.

Use Yubikey and Password-store for Ansible credentials

I spent some time over the last months to improve the security of servers and passwords. In doing so, I started to orchestrate my servers using a configuration management tool called Ansible. This allows me to spin-up fresh servers in a few seconds and to get rid of year-old, polluted and insecure system images.

Ansible loves Yubico
Ansible loves Yubico.

My ‘single password for everything’ has been replaced by a new password policy which enforces individual passwords for every single service. This was easier than I previously expected:

To unlock the ‘paranoid’ level, I additionally purchased a Yubikey Neo token to handle the decryption of my login credentials in tamper-proof hardware. ‘pass’ is just a small shell script to glue several existing Unix tools together: Bash, pwgen, Git, xclip & GnuPG (obeying the Unix philosophy). The passwords are stored in simple text files which are encrypted by PGP and stored in a directory structure which is managed in a Git repository.

Yubikey Neo und Neo-n
Yubikey Neo und Neo-n.

There are already a tons of tutorials which present the tools I describes above. I do not want to repeat all of it. So, this post is dedicated to solve some smaller issues I encountered.

transWhat

Die Telefonvermittelung bei den Simsons
Die Telefonvermittelung bei den Simsons.

transWhat ist ein XMPP Transport, der den WhatsApp Messenger in das Jabber Netzwerk einbindet.

Das Gateway simuliert dabei serverseitig die normale WhatsApp App von Android beziehungsweise iPhone. Der User benötigt nur noch einen normalen XMPP Client wie beispielsweise Adium, Gaijm, IM+ oder Pidgin. Damit ist es nun möglich WhatsApp auf nahezu allen Geräten und Betriebssystemen einzusetzen. Ich kann transWhat sehr in Kombination mit Pidgin auf Desktops und Laptops und mit IM+ auf Tablets empfehlen 😊.

Alle Details, Serverdaten, Logins, Tipps und Tricks findet ihr hier im Wiki.

Aus verschiedenen Gründen werde ich den Code nicht veröffentlichen sondern das Gateway nur als Service anbieten.

Ich habe mich nun doch dazu entschieden den Quelltext freizugeben. Er ist auf Codeberg zu finden: /stv0g/transwhat .

Nach dem Break gibt’s noch ein paar technische Details und Informationen zur Umsetzung.

calcelestial

Planets of the Solar System

/stv0g/calcelestial ist ein kleines Linux-Tool zum Berechnen von Auf- und Untergangszeiten sowie der Position sämtlicher Planeten unseres Sonnensystems.

Es ist der Weiterentwicklung von /stv0g/sun , das ursprünglich als kleines Bash-Skript für meinen Router startete. Mittlerweile ist das Tool zu einem weit umfangreicherem Werkzeug gewachsen, welches nicht mehr nur die Auf- und Untergangszeit der Sonne berechnen kann:

Es sind mit dem Mond, Mars, Neptun, Jupiter, Merkur, Uranus, Saturn, Venus und Pluto eine Menge neuer Planeten dazugekommen. Auch kann nun die Position dieser Himmelskörper zu jedem beliebigen Zeitpunkt oder dem Auf- und Untergang berechnet werden.

Nun bin ich selber kein kleiner Hobby-Astronom, sodass ich diese ganzen Berechnungen aus dem Ärmel schütteln könnte. Stattdessen nutze ich die Bibliothek libnova. libnova benutzt die sehr genauen Algorithmen “Variations Séculaires des Orbites Planétaires” (kurz VSOP-87), die Pierre Pratagnon 1987 entwickelte.

Terminal window
$ calcelestial
Usage:
calcelestial [options]
Options:
-p, --object calc for celestial object: sun, moon, mars, neptune,
jupiter, mercury, uranus, saturn, venus or pluto
-H, --horizon calc rise / set time with twilight: nautic, civil or astronomical
-t, --time calc at given time: YYYY-MM-DD [HH:MM:SS]
-m, --moment calc position at moment of: rise, set, transit
-n, --next use rise, set, transit time of tomorrow
-f, --format output format: see strftime (3) for more details
-a, --lat geographical latitude of observer: -90° to 90°
-o, --lon geographical longitude of oberserver: -180° to 180°
-q, --query query geonames.org for geographical coordinates
-z, --timezone override system timezone
-u, --universal use universial time for parsing and formatting
-h, --help show this help
-v, --version show version
A combination of --lat & --lon or --query is required.
Please report bugs to: post@steffenvogel.de

Die einfachste Variante nutzt das Unix Tool at:

Terminal window
echo ~/bin/enable-lightning | at $(calcelestial -p sun -m set -q Frankfurt -H civil)

Mit folgenden Cronjobs, lässt sich dieses Prinzip auch leicht auf andere Anwendungen übertragen:

0 0 * * * echo 'fnctl stop && fnctl fade -c 000000' | at $(calcelestial -m rise -p sun -q Aachen)
0 0 * * * echo 'fnctl start' | at $(calcelestial -m set -p sun -q Frankfurt)

Mit dem Tool nvram-wakeup, lässt sich so beispielsweise der Rechner jeden Tag 10 Minuten for Sonnenaufgang automatisch starten:

Terminal window
nvram-wakeup -s $(date -d "-10 min $(calcelestial -m rise -p sun -q Berlin)" +%s)

Oder möchtest du deinen Rechner nach Sonnenuntergang automatisch herunterfahren?

Terminal window
shutdown $(date -d +10 min $(calcelestial -m rise -p sun --lat=50.55 --lon=-6.2) +%H:%M)

Die aktuelle Position des Mondes kann beispielsweise so bestimmt werden:

Terminal window
calcelestial -p moon -q Aachen -f "az: §a alt: §h"

Detailiertere Dokumentation findet ihr in der Manpage calcelestial(1).

calcelestial ist wie immer auf Codeberg verfügbar /stv0g/calcelestial .

mountL2P: Mount L2P Shares on Linux

l2p-3d-klein

Vielleicht kennt ihr Sync-my-L2P? Es ist ein kleines Tool, das automatisiert Dateien vom Online Lernportal der RWTH herunterlädt und syncronisieren kann.

Eigentlich eine super Sache! Entgegen meiner ursprünglichen Erwartung ist das Tool auch unter Linux lauffähig. Ich habe mich trotzdem dazu entschieden das ganze etwas anders, aus meiner Sicht deutlich simpler, zu lösen.

Mein Skript nutzt die Möglichkeit einzelne Microsoft Sharepoint Ordner (hier: L2P-Lernräume) via WebDav einzubinden.

Dazu gibt es unter Linux zwei Varianten:

  1. [davfs2](https://savannah.nongnu.org/projects/davfs2 (nutzt FUSE, kompatibel mit mount und fstab)
  2. gvfs (stark in GNOME & Nautilus integriert, einfach)

Die zweite Variante ist für GNOME Nutzer deutlich einfacher, da hier nur eine entsprechende URI in die Adresszeile des Dateimanagers eingegeben werden muss.

Mein Tool hilft euch diese URIs zu finden, indem es sich unter eurem Namen im L2P einloggt und nachsieht in welchen Lernräumen ihr registiert seid.

Das Skript ist auf Codeberg verfügbar: /stv0g/snippets/bash/mount.l2p.sh .

Terminal window
$ mountl2p.sh
usage: mountl2p.sh [-f FORMAT] [-s SEMESTER] [-u L2P_USER] [-p L2P_PASS]
FORMAT is one of 'gvfs' or 'fstab'
SEMESTER is an optional regex to filter the semester
L2P_USER is your L2P account name like 'sv123242'
L2P_PASS is your L2P account password

Um schnell auf die aktuellen Lernräume zugreifen zu können, bietet es sich an diese als Lesezeichen im Dateimanager zu registrieren:

Terminal window
./mountl2p.sh -f gvfs -s "ws12|ss12" -u sv111090 >> ~/.gtk-bookmarks
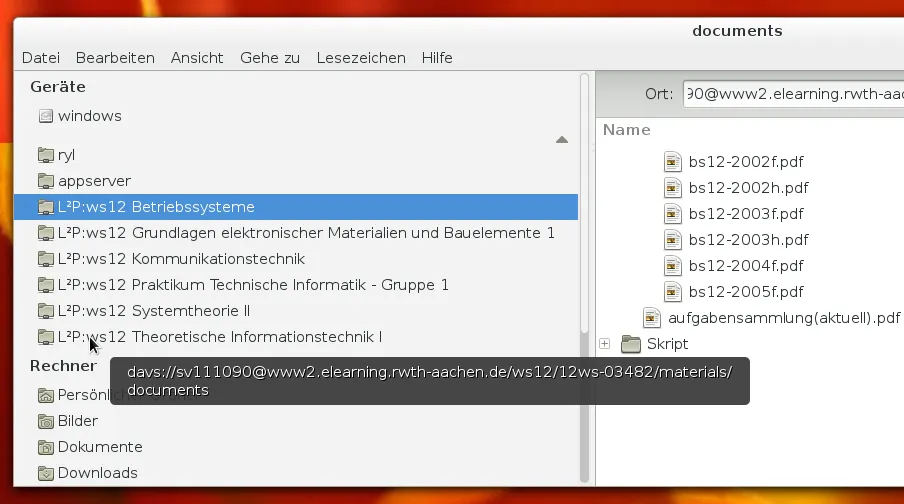
L2P WebDAV Mount
L2P WebDAV Mount.

Conway's Game of Life

Conway's Game of Life Screenshot
Conway's Game of Life Screenshot.

Als Übung für meine Informatik Vorlesung an der RWTH Aachen habe ich diese C Implementation von Conways Game of Life geschrieben.

Dieses simple “zero player” Game wird komplett im Terminal ausgeführt. Mit Mausunterstützung und Farben wurden mit libncurses realisiert.

Den Quelltext findet ihr inklusive eines Makefiles auf Codeberg: /stv0g/rwth-info1/src/conway.c .

  • p” pausiert das Spiel
  • q” beendet das Spiel
  • c” leert das Spielfeld
  • Leertaste setzt eine neue Zelle in das aktuelle Feld
  • Pfeiltasten bewegen den Cursor
  • Maus kann zum Bewegen des Cursors genutzt werden
  • 0” fügt ein chaotisches Anfangsmuster ein
  • 1” fügt einen Glider in das Spielfeld ein
  • 2” fügt einen Segler in das Spielfeld ein
  • 3” fügt einen Buffer in das Spielfeld ein
  • +” erhöht die Anzahl der Generationen pro Sekunde (frames per second)
  • -” erniedrigt die Anzahl der Generationen pro Sekunde (frames per second)