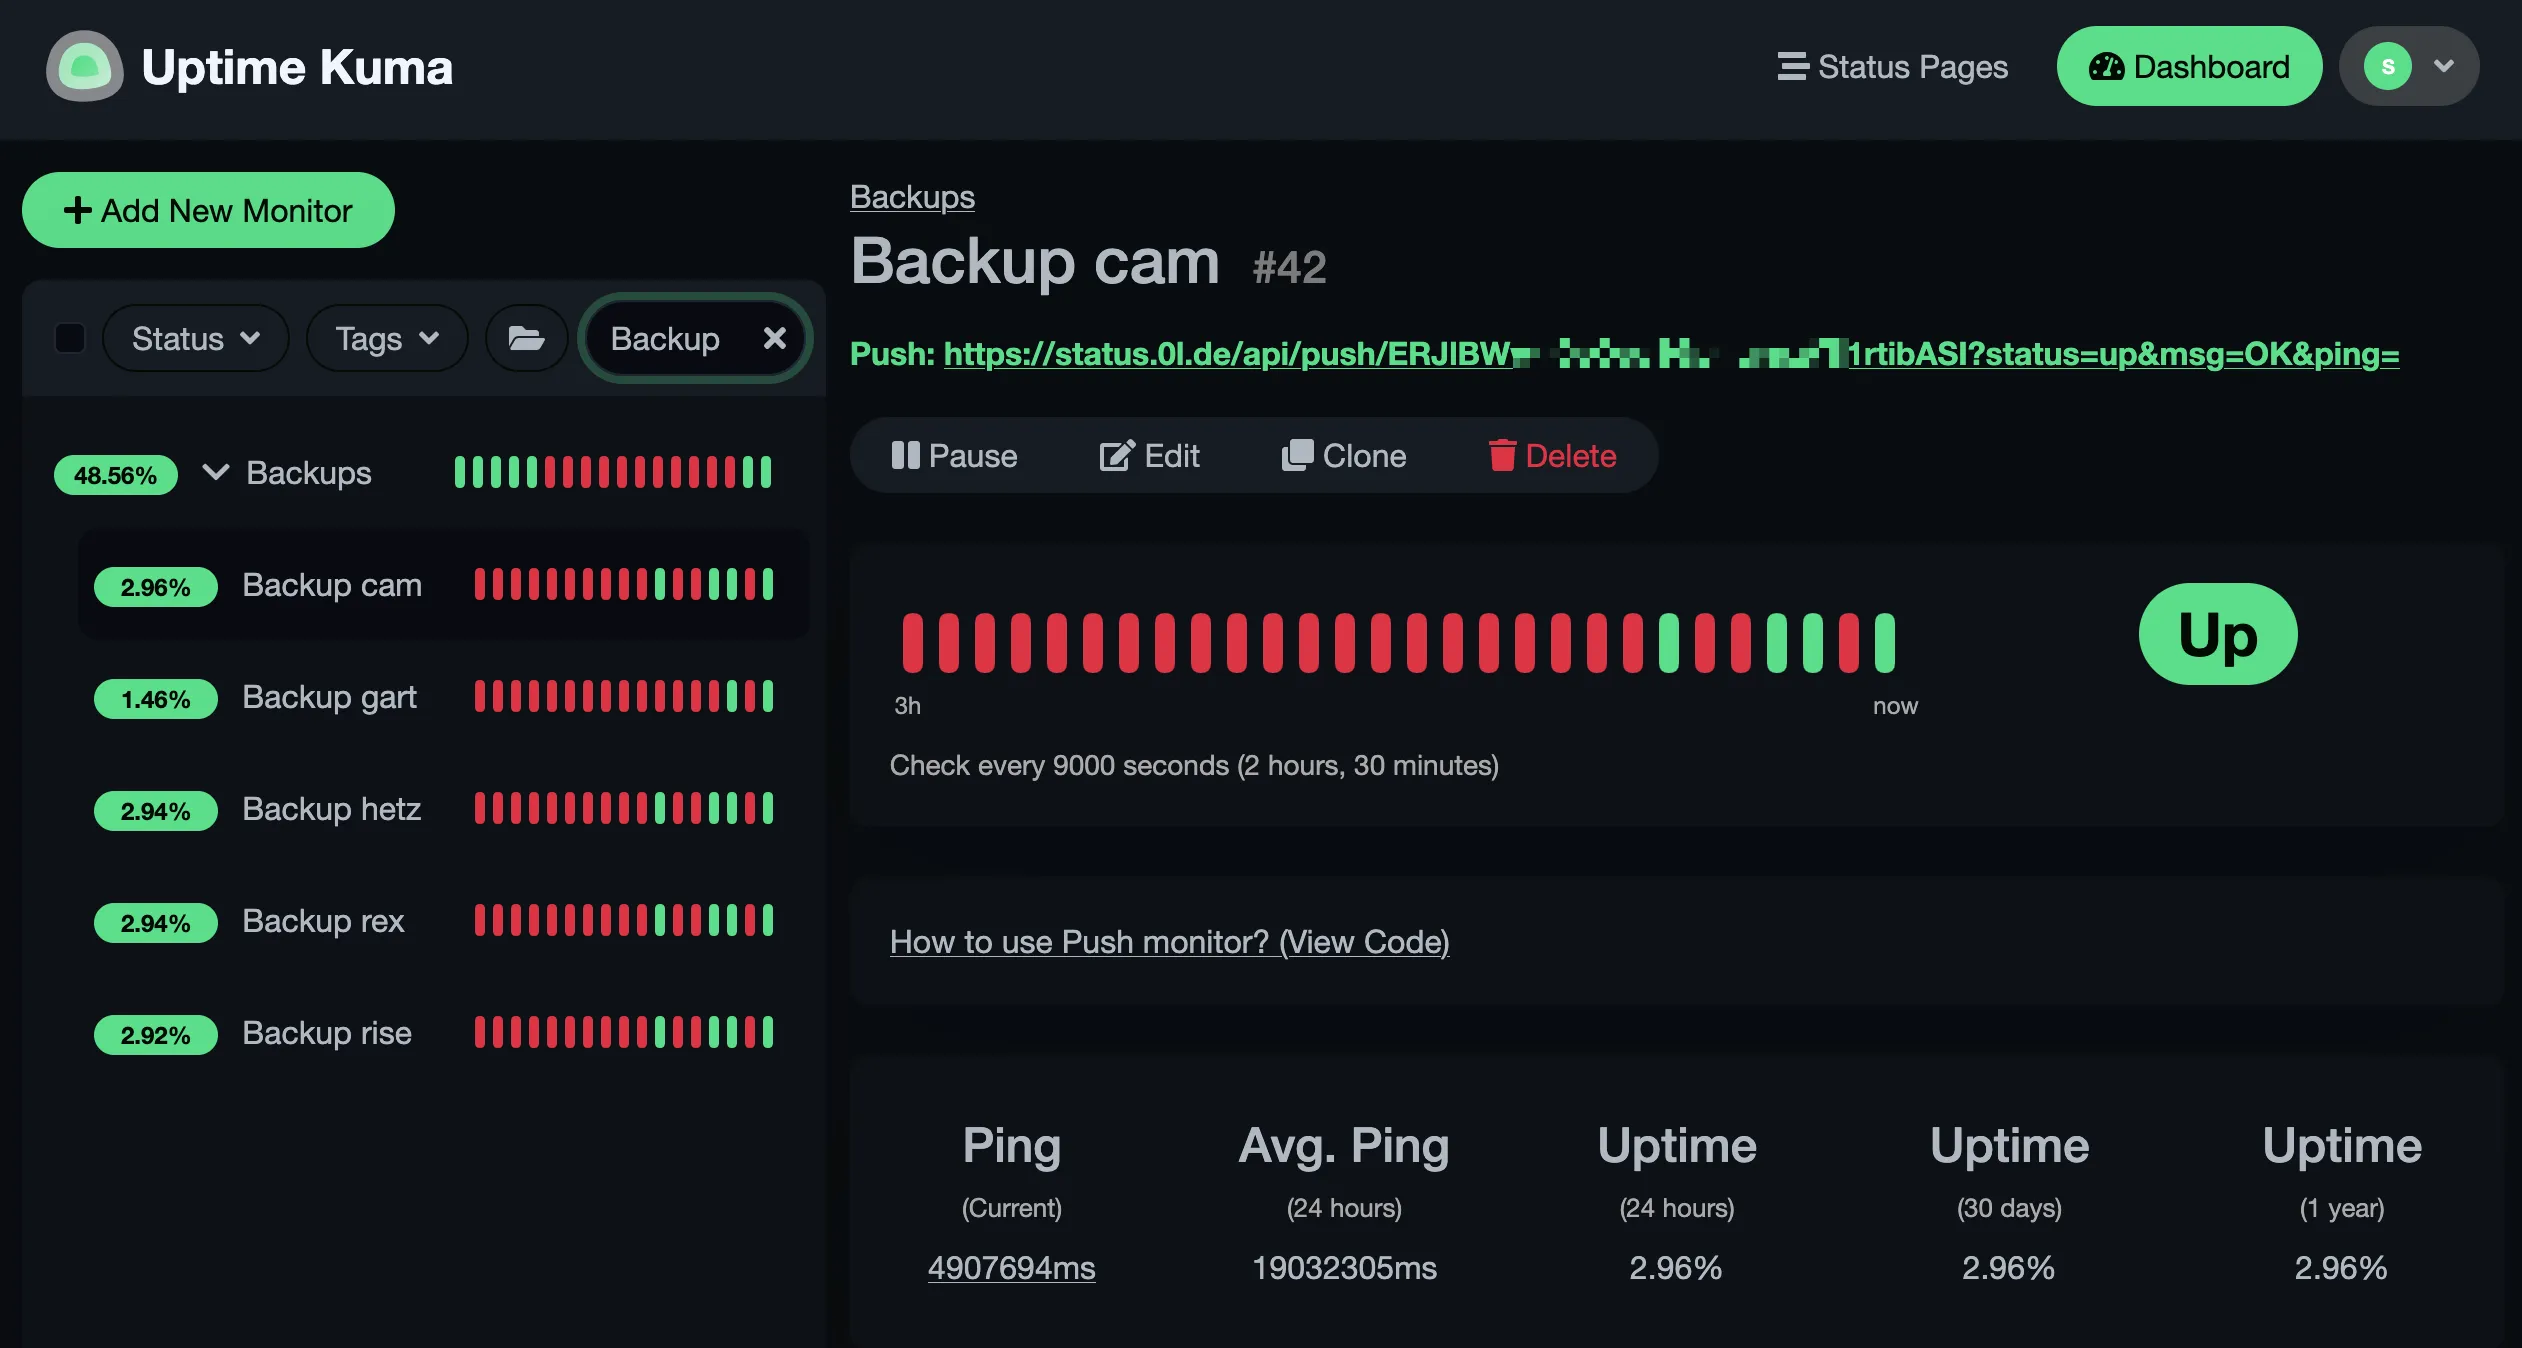
I run restic to back up my servers.
One day I noticed a repository hadn’t received a new snapshot in weeks.
The backup job had been silently failing, and I had no idea.
That’s the worst kind of failure: everything appears fine until you actually need the backup.
/stv0g/restic-monitor is a small Go tool that checks whether each of your restic repositories has a recent enough snapshot and reports the result to an Uptime Kuma push monitor.
Run it on a timer and you’ll know within hours if a backup stops working.
When I spotted a used Sylvac S_Cal EVO caliper on eBay for €90, I jumped on it.
Swiss-made precision instruments don’t usually fall into hobby budgets, but here was my chance: a Bluetooth-enabled digital caliper that normally costs 3-4× as much.
I thought I was buying a better measuring tool.
I didn’t realize I was buying a new FreeCAD input device.
I’ve developed a Python library, sylvac-measure, that can read measurements from the S_Cal EVO over Bluetooth.
Using that library, I created a FreeCAD addon called InstrumentInput which allows you to click on any dimension field in FreeCAD, take a measurement with the caliper, and have the value appear instantly in the field with proper units.
This eliminates the need for manual transcription, reduces errors, and creates a seamless workflow between physical measurement and digital modeling.
More than 14 years ago, I migrated my 26 open source code projects to GitHub.
Back then GitHub was a fresh and modern platform pushing the boundaries of collaborative software development.
Over the years, however, my perspective on GitHub has changed significantly.
I have recently migrated my by now 79 repositories from GitHub to Codeberg, a decision driven by several significant factors.
I recently moved into a new apartment which I used as an opportunity to make our home a little smarter.
As a big open source supporter I built my smart home platform with Home Assistant of course.
Unfortunately, there are still far too few products that are directly compatible with Home Assistant.
Especially in the area of humidifiers where I only found products that rely on a proprietary app or cloud from the manufacturer.
Something that I would like to avoid at all costs.
For one thing, such dependence is a certain form of planned obsolescence, as the product becomes useless as soon as the app loses its compatibility with new smartphone operating system versions or the manufacturer’s cloud is no longer operated.
Therefore, it was important for me to find a smart humidifier that integrates directly with my Home Assistant setup.
To achieve this goal, I identified two options:
Add sensors / actuators to a classic humidifier to make it smart.
Replace the firmware of a smart humidifier with my own source code.
I decided to use the second approach, because it required less effort, since I would have had to implement my own firmware anyway.
My blog noteblok.net has joined the Fediverse.
You can follow my posts via this new handle: stv0g@noteblok.net.
This has been made possible by the WordPress ActivityPub Plugin.
With the ActivityPub plugin installed, the WordPress blog functions as a federated profile, along with profiles for each author.
For example, my blog-wide profile can be found at @blog@noteblok.net.
Authors like myself, on the other hand, would have their individual profiles at @stv0g@noteblok.net.
The integration allows following the blog from your own Fediverse platform and account like Mastodon.
In return you can also react and comment to my blog posts via simply replying with your existing Fediverse account.
Just like the venerable Dnsmasq, AVM’s FRITZ!OS uses hostnames learned from its DHCP leases and makes them resolvable via its internal DNS server.
Unfortunately, this feature in FRITZ!OS has some limitations:
The name of the DNS Zone is hard-coded to fritz.box and can not be adjusted. Hence, the resolvable names have the following schema: myhostname.fritz.box
The internal DNS server only supports recursive DNS lookups. It does not act as an authoritative DNS server. Hence the local zone can not be delegated.
AXFR zone transfers are not supported.
My solution to these shortcomings is Fritz-DNS which:
Is a small tool written in the Go programming language.
Is a small authoritative DNS server which serves A / AAAA resource records for local hosts connected to an AVM FRITZ!Box home WiFi router.
Can be used in a hidden master configuration as it supports AXFR zone transfers.
Uses the custom extension (X_AVM-DE_GetHostListPath) of the TR-064 Hosts SOAP-API as documented here to retrieve a list of local hosts.
Supports the generation of AAAA (IPv6) resource records based on the hosts MAC addresses using the 64-Bit Extended Unique Identifier (EUI-64) and a configured unique local address (ULA) prefix.
Does not yet support PTR resource records (to be implemented…)
Ich möchte Stadtpolitik in Aachen für alle verständlich machen.
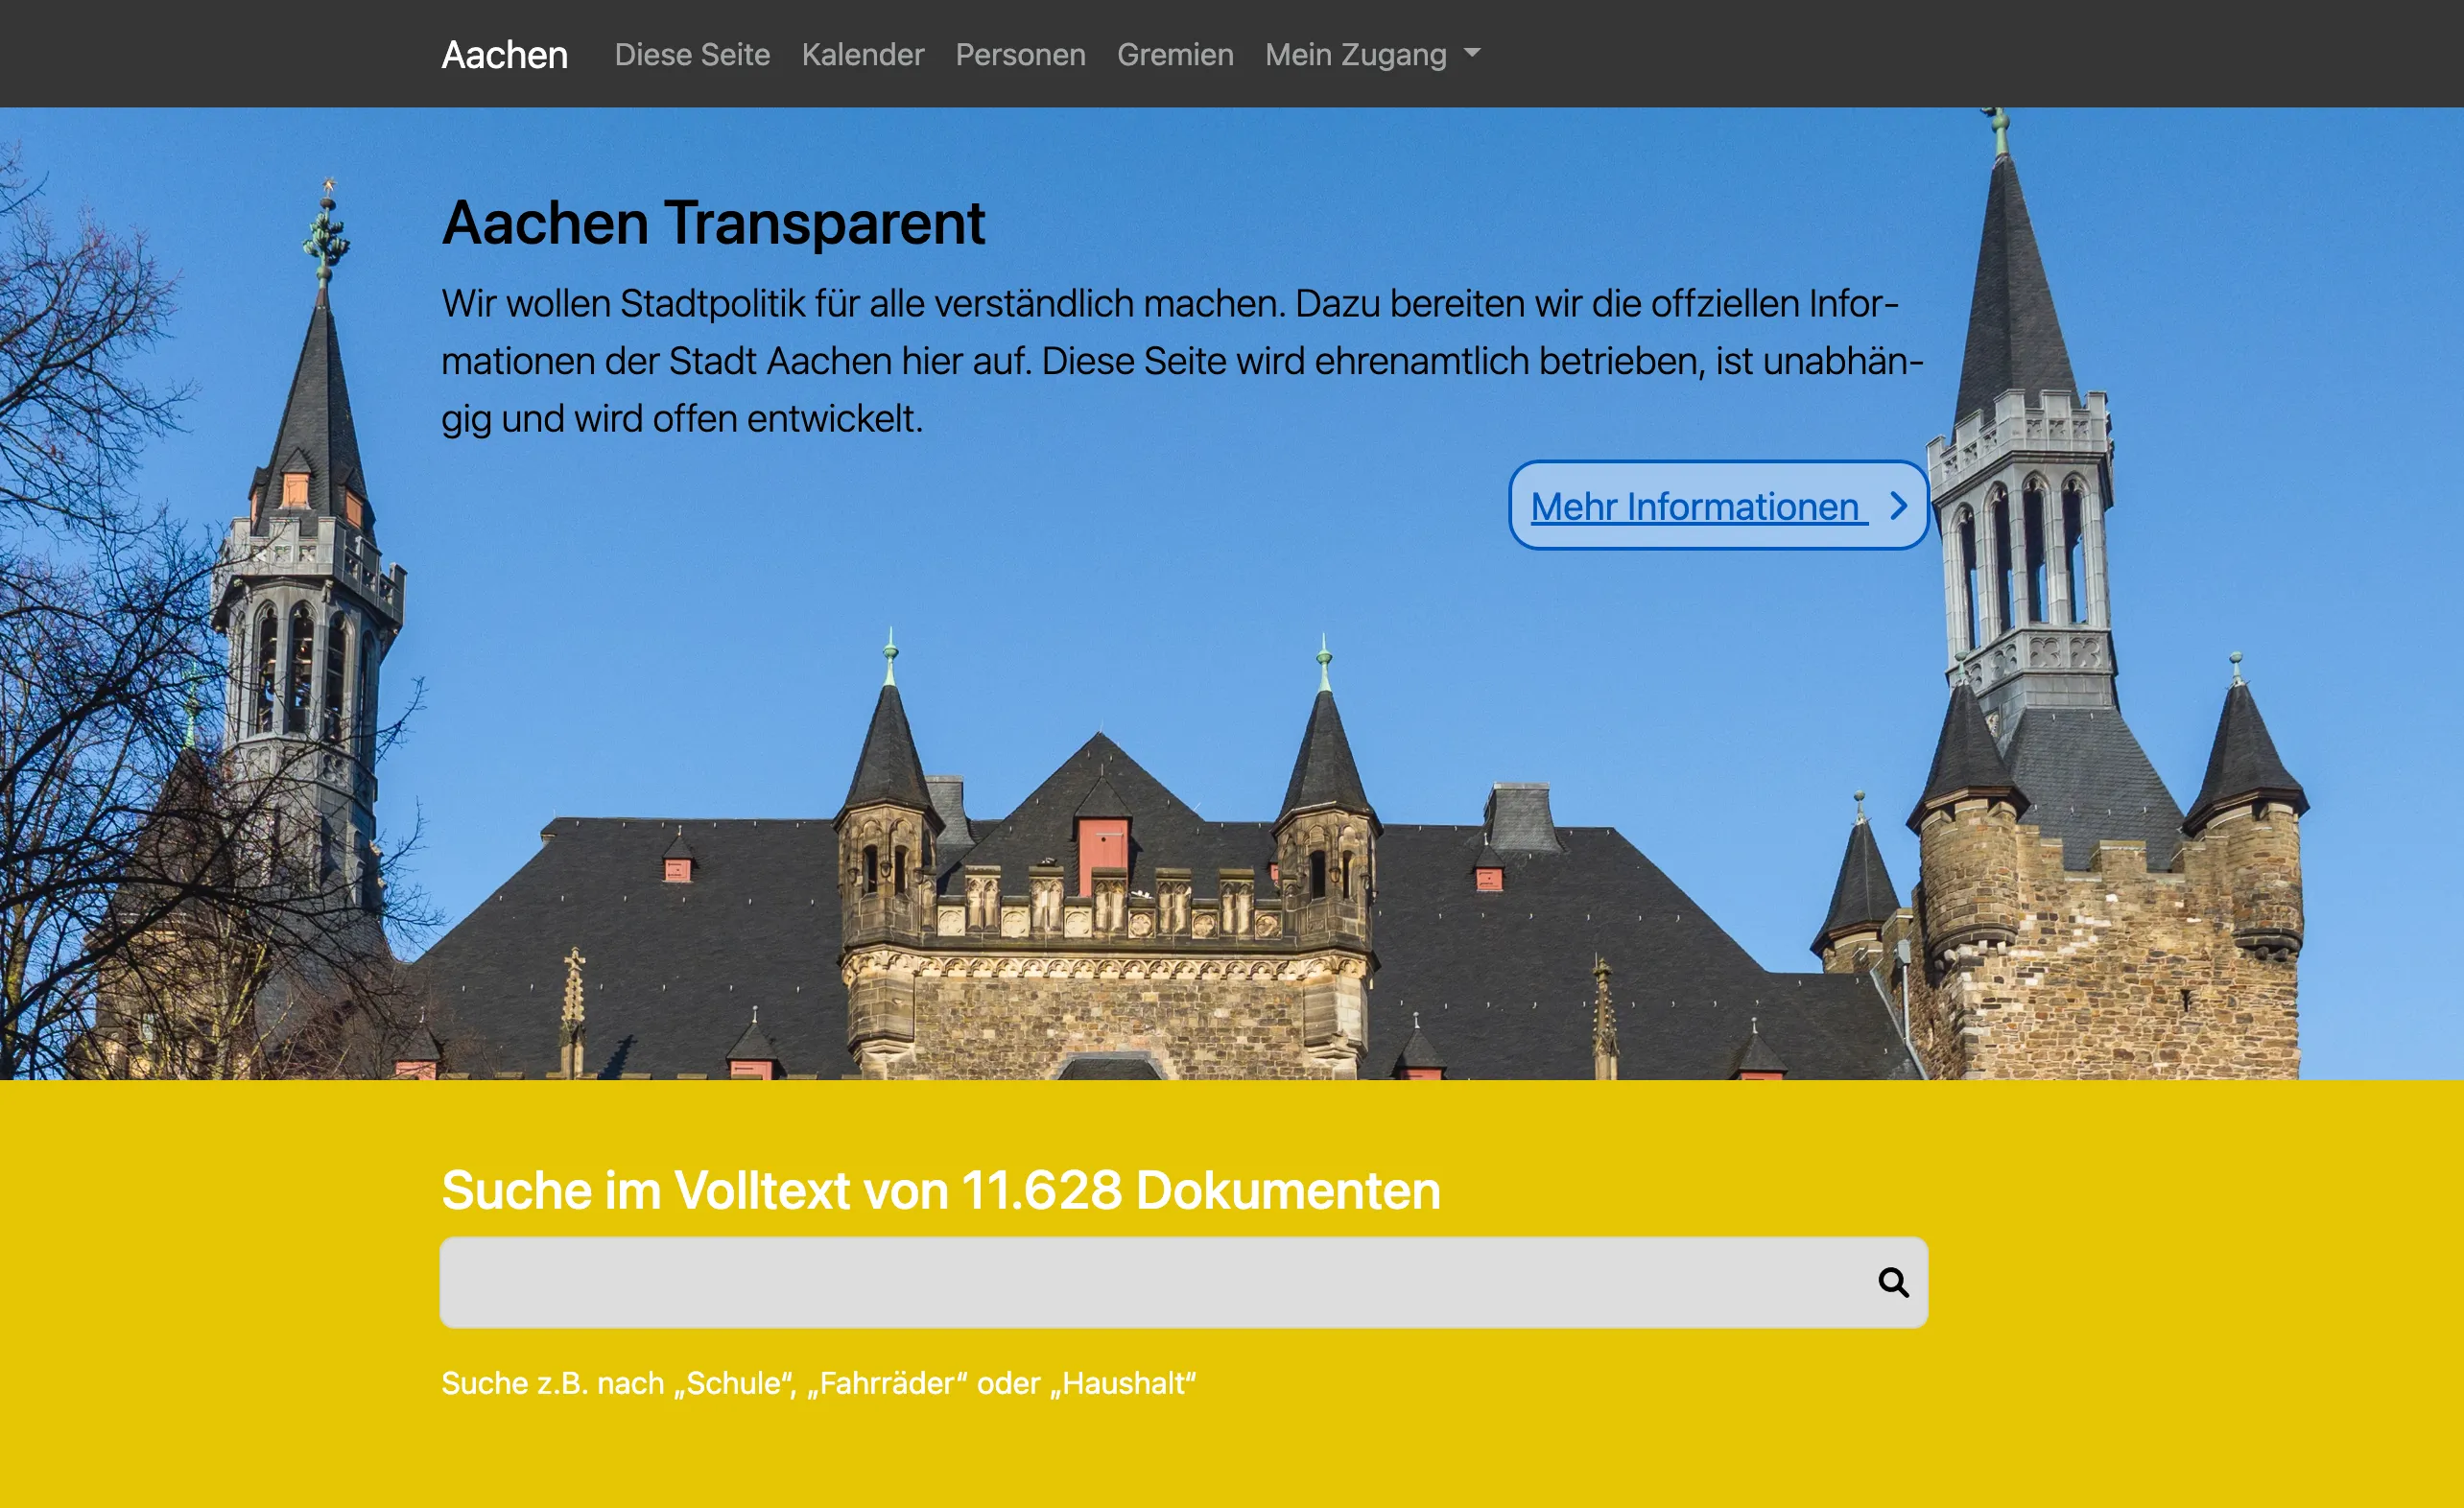
Mein aktuellstes Projekt aachen-transparent.de ermöglicht es, die öffentlichen Informationen aus dem städtischen Ratsinformationssystem modern und benutzerfreundlich aufzubereiten.
Dazu habe ich das bereits existierende Open-Source Projekt Meine-Stadt-Transparent erweitert und für die Bedürfnisse in Aachen angepasst.
Screenshot von aachen-transparent.de.
Aachen Transparent ist ein Projekt, dass ich ehrenamtlich im Rahmen des Open Data Labs Aachen ins Leben gerufen habe.
Es versucht einige der Unzulänglichkeiten des Ratsinformationssystems der Stadt Aachen zu umgehen.
Dazu nutzt es dessen öffentliche OParl Schnittstelle um die dort hinterlegten Informationen über eine moderne Oberfläche zugänglich zu machen.
WireGuard is a communication protocol and free and open-source software that implements encrypted virtual private networks (VPNs), and was designed with the goals of ease of use, high speed performance, and low attack surface.
I’ve been using it in my home lab setup since about 2020.
When, at the end of 2021, it was finally merged into the Linux mainline with release 5.9, I started to replace my former Tinc-VPN setup with it.
Tinc-VPN is another great open source VPN solution.
Unfortunately, its development has stalled over the last years which motivated me to look for alternatives.
In contrast to WireGuard, Tinc runs as a user-space daemon and uses tun / tap devices which adds a significant processing overhead.
Like WireGuard, it is also using UDP for tunneling data, but falls back to TCP in situations where direct datagram connectivity is not feasible.
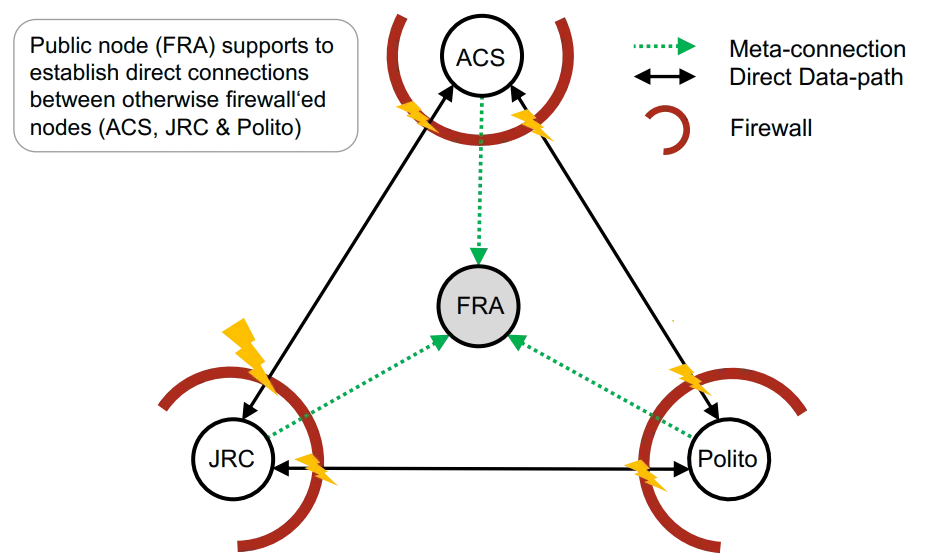
Another big advantage of Tinc is its ability to form a mesh of nodes and to route traffic within it when direct P2P connections are not possible due to firewall restrictions.
At the same time, this mesh is also used for facilitating direct connections by signaling endpoint addresses of NATed hosts.
Tinc's mesh capability.
This mesh functionality made Tinc quite robust against the failure of single nodes as usually we could route traffic via other paths.
That said, it is worth noting that this setup will not bring back some of the beloved features of Tinc.
Both meshing, the peer and endpoint discovery features of Tinc are currently and will never be supported by WireGuard.
Jason A. Donenfeld, the author of WireGuard, focused the design of WireGuard on simplicity, performance and auditability.
Hence advanced features like the ones mentioned will only be available to WireGuard by additional agents / daemons which control and configure WireGuard for you.
Examples for such are Tailscale, Netmaker and Netbird.
The setup presented in this post is a so-called active/standby configuration consisting of two almost equally configured Linux servers running both WireGuard and the keepalived daemon.
As the name suggests, only one of those two servers will be actively handling WireGuard tunneling traffic while the other one stands by for the event of a failure or maintenance of the active node.
Before we get started, some requirements for the setup:
2 Servers running Linux 5.9 or newer.
A working WireGuard configuration.
A local L2 network segment to which both servers are connected.
Upstream connectivity without NATing via a gateway connected to the network segment (usually provided by your internet or hosting provider).
An unused address to be used as Virtual IP (VIP) which roamed between the two servers by VRRP.
An important point here is the assumption that we are running both servers in the same switched network segment as this is a requirement for VRRP.
We are also assuming that the upstream gateway performs no NATing.
This guide covers only IPv6 addressing.
However all steps can be also adapted or repeated for a dual stack or IPv4-only setup.
Similarly, a reciprocal configuration file is needed on the client side which we skip here for brevity.
Before proceeding, we activate the interface on both servers:
Terminal window
systemctlenable--nowwg-quick@wg1
wgshowwg1# Check if interface is up
Configuring Keepalived
Create a configuration file for keepalived at /etc/keepalived/keepalived.conf
global_defs {
enable_script_security
script_user root
}
# Check if the server the WireGuard interface configured
vrrp_script check_wg {
script "/usr/bin/wg show wg1"
user root
}
vrrp_instance wg_v6 {
interface eno1
virtual_router_id 52
notify /usr/local/bin/keepalived-wg.sh
state BACKUP # use BACKUP for Server B
priority 99 # use 100 for Server B
virtual_ipaddress {
2001:DB8:1::1/64
}
track_script {
check_wg
}
}
Create a notification script for keepalived at /usr/local/bin/keepalived-wg.sh
#!/usr/bin/env bash
TYPE=$1
NAME=$2
STATE=$3
PRIO=$4
WGIF=wg1
case${STATE}in
MASTER)
iplinksetupdev${WGIF}
;;
BACKUP|FAULT|STOP|DELETED)
iplinksetdowndev${WGIF}
;;
*)
echo"unknown state"
exit1
esac
Now start the keepalived daemon:
Terminal window
chmod+x/usr/local/bin/keepalived-wg.sh
systemctlenable--nowkeepalived
Testing the fail over
In our configuration, Server A has a higher VRRP priority and as such will be preferred if both servers are healthy.
To test our setup, we simply bring down the WireGuard interface on Server A and observe how the VIP gets moved to Server B.
From the WireGuard peers perspective not much changes.
In fact no connections will be dropped during the fail-over.
Internally, the client’s WireGuard interface renegotiates the handshake.
However, that step is actually not observable by the user.
Run the following commands on Server A while also testing the connectivity from the client side through the tunnel via ping -i0.2 2001:DB8:2::1:
Terminal window
# Check that keepalived has moved the VIP to interface eno1
ipaddrshowdeveno1
# Bring down the Wireguard interface
wg-quickdownwg1
# Keepalived should now have moved the VIP to Server B
In my personal network, I operate a Interior Gateway Protocol (IGP) to dynamically route traffic within and also towards other networks.
Common IGPs are OSPF, ISIS or BGP.
In my specific case, both Servers A & B run the Bird2 routing daemon with interior and exterior BGP sessions.
So how does the WireGuard HA setup interoperate with my interior routing? Quite well actually.
As my notify script (keepalive-wg.sh) will automatically bring up / down the interface, the routes attached to the interface will be picked up by Bird’s direct protocol.
I am also planning to extend my WireGuard agent cunīcu (/cunicu/cunicu ) to support the synchronization of WireGuard interface configurations between multiple servers.
Surprisingly, the setup works by using Keepalived and does not require any iptables or nftables magic to rewrite source IP addresses.
I’ve seen some people mentioning that SNAT / DNAT would be required to convince WireGuard to use the virtual IP instead of the server addresses.
However, in my experience this was not necessary.
Another concern has been that the backup Wireguard interface still might attempt to establish a handshake with its peers.
This would quite certainly interfere with the handshakes originated by the current master server.
However, also this has not been proven to be the case.
I assume the fact that our notify script brings down the WireGuard interface on the backup server causes them to cease all communication with its peers.
In my previous post, I demonstrated how to gain root access by enabling a Telnet daemon via the router’s AT-over-TCP interface.
In this post I will close this gaping security hole by replacing the Telnet with a Secure Shell (SSH) daemon.
Netgear’s firmware does not ship with an SSH daemon itself.
So we first build a statically linked Dropbear instead of the rather heavy OpenSSH daemon.
This post is documenting some internals of the device which is not the most exciting stuff to read.
I mainly collected it here for documentation purposes.
All information in this post has been collected from a device running firmware version NTGX55_12.04.12.00.
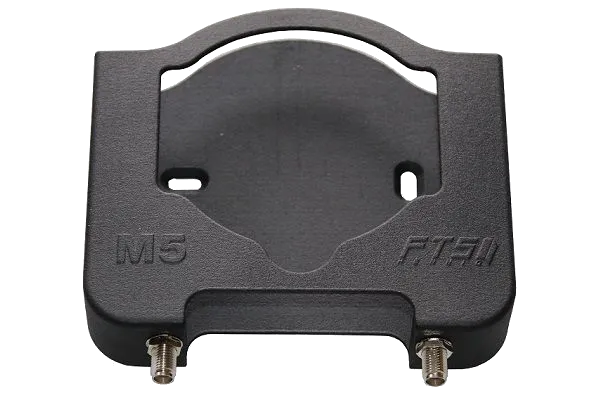
My inspiration: the wall-mount and antenna adapter from FTS Hennig.
Unfortunately, the mount is with a price tag of around 50 € rather expensive.
So I decided to use our new lab 3D-printer and try to design it myself using Autodesk’s Fusion 360 software.
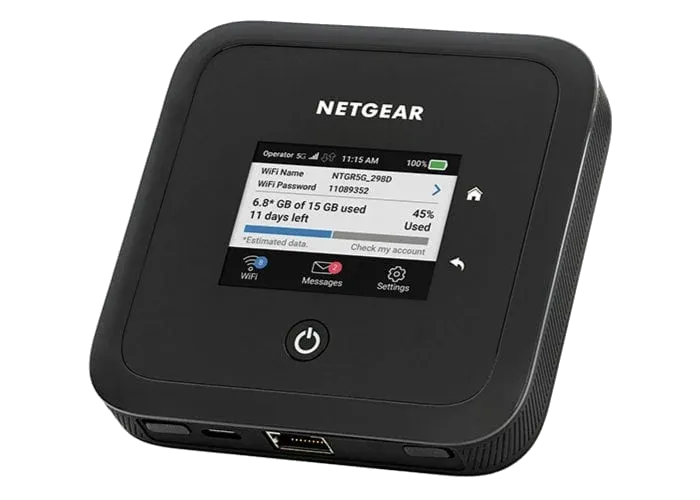
This blog post covers the required steps to gain root access via Telnet on Netgear Nighthawk Mobile 5G/LTE Routers. It’s the first post in a small series covering my experiences playing around with this device.
Last month I obtained one of Netgear’s latest mobile 5G routers, the Netgear Nighthawk M5 (model MR5200-100EUS) . Being one of the most expensive consumer 5G routers, I was lucky to get a fairly good second-hand deal from eBay.
Im September letzten Jahres hat sich in Aachen das Open Data Lab mit einer virtuellen Kick-off Veranstaltung gegründet.
Im Open Data Lab wollen wir ehrenamtlich Projekte rund um Offene Daten in Aachen voranbringen.
Wir suchen dazu Personen, die daran generell interessiert sind, ob Entwickler*innen, Designer*innen, Datenjournalist*innen aus Verwaltung, Politik und Gesellschaft.
Wir wollen Daten und Ideen zusammenbringen und daraus Projekte generieren.
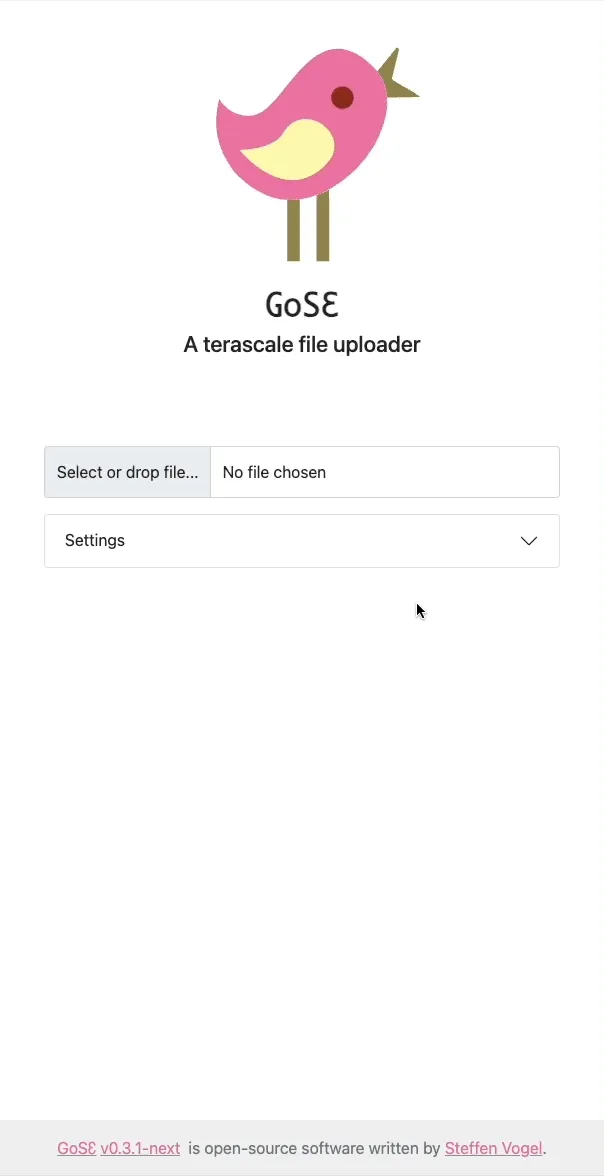
GoSƐ is a modern and scalable file-uploader focusing on scalability and simplicity.
It is a little hobby project I’ve been working on over the last weekends.
The only requirement for GoSƐ is an S3 storage backend which allows it to scale horizontally without the need for additional databases or caches.
Uploaded files are divided into equally sized chunks which are hashed with an MD5 digest in the browser for upload.
This allows GoSƐ to skip chunks which already exist.
Seamless resumption of interrupted uploads and storage savings are the consequence.
And either way both upload and downloads are always directed directly at the S3 server so GoSƐ only sees a few small HTTP requests instead of the bulk of the data.
Behind the scenes, GoSƐ uses many of the more advanced S3 features like Multi-part Uploads and Pre-signed Requests to make this happen.
Users have a few options to select between multiple pre-configured S3 buckets or enable browser & mail notifications about completed uploads.
A customizable retention / expiration time for each upload is also selectable by the user and implemented by S3 life-cycle policies.
Optionally, users can also opt-in to use an external service to shorten the URL of the uploaded file.
Currently a single concurrent upload of a single file is supported.
Users can observe the progress via a table of details statistics, a progress-bar and a chart showing the current transfer speed.
GoSƐ aims at keeping its deployment simple and by bundling both front- & backend components in a single binary or Docker image.
GoSƐ has been tested with AWS S3, Ceph’s RadosGW and Minio.
Pre-built binaries and Docker images of GoSƐ are available for all major operating systems and architectures at the release page: /stv0g/gose (Releases) .
GoSƐ is open-source software licensed under the Apache 2.0 license.
I consider the current state of GoSƐ to be production ready.
Its basic functionality is complete.
However, there are still some ideas which I would like to work on in the future:
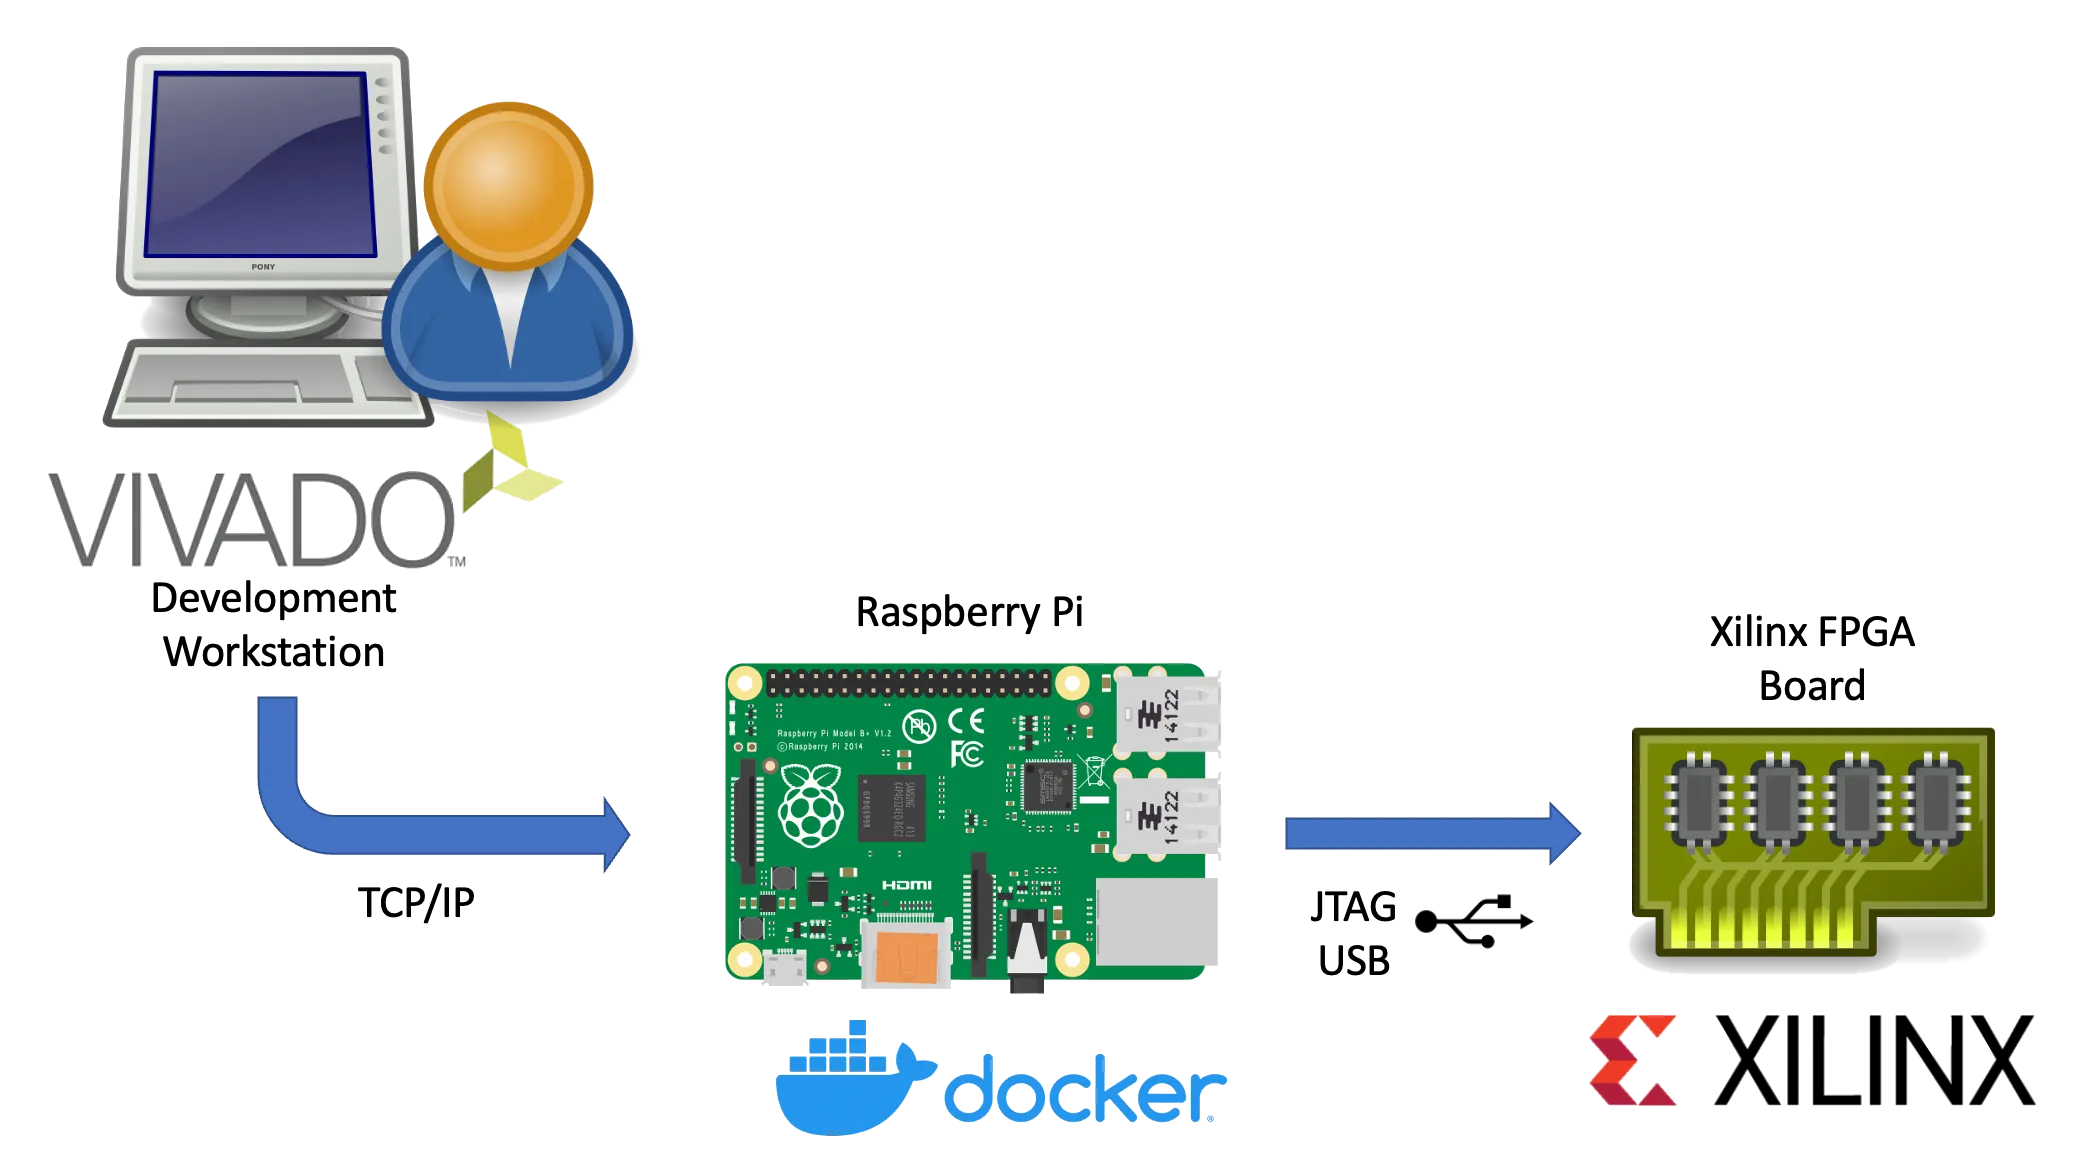
This article describes the necessary steps to run a Xilinx hw_server as a Docker container.
Xilinx’s hw_server is a command line utility which handles JTAG communication between a Xilinx FPGA board and usually the Vivado IDE.
It can be used to configure the FPGA bitstream, connect to the embedded logic analyzer cores (ILA) or perform debugging of processor cores via GDB and the Xilinx System Debugger (XSDB).
The hw_server is usually used when those tasks shall be performed remotely as the connection between Vivado or XSDB is established via TCP connection and allows us to run it on a remote system.
Running the hw_server as a Docker container has the benefit that its installation is simplified to starting a Docker container by running:
Terminal window
dockerrun\
--restartunless-stopped\
--privileged\
--volume/dev/bus/usb:/dev/bus/usb\
--publish3121:3121\
--detach\
ghcr.io/stv0g/hw_server:v2021.2
It also allows us to run the hw_server on architectures which are not natively supported by Xilinx such as the commonly used Aarch / ARM64 and ARMv7 architectures found in Raspberry Pis.
This is enabled by Docker’s support for running container images for non-native architectures.
I am using the aptman/qus Docker image (/dbhi/qus ) to set up this user-mode emulation.
The qemu-user-static (qus) image is a compilation of utilities, examples and references to build and execute OCI images (aka docker images) for foreign architectures using QEMU’s user-mode emulation.
Run the following commands to run the hw_server on an embedded device:
Terminal window
# Install docker
sudoapt-getupdate&&sudoapt-getupgrade
curl-sSLhttps://get.docker.com|sh
# Start Docker
sudosystemctlenable--nowdocker
# Enable qemu-user emulation support for running amd64 Docker images
# *Note:* only required if your system arch is not amd64!
In this quick post I will show you how to use the password manager “password-store”1 to securely store your credentials used by the Amazon Webservices command line client.
AWS CLI Logo.
The installation for Mac and Linux system is fairly easy:
Terminal window
pipinstallawscli
The credentials are stored as key-value pairs inside a PGP-encrypted file.
Every time you call the AWS CLI tool, your keys will be decrypted and directly passed to the aws tool.
Use pass to add your keys in the store:
Terminal window
passeditproviders/aws
An editor opens.
Use the following format:
User: stv0g
Access-Key: AKB3ASJGBS3GOMXK6KPSQ
Secret-Key: vAAABn/PMAksd235gAs/FSshhr42dg2D4EY3
Add the following snippet to your ~/.bashrc:
Terminal window
functionaws{
localPASS=$(passproviders/aws)
localAWS=$(whichaws)
# Start original aws executable with short-lived keys
I spent some time over the last months to improve the security of servers and passwords.
In doing so, I started to orchestrate my servers using a configuration management tool called Ansible.
This allows me to spin-up fresh servers in a few seconds and to get rid of year-old, polluted and insecure system images.
Ansible loves Yubico.
My ‘single password for everything’ has been replaced by a new password policy which enforces individual passwords for every single service.
This was easier than I previously expected:
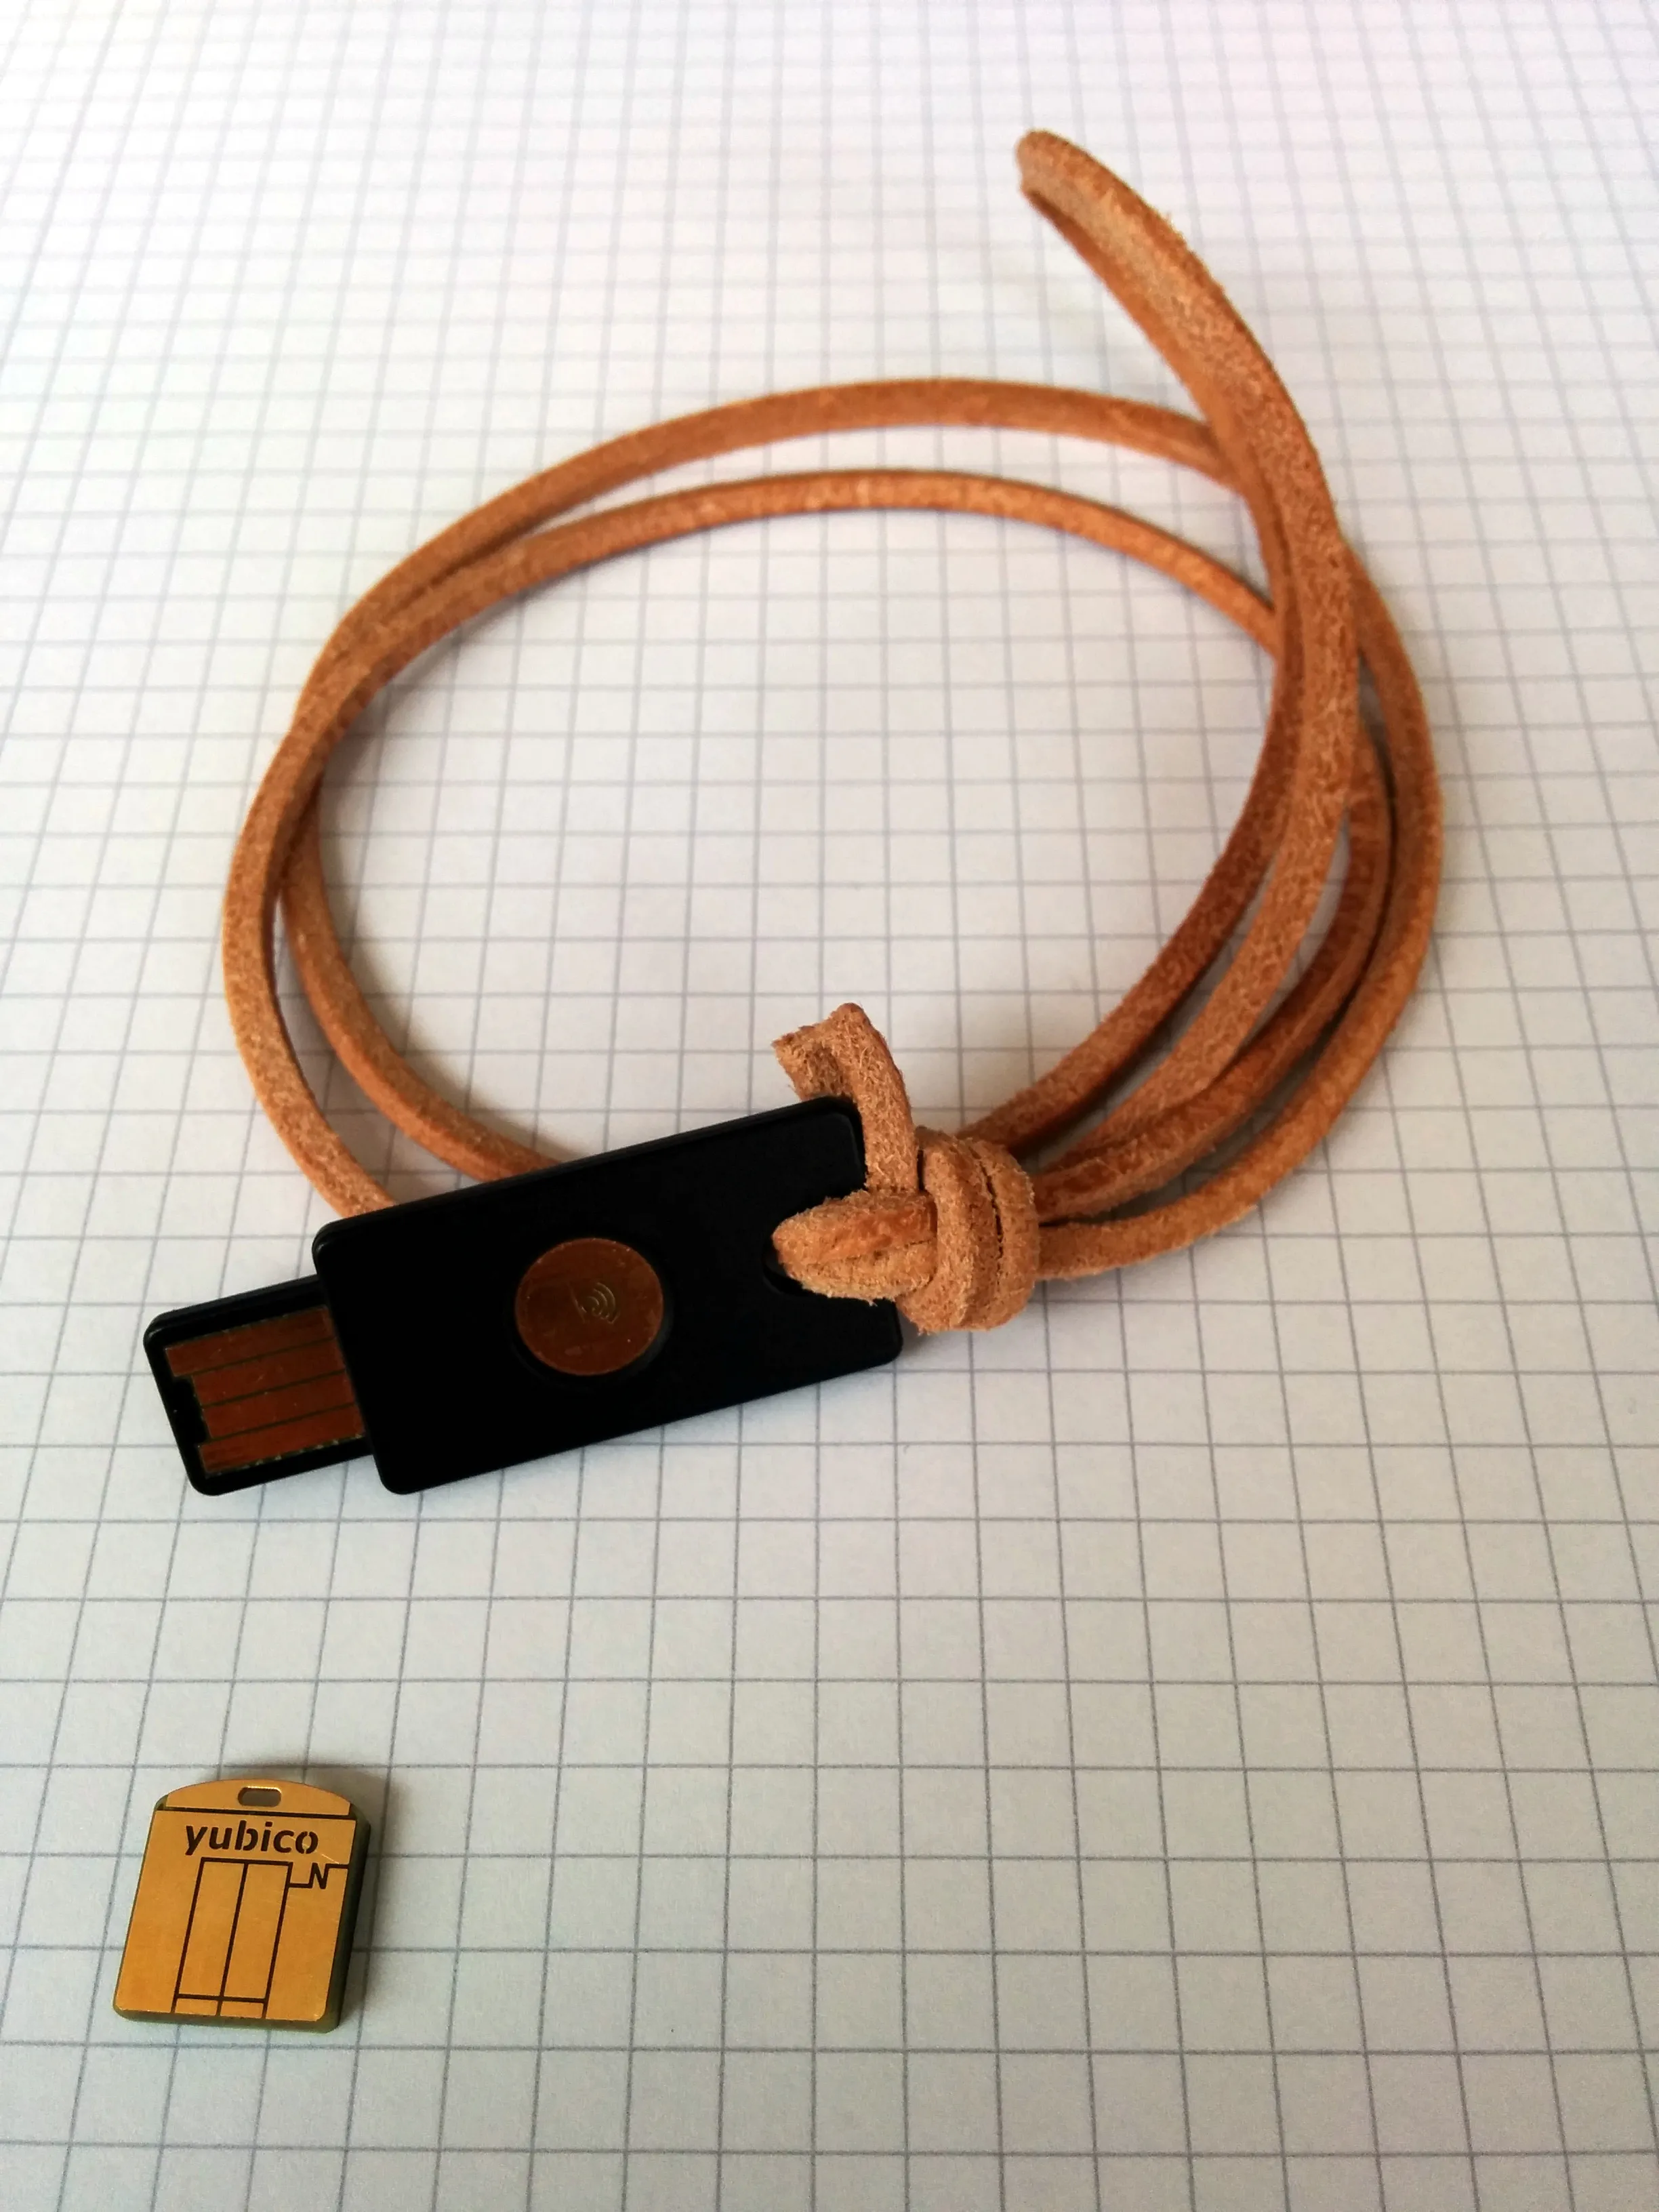
To unlock the ‘paranoid’ level, I additionally purchased a Yubikey Neo token to handle the decryption of my login credentials in tamper-proof hardware.
‘pass’ is just a small shell script to glue several existing Unix tools together: Bash, pwgen, Git, xclip & GnuPG (obeying the Unix philosophy).
The passwords are stored in simple text files which are encrypted by PGP and stored in a directory structure which is managed in a Git repository.
Yubikey Neo und Neo-n.
There are already tons of tutorials which present the tools I described above.
I do not want to repeat all of it.
So, this post is dedicated to solve some smaller issues I encountered.
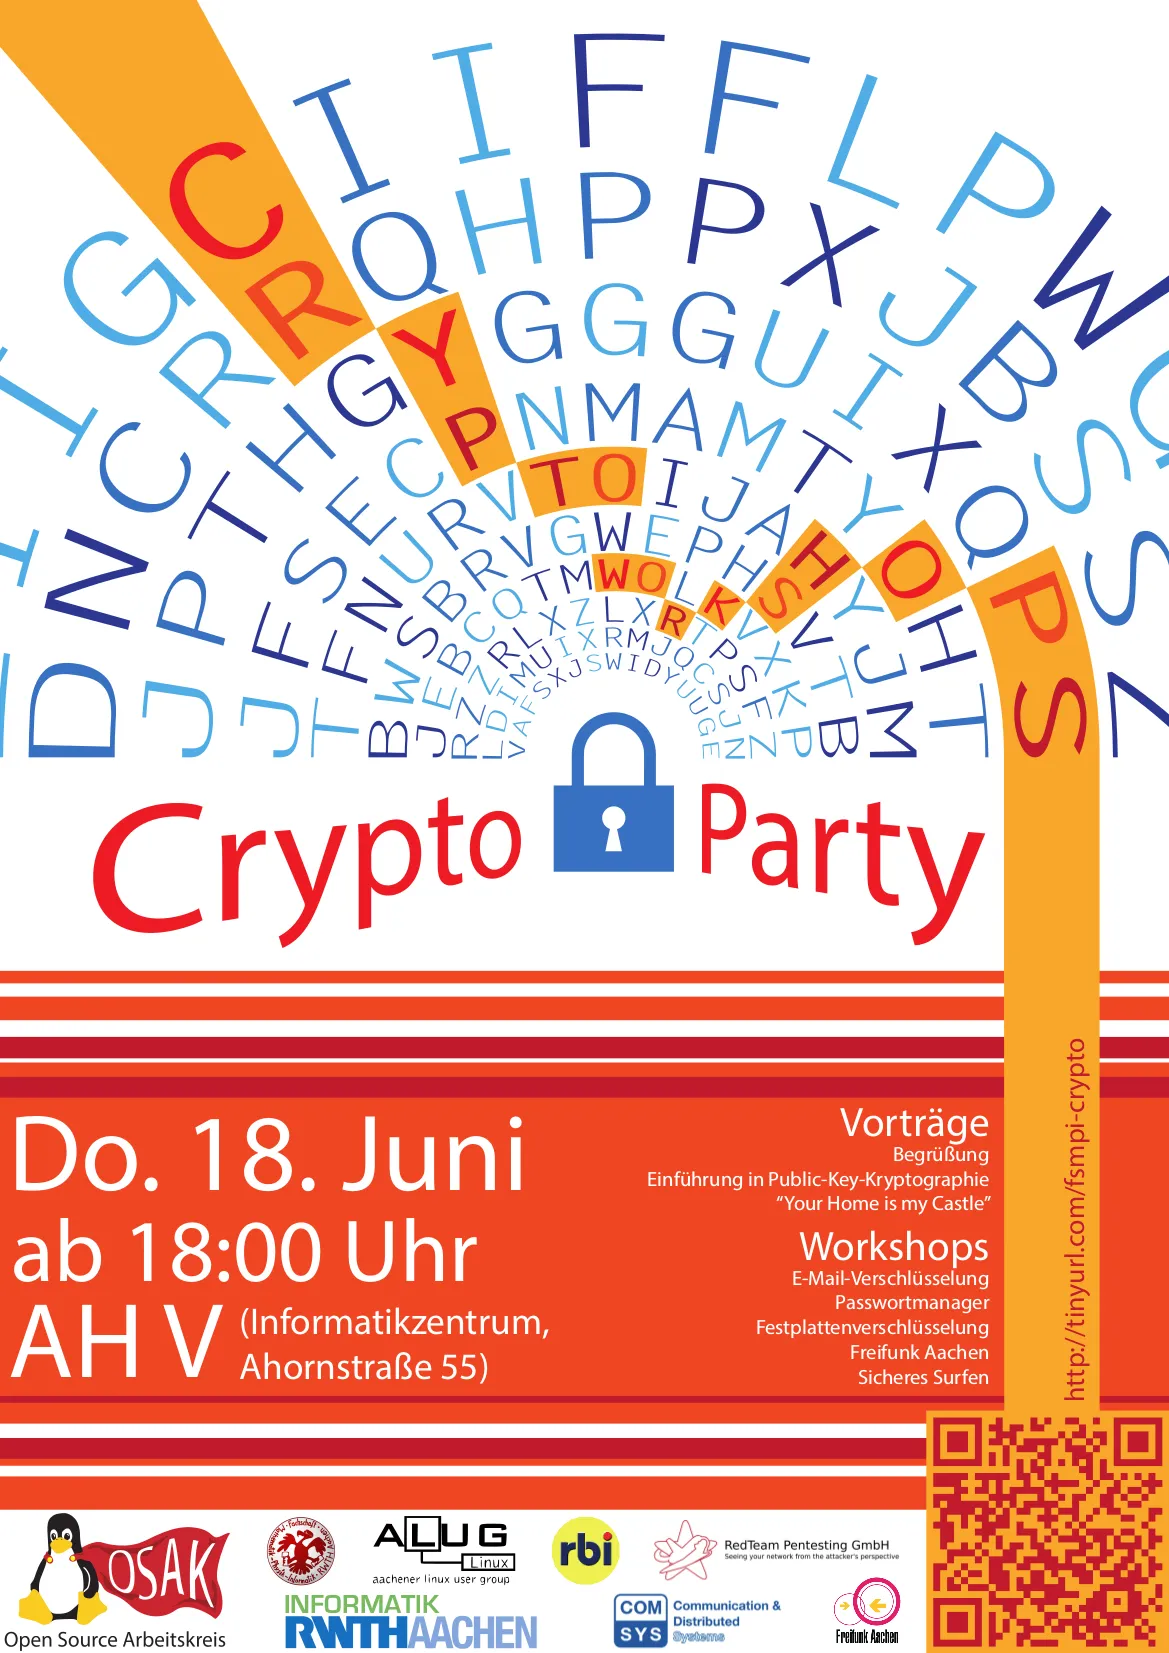
Ich werde in circa 20 Min eine kurze Übersicht über Security Tokens wie beispielsweise den Yubikey oder die OpenPGP Smartcard geben.
Dabei wird der Fokus auf verschiedenen Anwendungsszenarien wie One-Time-Passwords, Logins, sowie E-Mail Verschlüsselung liegen.
Update: Hier sind die Vortragsfolien und das Handout:
As a follow-up to the previous post, I’d like to present some code which I think might be helpful for other Qt / OpenCV projects as well.
This code was written for Pastie.
Pastie is a piece of software I wrote as part of my image processing seminar.
It makes use of the well known libraries:
I wrote a C++ header file to facilitate the co-operation of those two libraries.
This file enables the conversion / casting of OpenCV and Qt types e.g.:
The lectures during my last semester were largely focused on digital image processing.
Combining this with the inspiration for 3D printing, I gathered through my trip through South Korea, resulted in the following seminar paper.
Seminars are a compulsory part of our curriculum which I like due to the self-contained work and the ability to pick an individual topic.
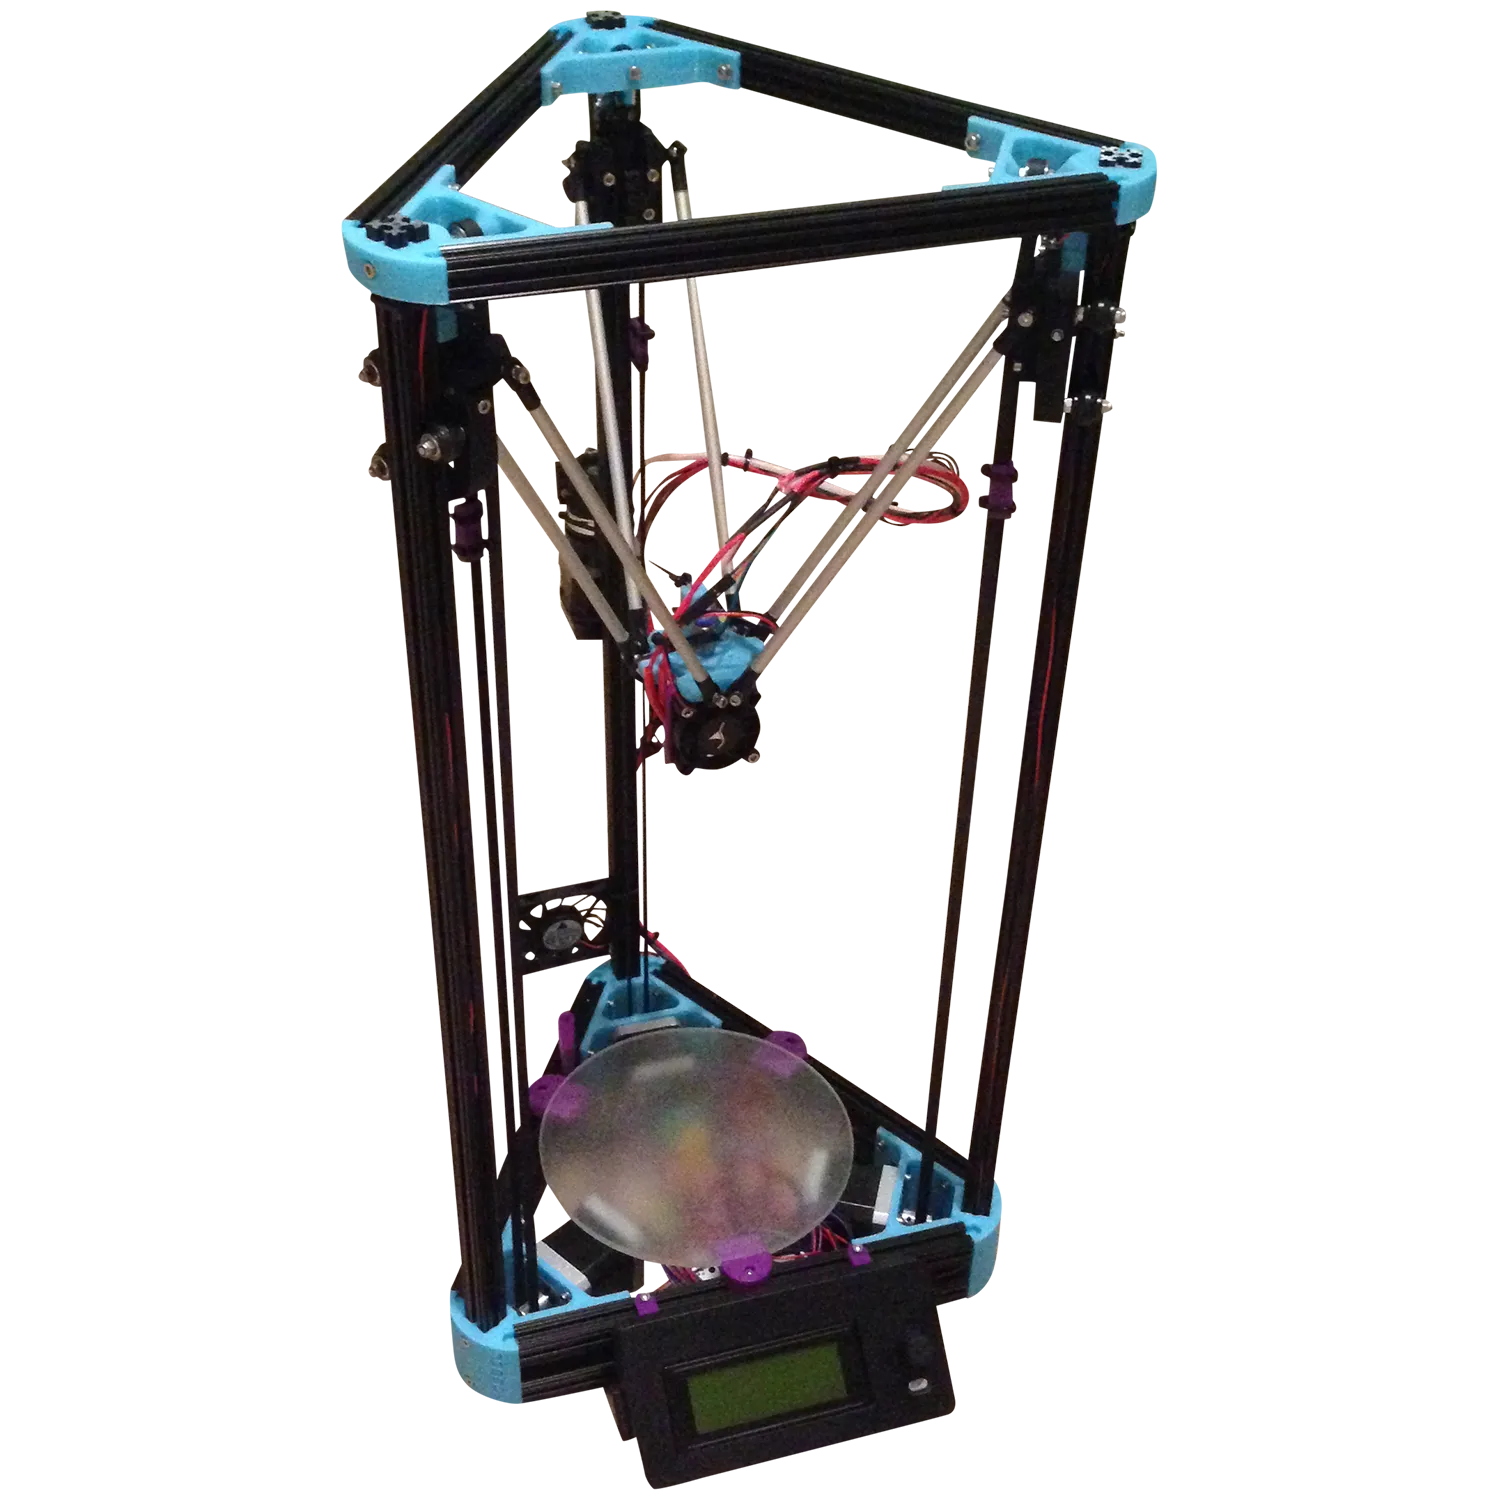
Over the past year, I’ve built my own Kossel 3D printer.
The Mini Kossel is based on a novel parallel delta kinematic which was developed by Johann C. Rocholl, a Google engineer from Germany.
This paper is targeting the automation of solder paste dispensing onto printed circuit boards by using computer vision and RepRap robots.
Almost fourteen months ago, I started working on my bachelor thesis.
Although I finished it half a year ago, it’s still part of my work as a student research assistant.
During my initial work, most of the code was written for an internal research kernel.
I’m now happy that we were able to port it to an open source kernel called eduOS: /RWTH-OS/eduOS ).
This minimal operating system is used for practical demos and assignments during the OS course at my university.
There’s much more I could write about.
So this will probably be another separate blog post.
The motive for this article is an abstract I wrote for the student research competition of the ASPLOS conference which is held this year in Istanbul, Turkey.
Unfortunately my submission got rejected.
But as a nice side-effect, I now have the chance to present my work to an English audience as well:
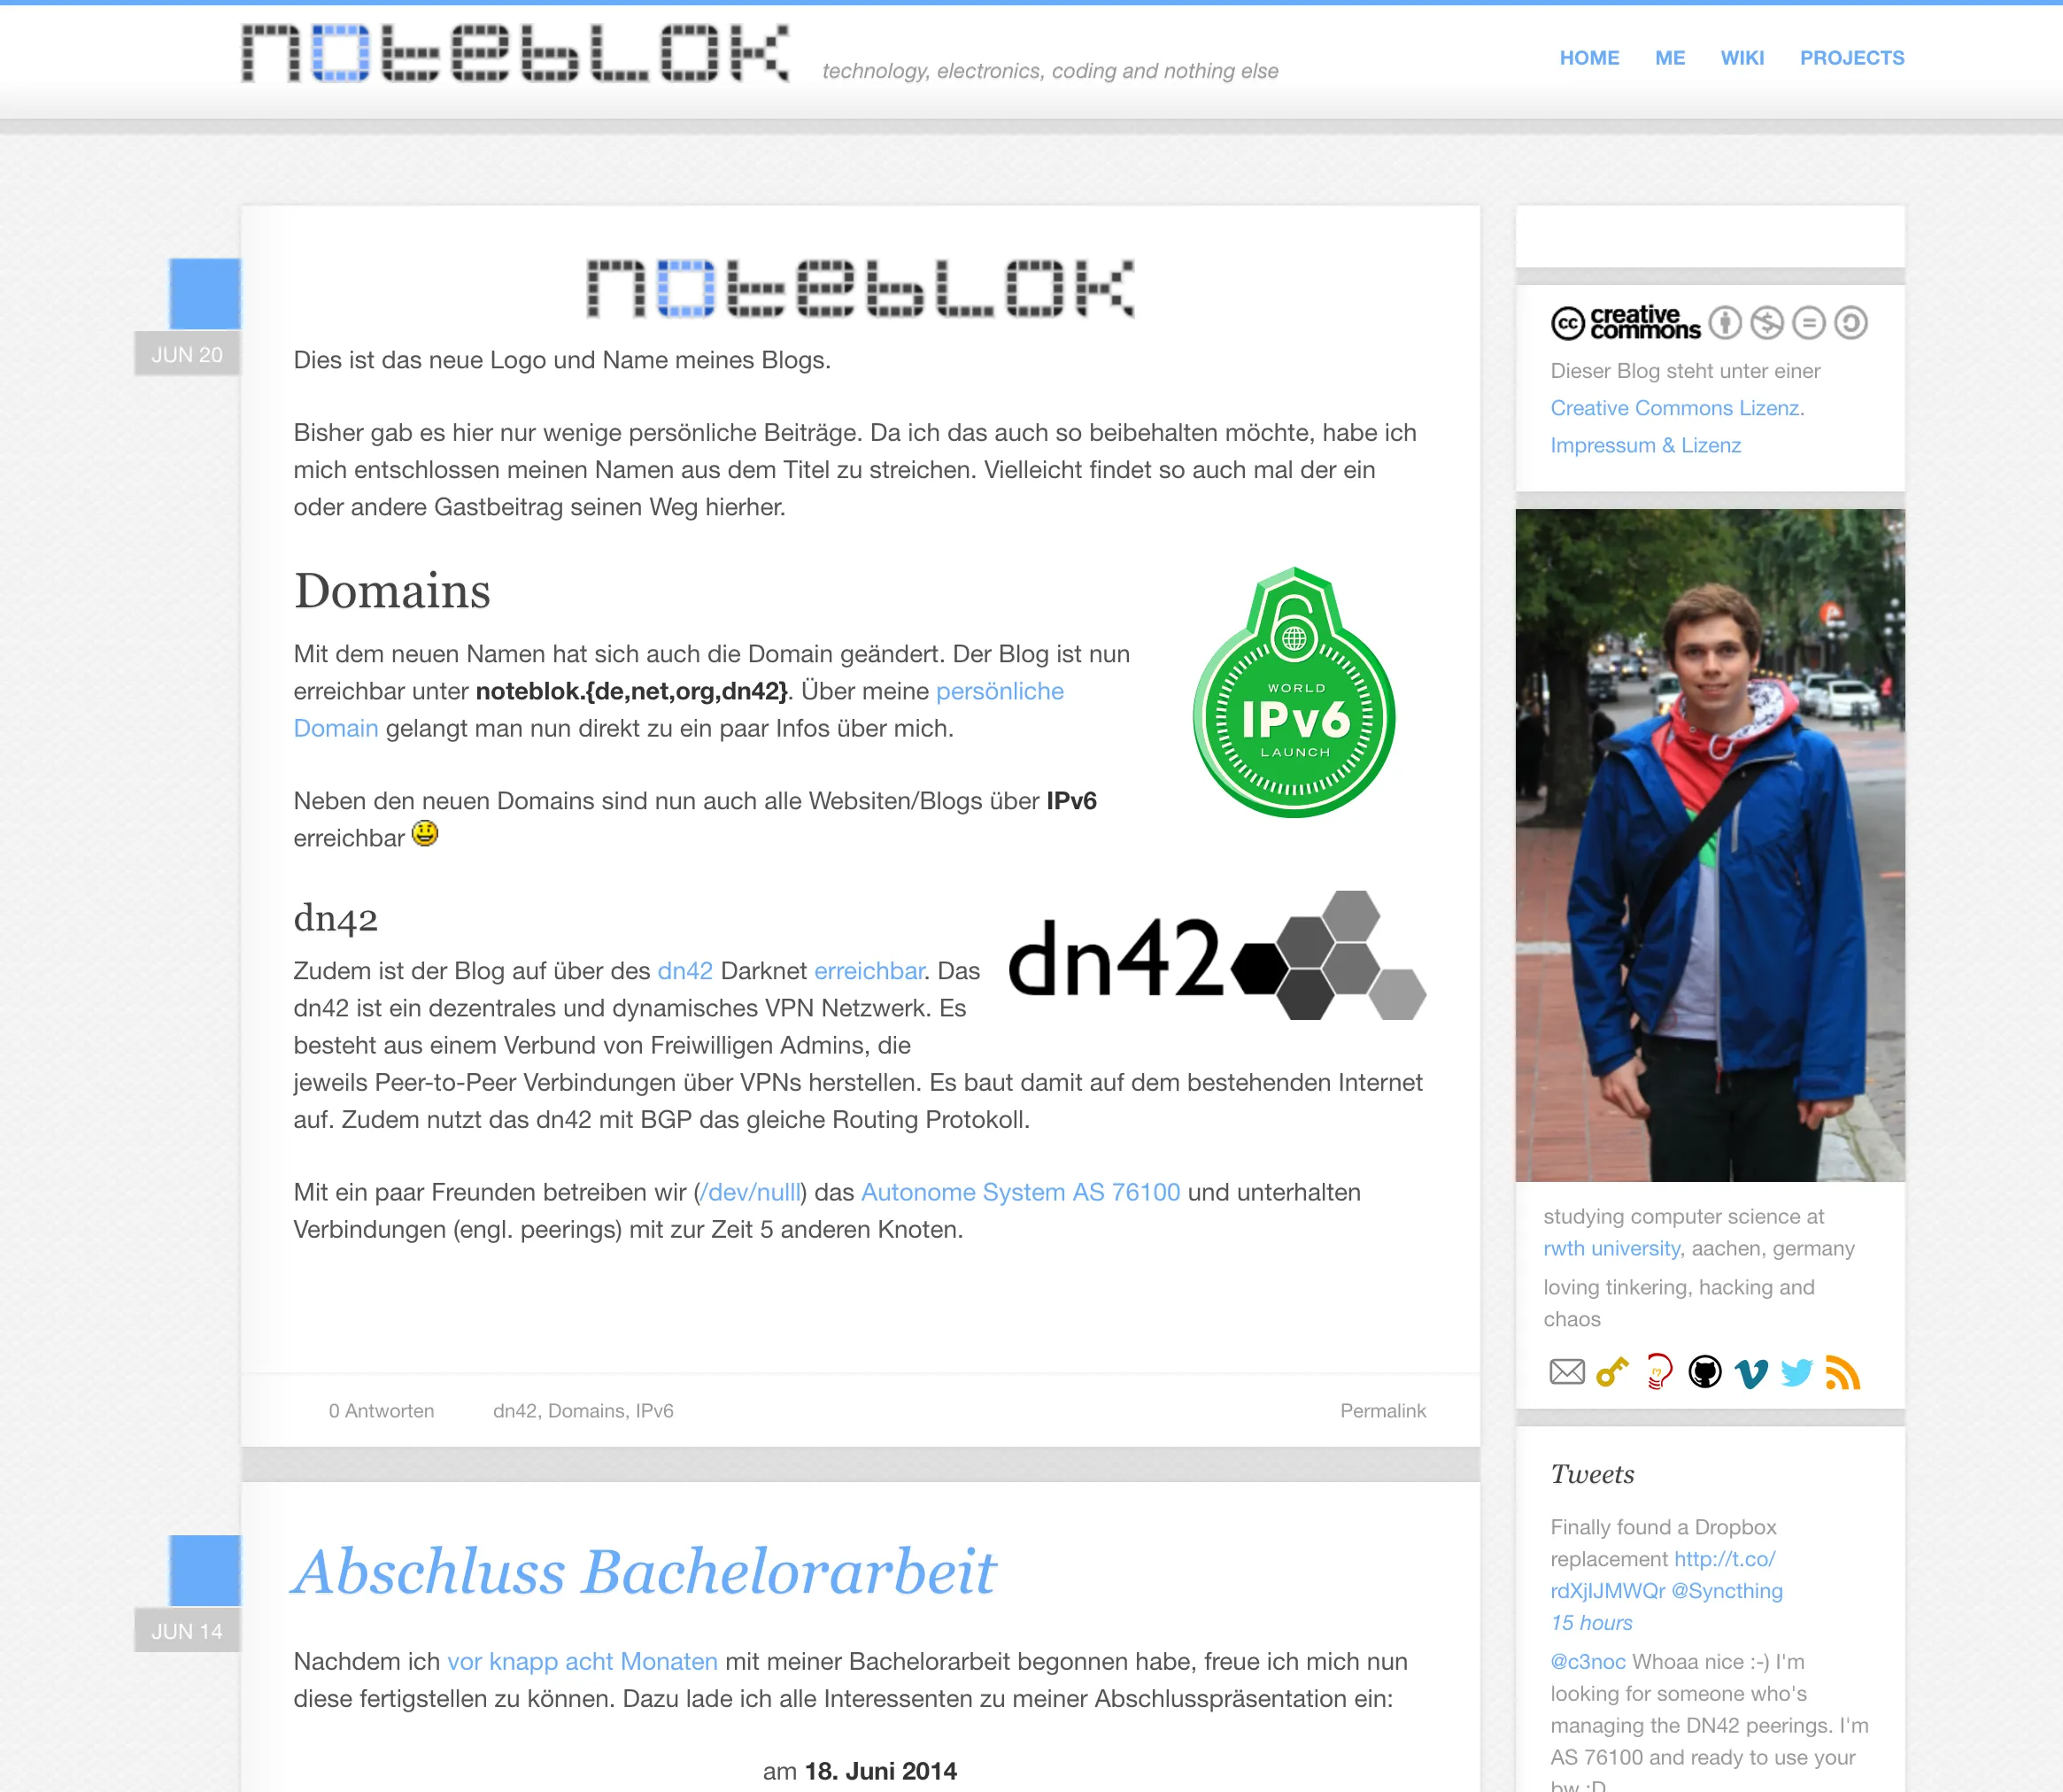
Bisher gab es hier nur wenige persönliche Beiträge.
Da ich das auch so beibehalten möchte, habe ich mich entschlossen meinen Namen aus dem Titel zu streichen.
Vielleicht findet so auch mal der ein oder andere Gastbeitrag seinen Weg hierher.
Mit dem neuen Namen hat sich auch die Domain geändert.
Der Blog ist nun erreichbar unter noteblok.{de,net,org,dn42}.
Über meine persönliche Domain gelangt man nun direkt zu ein paar Infos über mich.
Neben den neuen Domains sind nun auch alle Webseiten/Blogs über IPv6 erreichbar 😊.
Zudem ist der Blog über das dn42 Darknet erreichbar.
Das dn42 ist ein dezentrales und dynamisches VPN Netzwerk.
Es besteht aus einem Verbund von freiwilligen Admins, die jeweils Peer-to-Peer Verbindungen über VPNs herstellen.
Es baut damit als Overlay Netzwerk auf dem bestehenden Internet auf.
Zudem nutzt das dn42 mit BGP, DNS, Whois die gleichen Protokolle wie das reguläre Internet.
Nachdem ich vor knapp acht Monaten mit meiner Bachelorarbeit begonnen habe, freue ich mich nun diese fertigstellen zu können.
Dazu lade ich alle Interessenten zu meiner Abschlusspräsentation ein:
Am 18. Juni 2014 um 13:00 Uhr im Raum BSZ-20 des EON Energy Research Center
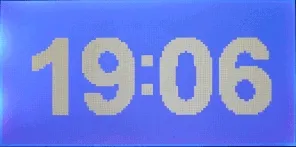
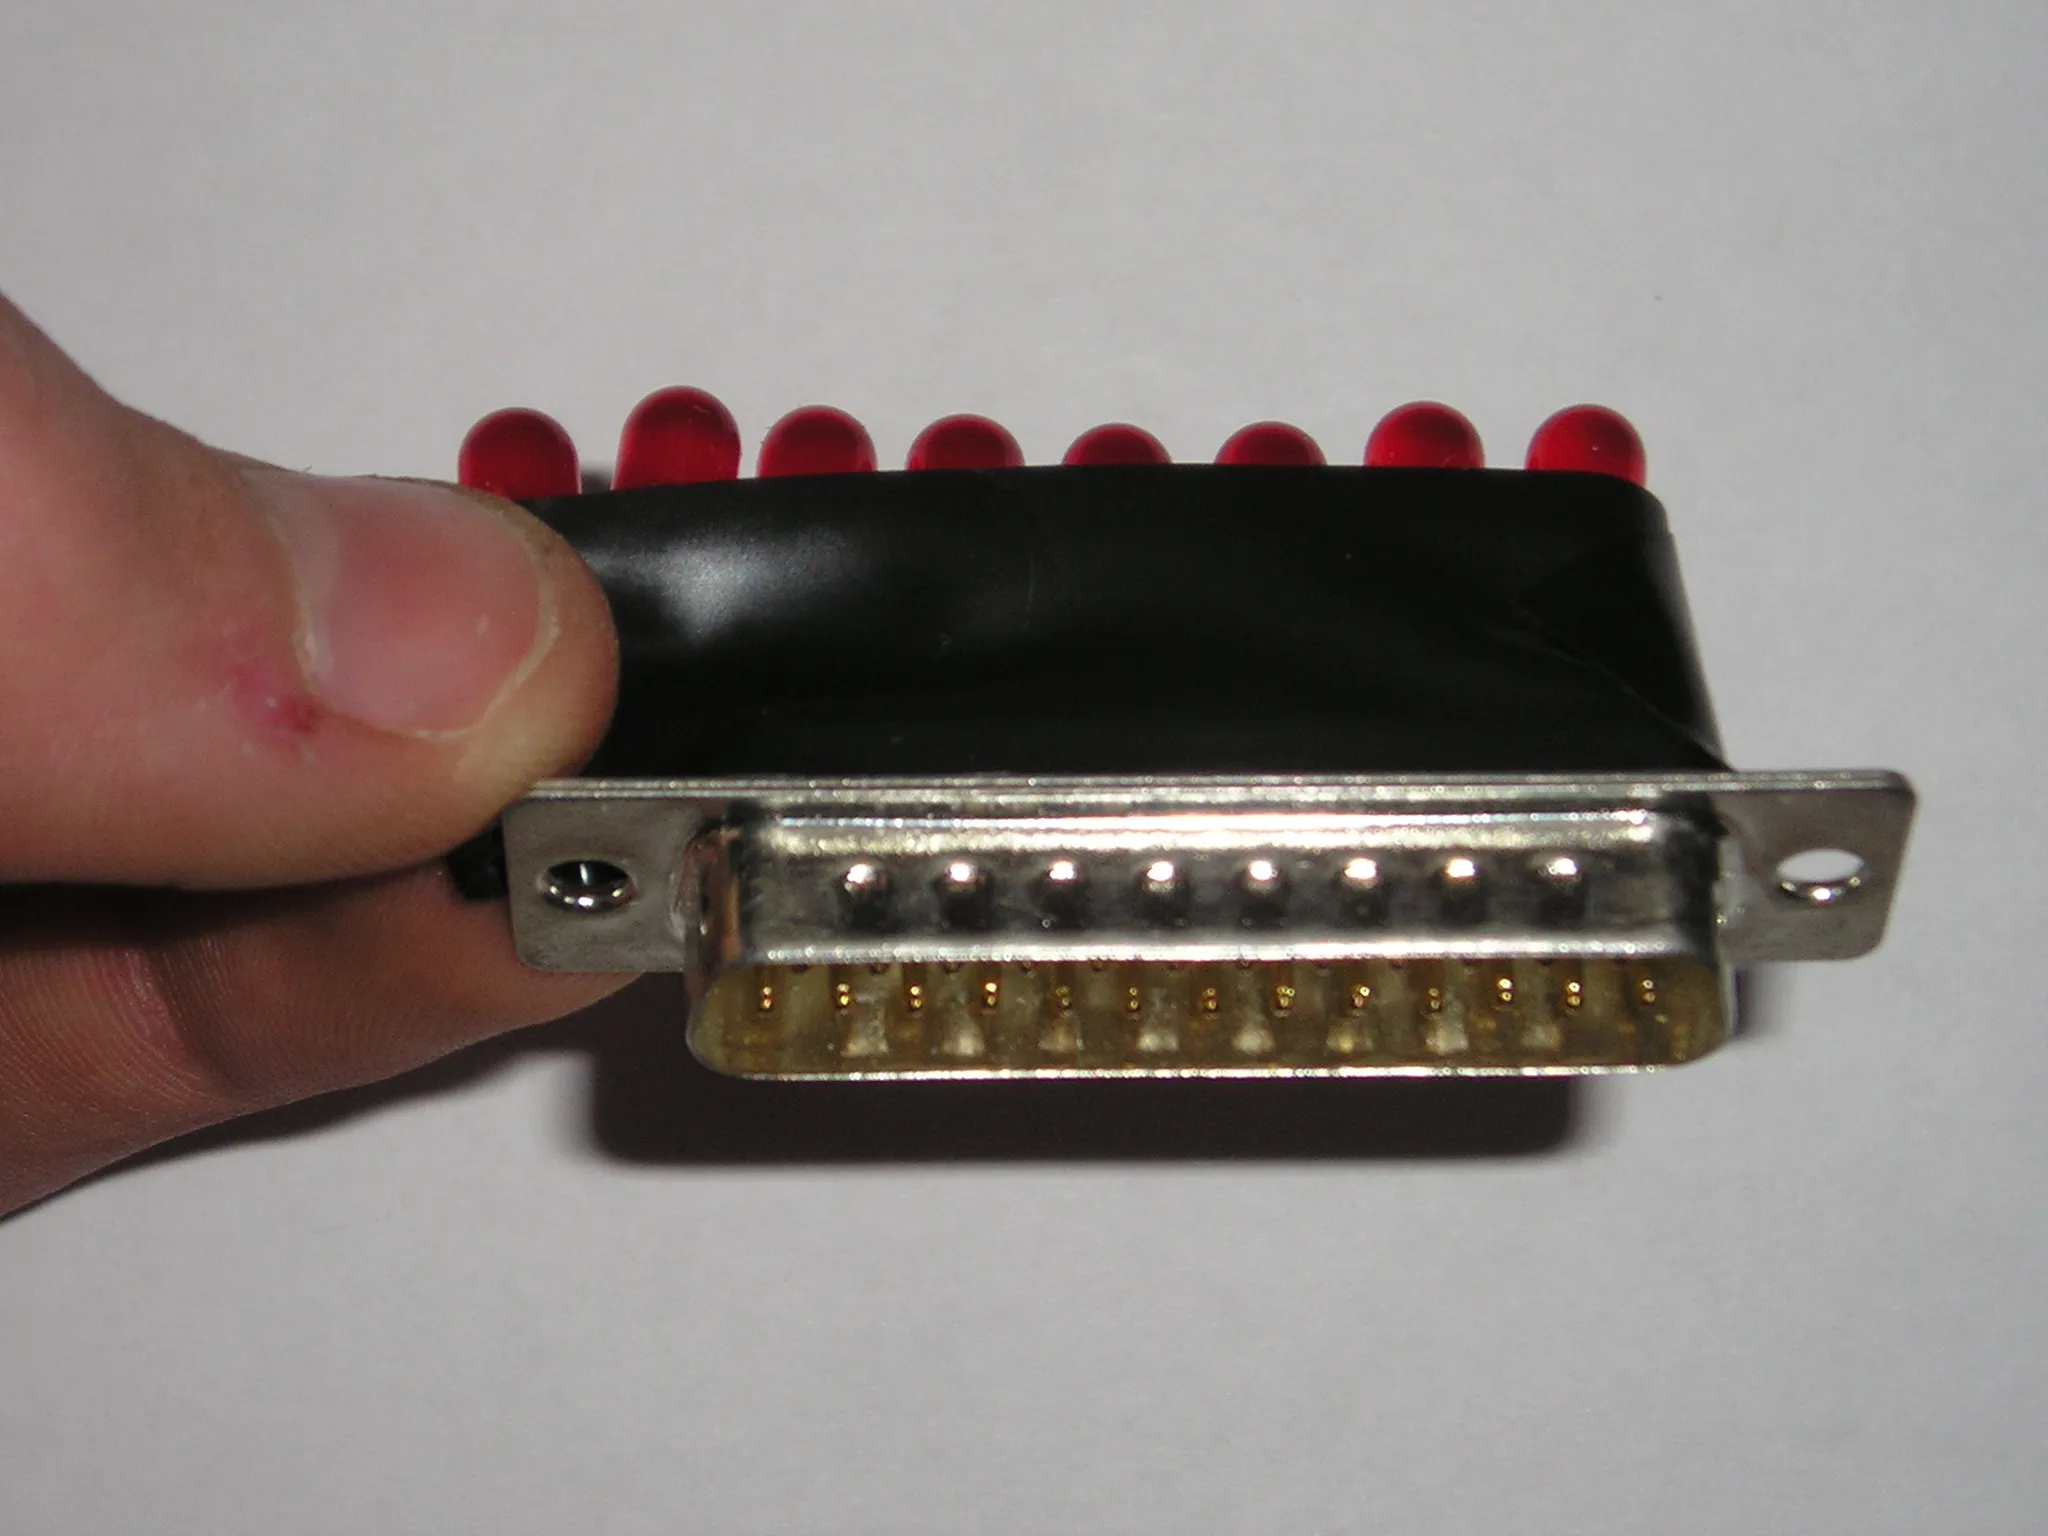
Und schon wieder habe ich ein kleines Hardwareprojekt, das ich hier vorstellen möchte.
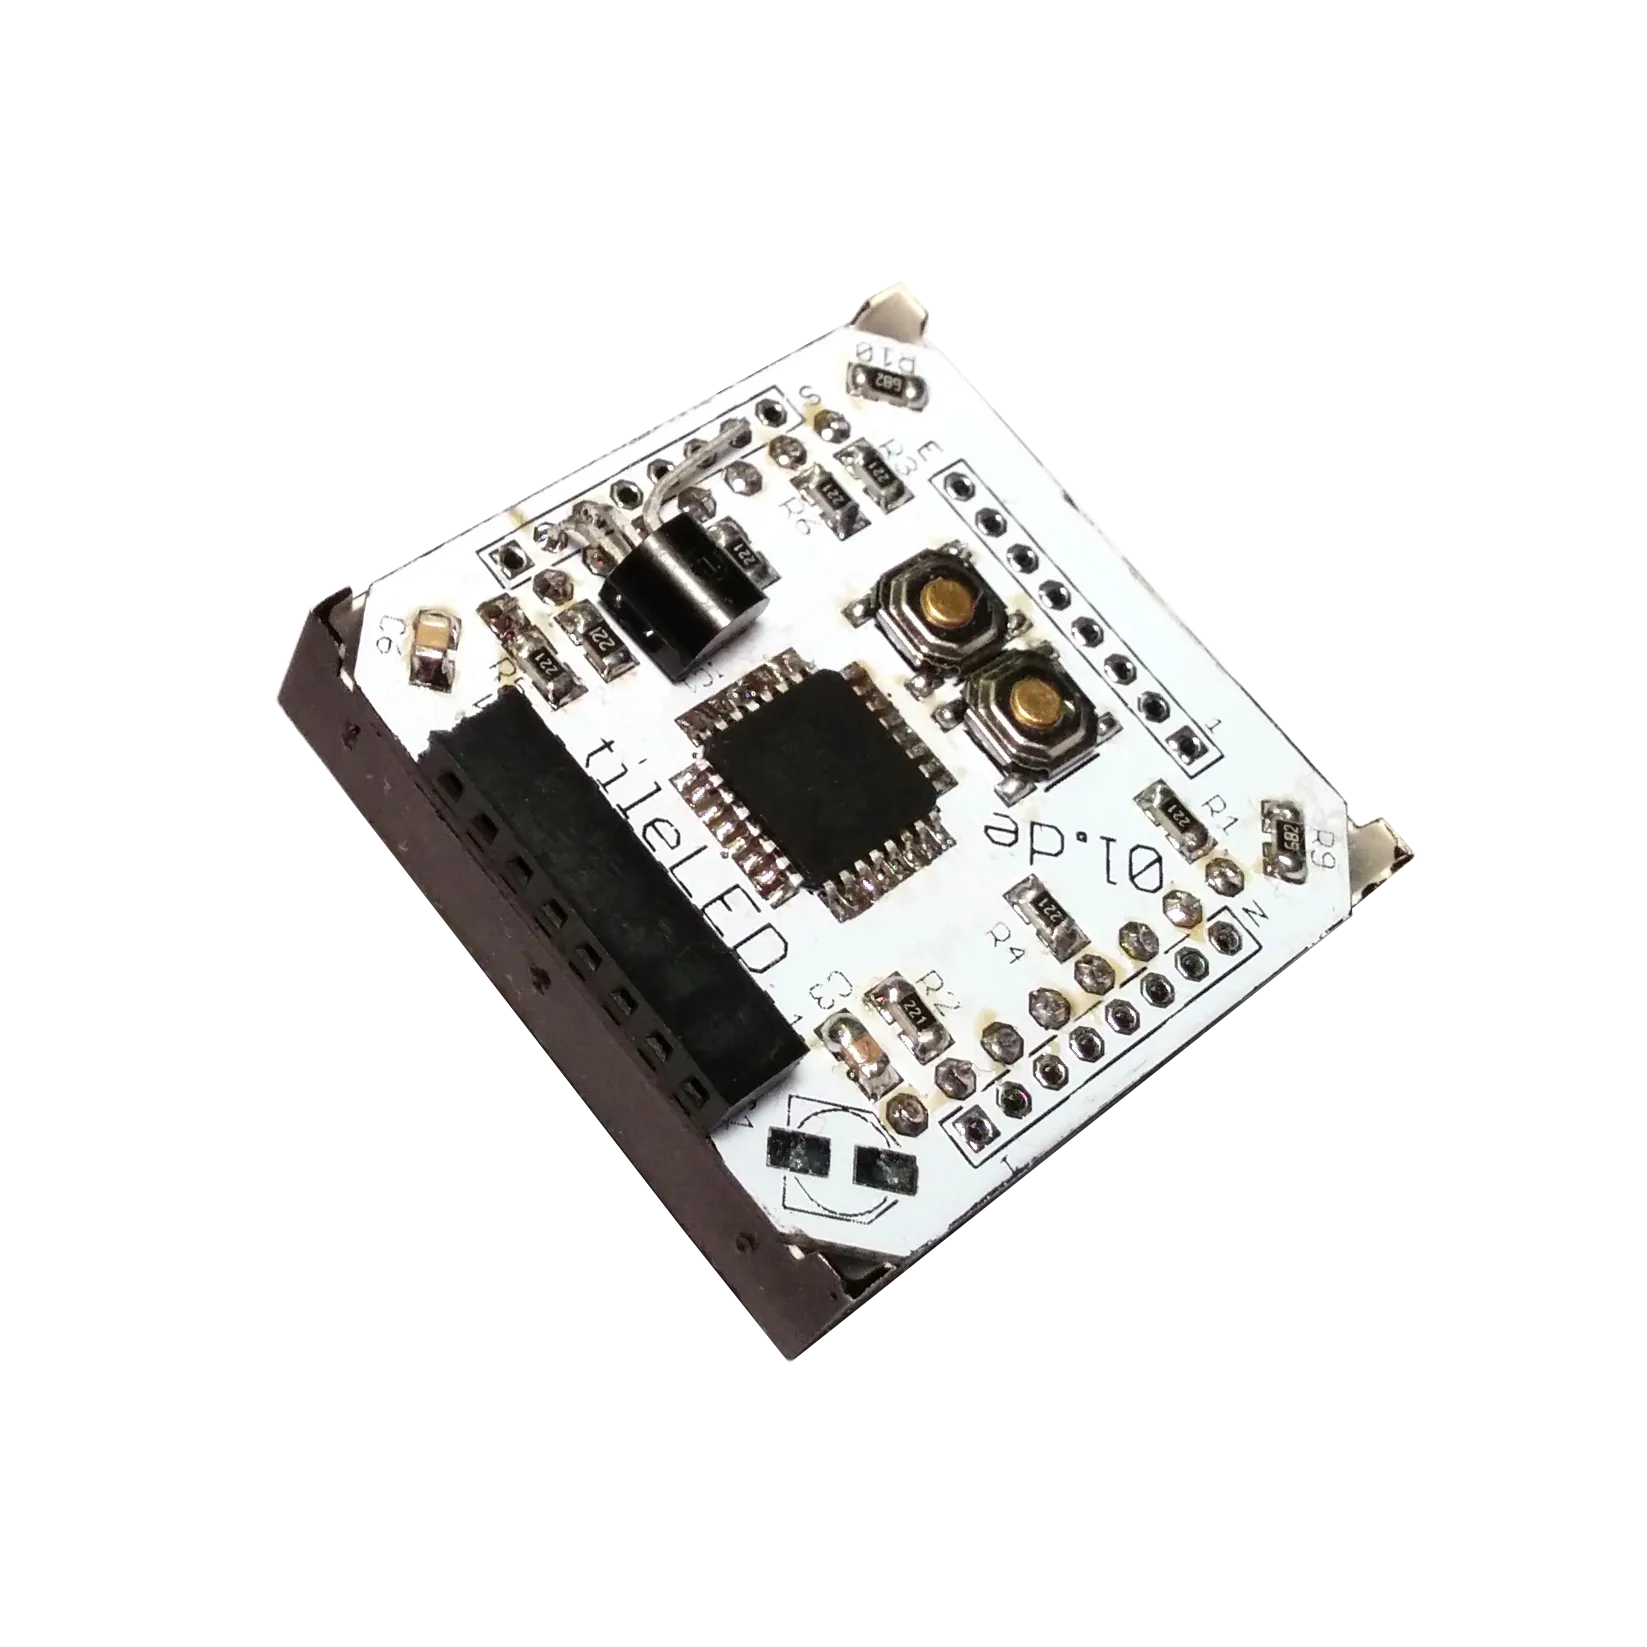
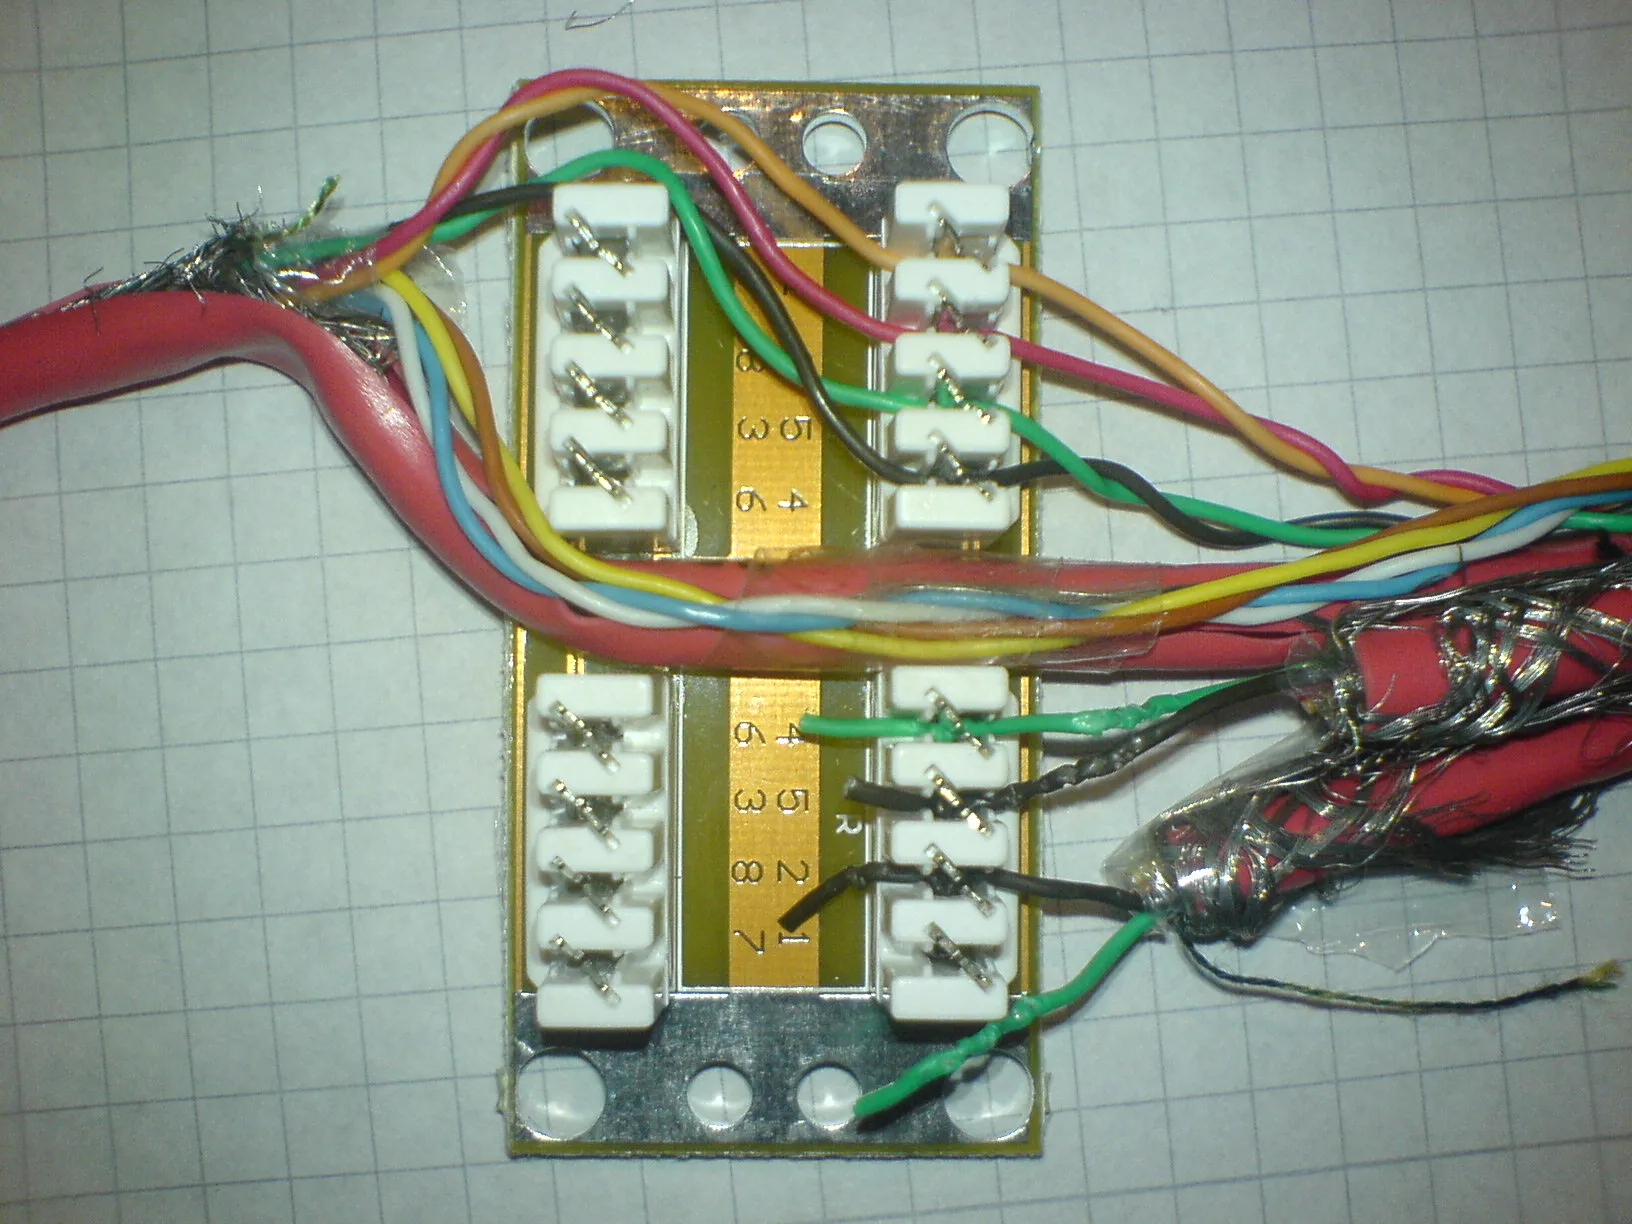
Auf eBay bin ich auf diese günstigen LED Dot-Matrix Displaymodule gestoßen.
Auf einer Größe von 3x3cm besitzen sie 8x8 rote oder grüne LEDs, die per Multiplexverfahren angesteuert werden.
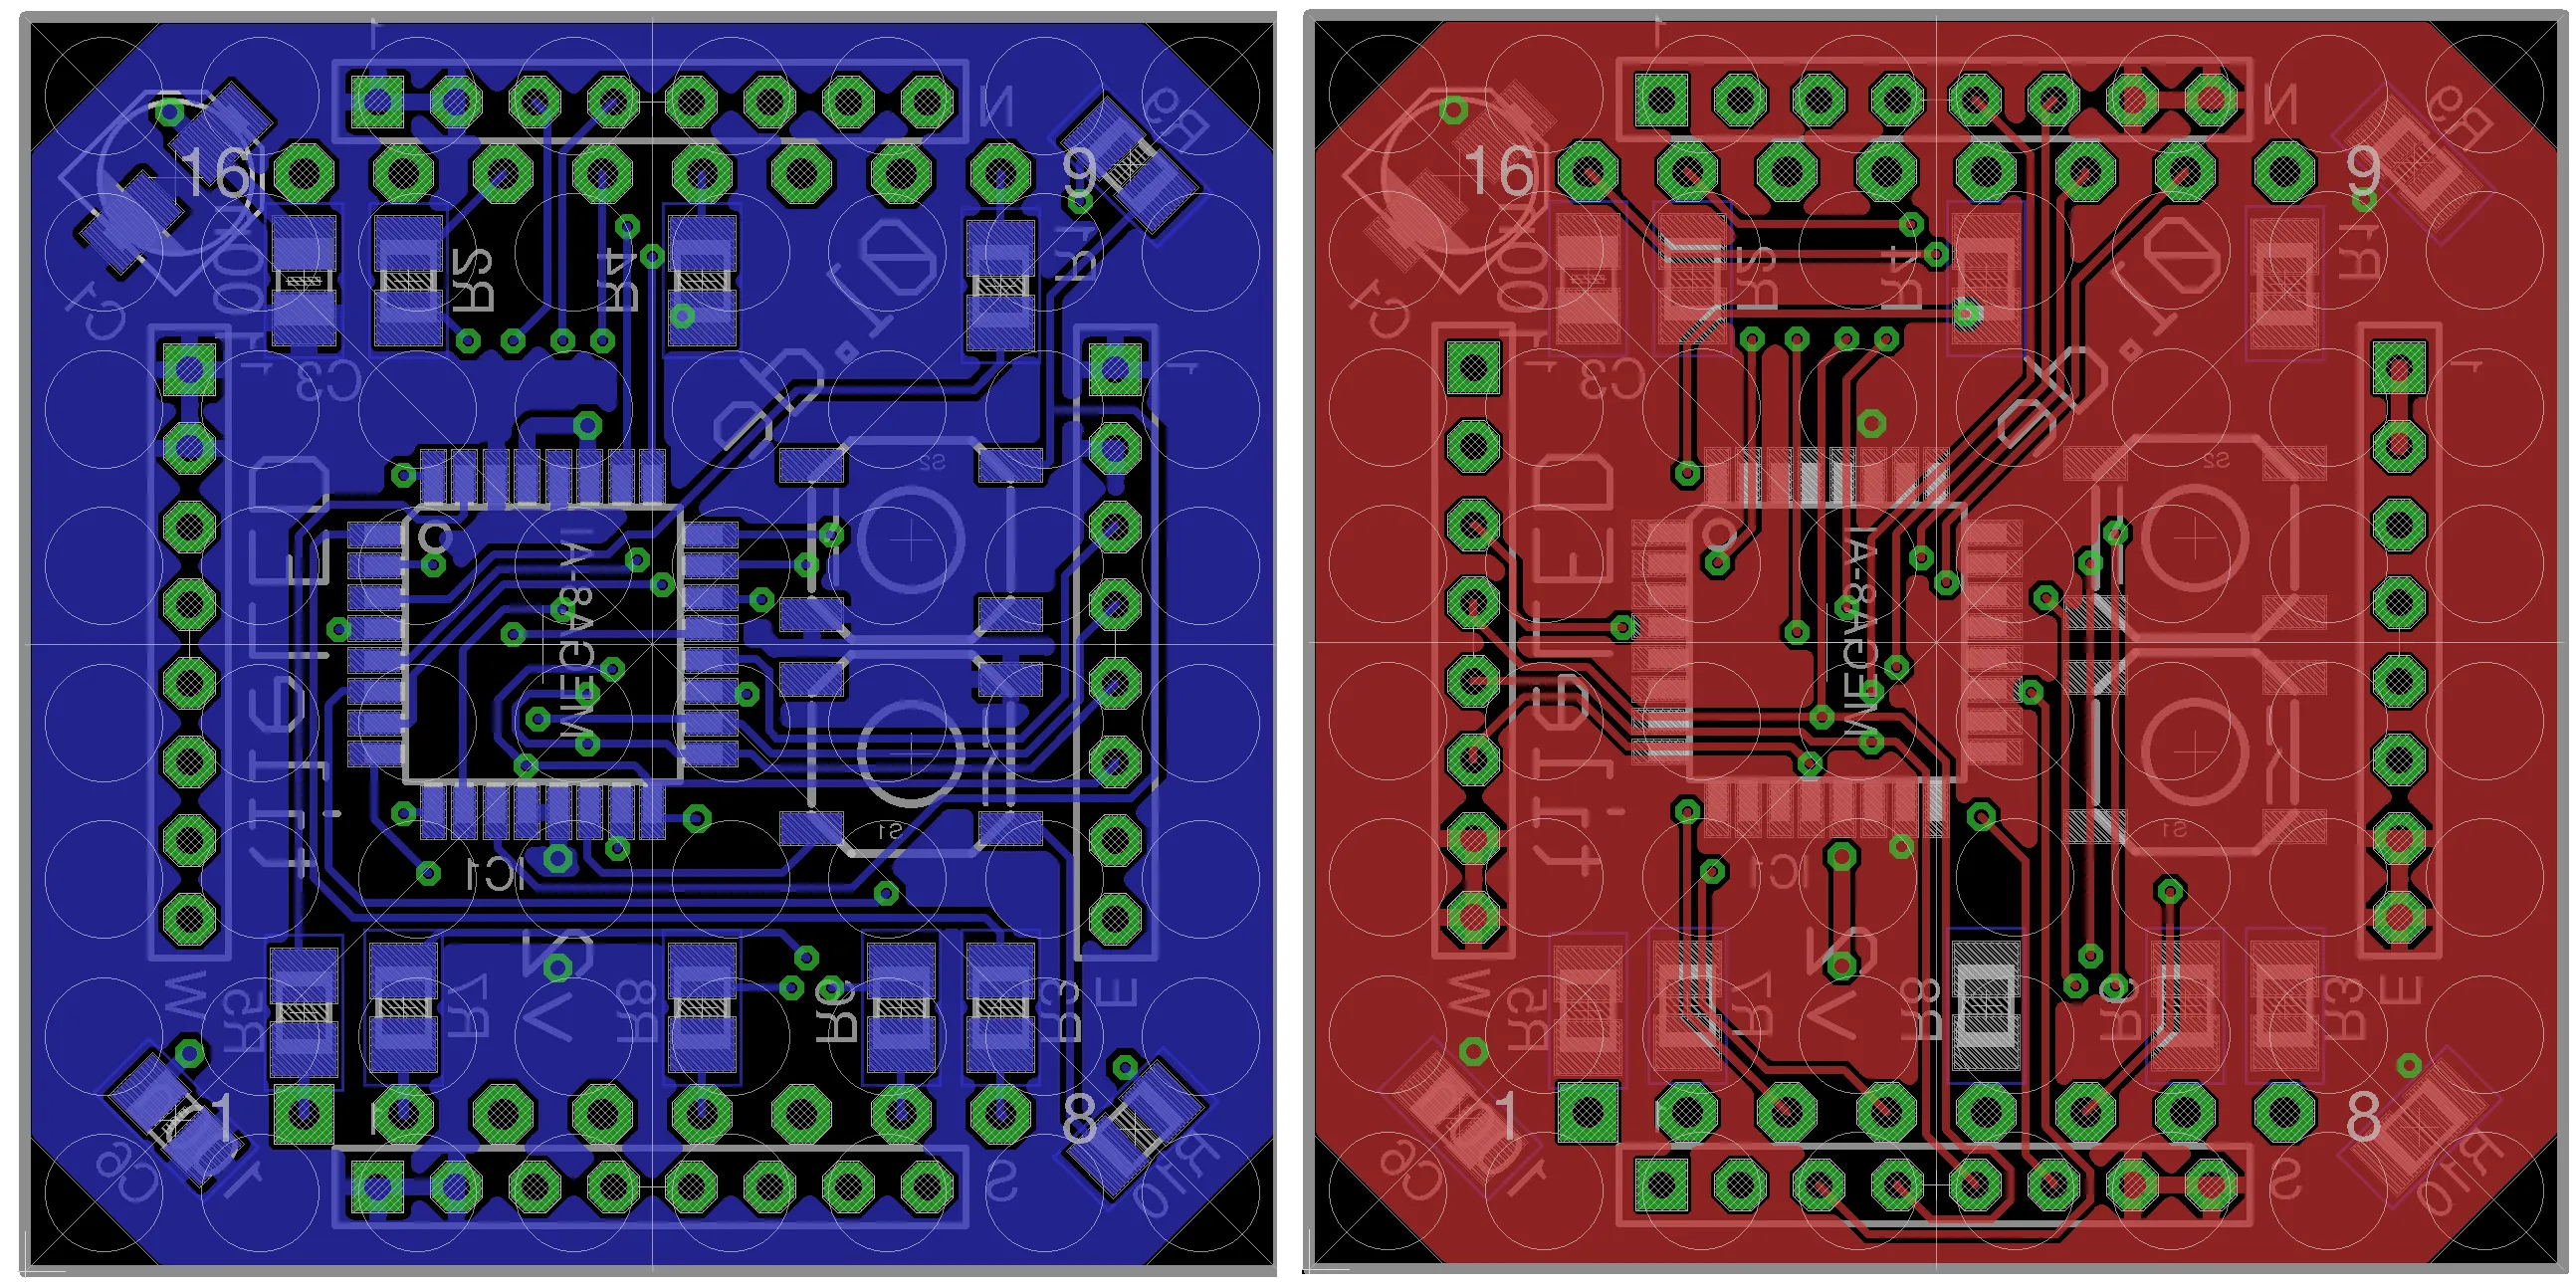
Für diese Module habe ich eine kleine Platine designed, die nicht größer ist als das Modul selber.
Die LEDs werden über einen kleinen ATmega8 Mikrocontroller direkt angesteuert.
Auf Konstantstromquellen habe ich hier zugunsten der Platinengröße verzichtet.
Auch wenn diese Beschaltung den ATmega etwas überlastet, funktioniert es super.
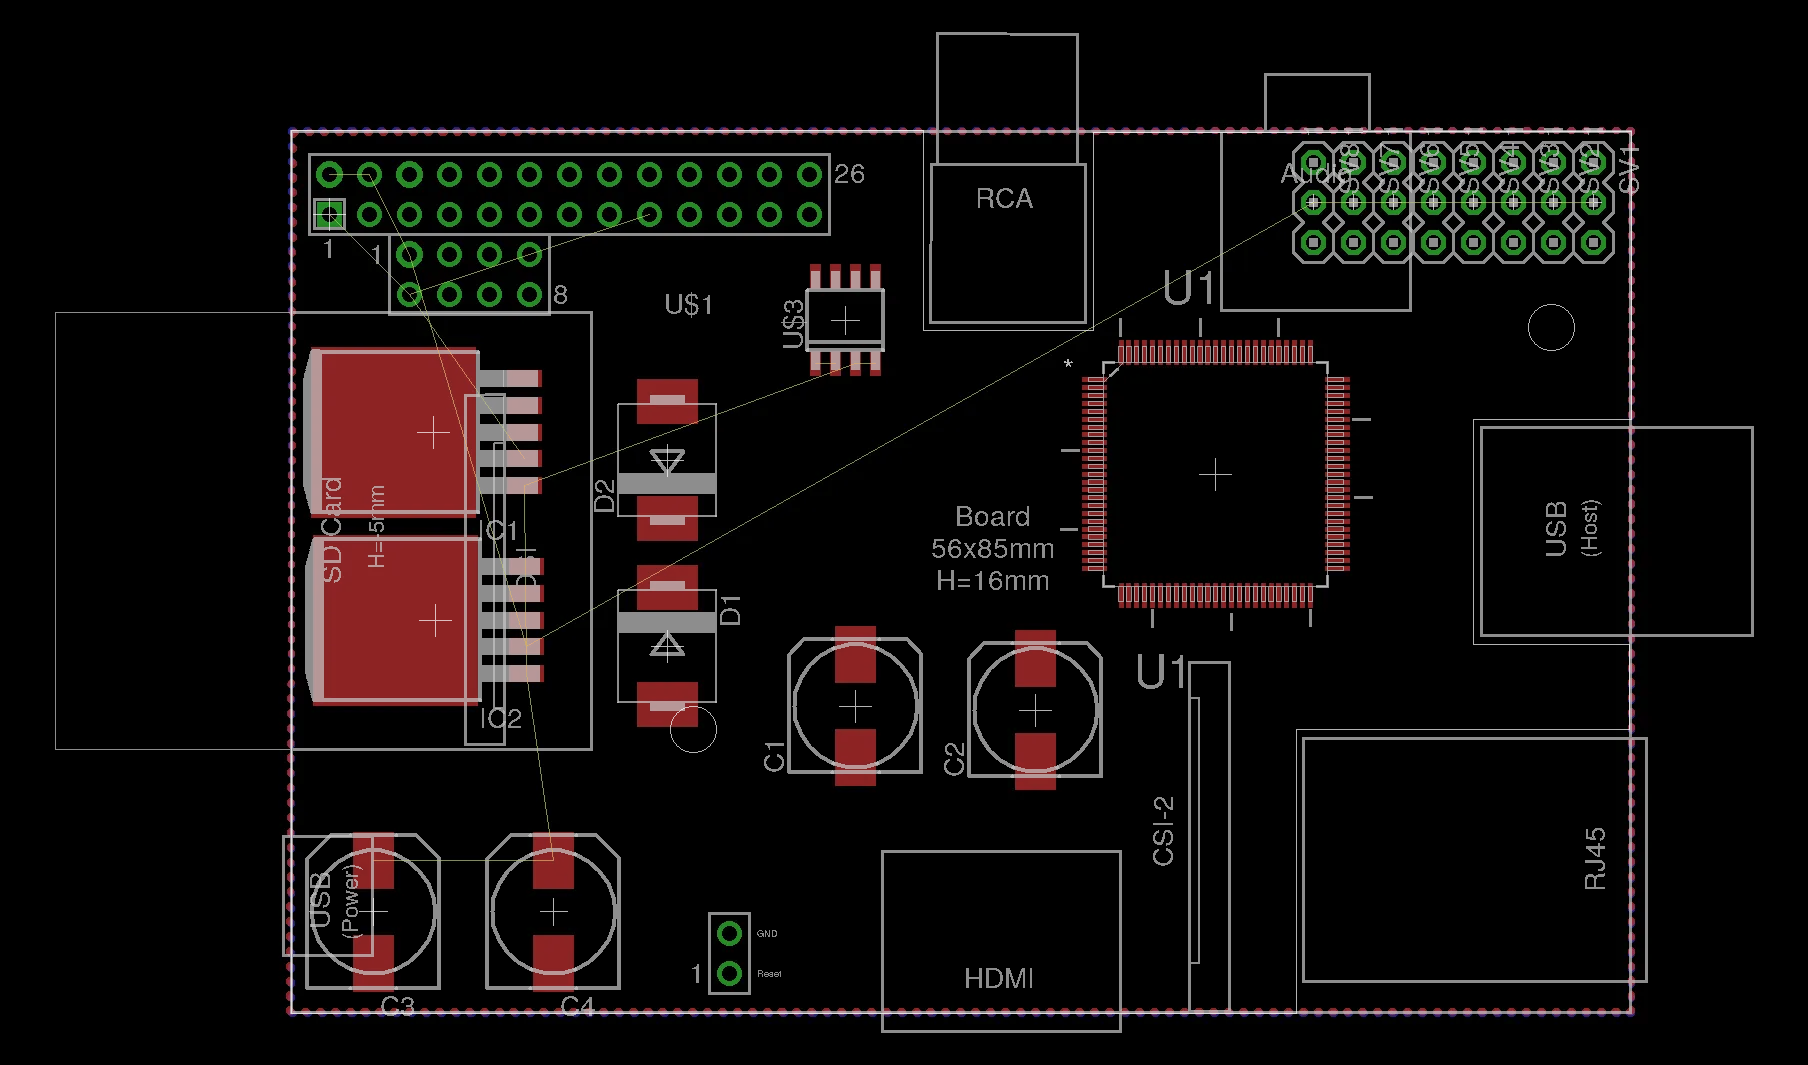
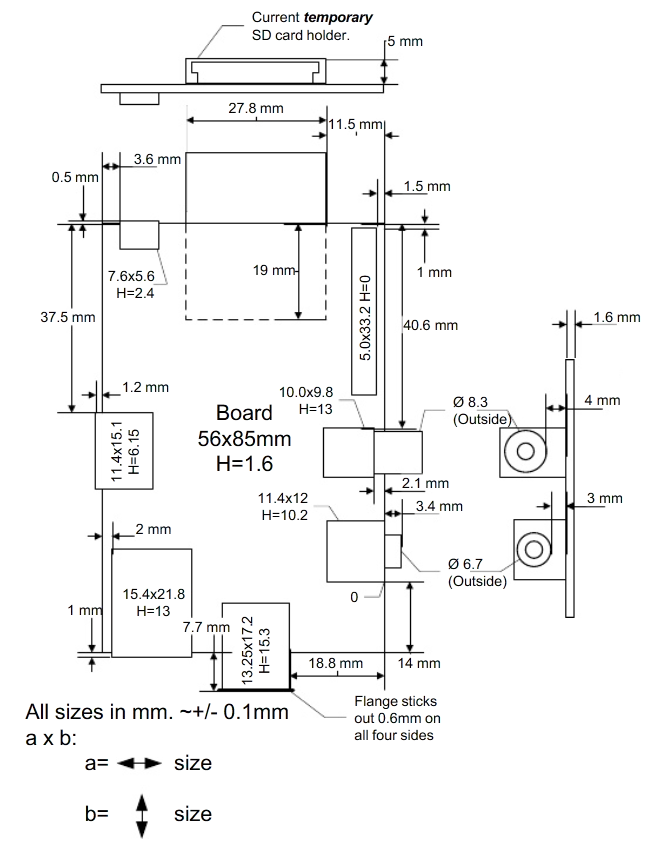
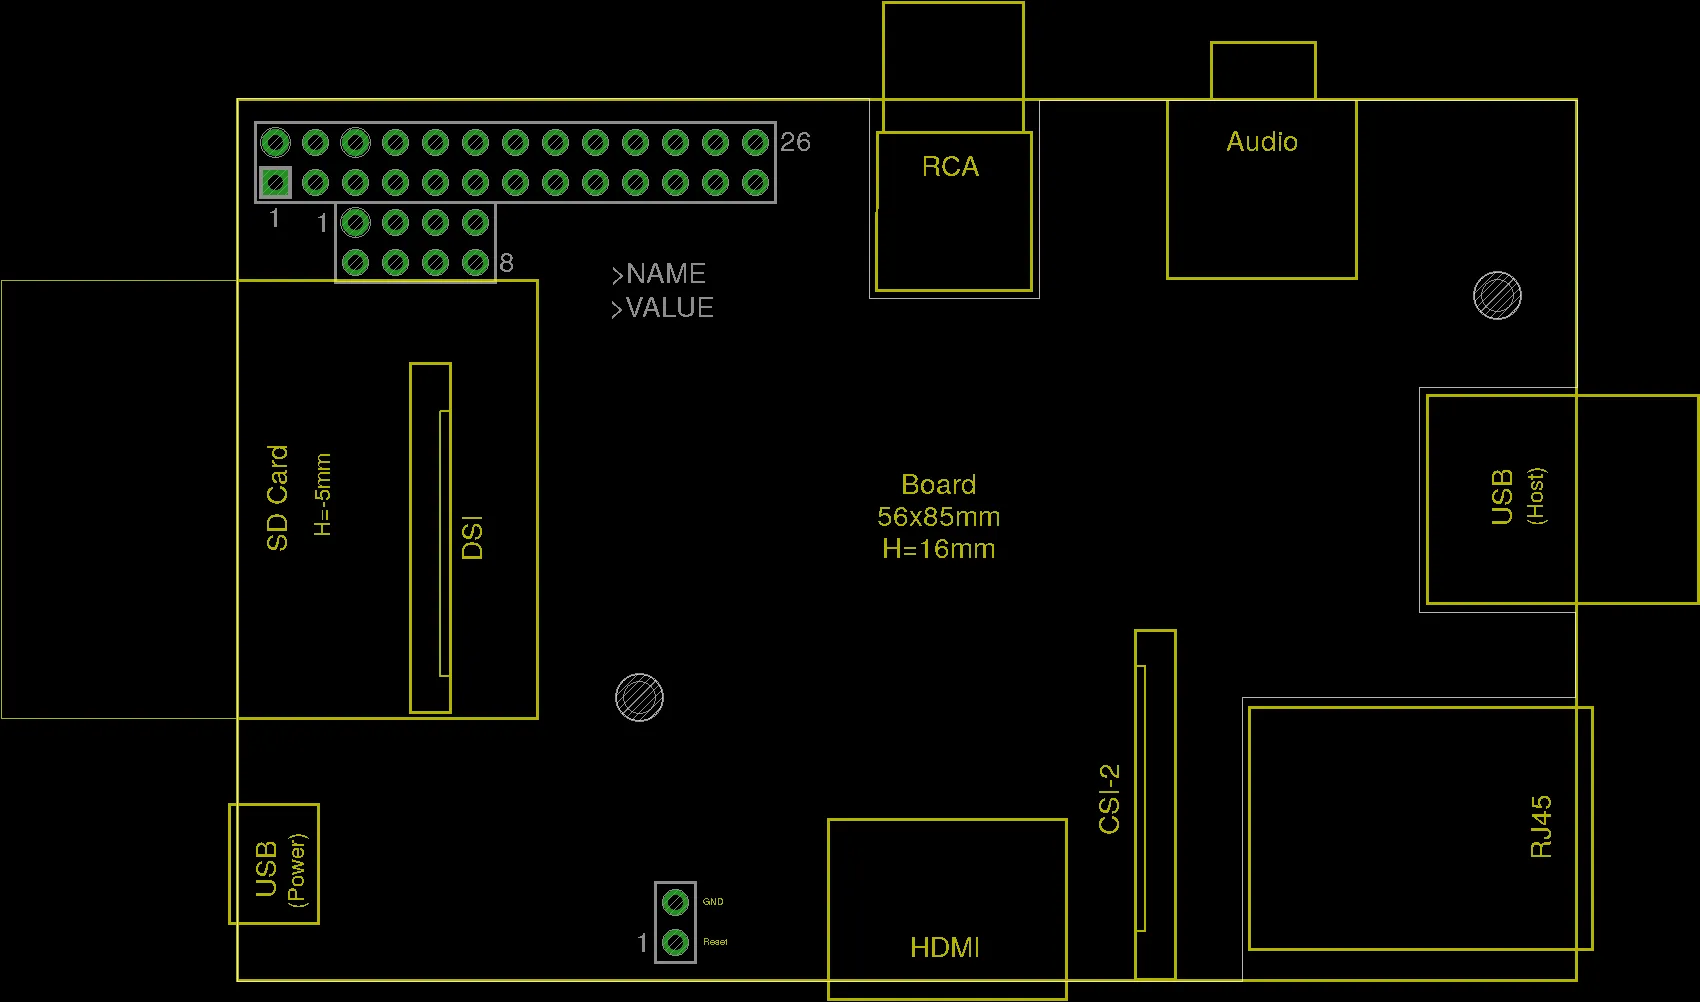
Für mein neuestes Projekt habe ich mir die Mühe gemacht und meine EAGLE Bibliotheken aufgeräumt.
EAGLE ist ein CAD Programm des Unternehmens Cadsoft, das vornehmlich im Elektronik/DIY Bereich zum Designen von Schaltplänen und Platinen eingesetzt wird.
In den letzten Jahren haben sich einige selbst erstellte Bibliotheken angesammelt, die ich hier nun gesammelt veröffentliche.
Mit ihnen können die bereits mitgelieferte Datenbank von Bauteilen (Footprints und Symbole) erweitert werden.
Diese Bibliotheken und noch einige Skripte, Einstellungen und CAM Jobs findet ihr auf Codeberg: /stv0g/eagle .
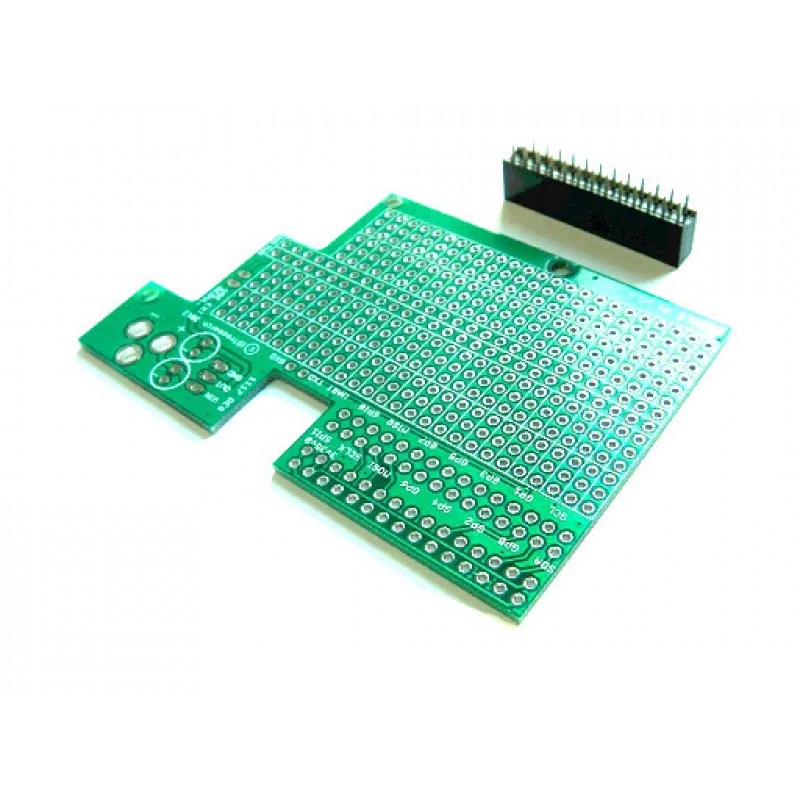
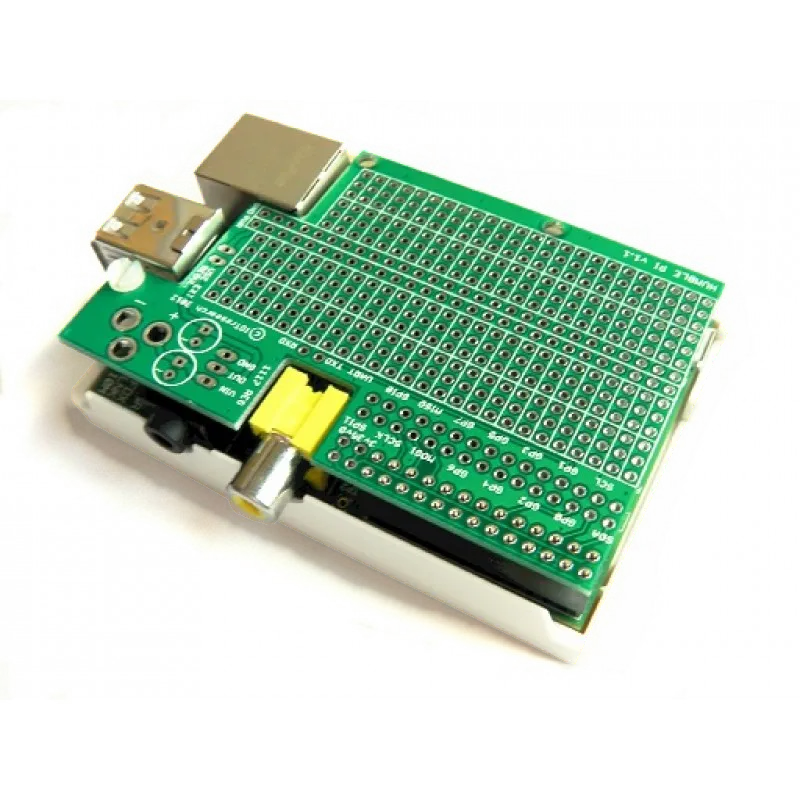
Ein Layout mit dem RPi Shield.
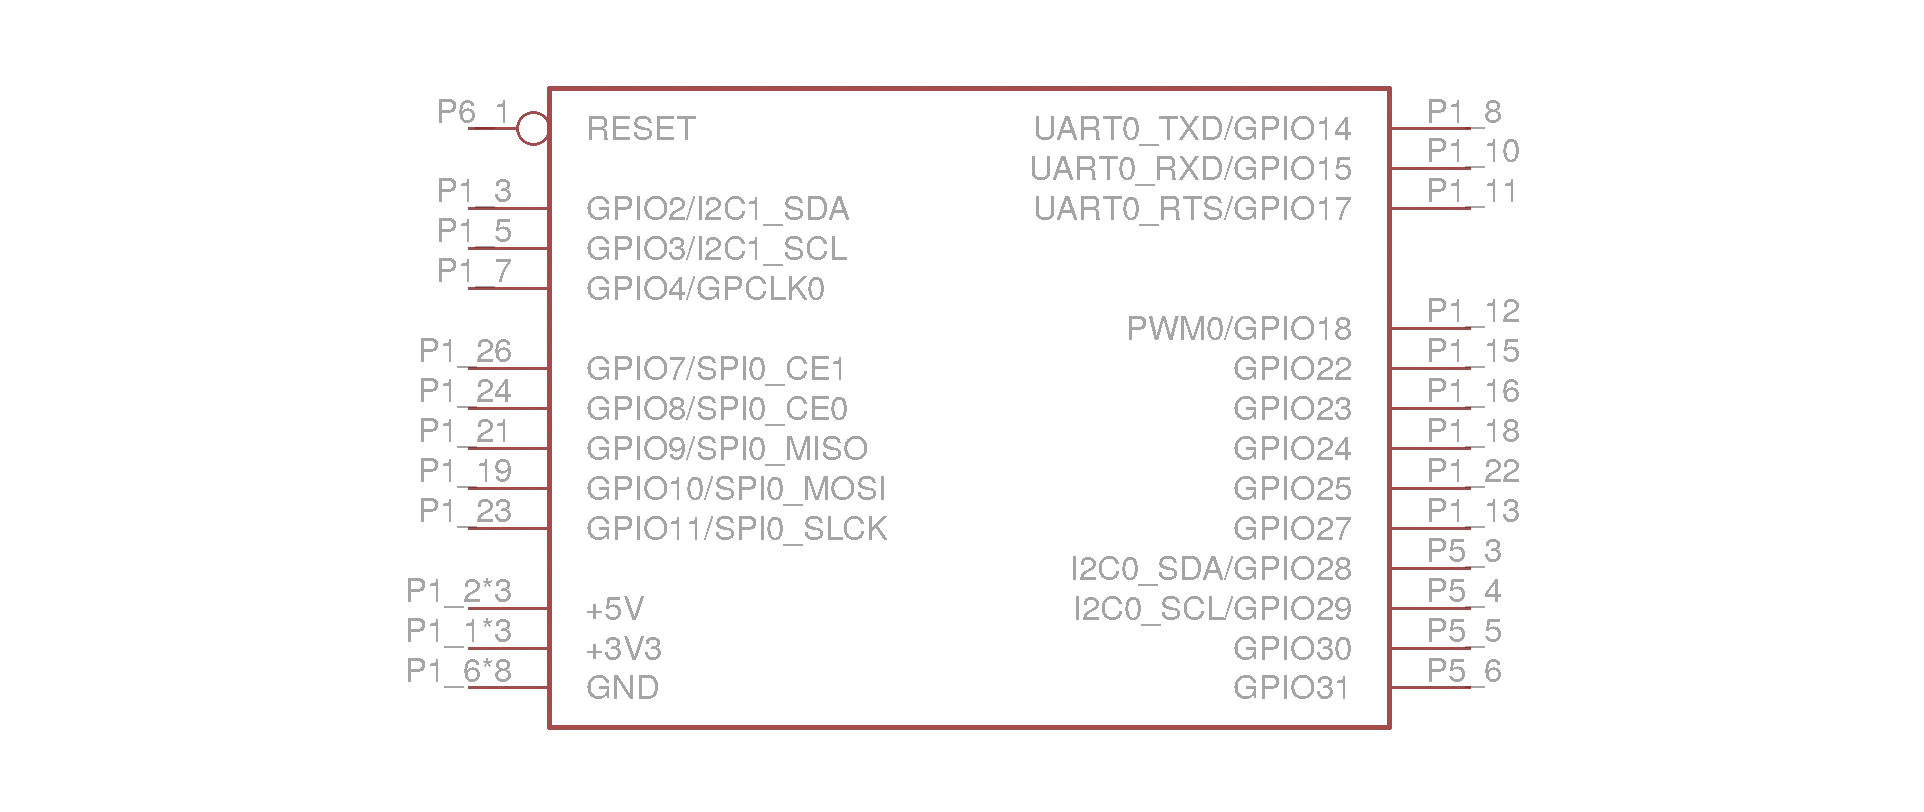
Interessant ist vielleicht noch die Raspberry Pi Bibliothek.
Bisher gab es noch keine EAGLE Bibliothek mit der man einfach Shields (vergleiche auch Arduino) für den Board-Computer layouten konnte.
Die Bibliothek enthält die genauen Abmessungen des Pi’s und die Belegung aller GPIO Stiftleisten.
Aber die folgenden Bilder erklären das sicher viel besser.
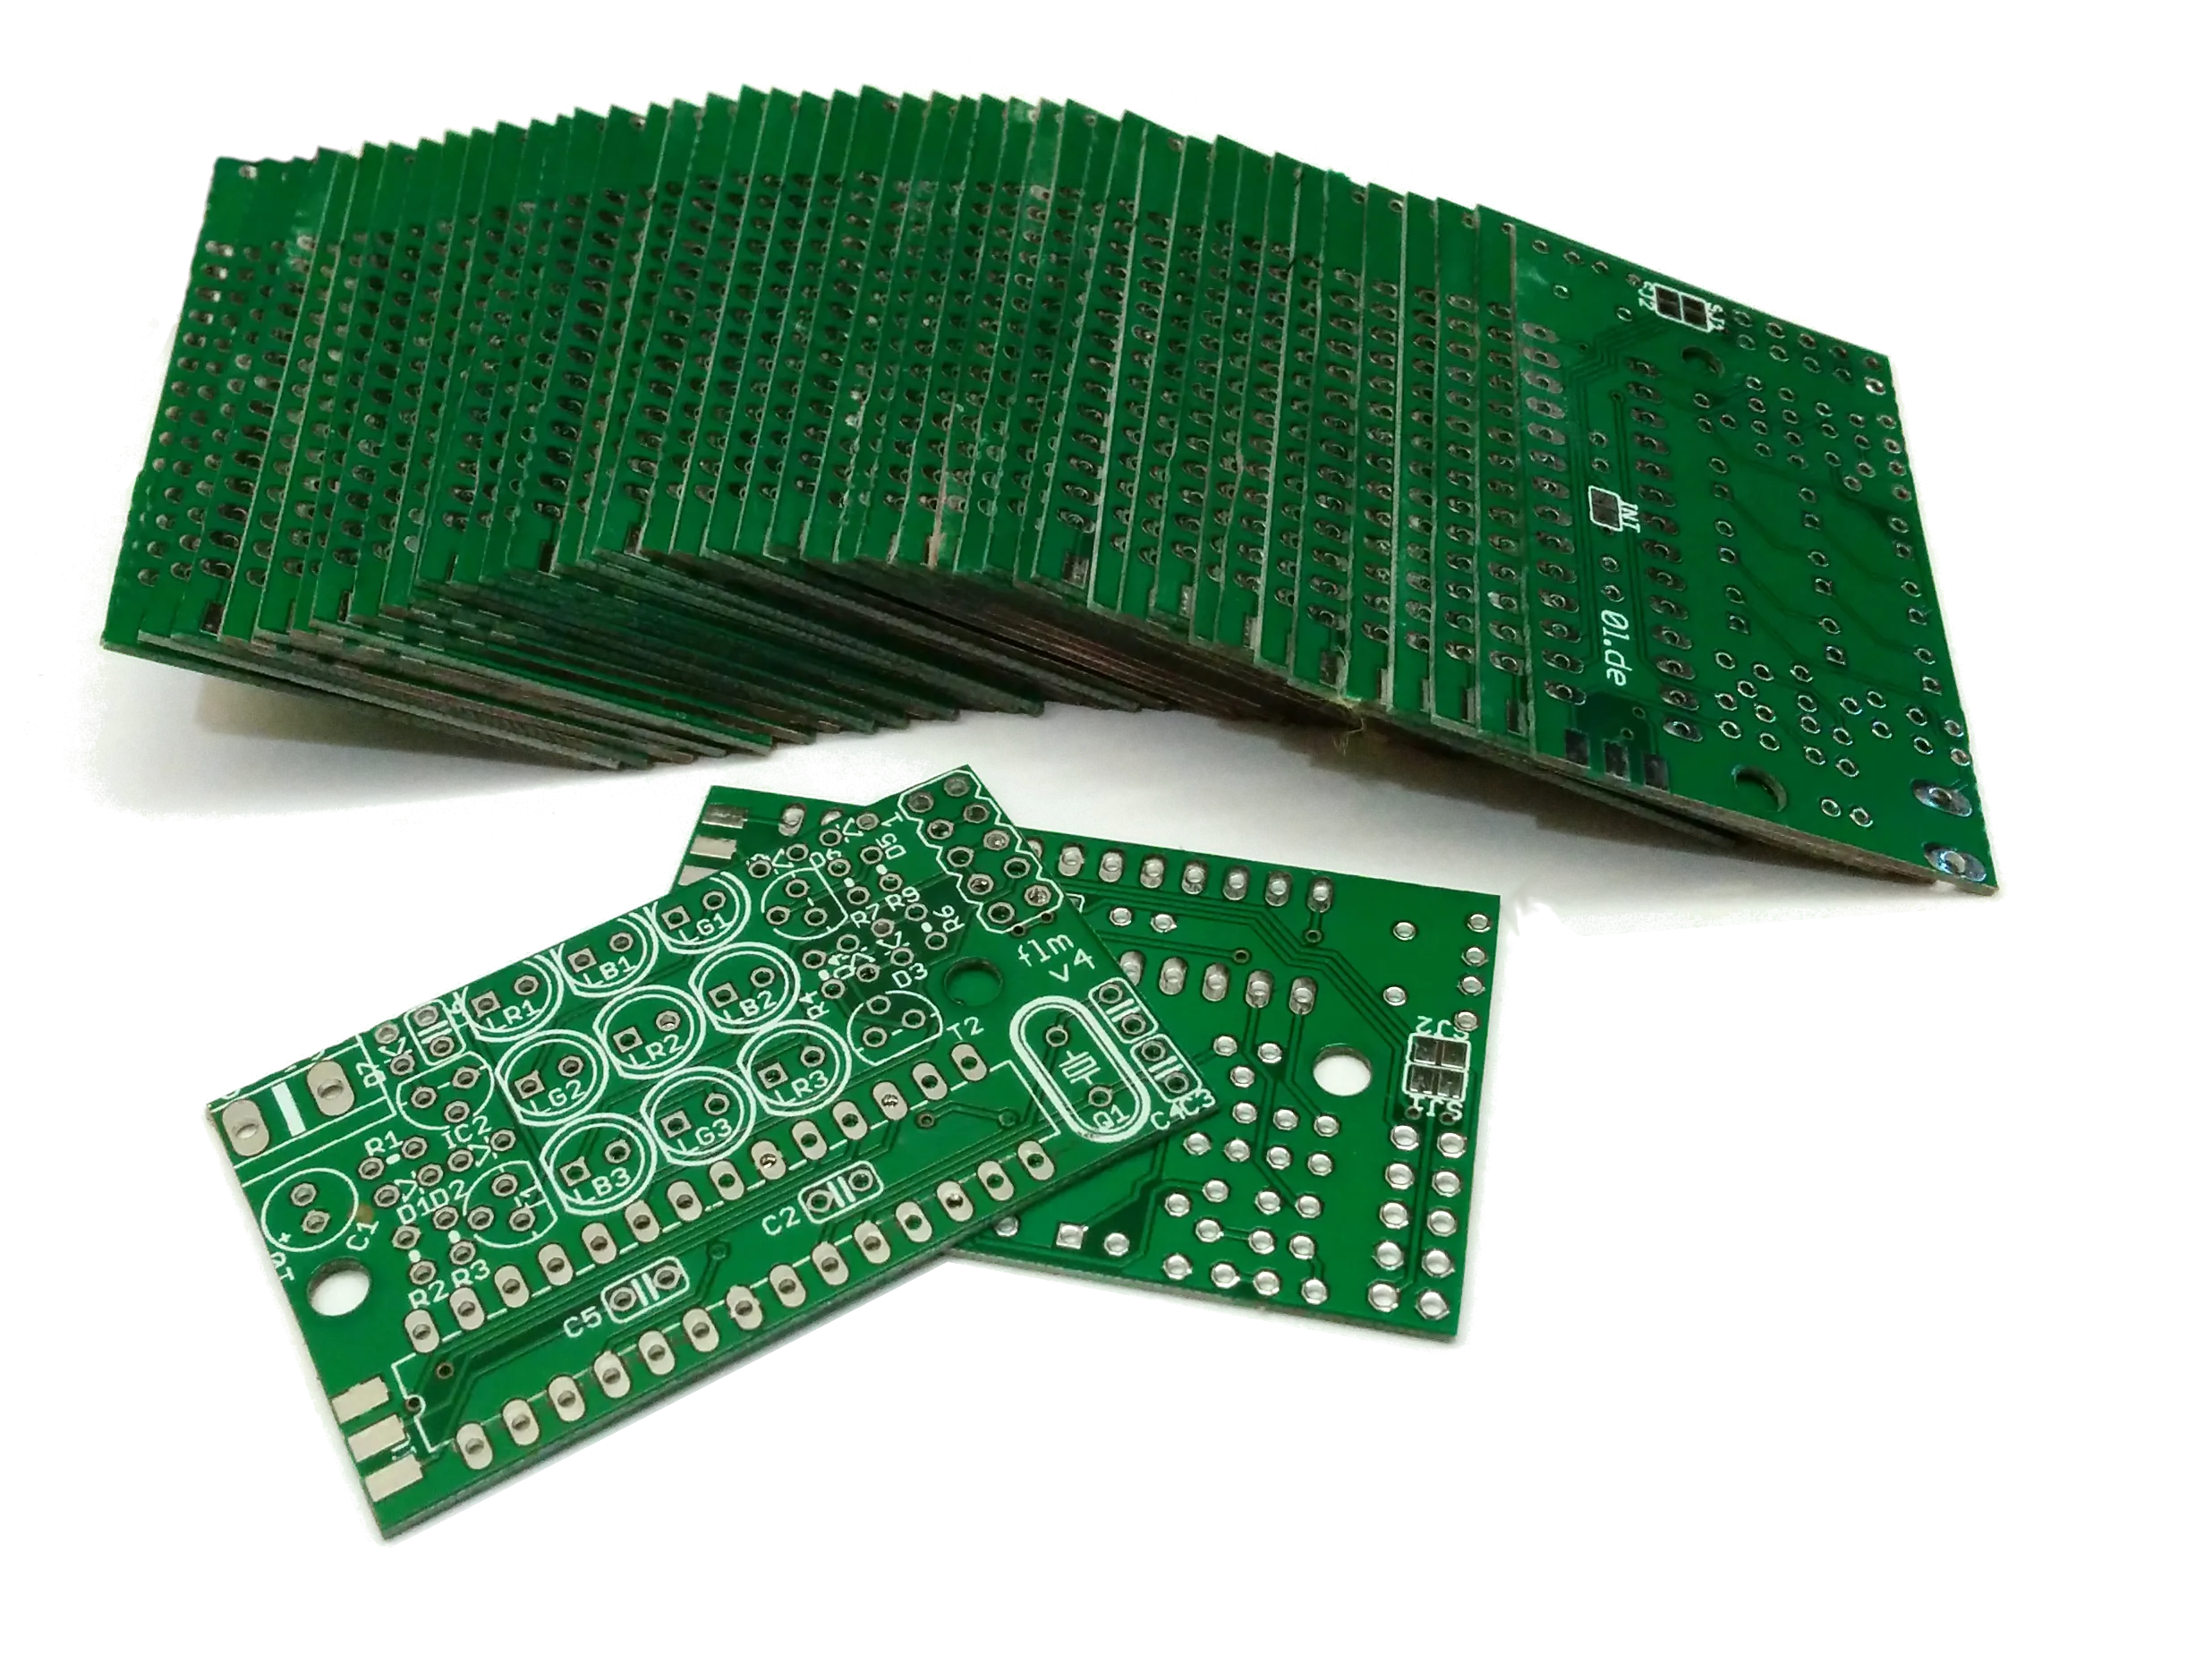
Vielleicht habt ihr ja Lust ein kleines Ambilight zu basteln? Ich habe noch ne Menge der Platinen übrig, die ich gerne in Aachen verschenken oder tauschen würde.
Sind dir LEDs zu langweilig? Ich hab auch noch andere Platinen übrig…
In meinen älteren Beträgen (hier und hier) gibt es auch noch ein paar kleine Anregungen was man alles mit dem flm so anstellen kann.
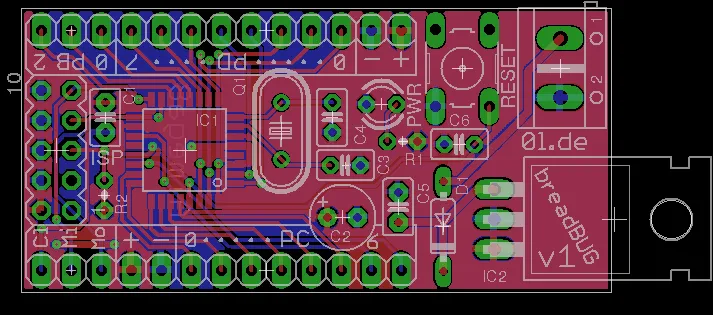
breadBUG ist ein kleines Mikrocontroller Modul, das direkt auf ein Breadboard aufgesteckt werden kann.
Es ist als Prototyping-Werkzeug für tägliche Basteleien gedacht.
Es fasst das für den Mikrocontroller nötige “Vogelfutter” auf einer kleinen Platine zusammen:
ATmega8 Controller
16 MHz Quarz und Keramikkondensatoren
5 V Festspannungsregler
Reset Taster
ISP Stecker
LED zur Spannungsüberwachung
breadBUG ist während meiner Arbeit für die Mikrocontroller-AG des MMIs entstanden.
Einige Teilnehmer wünschten sich ein einfaches, kleines und günstiges Modul, das sie als Alternative zu dem von uns verwendeten Evaluation Board für eigene Projekte nutzen können.
Fast alle von uns in der AG verwendeten Erweiterungsmodule sind daher Pin-kompatibel mit dem “breadBUG” Board.
Bis auf den Controller selber haben wir nur Through-hole Komponenten verwendet um den Aufbau auch für Einsteiger möglichst einfach zu halten.
Das Board hat etwa eine Größe von 2.5x5 cm, sodass im Mehrfachnutzen genau zwei Boards auf eine 5x5cm Platine von seeedstudio.com passen.
Damit liegt der Preis für eine einzelne Platine bei weniger als 50 Cent.
Vor drei Jahren war ich selber Teilnehmer der Mikrocontroller AG und habe diese dann für die vergangenen zwei Jahre mit Hilfe zweier weiterer Kommilitonen, Markus Hamm und Mats Markus, geleitet.
Als Abschluss meiner dortigen Arbeit schreibe ich nun meinen Bericht und möchte diesen hier kurz zusammenfassen.
Den kompletten Tutoriums Bericht könnt ihr euch hier herunterladen:
Das Institut für Mensch-Maschine-Interaktion (MMI) der RWTH bietet für Studenten des zweiten Semesters eine freiwillige AG zum Einstieg in die Mikrocontroller Programmierung an.
Diese verknüpft theoretische Grundlagen der Vorlesung “Grundgebiete der Informatik 2” von Prof. Roßmann mit praktischen Beispielen und Aufgaben aus dem Bereich der Mikrocontroller.
Es handelt sich um eine freiwillige Veranstaltung, die für die Teilnehmer nicht als Studienleistung anerkannt werden kann.
Wie auch in der Vorlesung werden die ATmega Mikrocontroller der Firma Atmel verwendet.
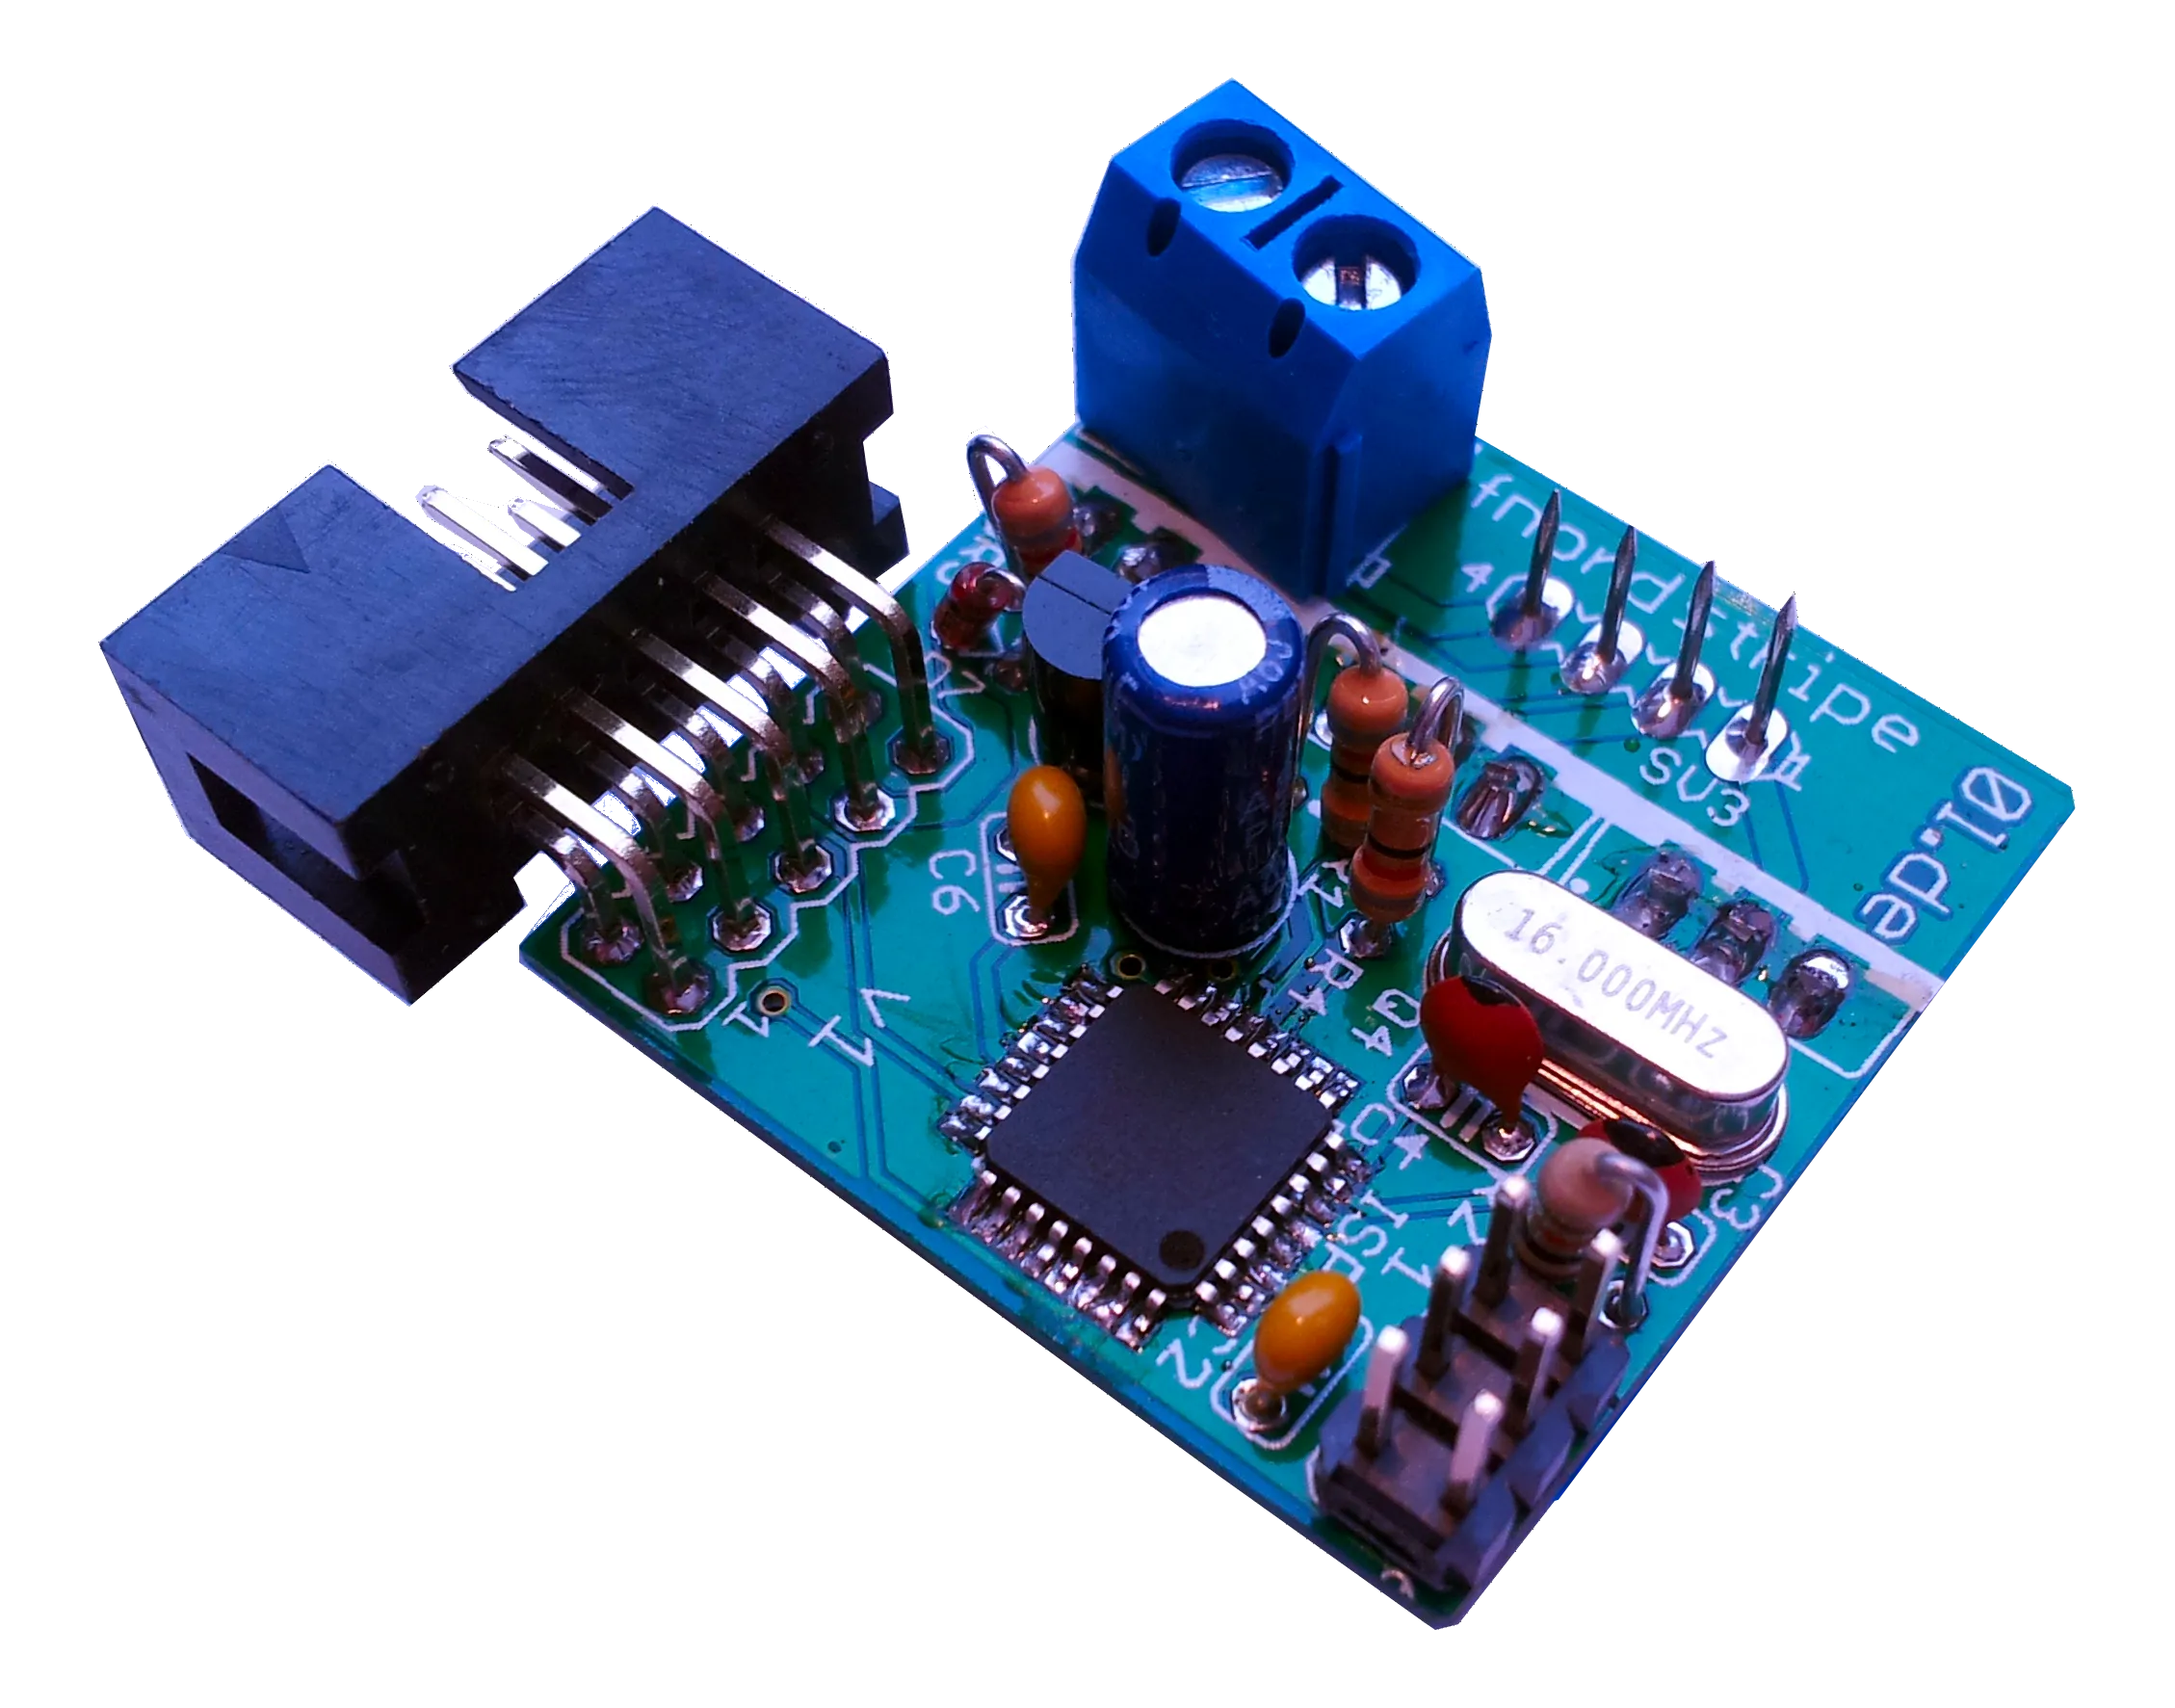
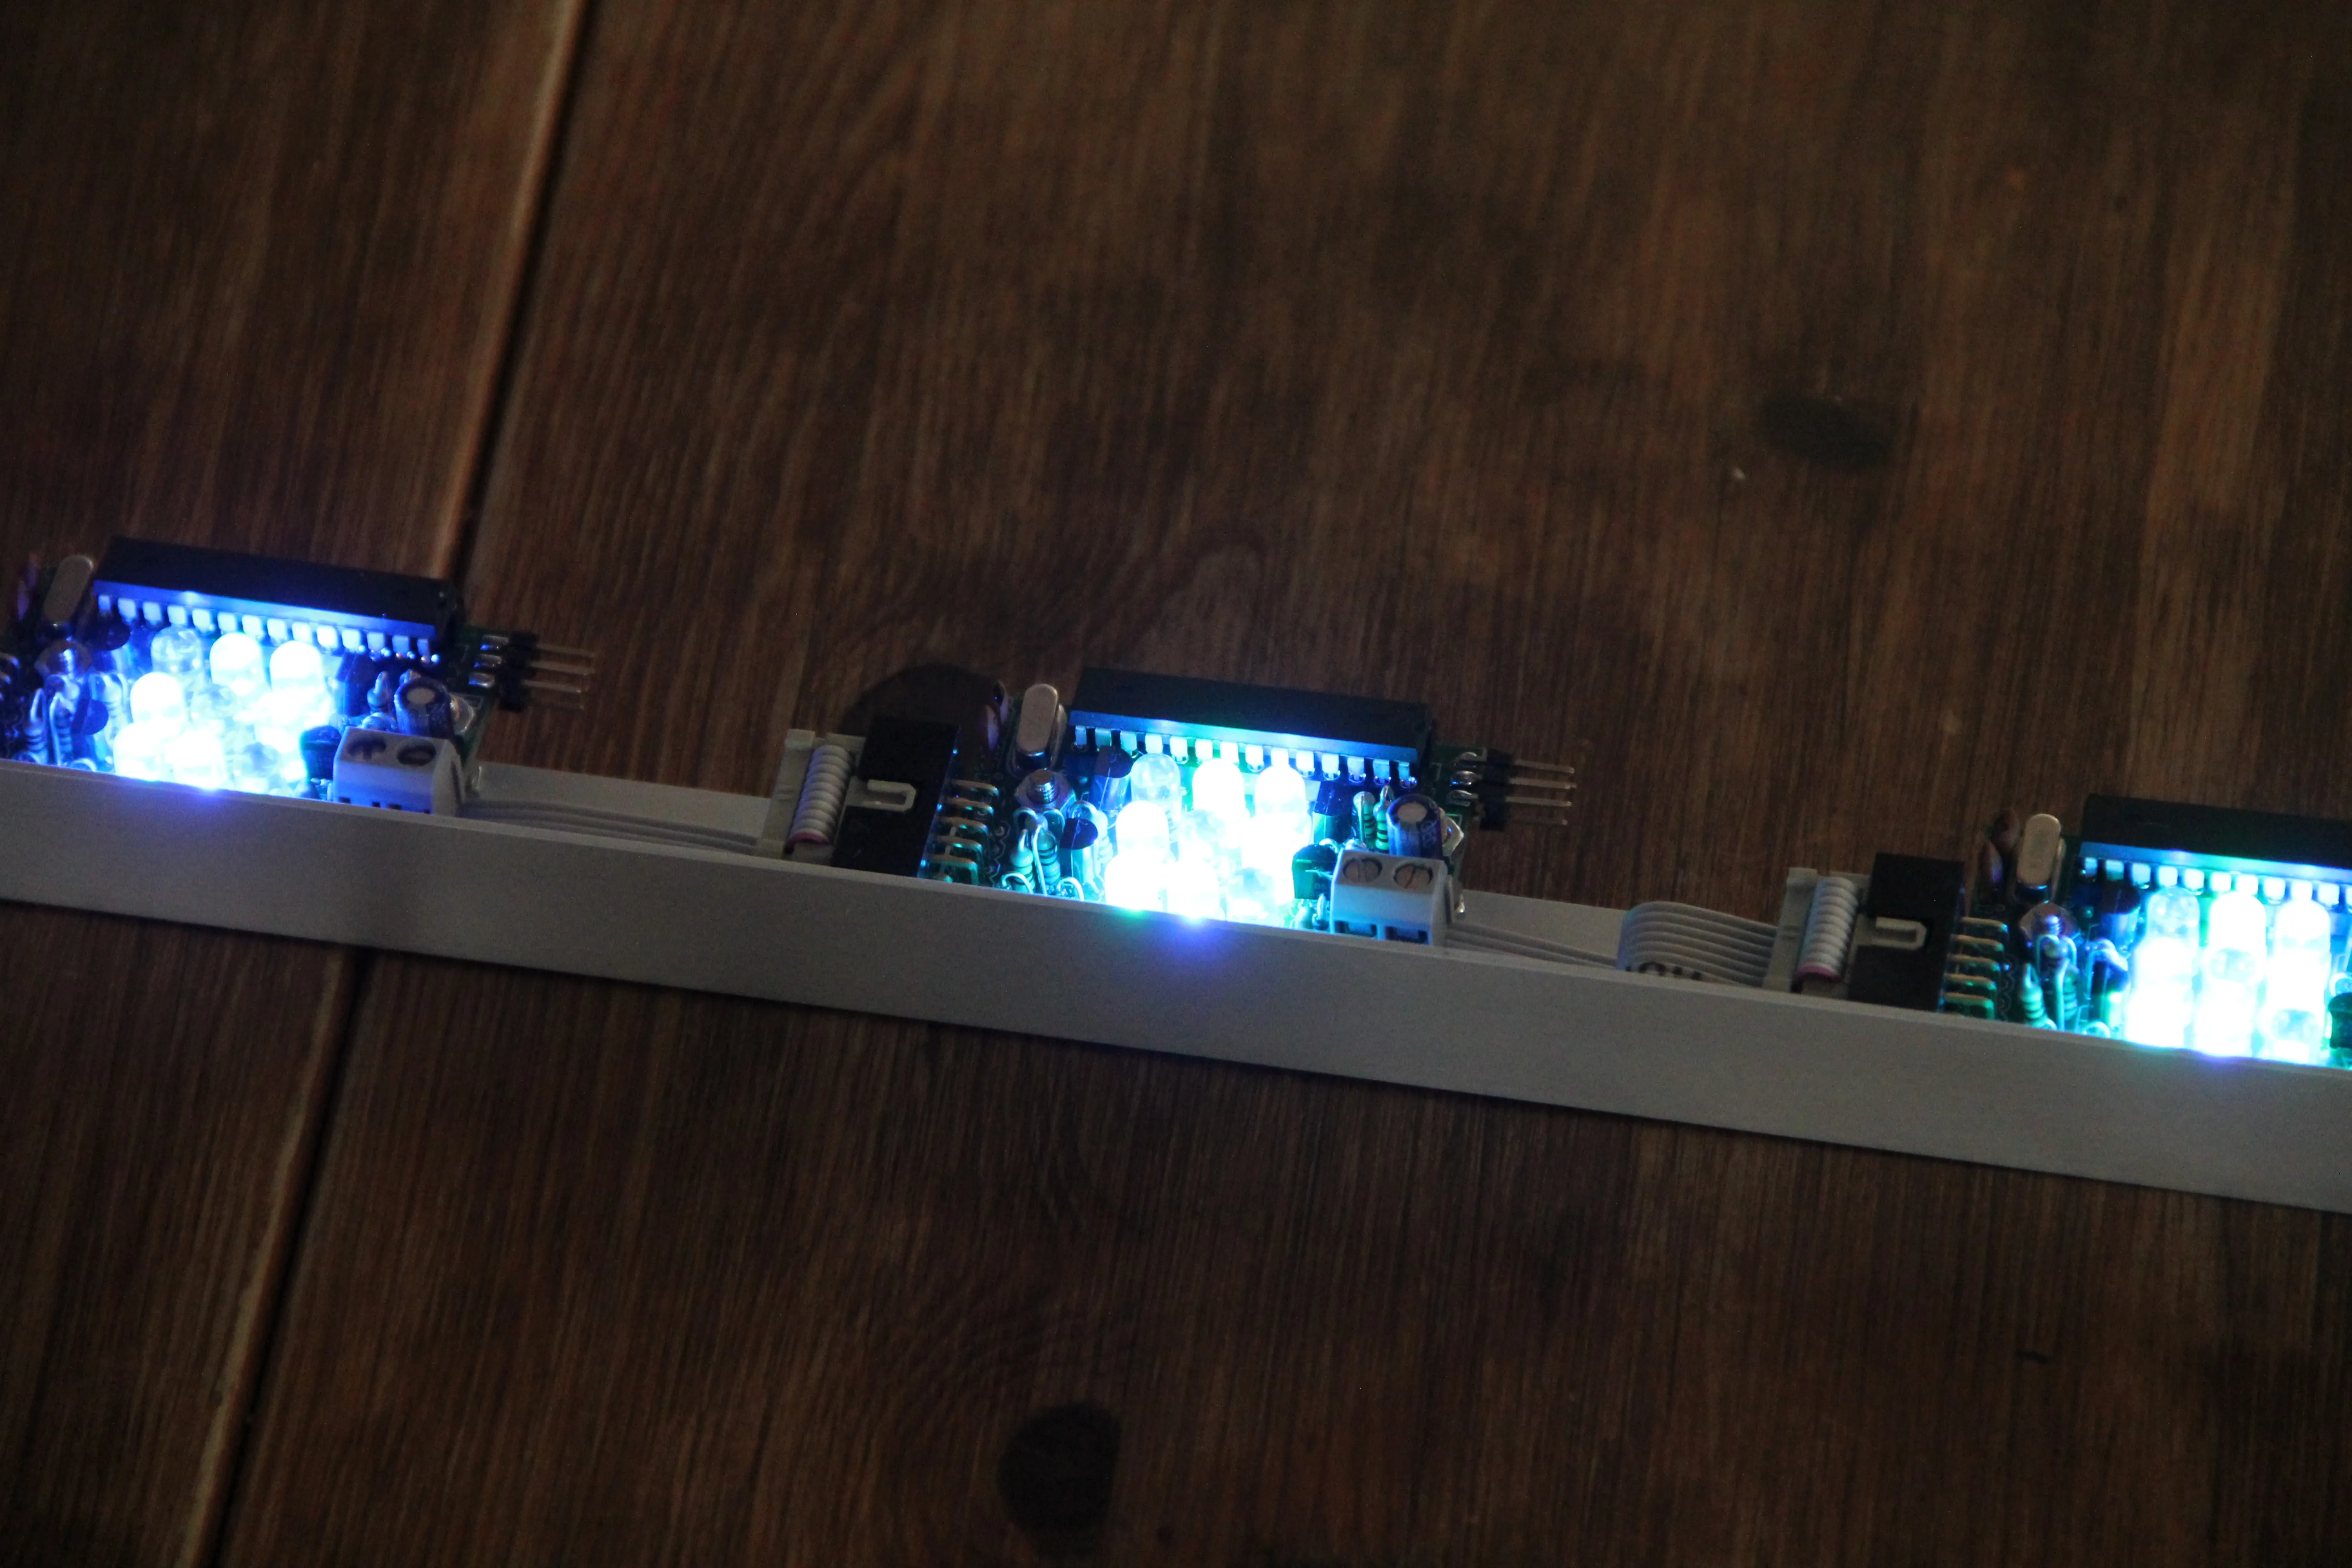
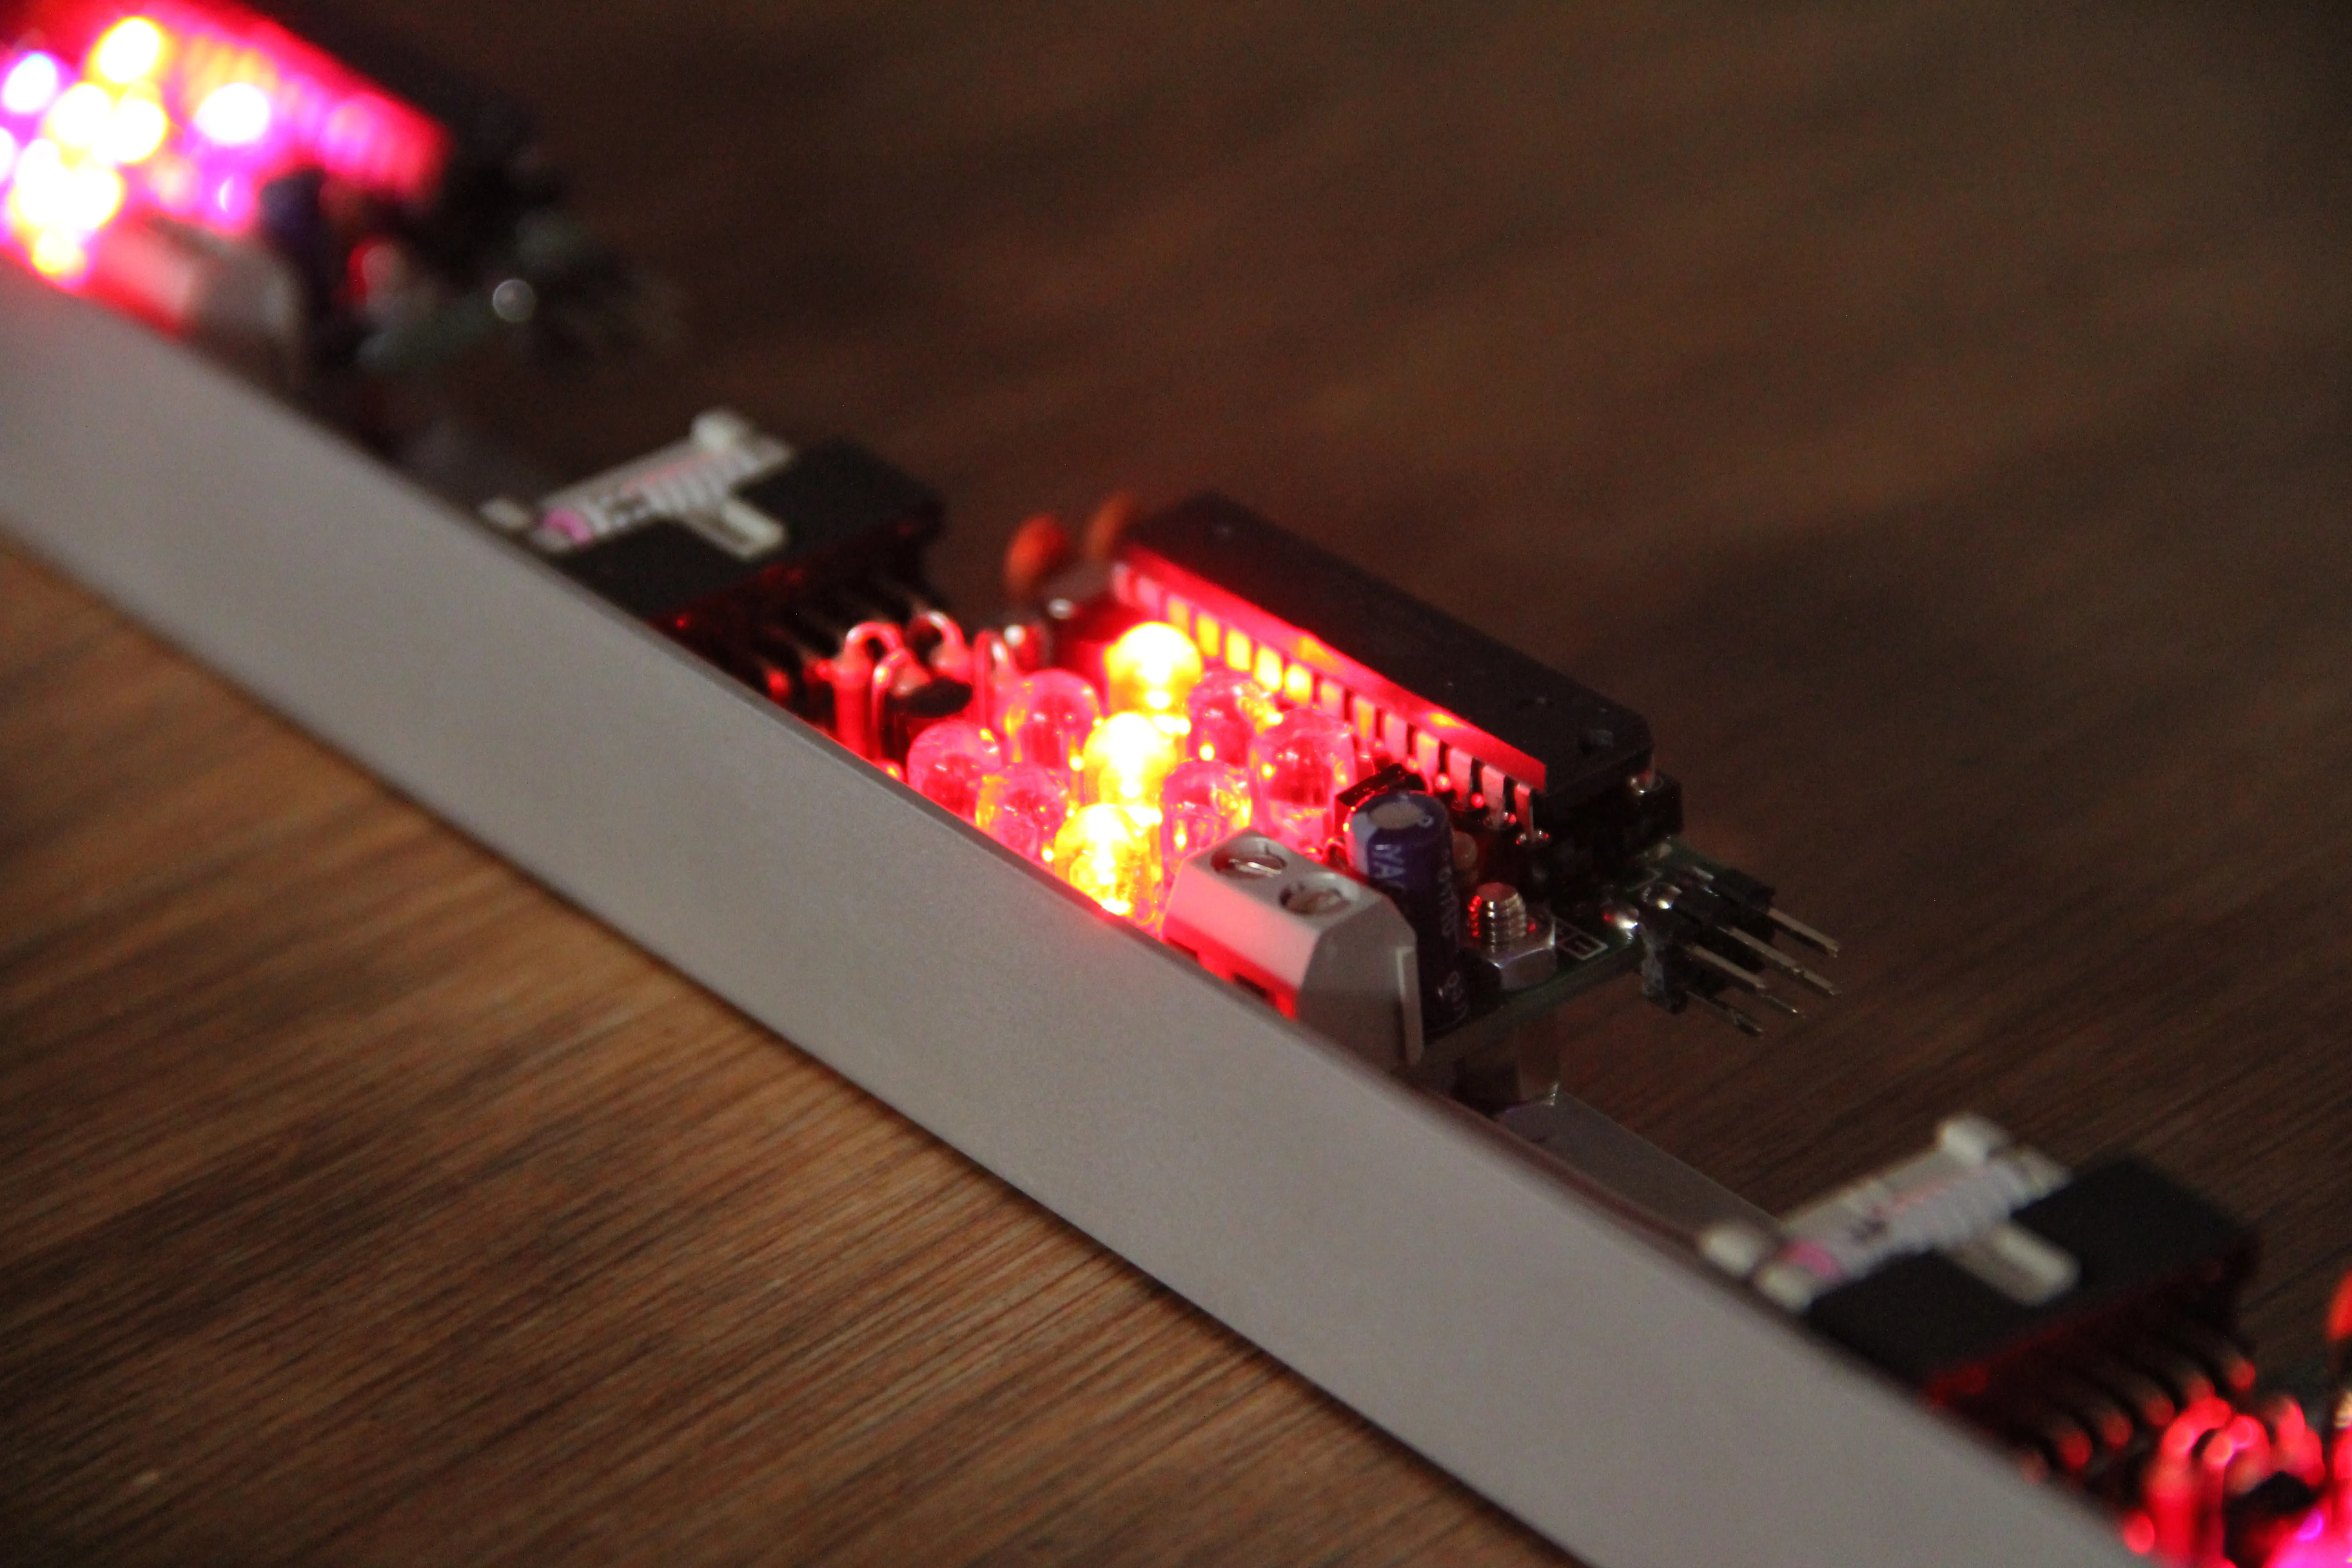
In diesem und folgendem Beitrag geht es wieder um fnordlichter.
Ja genau, ich habe schon vor einem Jahr mal darüber geschrieben.
fnordlichter sind kleine LED Module die über einen gemeinsamen Bus angesteuert werden können.
Ich nutze diese Module zur intelligenten Beleuchtung unserer Wohnung.
Sie können uns über neue Mails, den aktuellen Stromverbrauch, das Wetter oder den Serverstatus benachrichtigen oder einfach als Stimmungs-Licht oder Party-Beleuchtung genutzt werden.
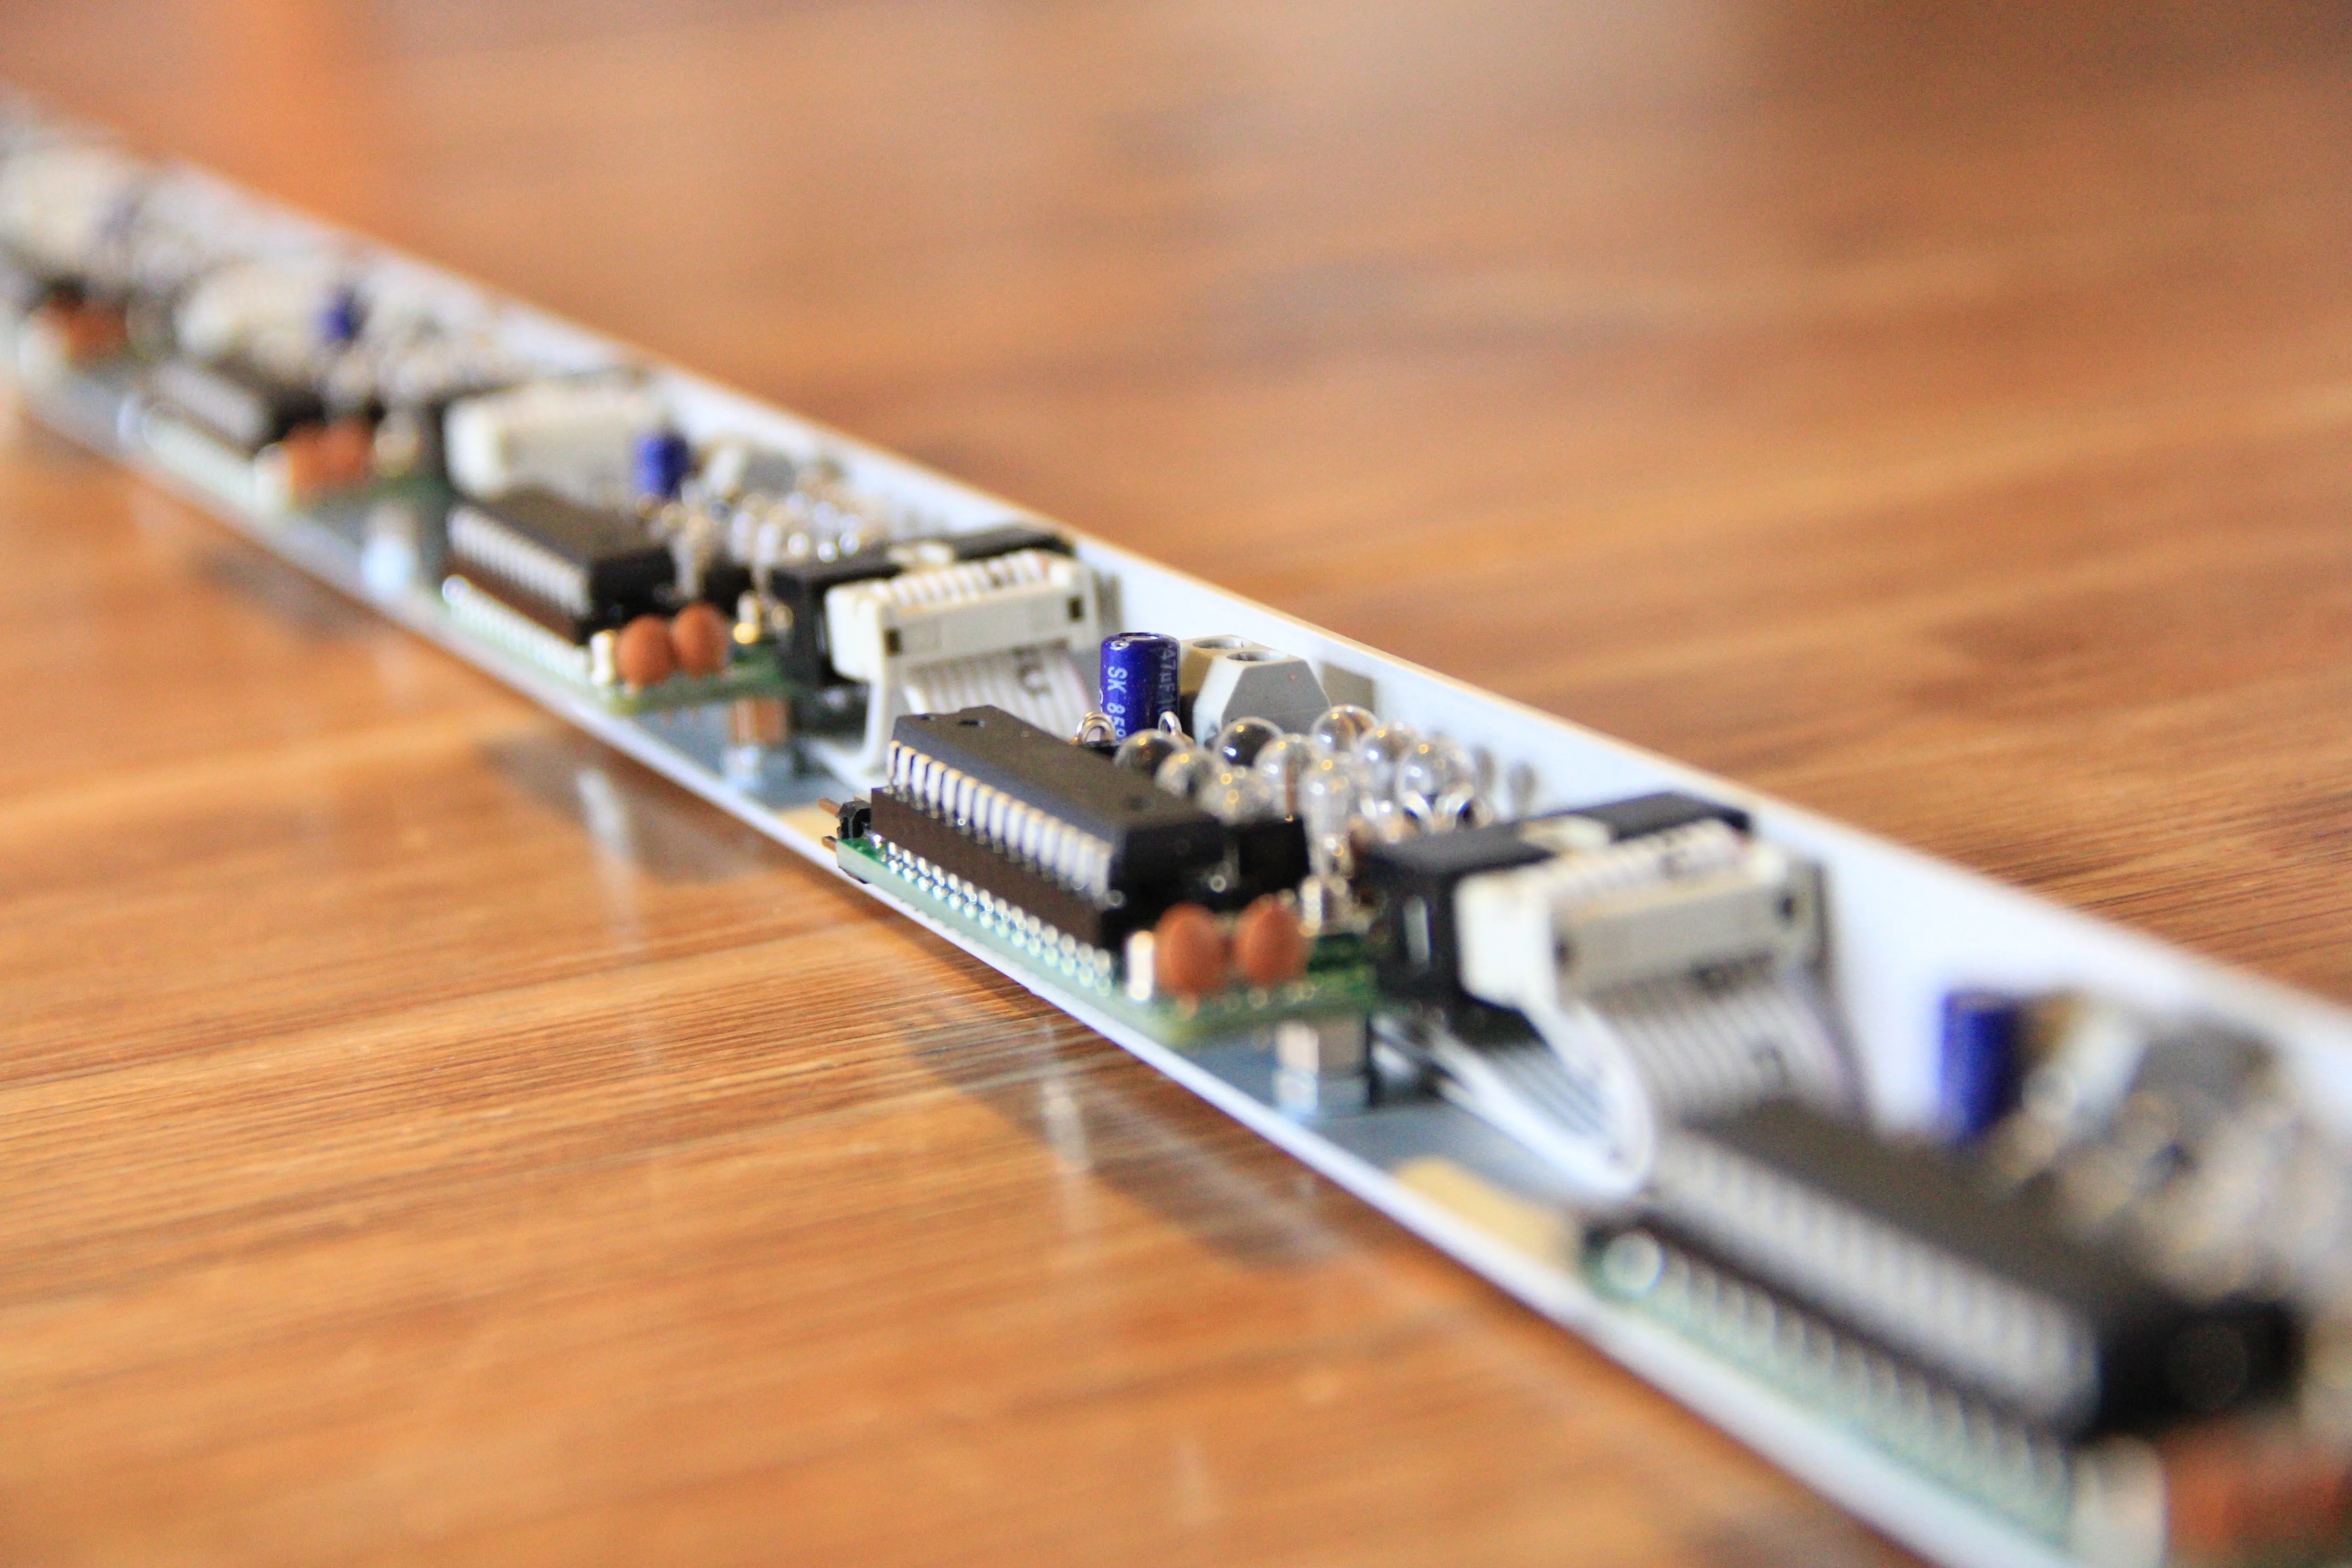
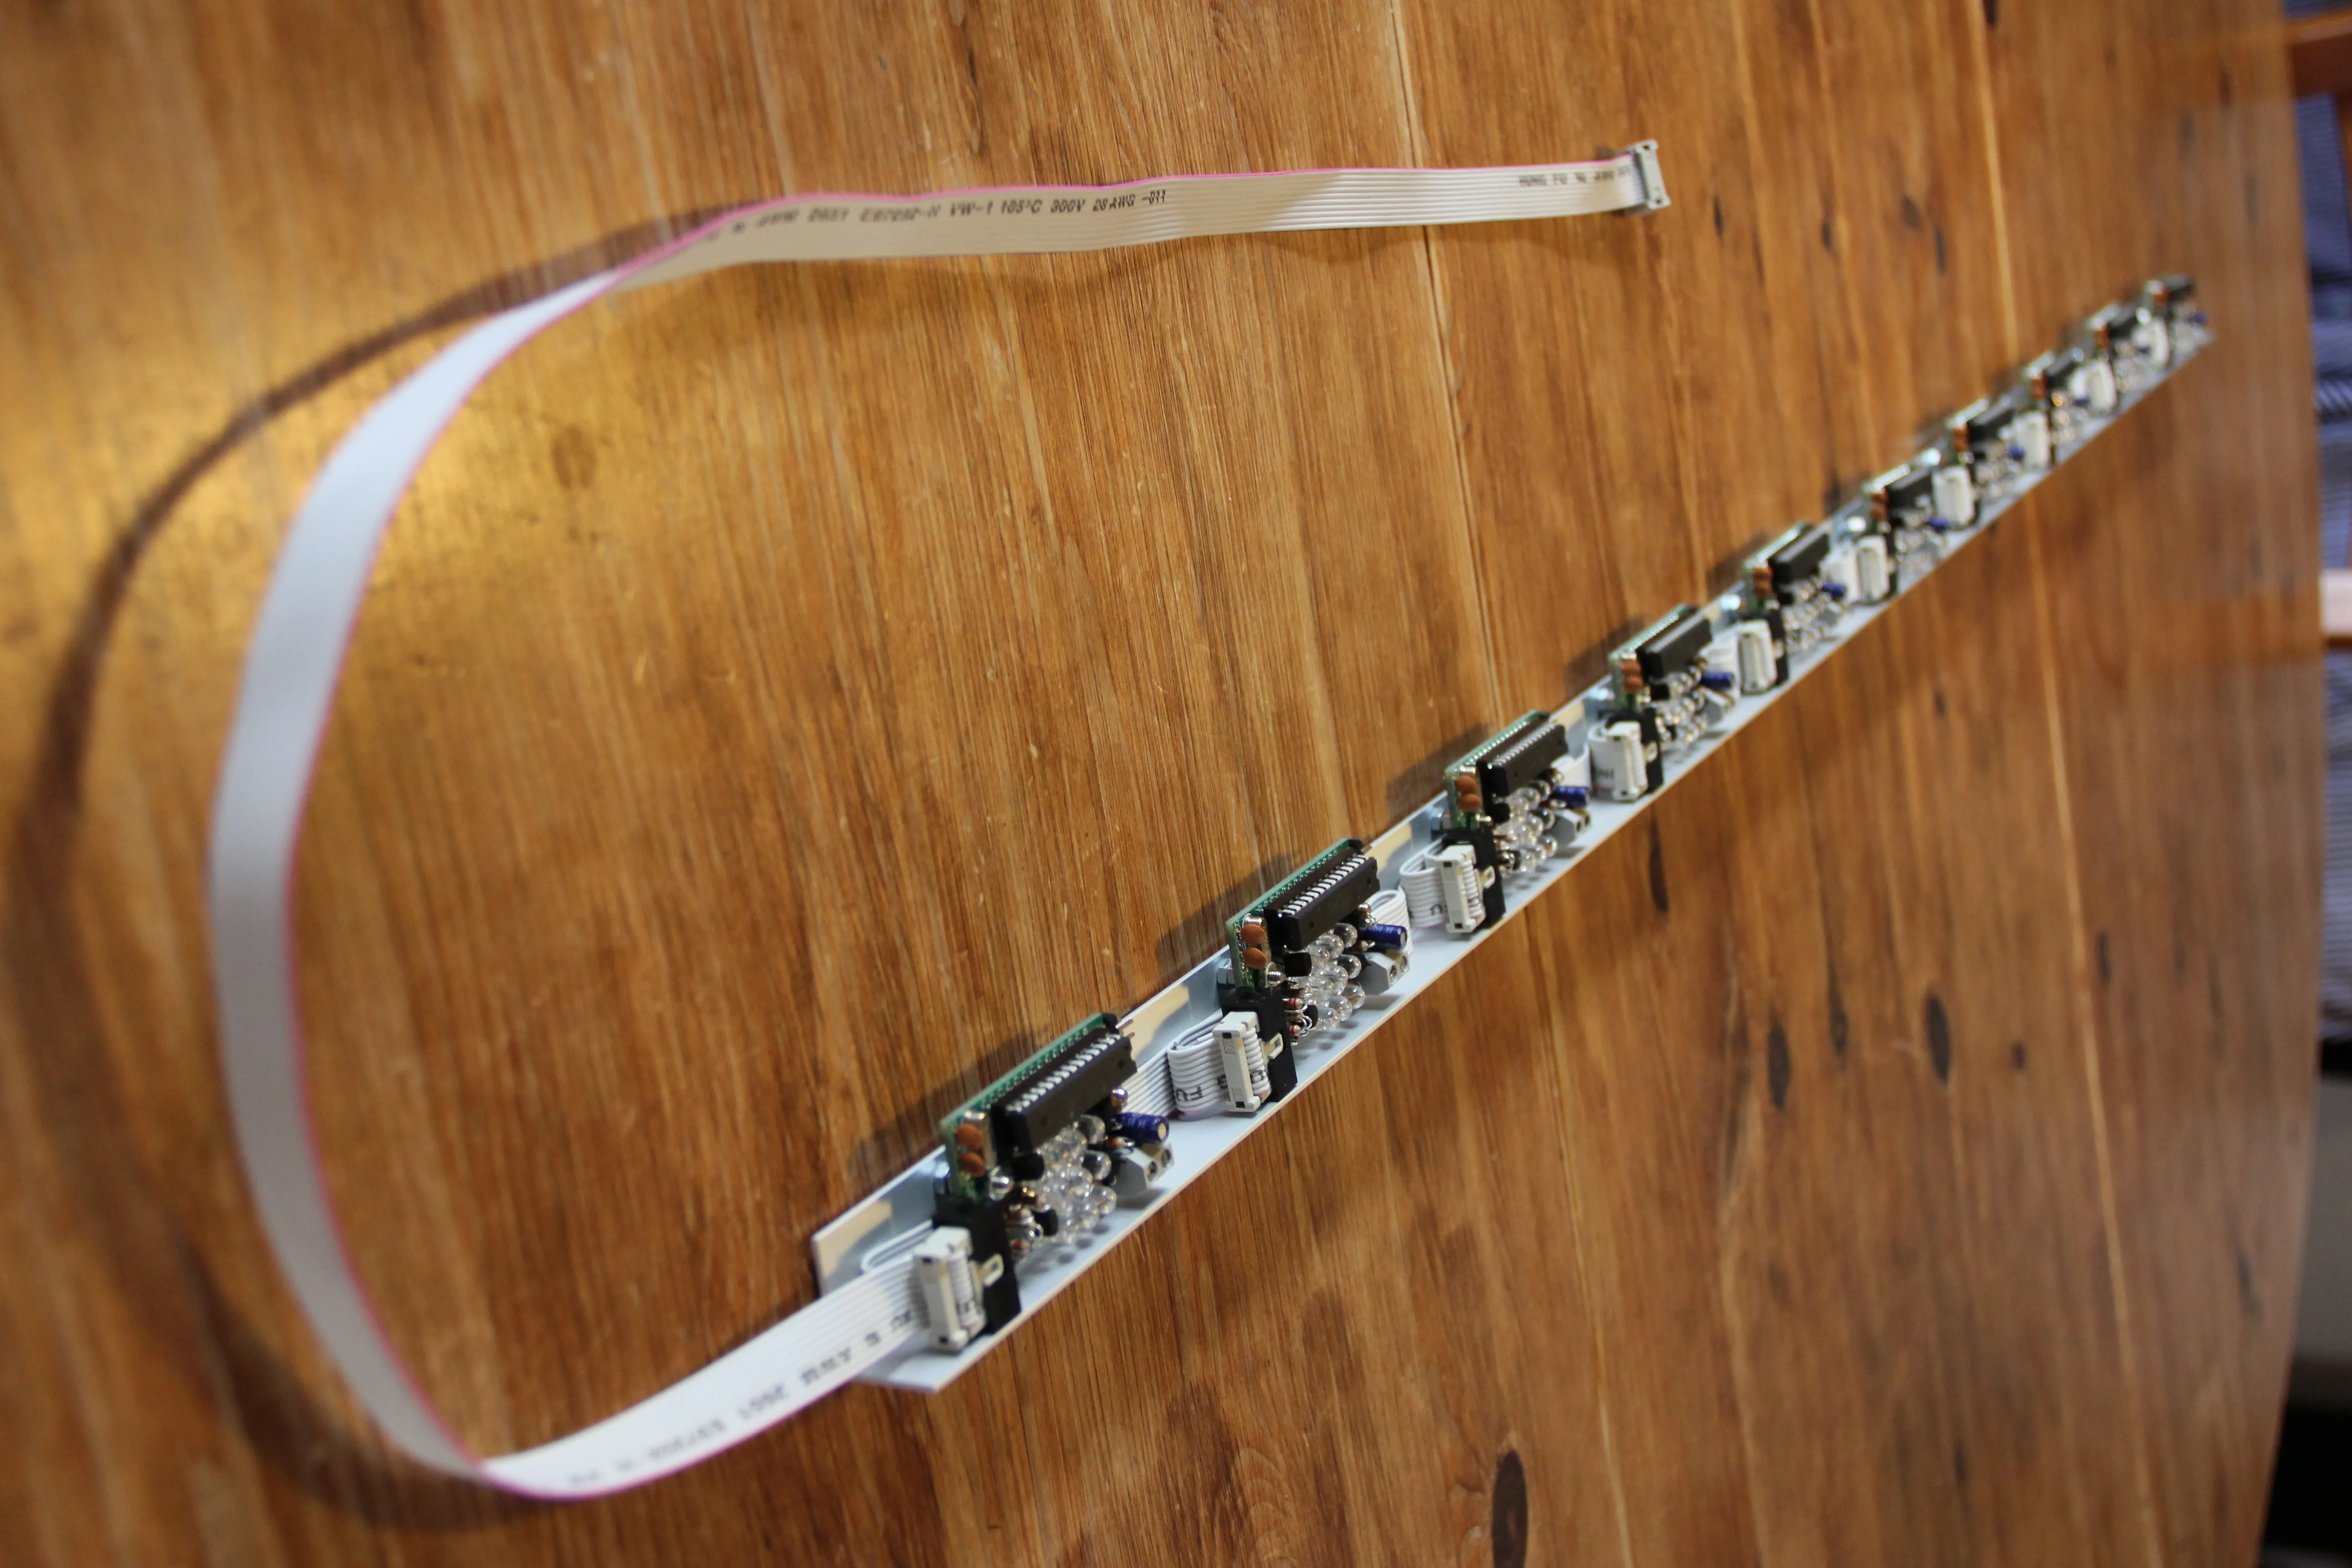
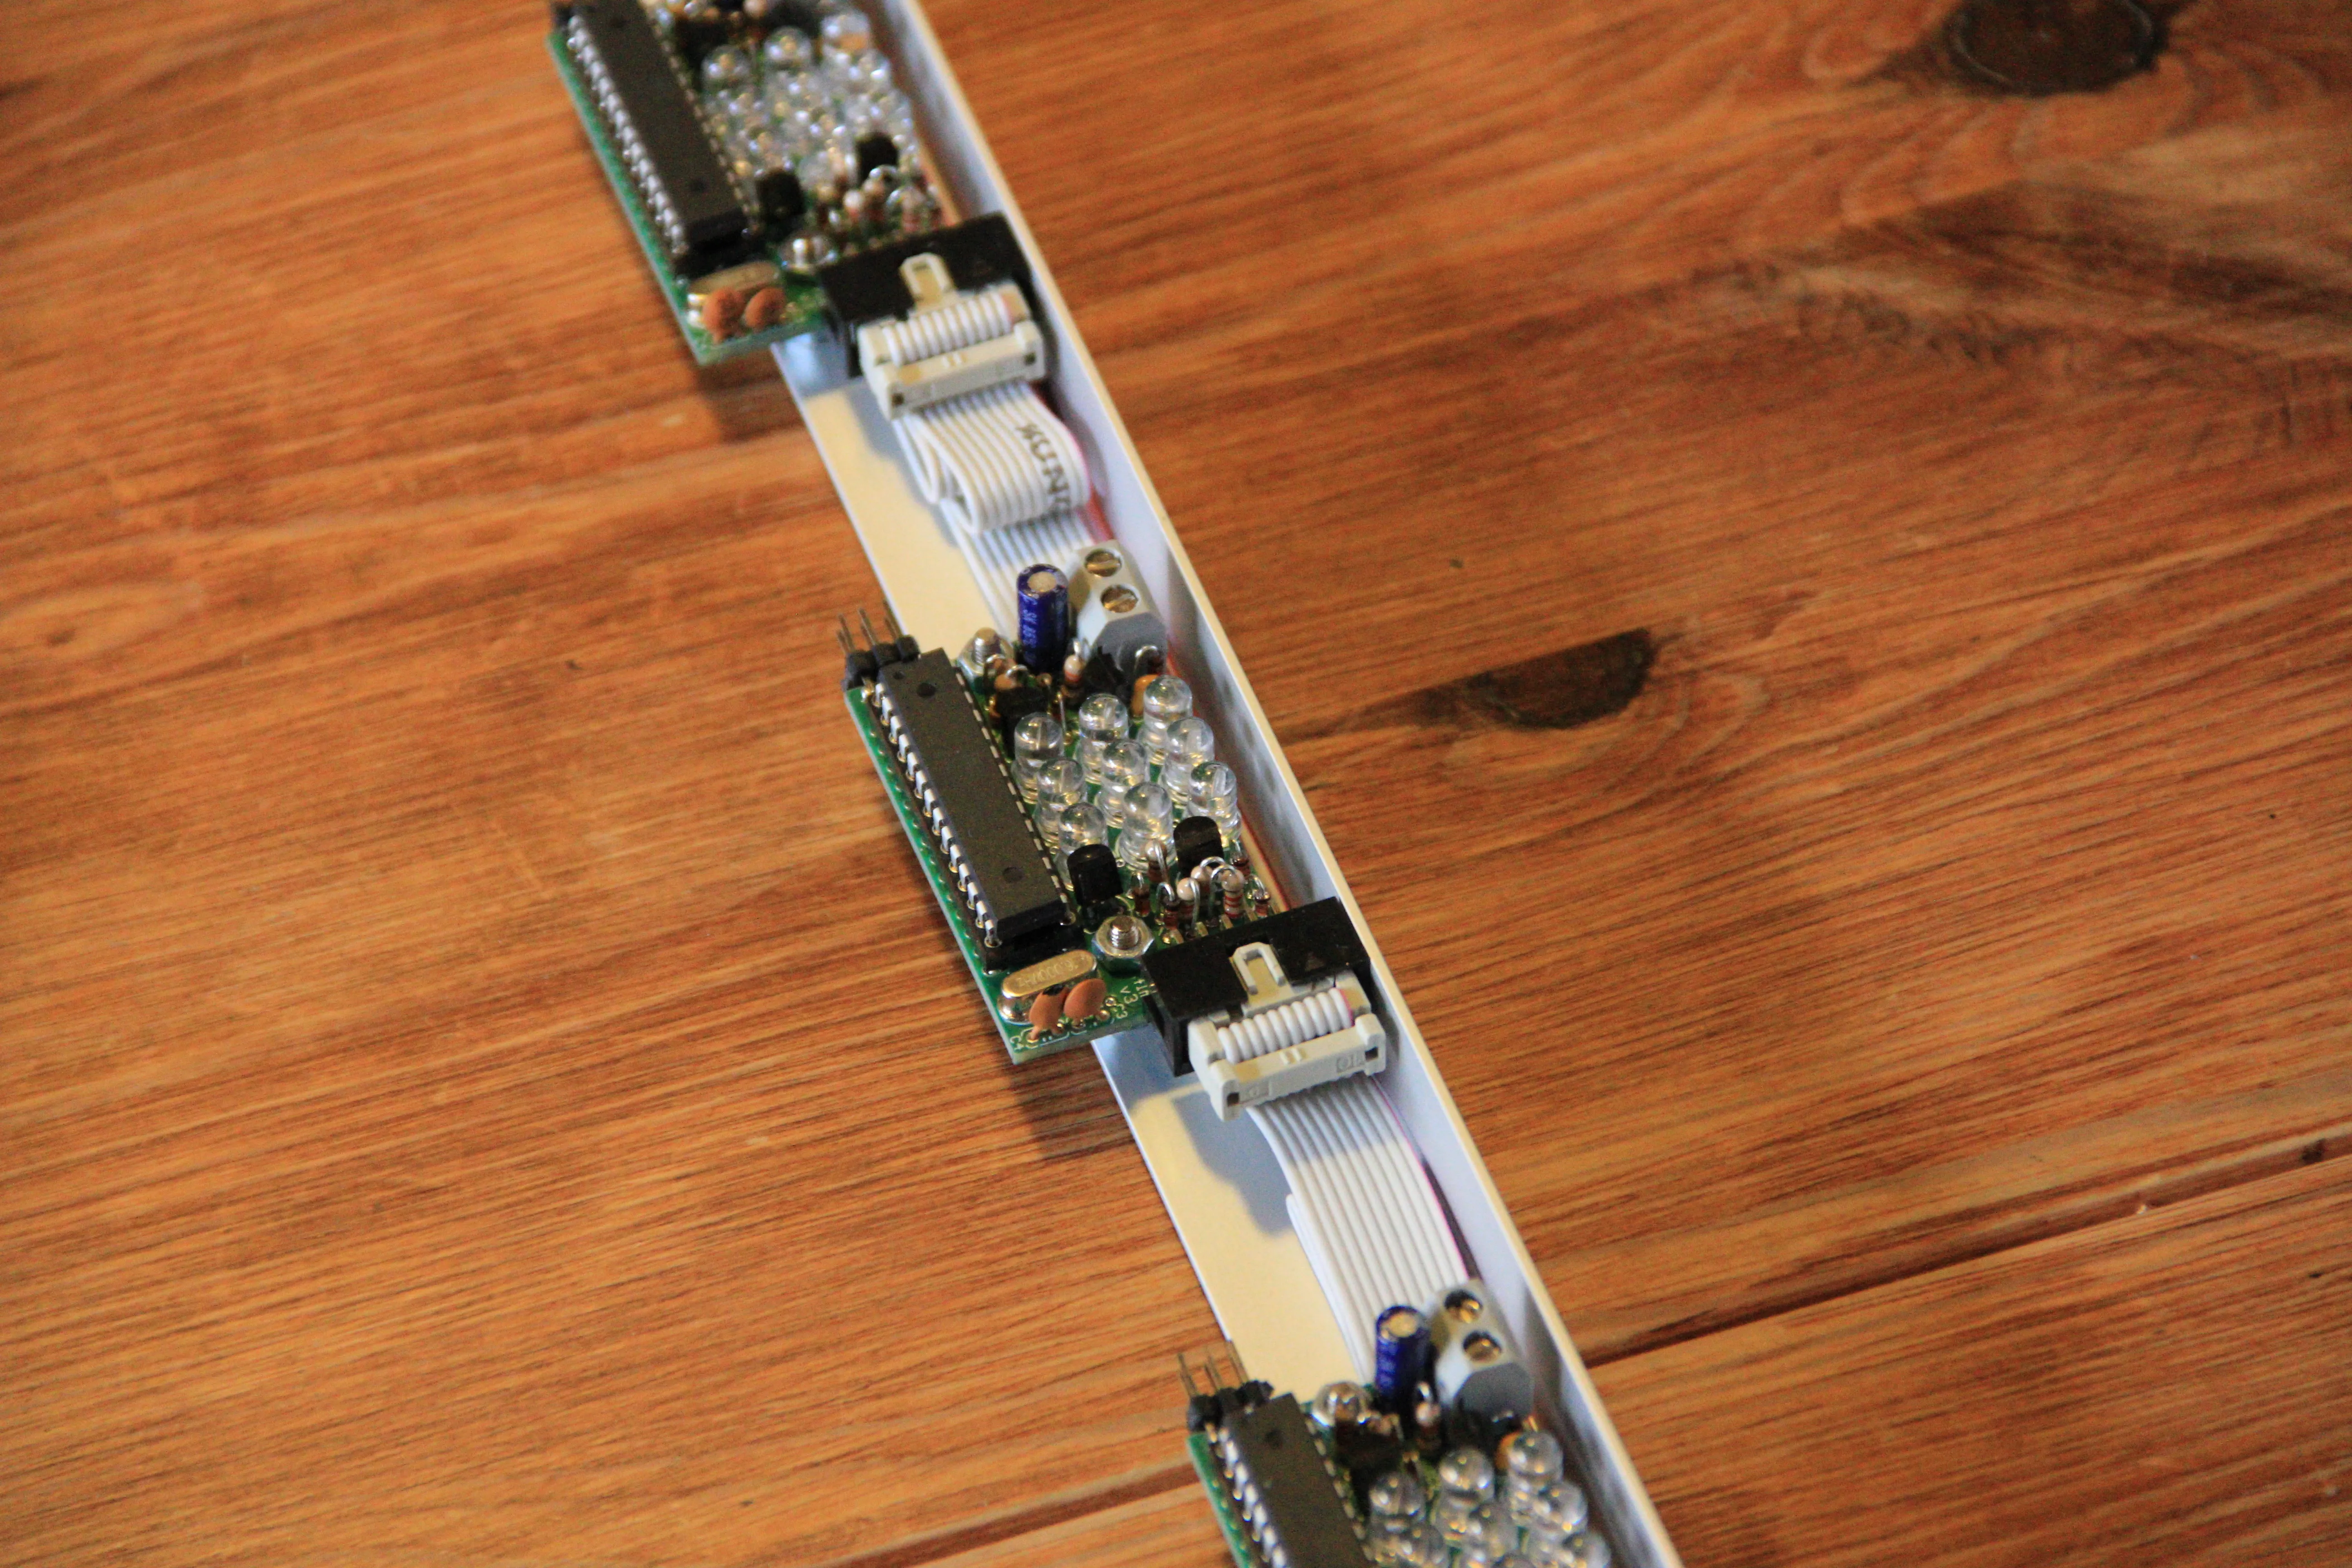
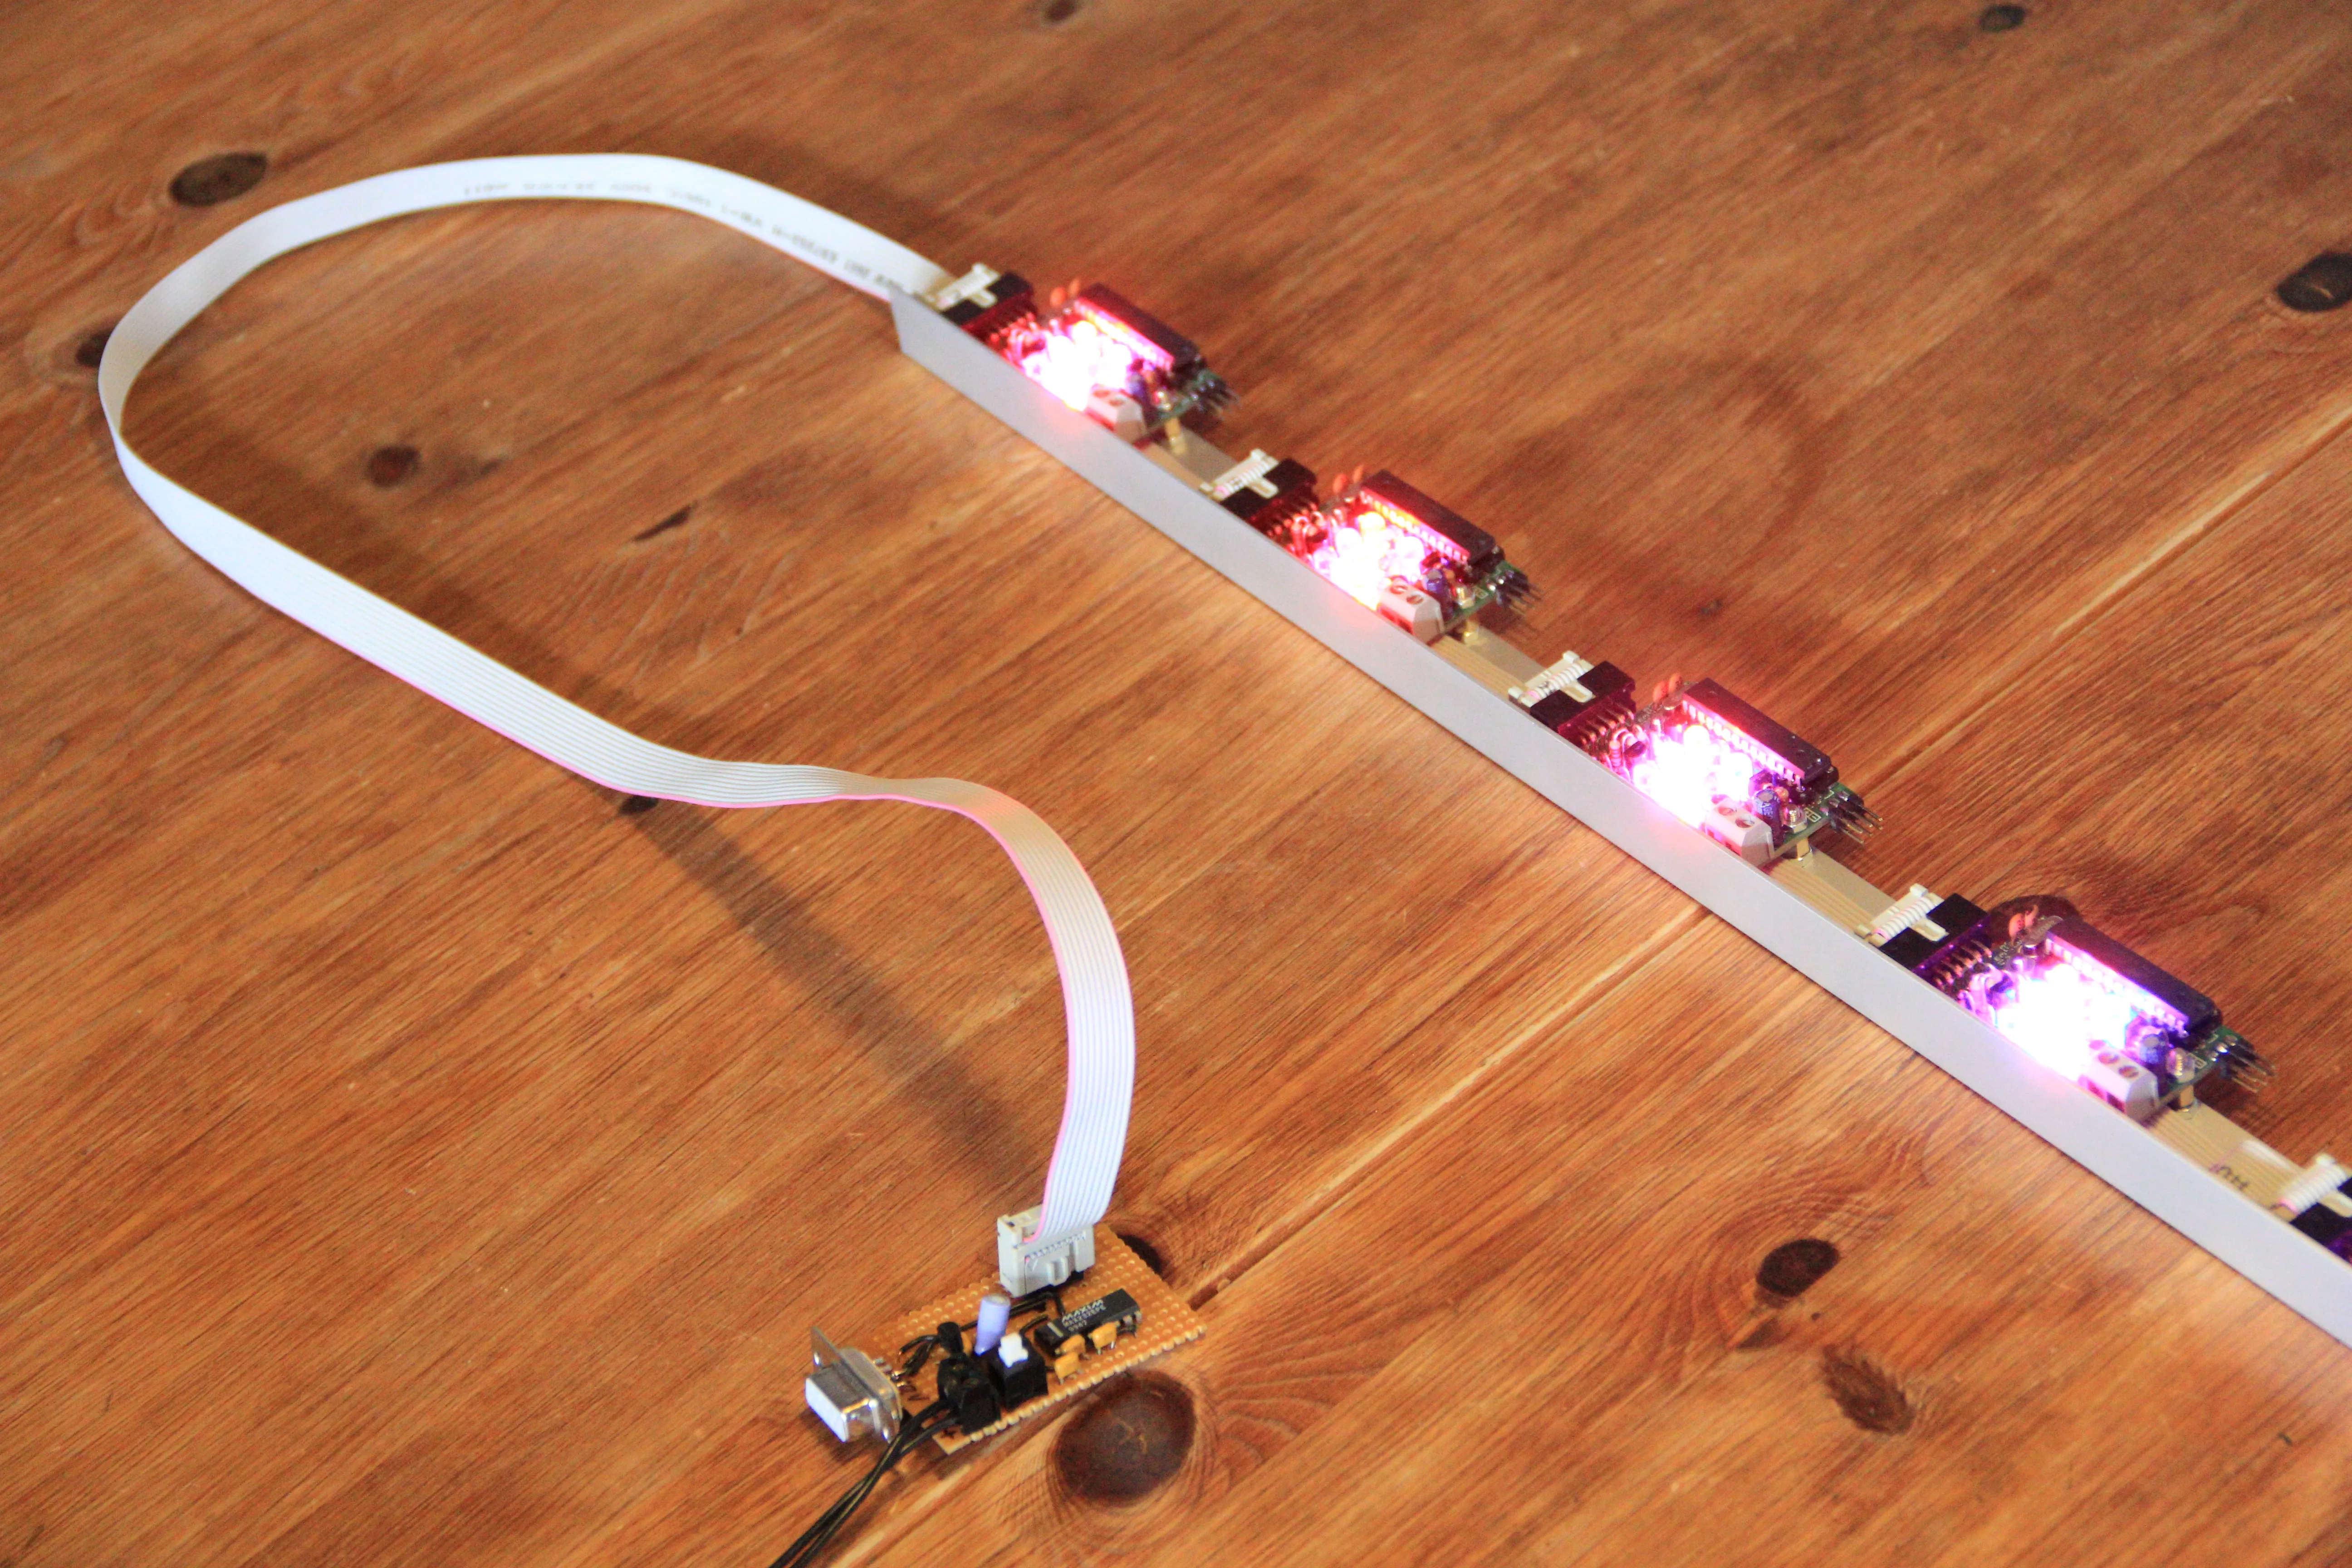
Da die einzelnen Module leider nicht genügen um damit mein ganzes Zimmer zu beleuchten, habe ich mich entschieden für diesen Zweck eigene Hardware zu entwickeln.
Wie der Name dieses Beitrags es bereits andeutet können meine fnordstripe Module ganze Bänder/Streifen von LEDs ansteuern.
Ausgehend von dem fnordlichtmini Design habe ich die LEDs und Konstantstromquellen durch drei MOSFETs ersetzt, die jeweils einige hundert LEDs betreiben können.
Im Bild oben wurden die MOSFETs aus Platzgründen auf der Unterseite der Platine verlötet.
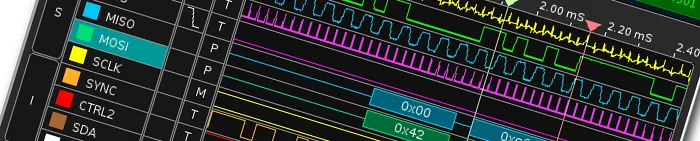
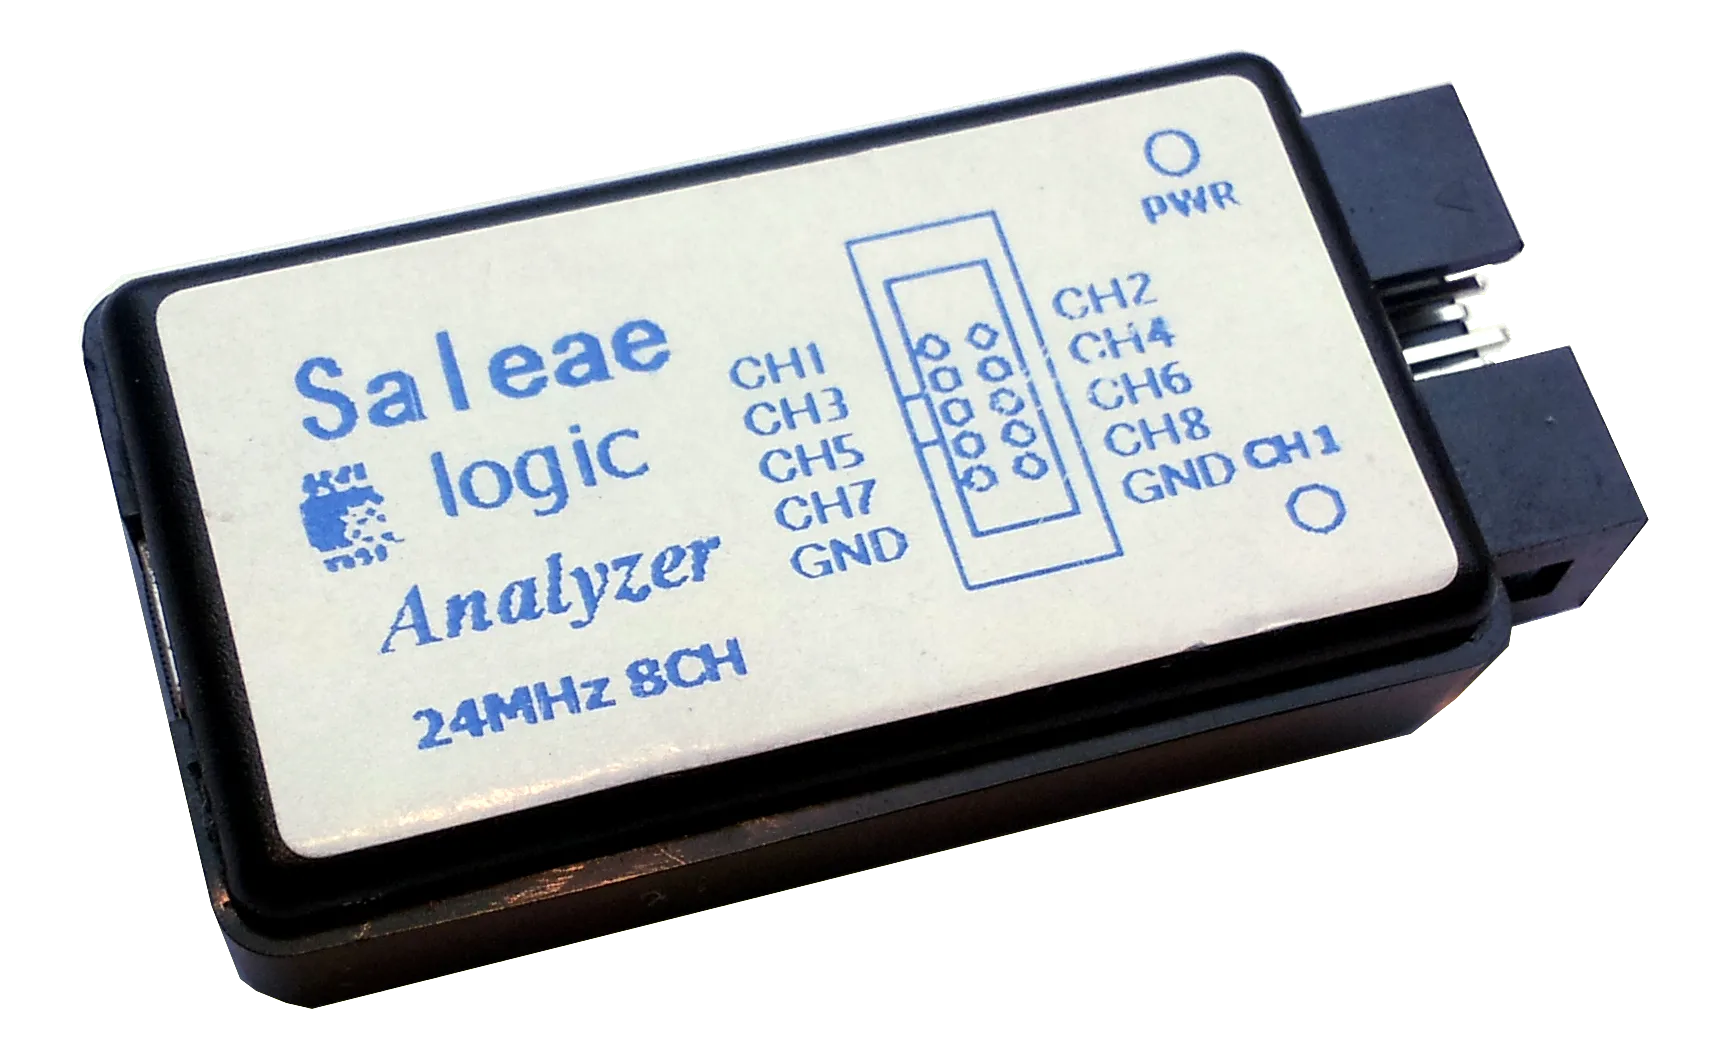
Für Einsteiger können die ersten Schritte beim Basteln mit Mikrocontrollern häufig etwas frustrierend sein.
Ja, das ist leider auch meine eigene Erfahrung.
Der Fehler liegt dann meist im Verborgenen: Wackelkontakte, eine instabile Spannungsversorgung oder Softwarefehler — hierbei helfen nur viel Geduld und geeignete Messgeräte.
Dass dies aber nicht immer direkt ein teures Oszilloskop sein muss, möchte ich in diesem Beitrag zeigen.
Ich konzentriere mich dabei auf einige fast baugleiche Geräte: Saleae Logic & USBee AX.
Beide basieren auf dem gleichen Mikrocontroller, dem Cypress FX2, und werden per USB an den Rechner angeschlossen.
Bei eBay, AliExpress und co. sind sie für unter 10 € erhältlich.
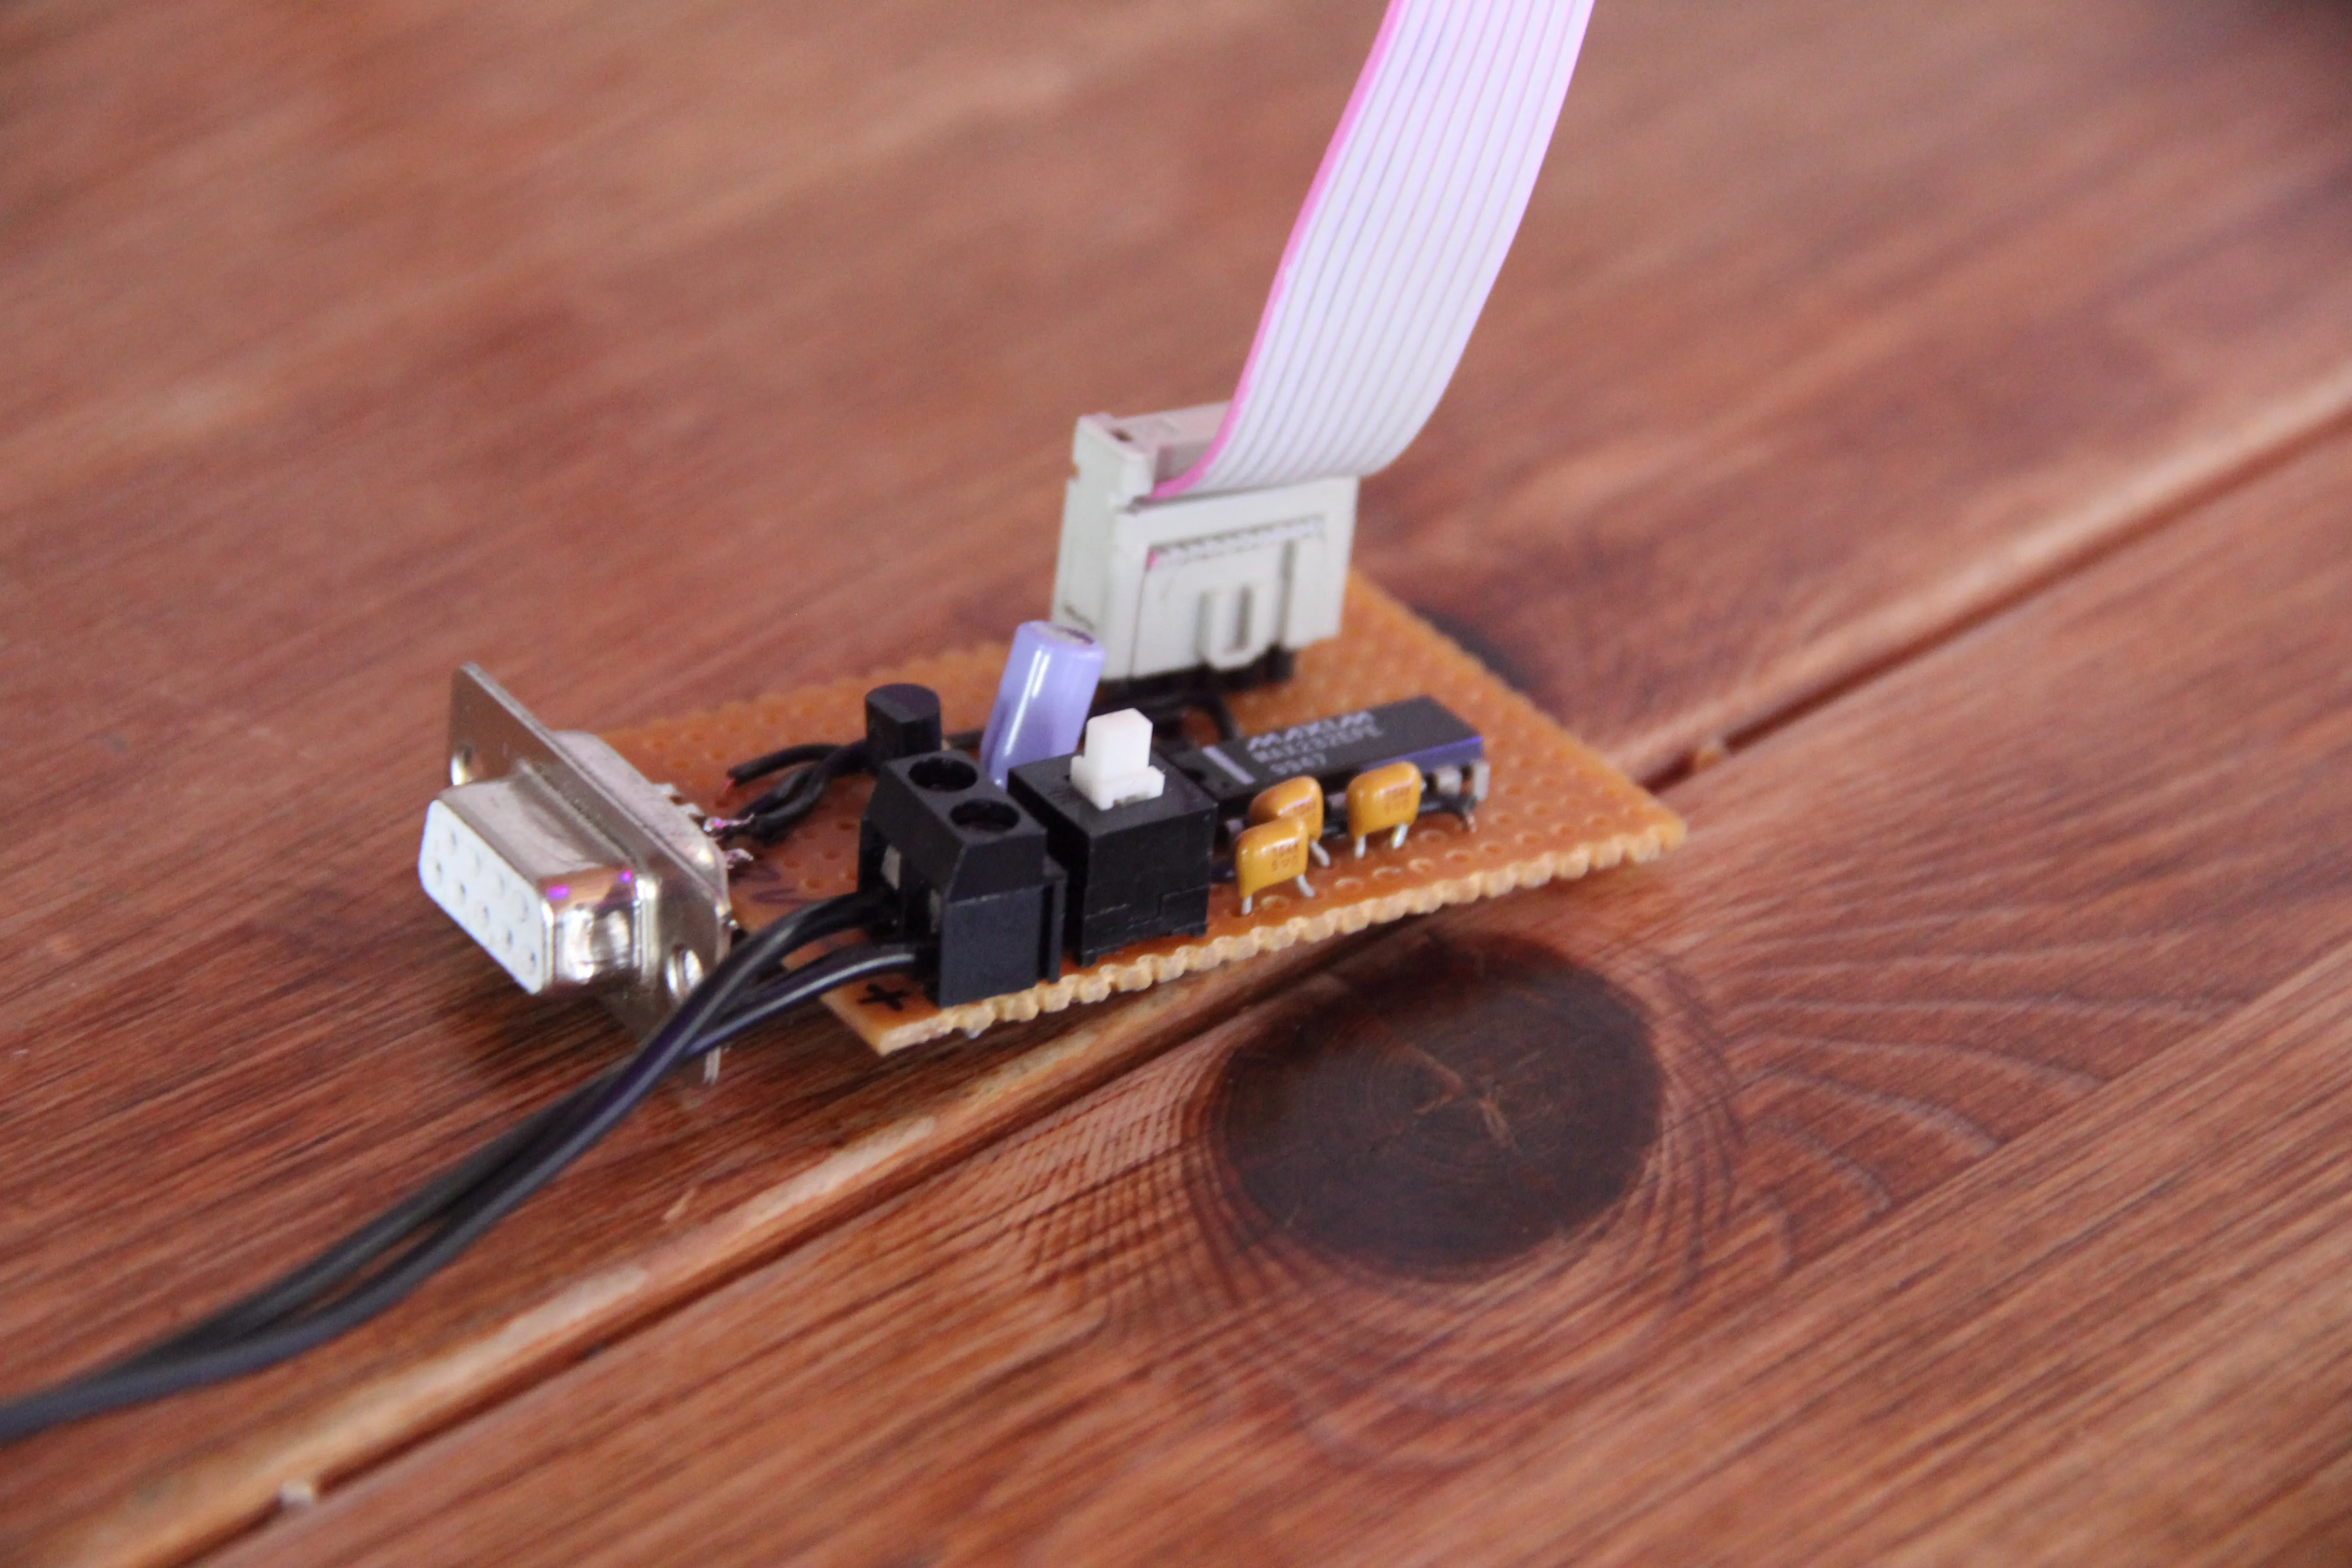
transWhat ist ein XMPP Transport, der den WhatsApp Messenger in das Jabber Netzwerk einbindet.
Das Gateway simuliert dabei serverseitig die normale WhatsApp App von Android beziehungsweise iPhone.
Der User benötigt nur noch einen normalen XMPP Client wie beispielsweise Adium, Gaijm, IM+ oder Pidgin.
Damit ist es nun möglich WhatsApp auf nahezu allen Geräten und Betriebssystemen einzusetzen.
Ich kann transWhat sehr in Kombination mit Pidgin auf Desktops und Laptops und mit IM+ auf Tablets empfehlen 😊.
/stv0g/calcelestial ist ein kleines Linux-Tool zum Berechnen von Auf- und Untergangszeiten sowie der Position sämtlicher Planeten unseres Sonnensystems.
Es ist die Weiterentwicklung von /stv0g/sun , das ursprünglich als kleines Bash-Skript für meinen Router startete.
Mittlerweile ist das Tool zu einem weit umfangreicheren Werkzeug gewachsen, welches nicht mehr nur die Auf- und Untergangszeit der Sonne berechnen kann:
Es sind mit dem Mond, Mars, Neptun, Jupiter, Merkur, Uranus, Saturn, Venus und Pluto eine Menge neuer Planeten dazugekommen.
Auch kann nun die Position dieser Himmelskörper zu jedem beliebigen Zeitpunkt oder dem Auf- und Untergang berechnet werden.
Nun bin ich selbst kein kleiner Hobby-Astronom, sodass ich diese ganzen Berechnungen aus dem Ärmel schütteln könnte.
Stattdessen nutze ich die Bibliothek libnova.
libnova benutzt die sehr genauen Algorithmen “Variations Séculaires des Orbites Planétaires” (kurz VSOP-87), die Pierre Pratagnon 1987 entwickelte.
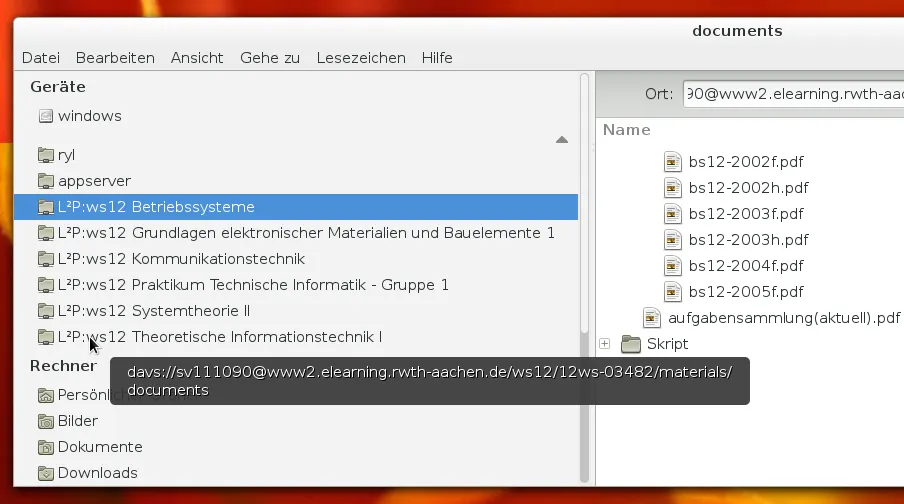
Vielleicht kennt ihr Sync-my-L2P? Es ist ein kleines Tool, das automatisiert Dateien vom Online Lernportal der RWTH herunterlädt und synchronisieren kann.
Eigentlich eine super Sache! Entgegen meiner ursprünglichen Erwartung ist das Tool auch unter Linux lauffähig.
Ich habe mich trotzdem dazu entschieden das ganze etwas anders, aus meiner Sicht deutlich simpler, zu lösen.
Mein Skript nutzt die Möglichkeit einzelne Microsoft Sharepoint Ordner (hier: L2P-Lernräume) via WebDav einzubinden.
Dazu gibt es unter Linux zwei Varianten:
davfs2 (nutzt FUSE, kompatibel mit mount und fstab)
gvfs (stark in GNOME & Nautilus integriert, einfach)
Die zweite Variante ist für GNOME Nutzer deutlich einfacher, da hier nur eine entsprechende URI in die Adresszeile des Dateimanagers eingegeben werden muss.
Mein Tool hilft euch diese URIs zu finden, indem es sich unter eurem Namen im L2P einloggt und nachsieht in welchen Lernräumen ihr registriert seid.
Wie war nochmal die Pinbelegung des Festspannungsreglers? Wie stark darf ich die Pins des Mikrocontrollers belasten? Wie viel Volt fallen an dieser LED ab?
Häufig sind es diese kleinen Fragen, die gerade Anfänger den Einstieg in die Welt der Elektronik oder Mikrocontroller erschweren.
Um diesen etwas zu erleichtern und auch den erfahrenen Bastlern einen Spickzettel zur Verfügung zu stellen, habe ich folgendes CheatSheet zusammengestellt:
Nicht selten kommt es mal vor, dass sich ein Rechner nach astronomischen Zyklen orientiert.
Die zur Berechnung der Osterfeiertage häufig verwendete Gaußsche Osterformel basiert so z.T.
auf der Mondgleichung.
Unser Problem stellte sich etwas anders dar: Die LED-Flurbeleuchtung in unserem Flur wird durch den Router geregelt und lief bisher in der Regel 24/7.
Mit dem hier vorgestellten Programm haben wir es nun geschafft die Laufzeit auf die Nachtstunden zu begrenzen, indem wir die von unserer geografischen Position abhängige Sonnenuntergangszeit nutzen, um die Lampen erst bei Dämmerung einzuschalten.
UPDATE: Ich habe nochmal etwas Arbeit in das Tool investiert und es in ein eigenes Projekt ausgelagert.
Das neue Tool liefert wesentlich genauere Ergebnisse und mehr Funktionen.
Zu finden ist es hier: calcelestial.
Das neue Tool besitzt eine Reihe weiterer nützlicher Funktionen:
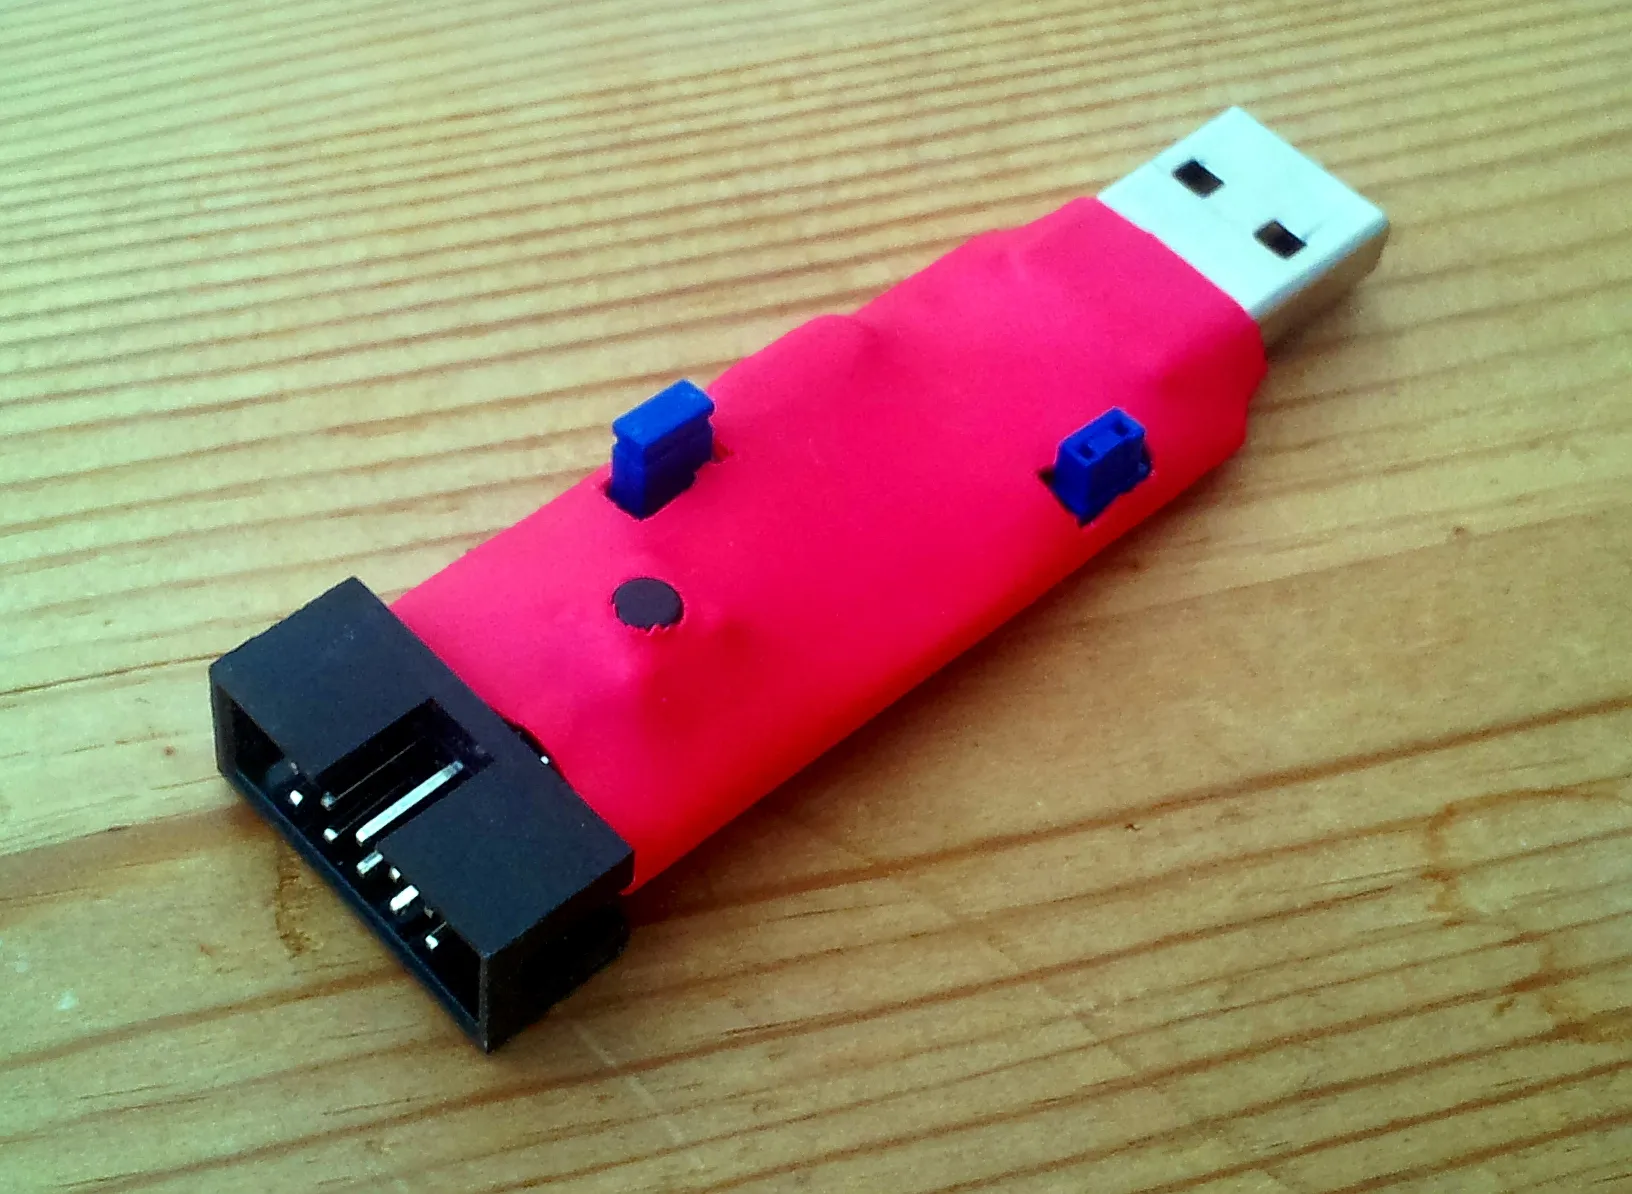
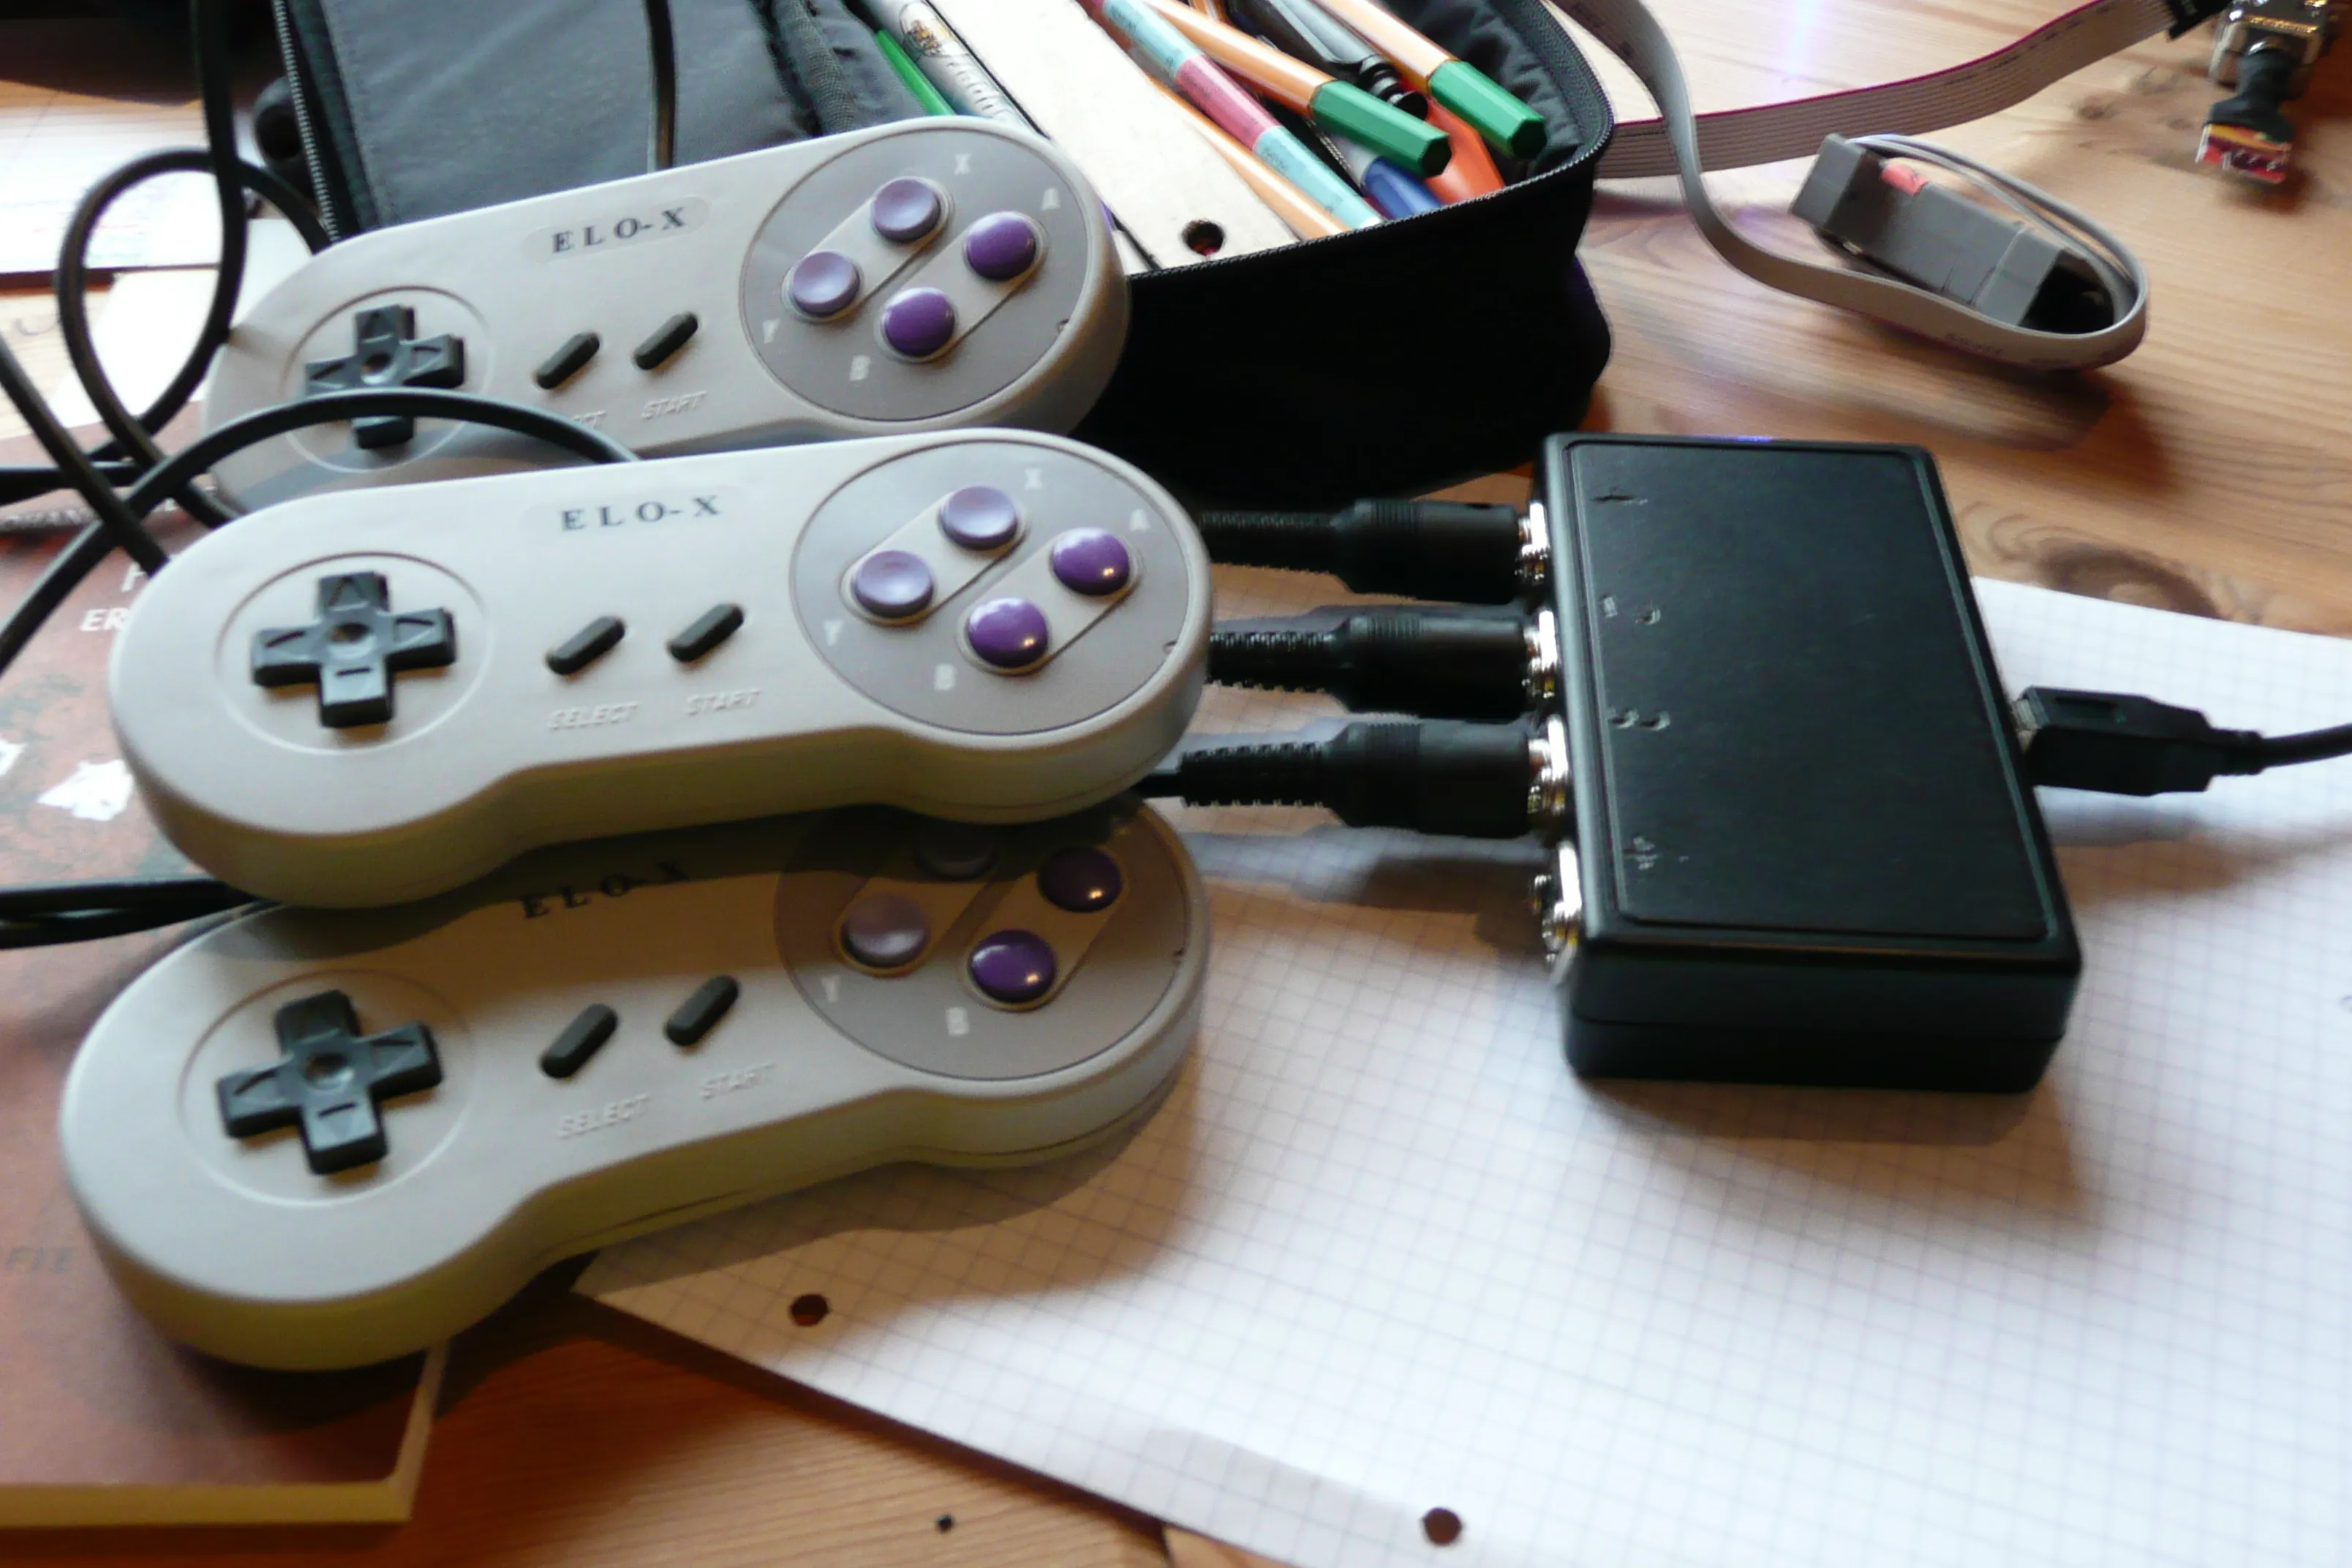
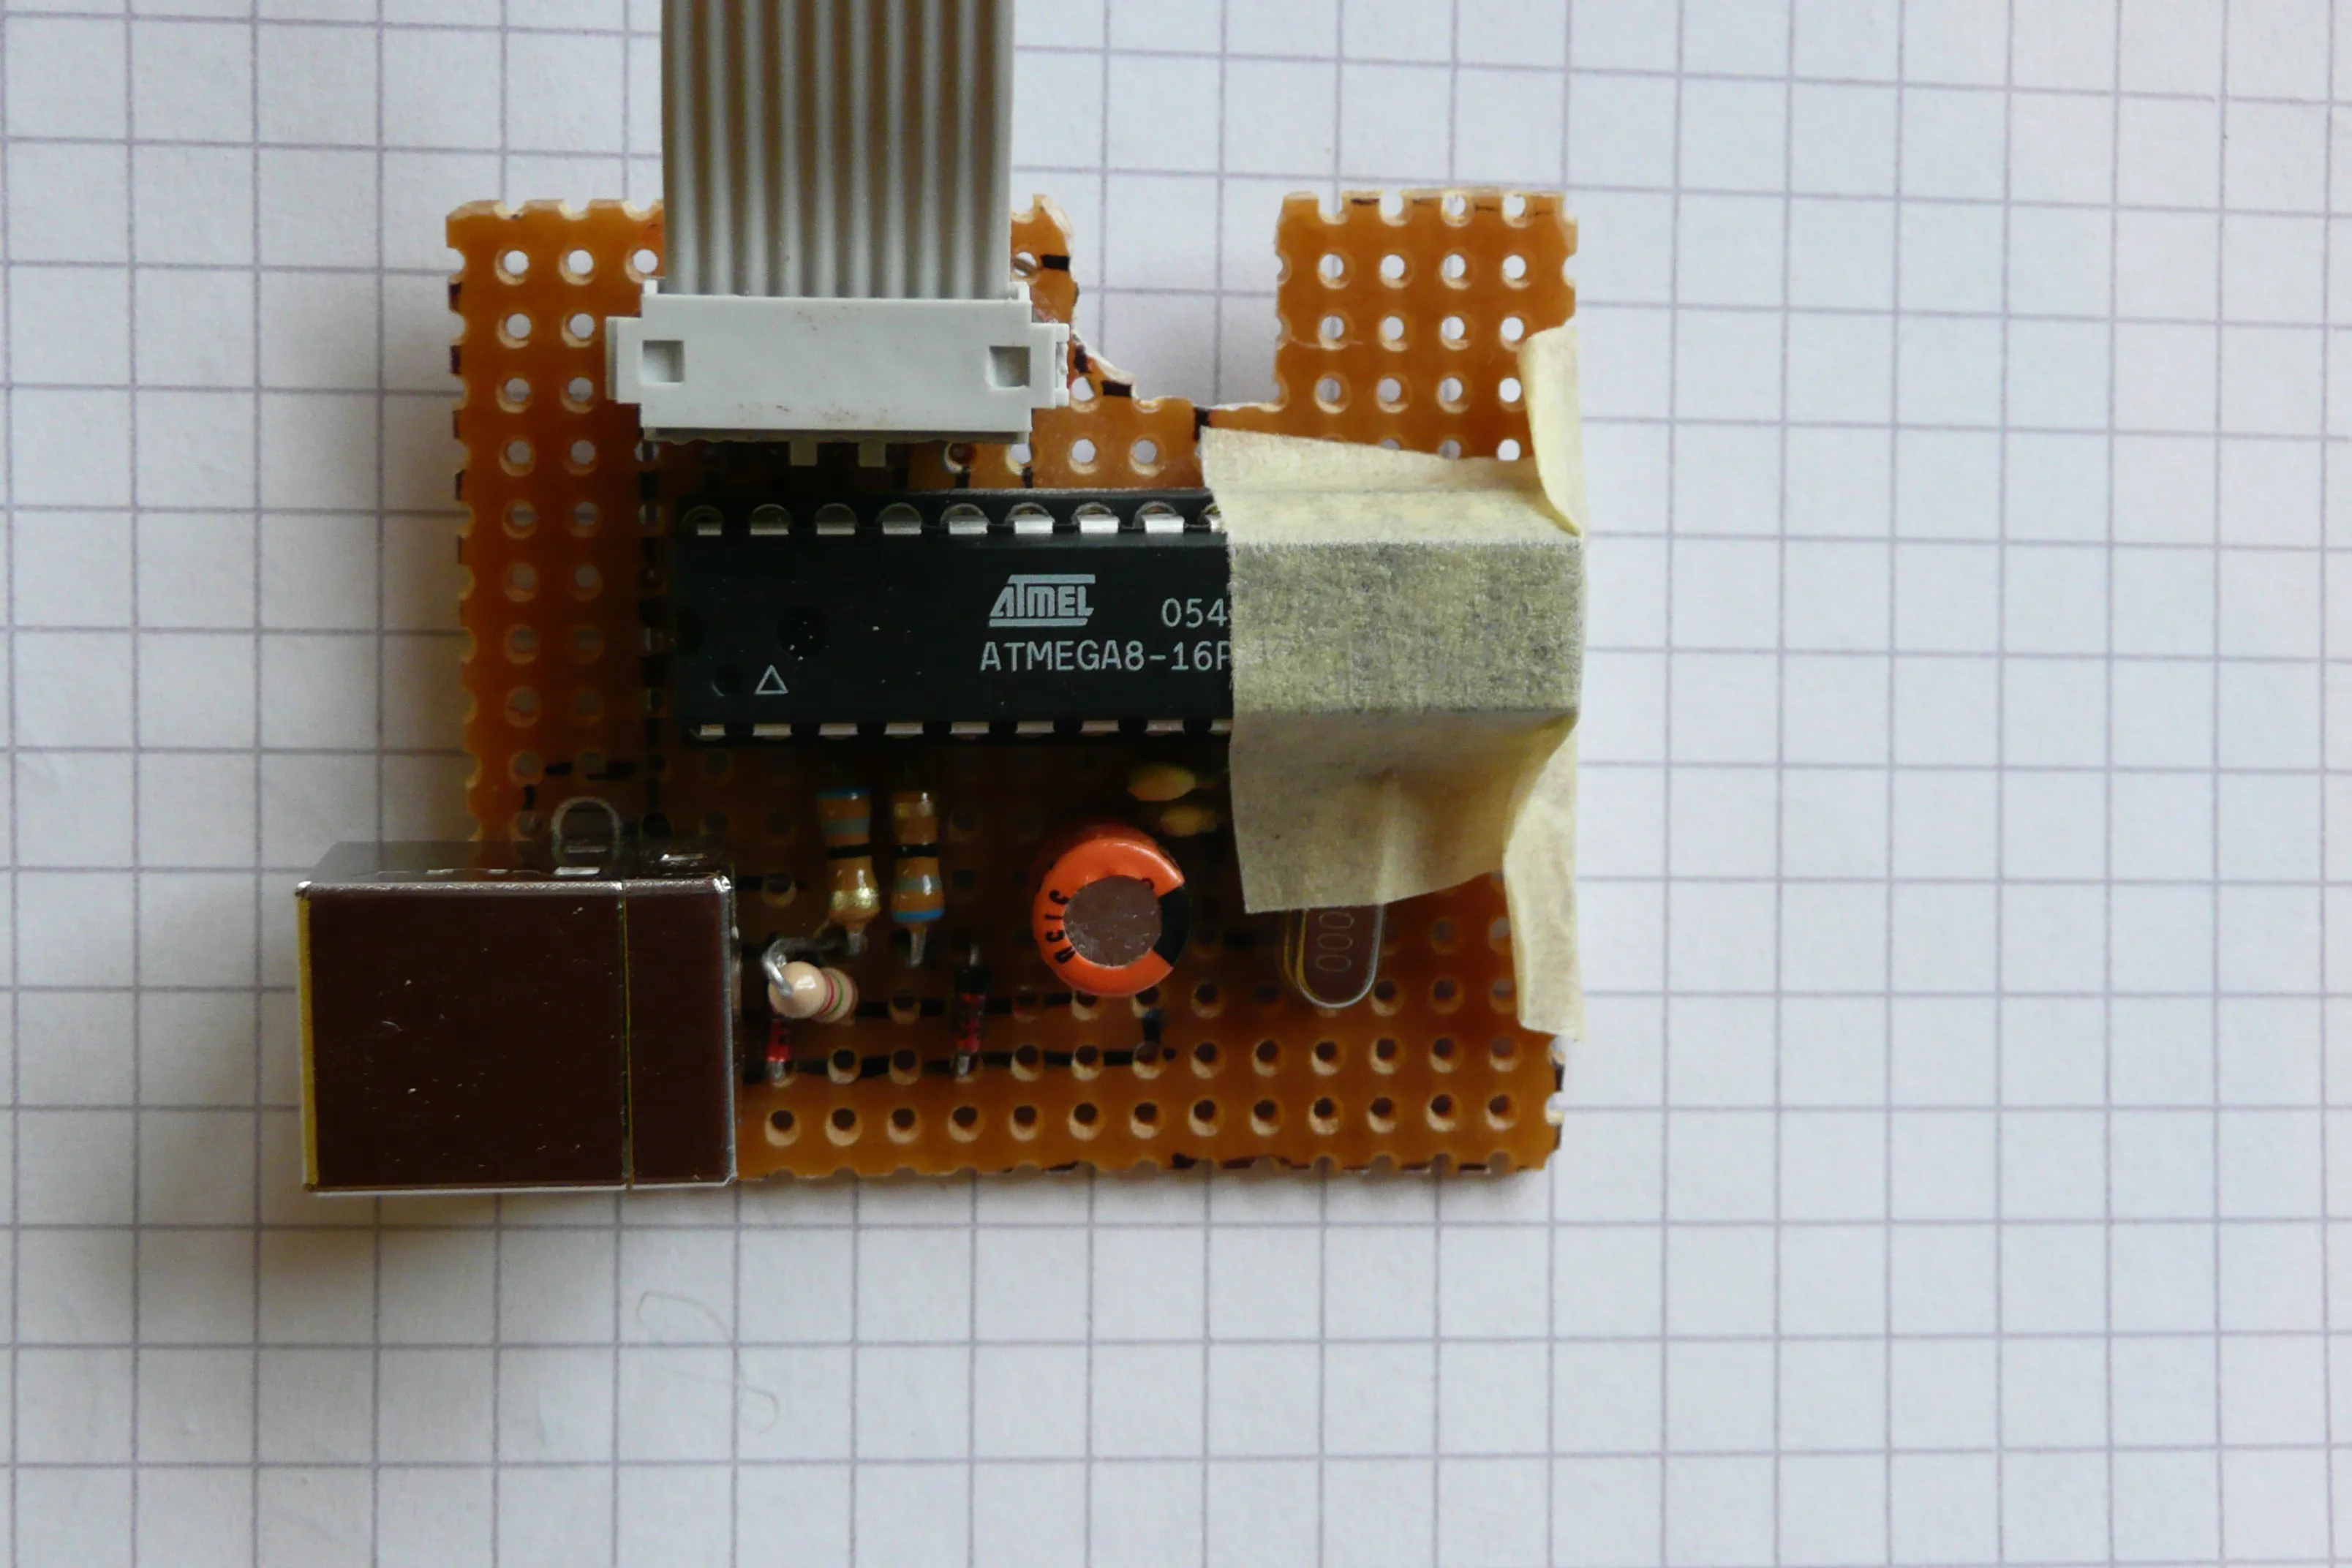
Als Abschlussprojekt und Vorbereitung auf meine Betreuertätigkeit für die Mikrocontroller-AG des MMI’s habe ich mich näher mit dem USB-Bus und dem darauf aufbauenden HID-Protokoll befasst.
HIDeKey ist ein kleiner USB-Stick, der als HID-Tastatur vom Rechner erkannt wird und beliebige Zeichenketten und Tastenkombinationen an den Host-Rechner senden kann.
Mein Ziel war es einen kleinen Hardware-Dongle zu entwickeln welcher Passwörter, TANs und Onetime-Tokens direkt an jeden beliebigen Rechner senden kann.
Meine Passwörter sind im verschlüsselten EEPROM des Mikrocontrollers gespeichert.
Beim Drücken des Tasters auf dem Stick, wird das Passwort eingegeben.
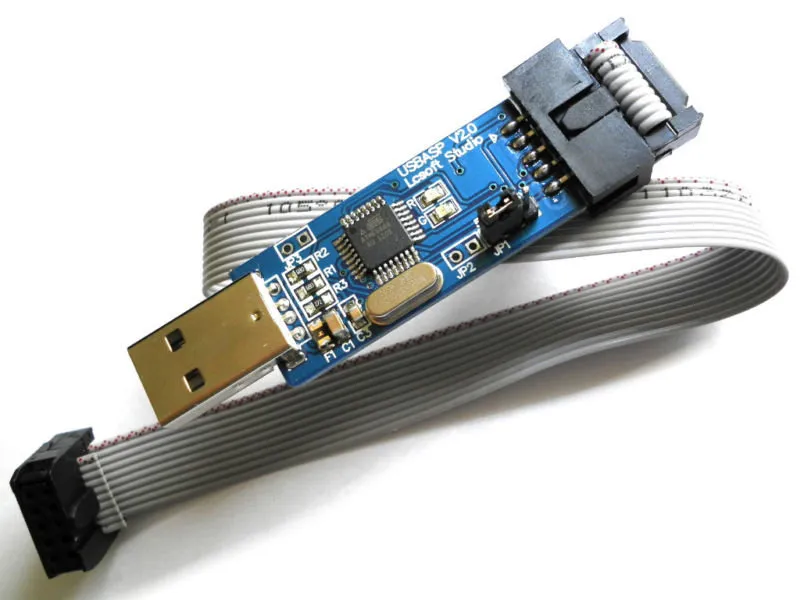
Als Hardware nutze ich die zuvor vorgestellten USBasp Programmieradapter aus China, deren Firmware ich durch eine eigene ersetzt habe.
Mit einem zusätzlichen Taster lässt sich so über ein kleines Menü zwischen 10 User-Passwort-Kombinationen wählen.
Neue Passwörter können mit einem kleinen Konsolen-Programm direkt über den Rechner einprogrammiert werden.
HIDeKey soll auch zur Generierung von One Time Passwords (OTP) genutzt werden können.
Da er sich wie eine gewöhnliche USB-Tastatur verhält, kann er auch unterwegs am Schlüsselbund in Internet-Cafés und Rechner-Pools genutzt werden.
Quelltext und Schaltpläne gibt es auf Codeberg: /stv0g/hidekey .
In meinem Wiki ist auch noch etwas Dokumentation gesammelt.
HIDeKey ist wie die meisten meiner Projekte als OpenSource veröffentlicht.
Ich freue mich über jede Verbesserung, Erweiterung oder andere Beiträge zu diesem Projekt 😊.
Campus Office ist unser Studienplaner an der RWTH.
Über ihn stellen wir uns unseren Stundenplan zusammen und melden uns zu Prüfungen an.
Campus Office besitzt auch einen einfachen Kalender, der alle Termine des aktuellen Semesters individuell für jeden Studenten zusammenfasst.
Glücklicherweise kann dieser Kalender auch im iCalendar-Format exportiert werden.
Leider ist jedoch keine automatische Synchronisation mit Google, Outlook & co möglich, da sich jeder Student zuvor mit seinen Daten angemeldet haben muss.
Um dieses Problem zu umgehen habe ich ein kleines Skript geschrieben, welches als Proxy fungiert und diese Anmeldung übernimmt.
Folgende URL kann beispielsweise im Google-Kalender abonniert werden:
So habe ich nun alle meine Uni-Vorlesungen, Übungen und Klausuren in meinem Android-Smartphone ohne mich jemals wieder um die Synchronisierung kümmern zu müssen.
Für gerade mal 2,95 € bieten chinesische Händler einen Klon des In-System-Programmers USBasp von Thomas Fischl auf eBay an.
Das Board wurde ursprünglich zum Programmieren von AVR Mikrocontrollern entwickelt und basiert selbst auf einem ATmega8 Controller.
Das Board bietet folgende Features, die auch für andere Zwecke genutzt werden können:
Dieses Angebot ist preislich unschlagbar.
Es gibt kein anderes megaAVR Board, das inklusive Versandkosten für unter 3 € zu haben ist.
Auch ein Selbstbau mit den günstigsten Bauteilen ist bei kleineren Stückzahlen (< 50) weit teurer.
Fertige Leerplatinen sind aber auch über eBay verfügbar.
Der günstige Preis hat aber auch einen Nachteil: Mitunter muss man einen Monat warten, bis der Stick im eigenen Briefkasten liegt.
Dafür gibt es in der Regel keine Probleme beim Zoll 😉.
Auch im dritten Semester hatten wir wieder eine Grundlagenvorlesung Informatik.
Im Vergleich zu letztem Jahr, war diese leider weniger interessant:
balancierte Bäume
konvexe Optimierungsprobleme
Multi-Prozessorsysteme
OSI-Layer
Glücklicherweise handelt es sich um eine Kofferklausur.
Das heißt man darf außer elektronischen Geräten so ziemlich alles mit in die Prüfung nehmen 😉.
Aber lasst euch nicht davon täuschen: einfacher wird es dadurch leider nicht.
Die Klausur war so überladen, dass man zum Nachlesen im Skript praktisch gar keine Zeit hatte.
Da war es ganz praktisch ein Inhaltsverzeichnis des Skriptes und eine knackige Zusammenfassung dabei zu haben.
Diese möchte ich hier mit euch teilen:
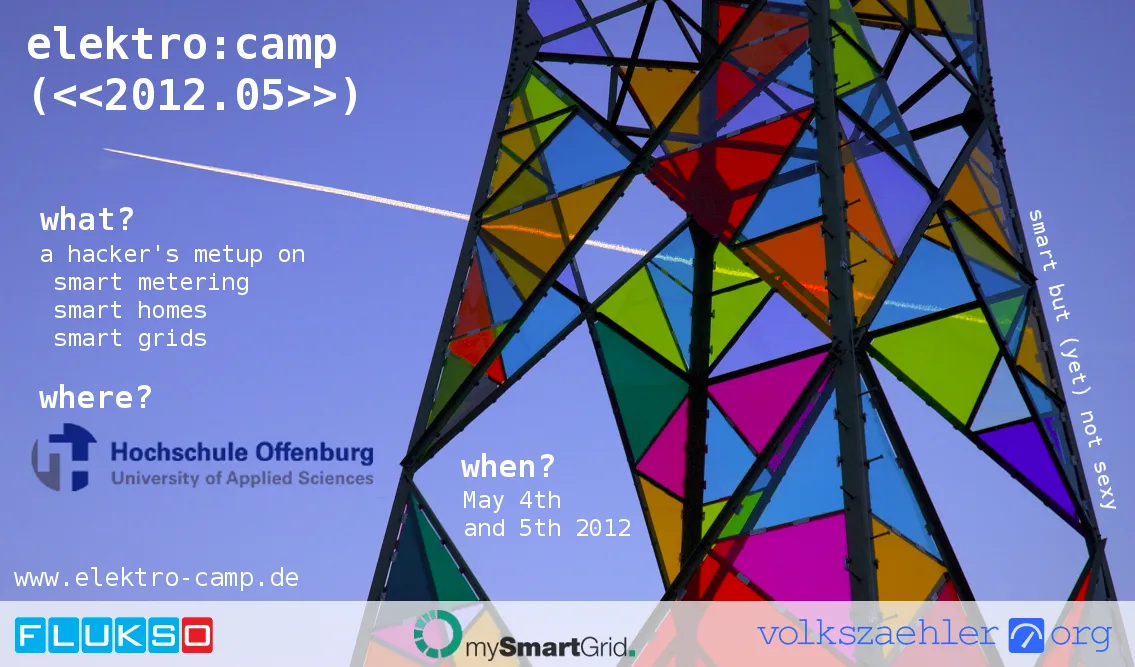
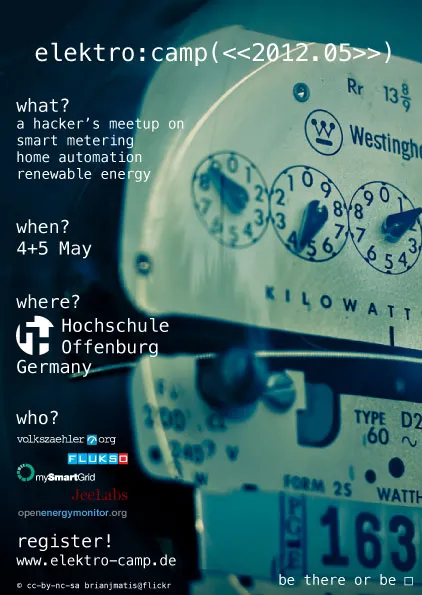
Mittlerweile zum vierten Mal seit zwei Jahren findet das elektro:camp nun bereits statt.
Diesmal wird es von @justinotherguy (volkszaehler.org) organisiert und findet am 4. und 5. Mai in der Hochschule Offenburg statt.
Thematisch bleibt sich das 2-tägige Barcamp treu.
Geplant sind neben den offenen Vorträgen zu intelligenten Stromnetzen & Häusern auch Workshops und Zeit zum Basteln und Diskutieren.
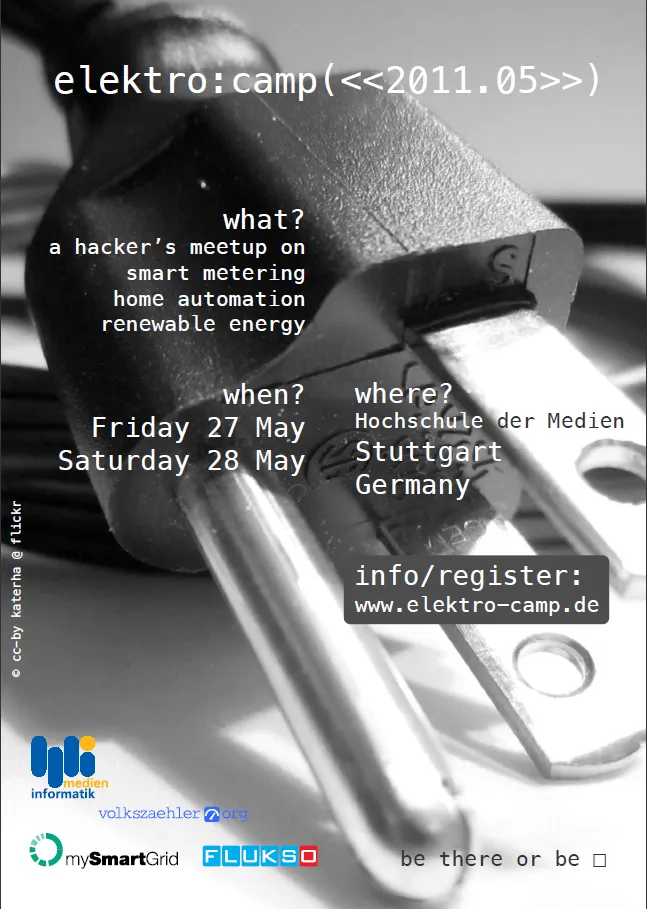
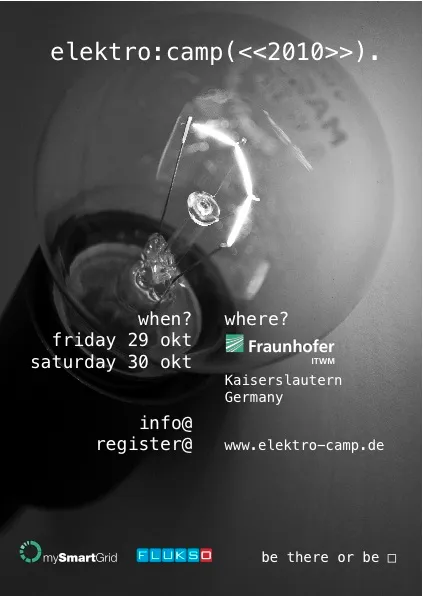
Offizieller Flyer.
Neben dem volkszaehler.org Projekt gesellen sich nun auch erstmals Gäste eines weiteren Open-Source Smart-Metering Projekts.
Wir freuen uns auf OpenEnergyMonitor.
So, nun geht es auch hier wieder weiter!
Nach 7 Monaten Pause neigt sich auch mein drittes Semester an der RWTH nun dem Ende entgegen und ich möchte hier wieder etwas regelmäßiger schreiben!
Dass es hier lange keine Beiträge gab, sollte nicht darauf schließen lassen, dass ich nichts zu berichten hatte 😉.
In den vergangenen Monaten hat sich viel getan.
Ich habe unter anderem an vzlogger und HIDeKey gewerkelt.
Ab diesem Semester arbeite ich beim Institut für Mensch-Maschine-Interaktion.
Dort betreue ich die Mikrocontroller AG und das Praktikum Informatik 1.
Den Blog habe ich mal etwas aufgeräumt und nutze nun Amazon Cloudfront als CDN.
In den nächsten Beiträgen möchte ich euch Erlang, eine funktionale Sprache zur parallelen Programmierung, vorstellen und über meine ersten Erfahrungen mit digitalem Schaltungsentwurf auf FPGA’s berichten.
Heute habe ich meine 27 git-Repositories auf Github (/stv0g ) umgezogen.
Ich habe mich entschlossen sie so einer größeren Öffentlichkeit zugänglich zu machen und als zusätzliches Backup auf meinem Server zu spiegeln.
Seit kurzem hat github seine neue API v3 veröffentlicht.
Auf dieser aufbauend habe ich ein PHP Script geschrieben, welches meine existierenden Repositories bei github anlegt und migriert.
Das Script in das Wurzelverzeichnis aller Repositories ablegen
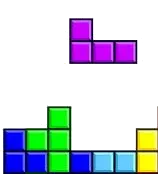
Neben der Informatik Vorlesung besuchte ich dieses Semester die Mikrocontroller AG.
In dieser freiwilligen Veranstaltung lernten wir den aus der Vorlesung bekannten Mikrocontroller, ATMega zu benutzen.
Zusammen mit meinen Gruppenmitgliedern Annika, Maiwand & Christian bauten wir ein 8x16 LED-Dot Matrix Display auf dem wir Tetris spielen konnten:
Ich sitze im Zug nach Hause.
Gerade komme ich von der letzten Vorlesung des zweiten Semesters: Informatik.
Eigentlich bin ich auf dem Weg in die Semester-”Ferien”, ständen da nicht für den nächsten Monat noch 4 Klausuren in meinem Kalender 😉.
Informatik, Grundlagen des Digitalrechners.
Klingt eigentlich recht trocken.
Trotzdem ist es klar mein Favorit unter den Fächern dieses Semesters.
Als Ergänzung zur Vorlesung richtete unser Professor einen kleinen Wettbewerb aus.
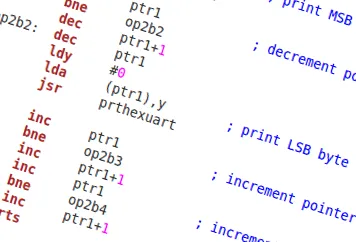
Mein Beitrag zum Students Enlightenment Award ist ein Compiler Frontend für den GNU Compiler der Atmel AVRs.
Teil der Vorlesung war die Einführung des Mikrocontrollers ATMega8 von Atmel und dessen Programmierung mit Assembler.
Dabei lernten wir zuerst die schaltungstechnischen Grundlagen und die Minimierung von Schaltnetzen.
Anschließend sind wir auf den Aufbau der zentralen Recheneinheit eingegangen (Steuerwerk, ALU).
transcode kompiliert & assembliert ANSI C und Assembler in Maschinencode und umgekehrt.
Dabei wird mit Hilfe von Debugging Informationen ein Bezug zwischen Zeilen im C-Code und den Mnemonics hergestellt.
Durch Auswählen von Zeilen werden Bezüge direkt durch Hervorhebungen dargestellt.
Für die Darstellung des Maschinencodes lässt sich zwischen binär, dezimal & hexadezimaler Form wählen.
Nachdem wir uns vergangenen Oktober gemeinsam beim Fraunhofer ITWM in Kaiserslautern getroffen haben, geht es dieses Jahr nach Stuttgart in die Hochschule der Medien:
Freitag 27. + 28. Mai 2011, Hochschule der Medien, Stuttgart.
Zwei Tage lang treffen sich Entwickler/Hacker & Interessierte um über
Smart Metering
Home Automation
Renewable Energy
Home Displays & User Interfaces
zu diskutieren und in Form eines Barcamps kleine Vorträge zu halten.
Ursprünglich wurde geplant das Camp jedes Jahr zu veranstalten.
Mit dem Treffen im Mai läuft es vielleicht sogar bald auf einen halbjährigen Turnus hinaus 😉.
Aus aktuellem Anlass wird es hoffentlich auch eine Diskussion über Geigerzähler und den Aufbau eines unabhängigen Sensornetzwerkes geben.
Über die Hälfte der Studierenden hat in ihrer Familie einen akademischen Hintergrund.
Wir denken, dass auch sozial benachteiligte Schüler das Recht haben, ihre Potentiale zu entfalten und Chancen zu nutzen!
Dabei wollen wir Hauptschüler durch individuelle Coaching Beziehungen mit Studenten unterstützen.
Unsere Vision ist eine Gesellschaft, in der
Bildungsgerechtigkeit,
soziale Mobilität und
Integration
Realität sind.
Zusammen mit 9 weiteren Gründungsmitgliedern haben wir dazu den ROCK YOUR LIFE! Standort Aachen gegründet.
Wir sind eingetragener Verein und Teil des Deutschland weiten Social Franchising Netzwerkes.
Wenn du Lust hast dich sozial zu engagieren, freuen wir uns dich bei einem unserer wöchentlichen Treffen am Mittwoch kennen zu lernen (aachen@rockyourlife.de).
Wir suchen noch begeisterte Mitstreiter für die Organisation unseres Standortes.
Werde Teil der Bewegung und sei einer der Ersten in Aachen.
Wir freuen uns auf dich 😉!
Willst du nur auf dem Laufenden bleiben, kannst du dich gerne in unseren Newsletter eintragen.
MMET: Das steht für Mathematische Methoden der Elektrotechnik und ist die erste Klausur meines Studiums.
Glücklicherweise dürfen wir ganz offiziell einen “Spicker” benutzen.
Ein DIN A4 Blatt beidseitig.
Gedruckt oder handgeschrieben.
Es geht hauptsächlich um Signale, Systeme, FIR-Filter und Fourier Transformationen.
Ich habe mir für die Klausur mal alle Definitionen mit LaTeX zusammengetragen.
Das Formelblatt gibt es auf uni.ist.hirnlos.net.
Morgen ist die Klausur.
Vielleicht können ja die folgenden Jahrgänge etwas damit anfangen 😉.
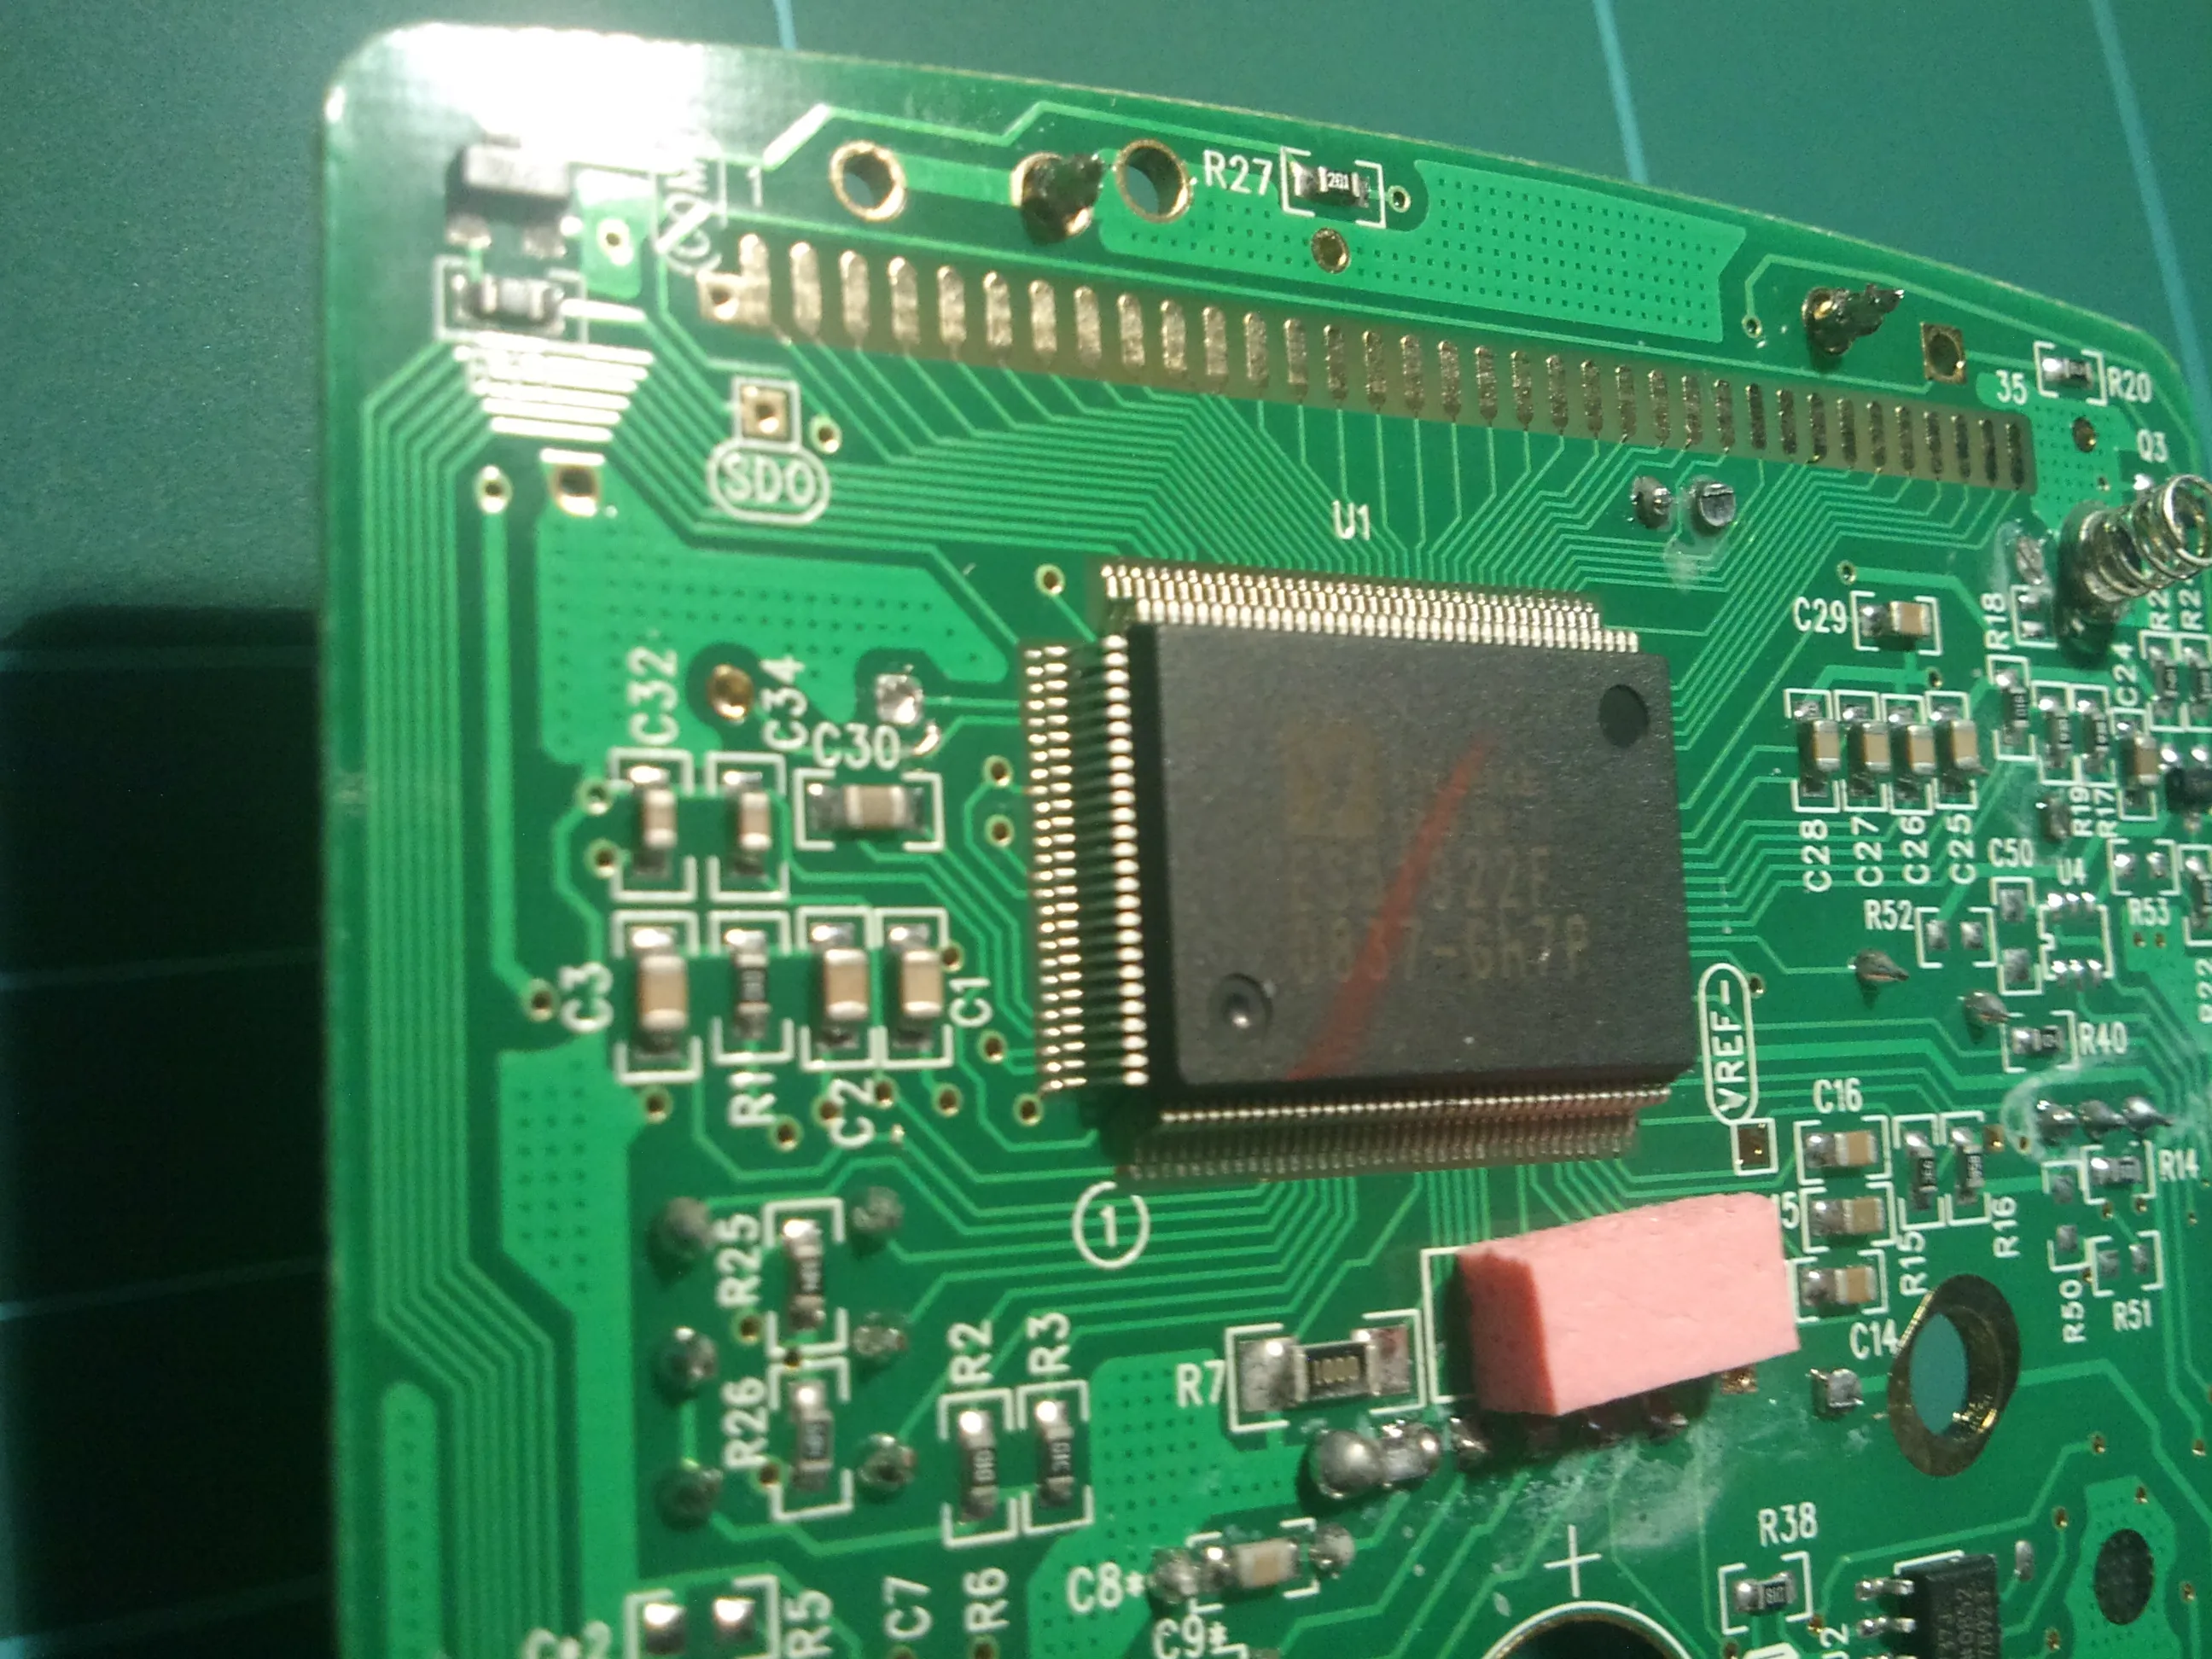
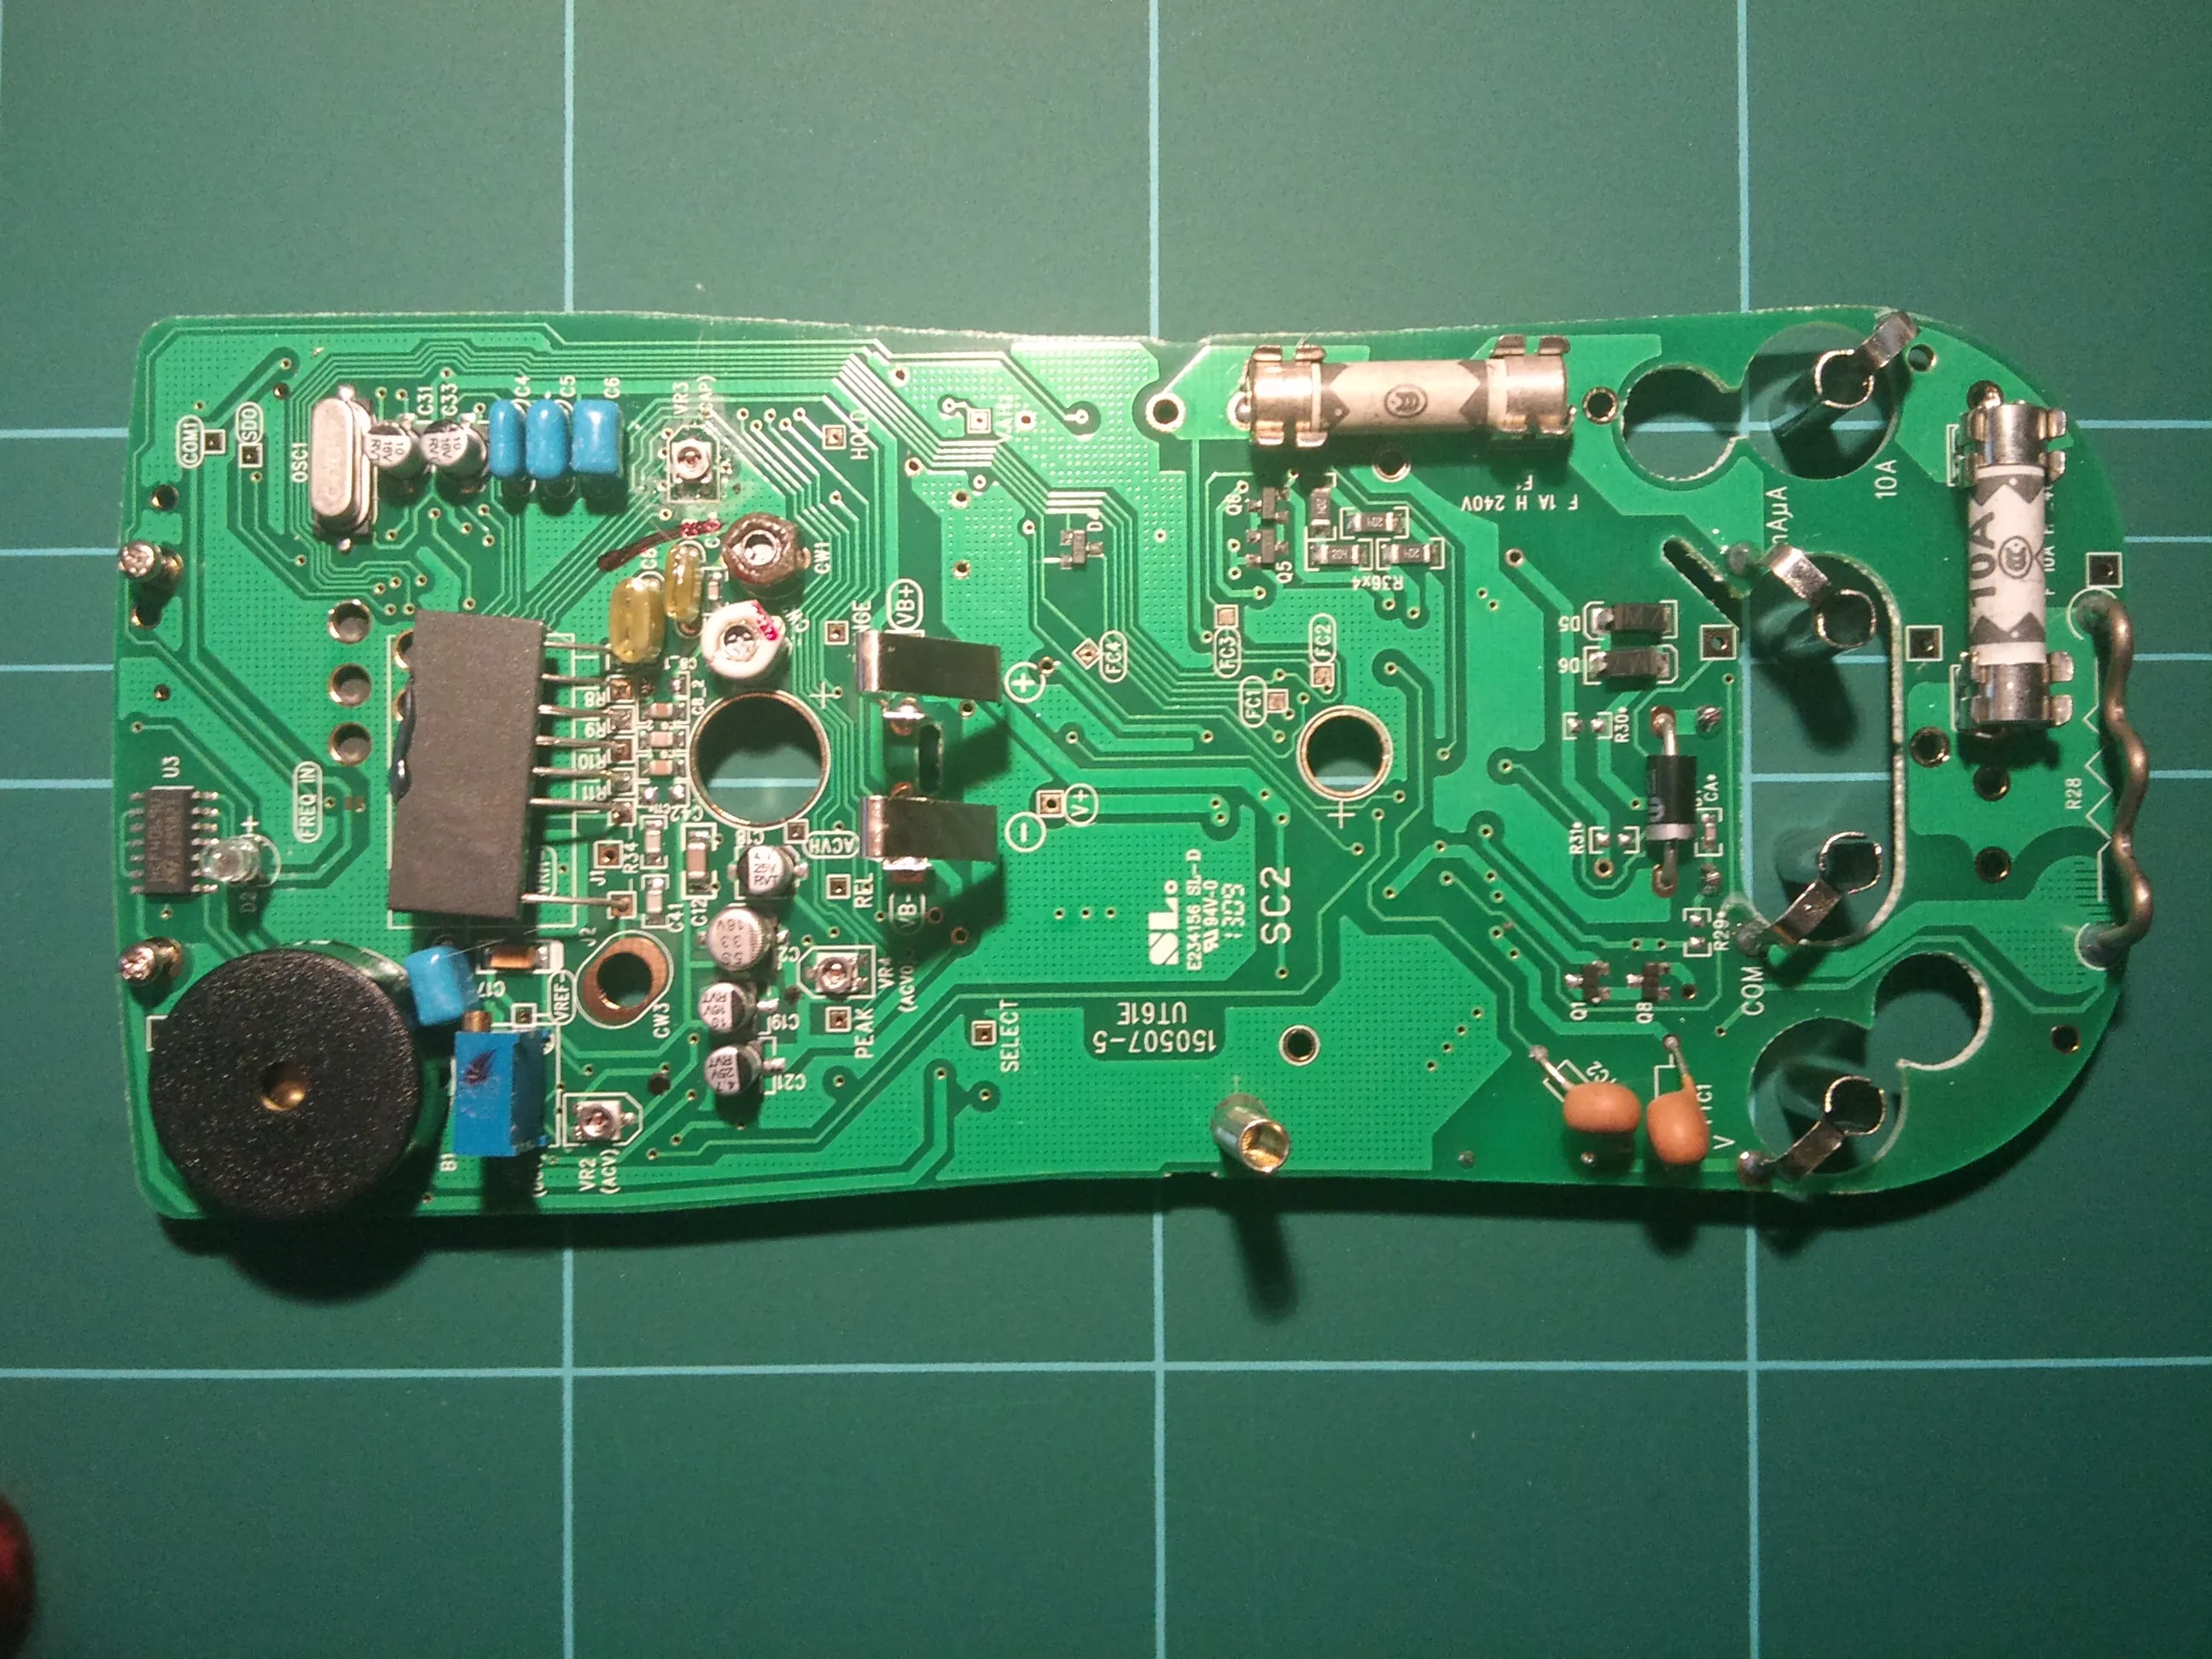
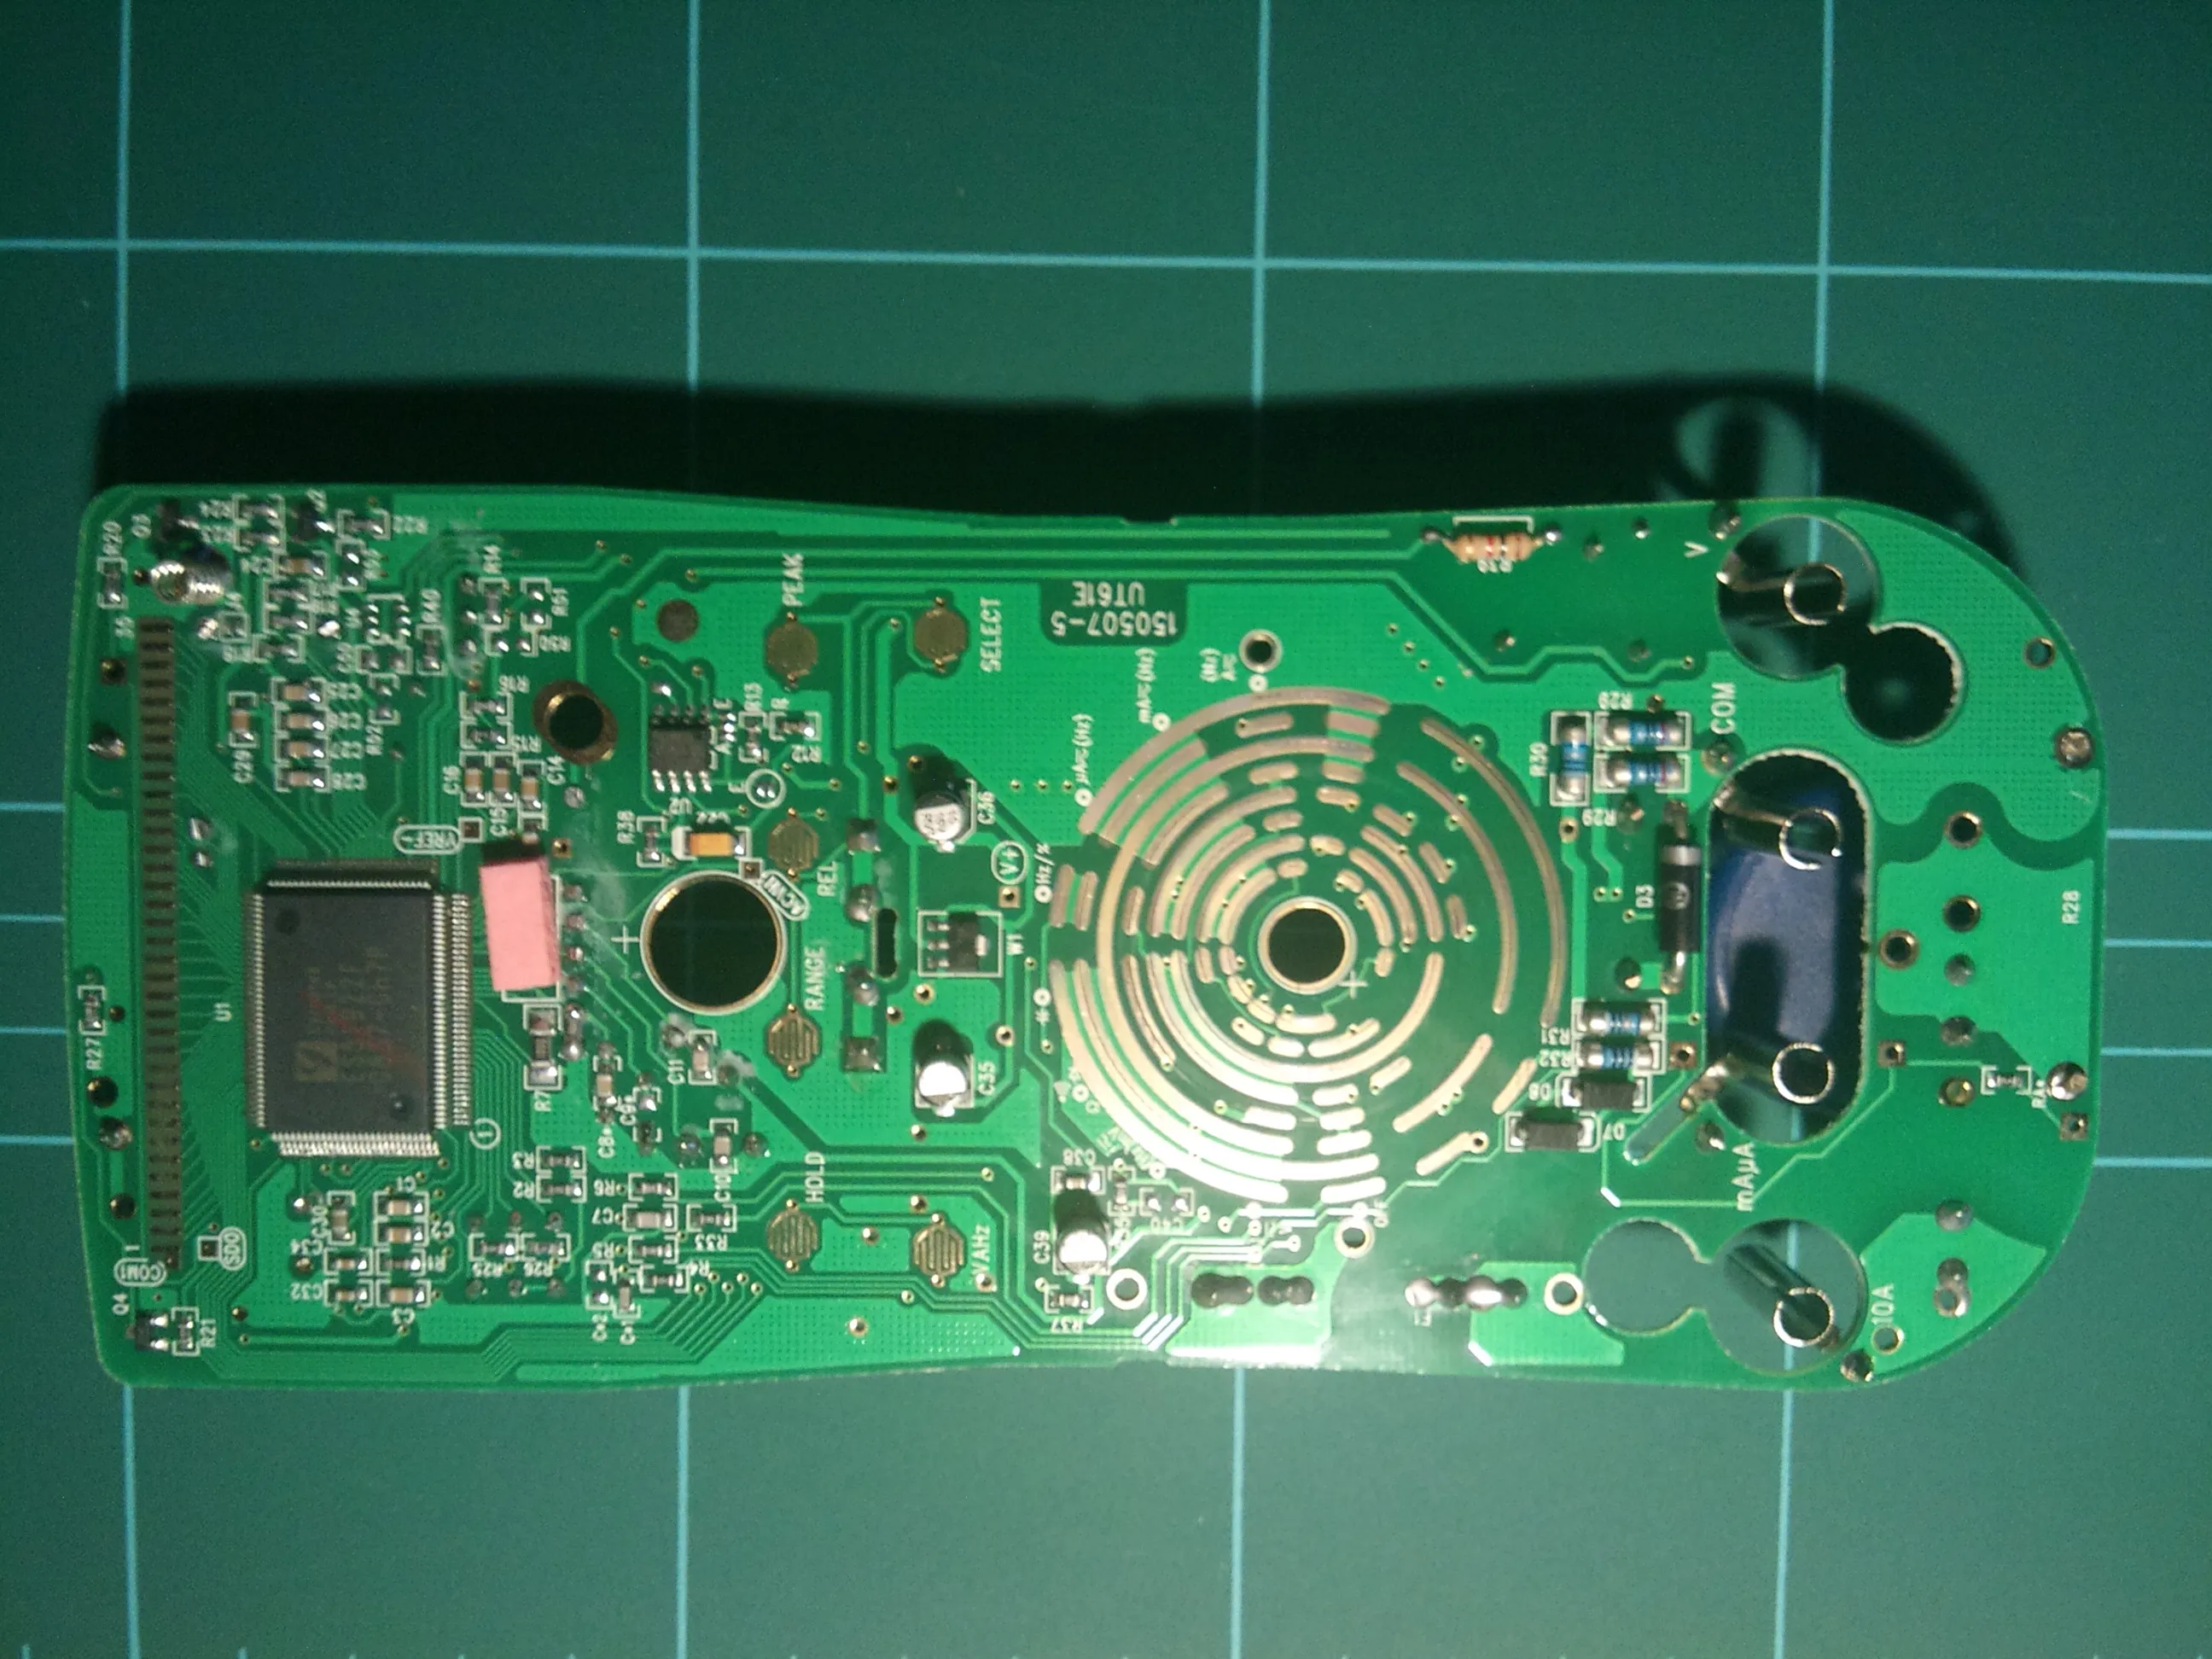
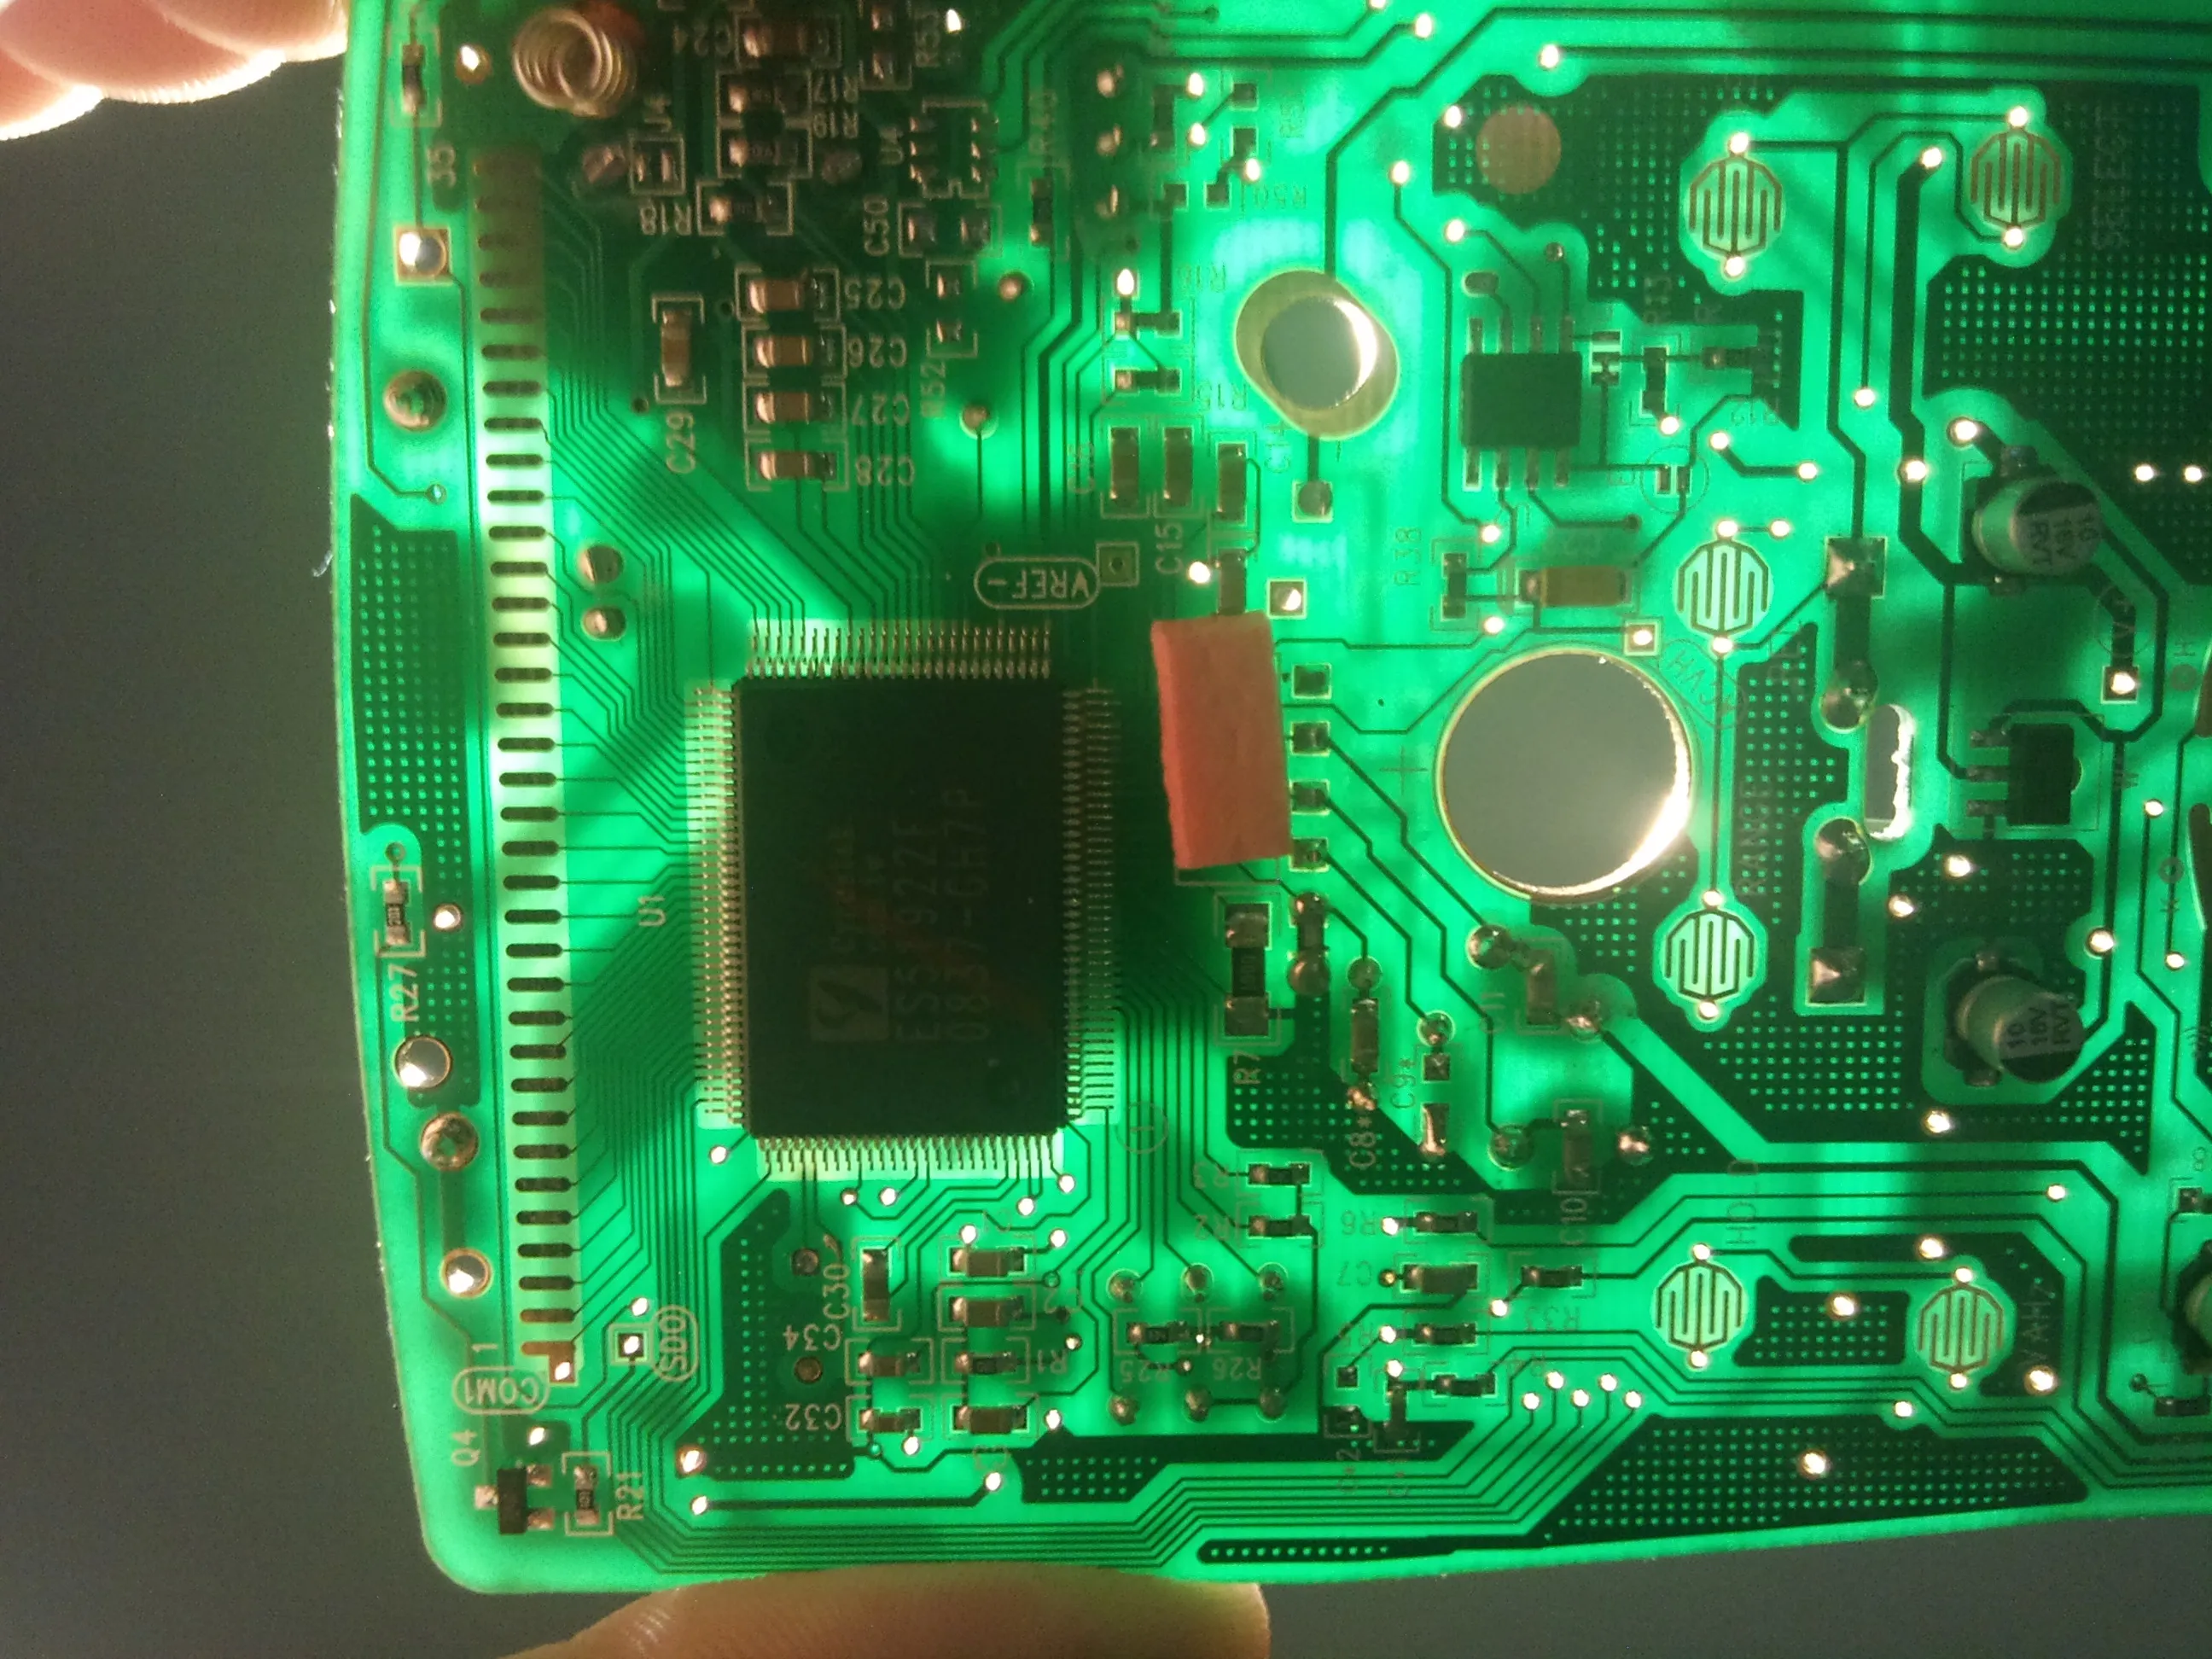
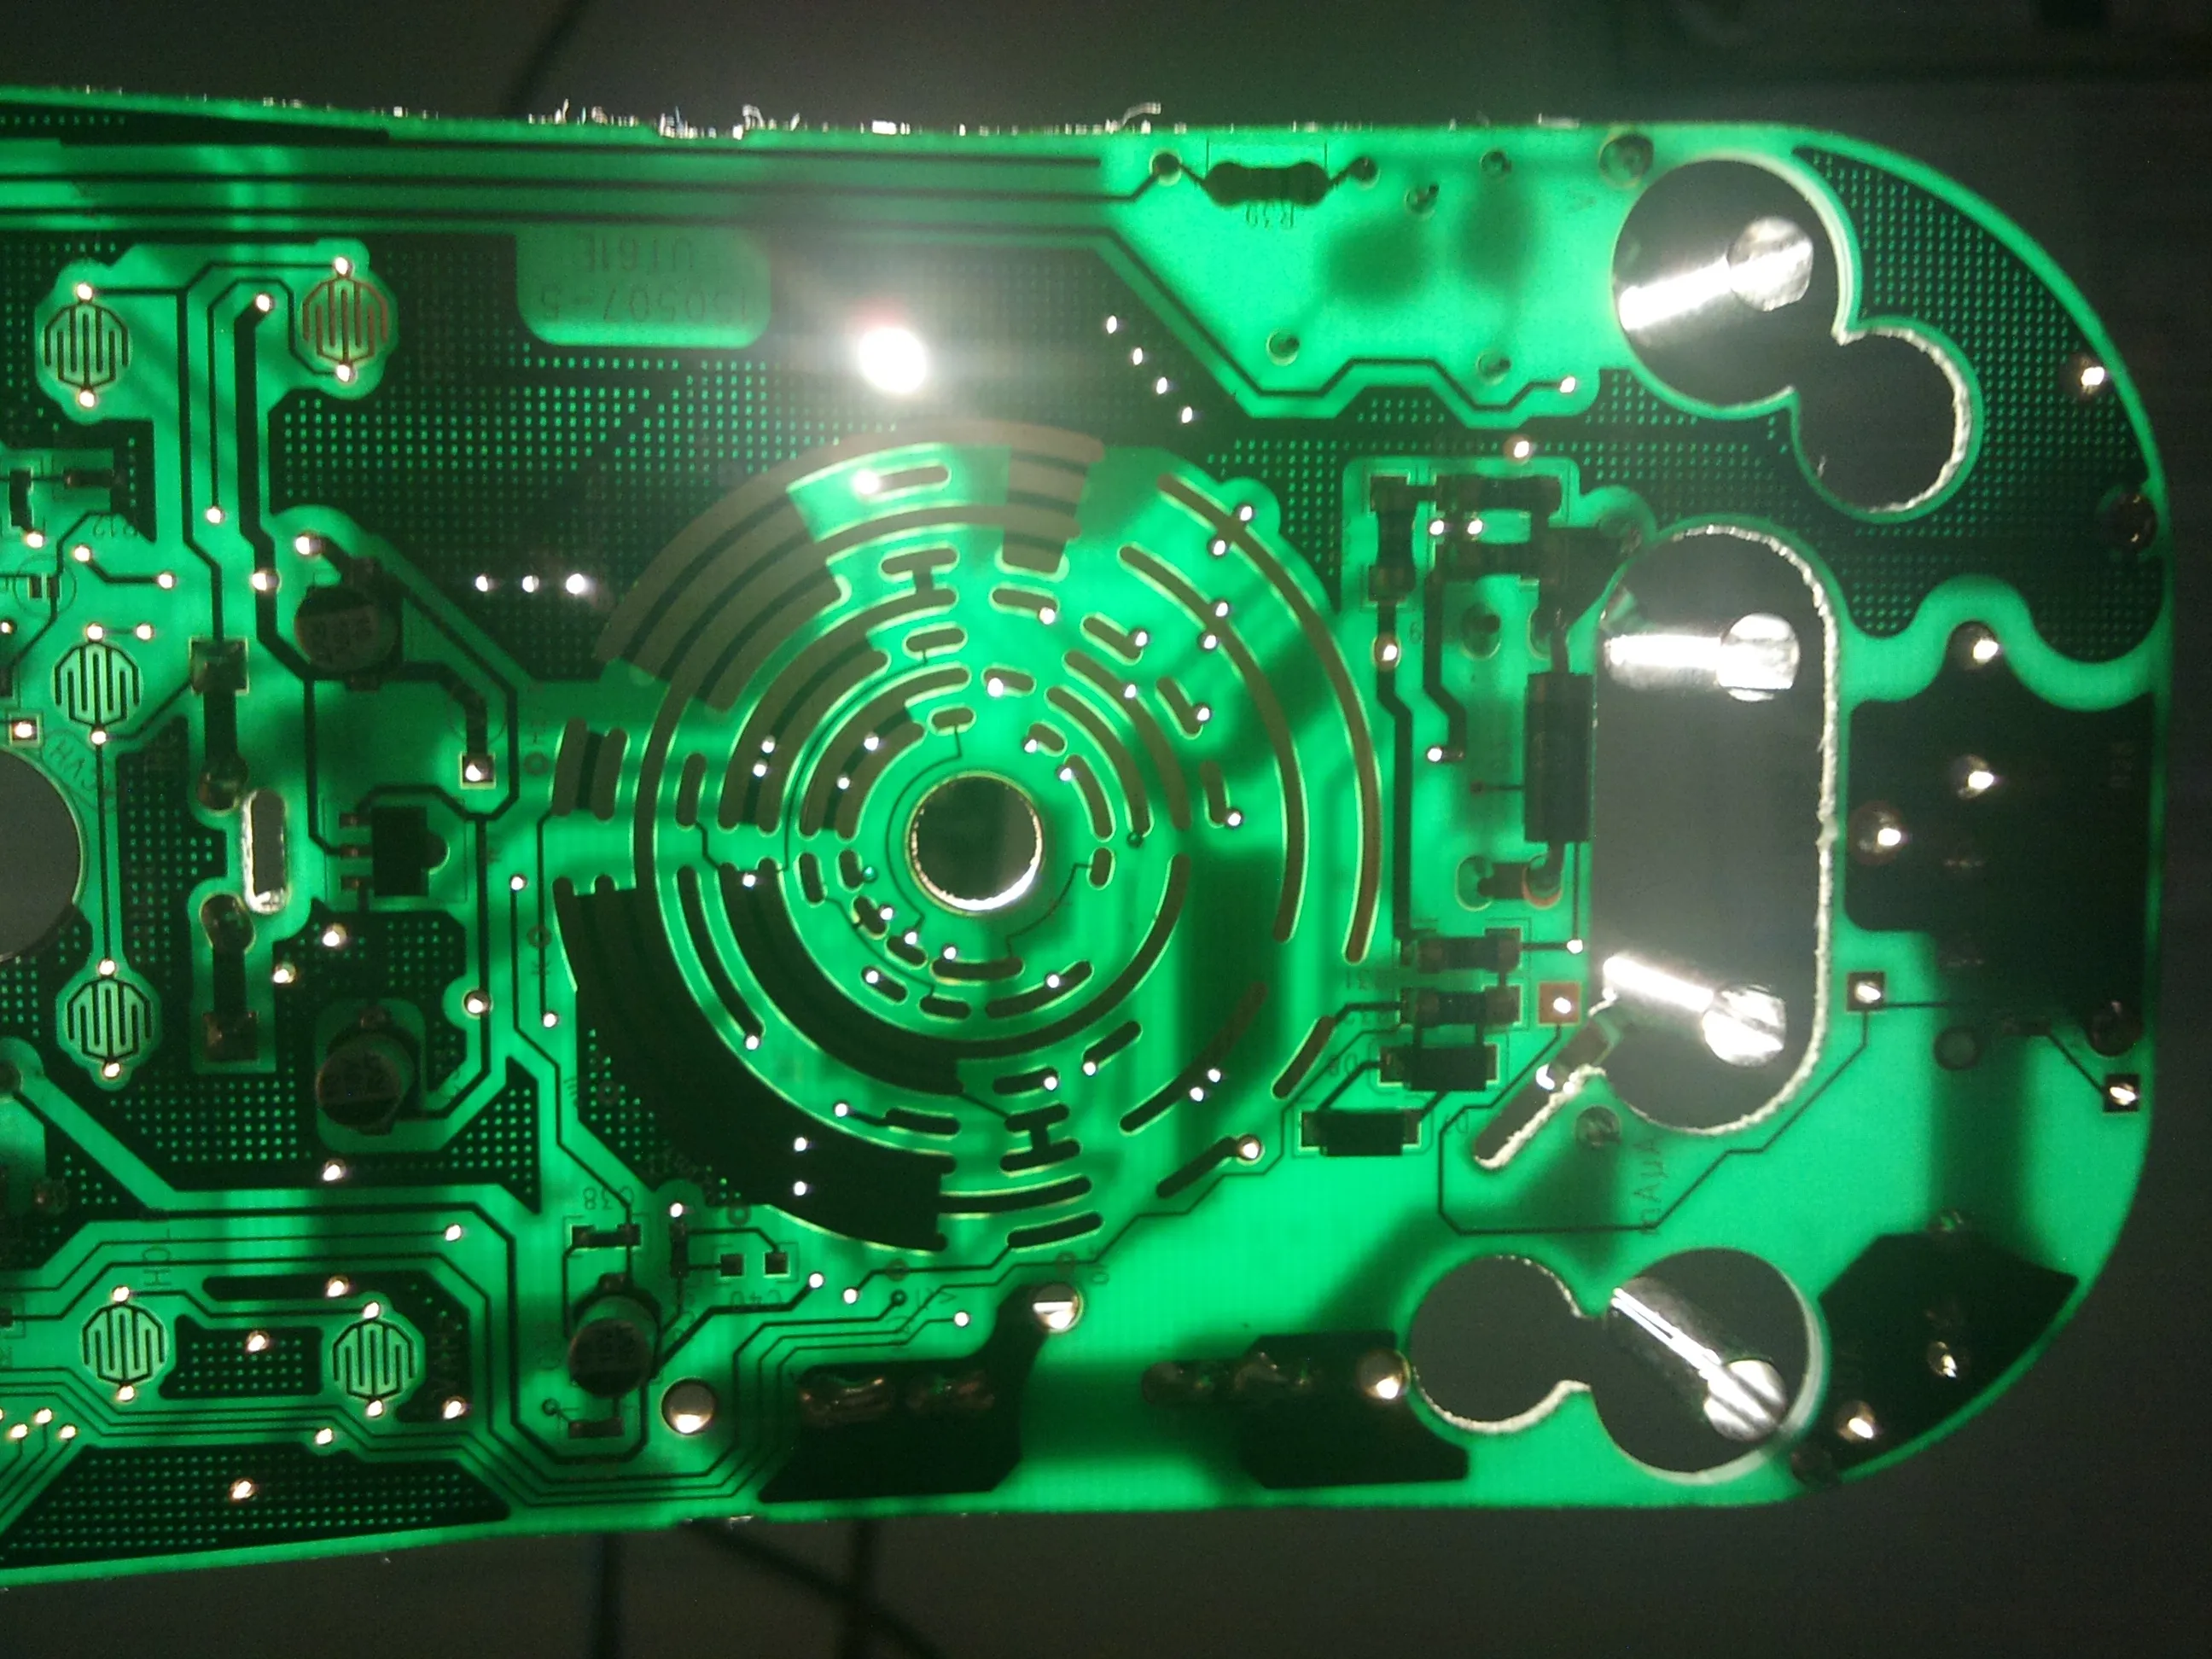
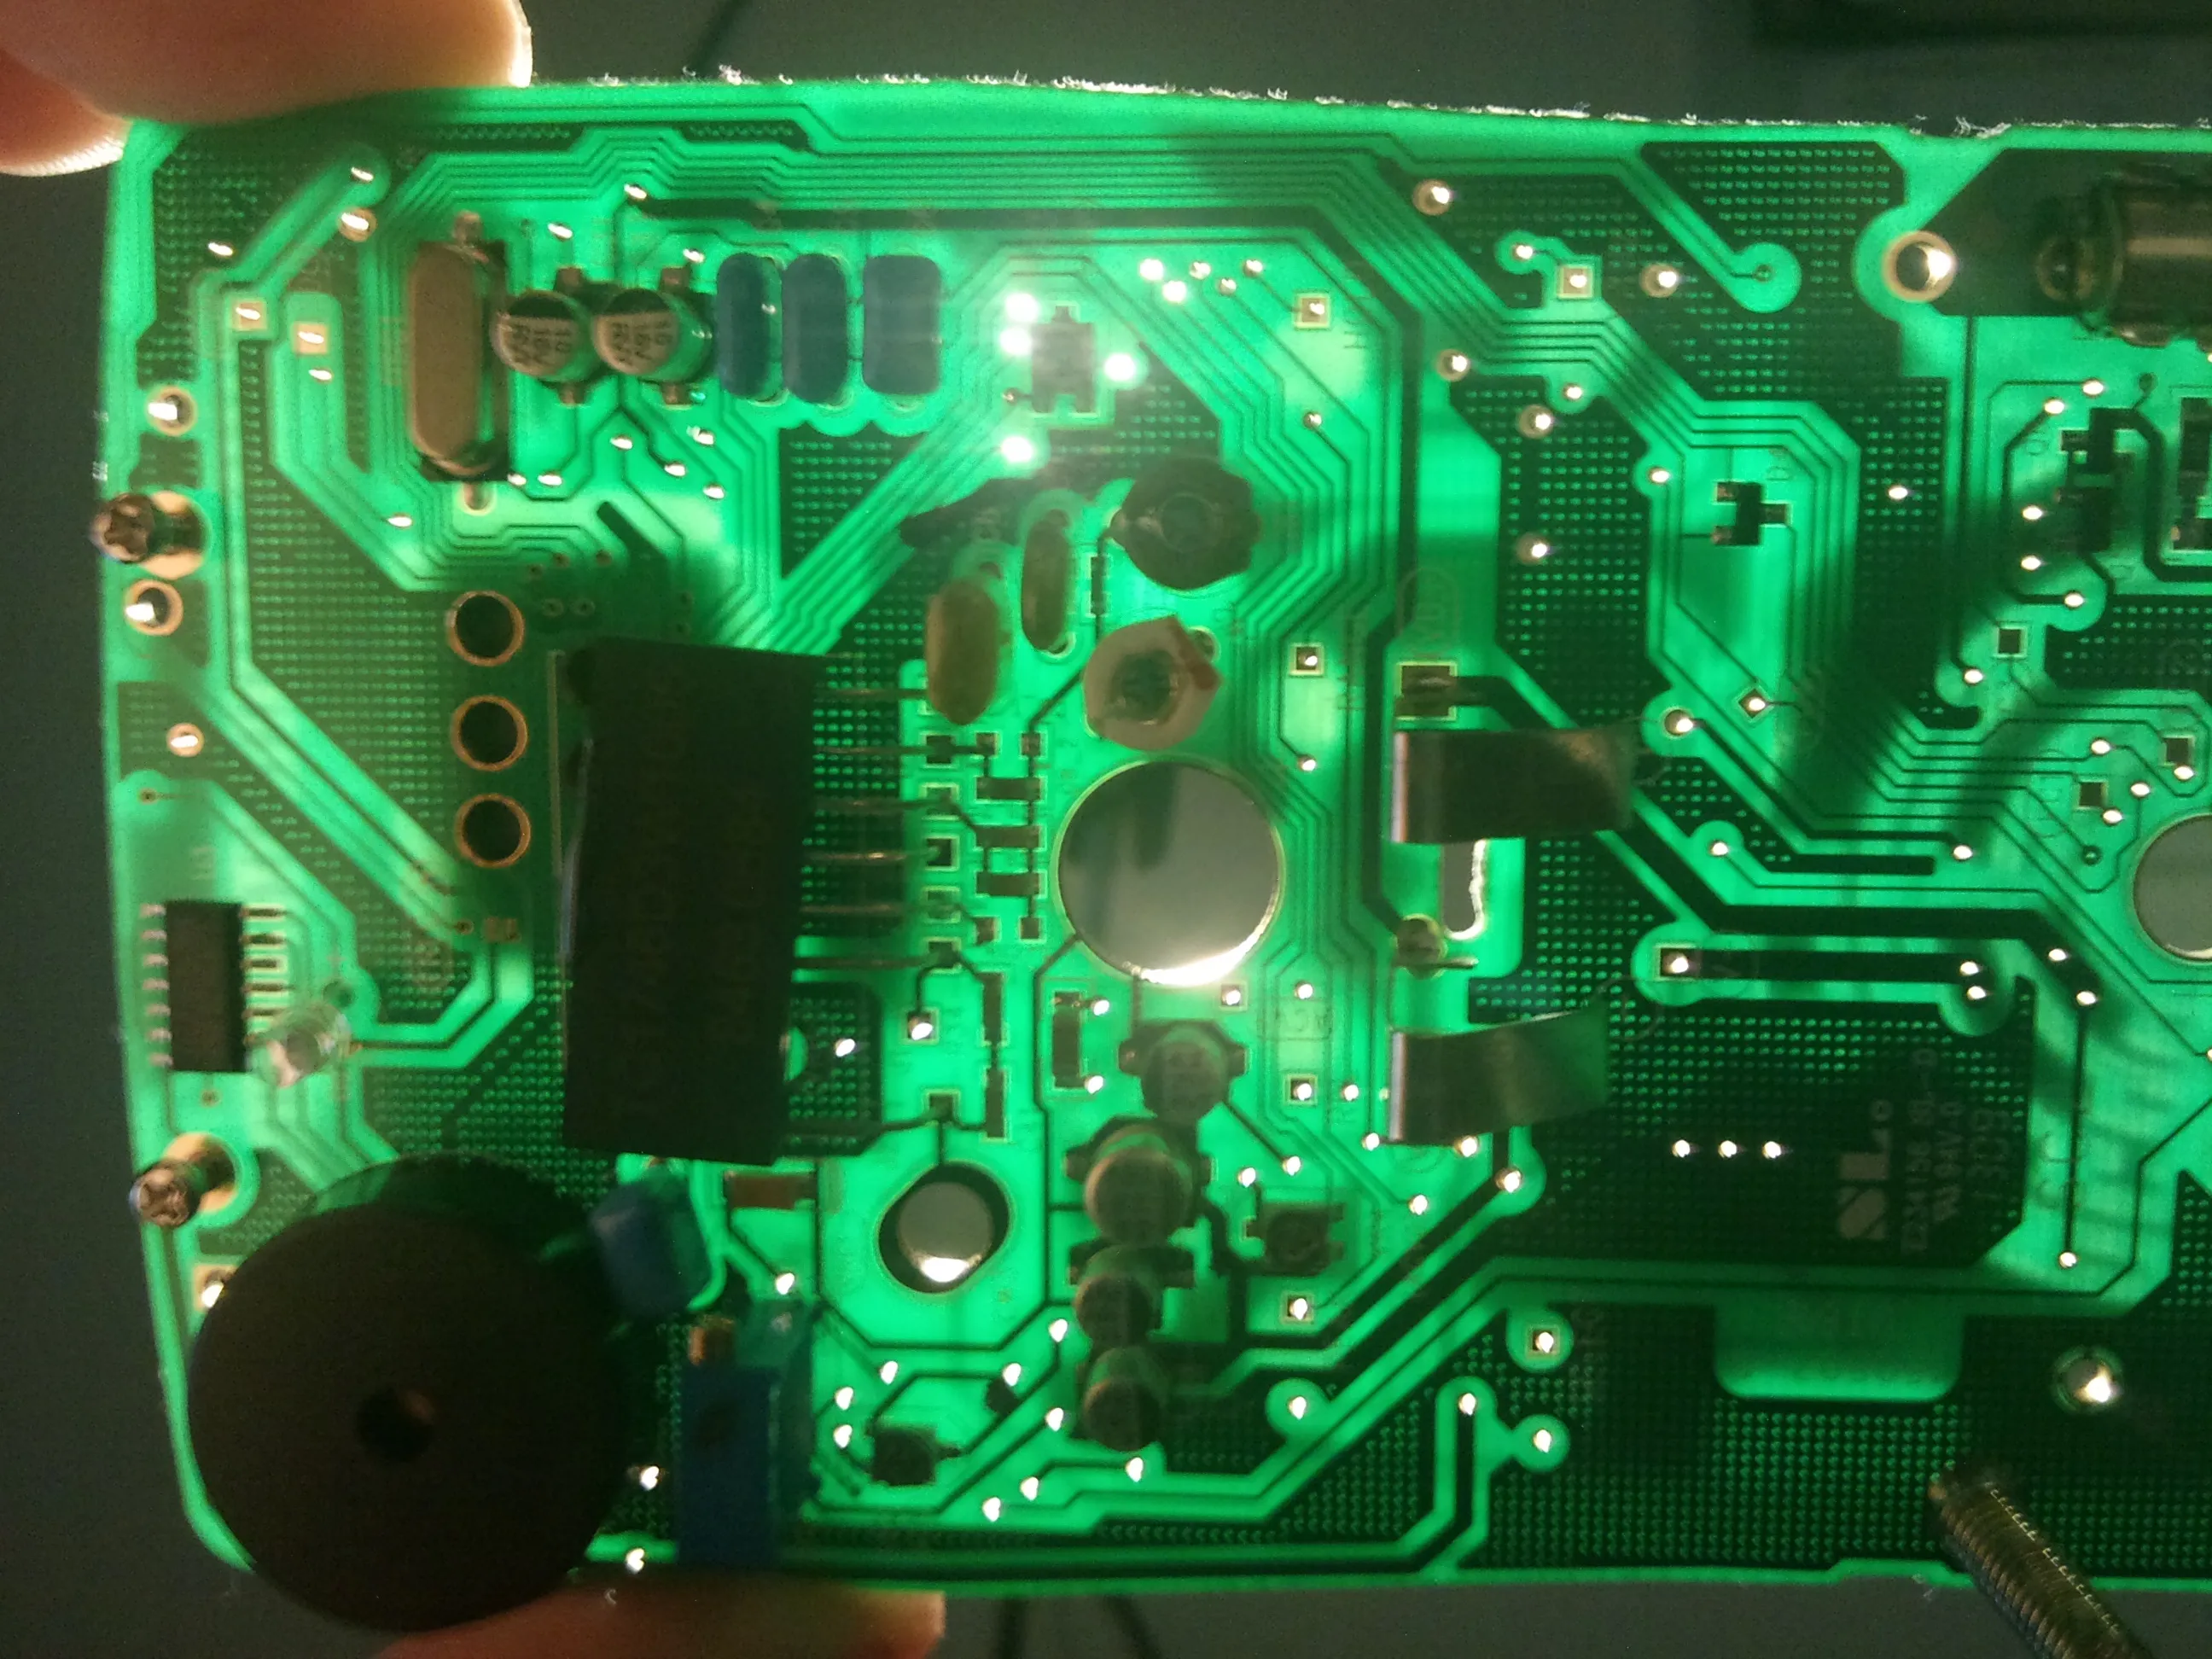
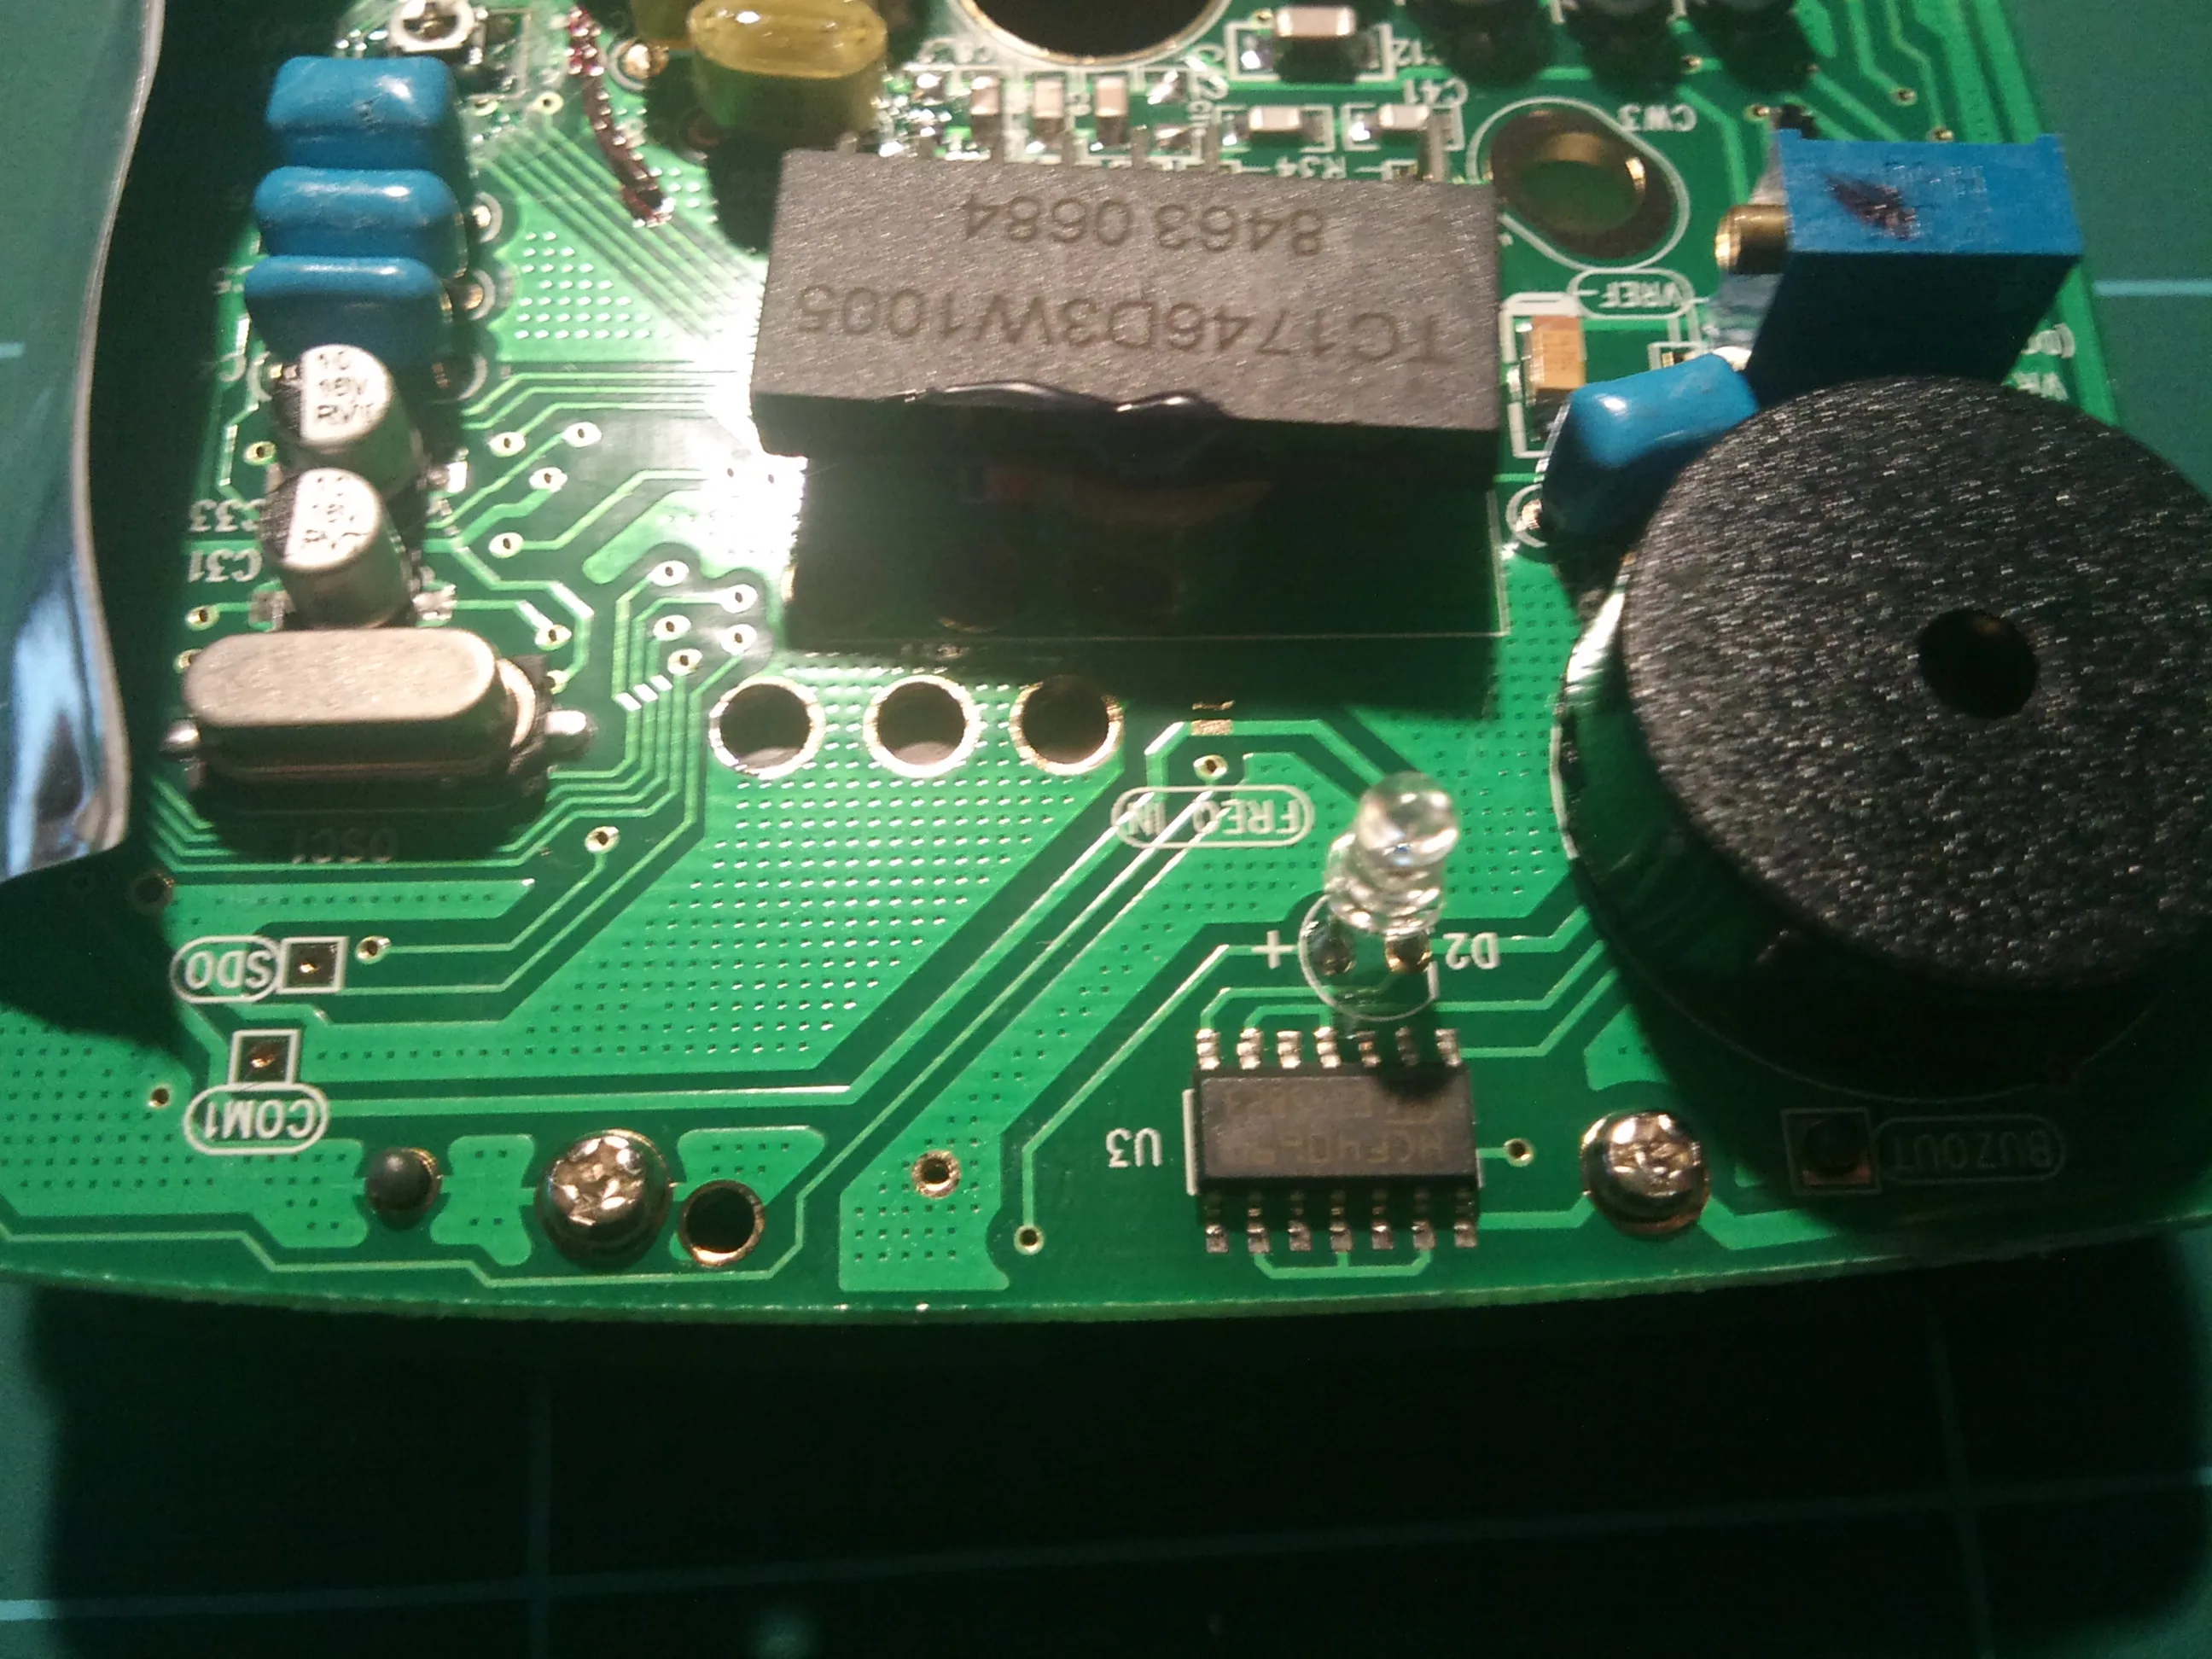
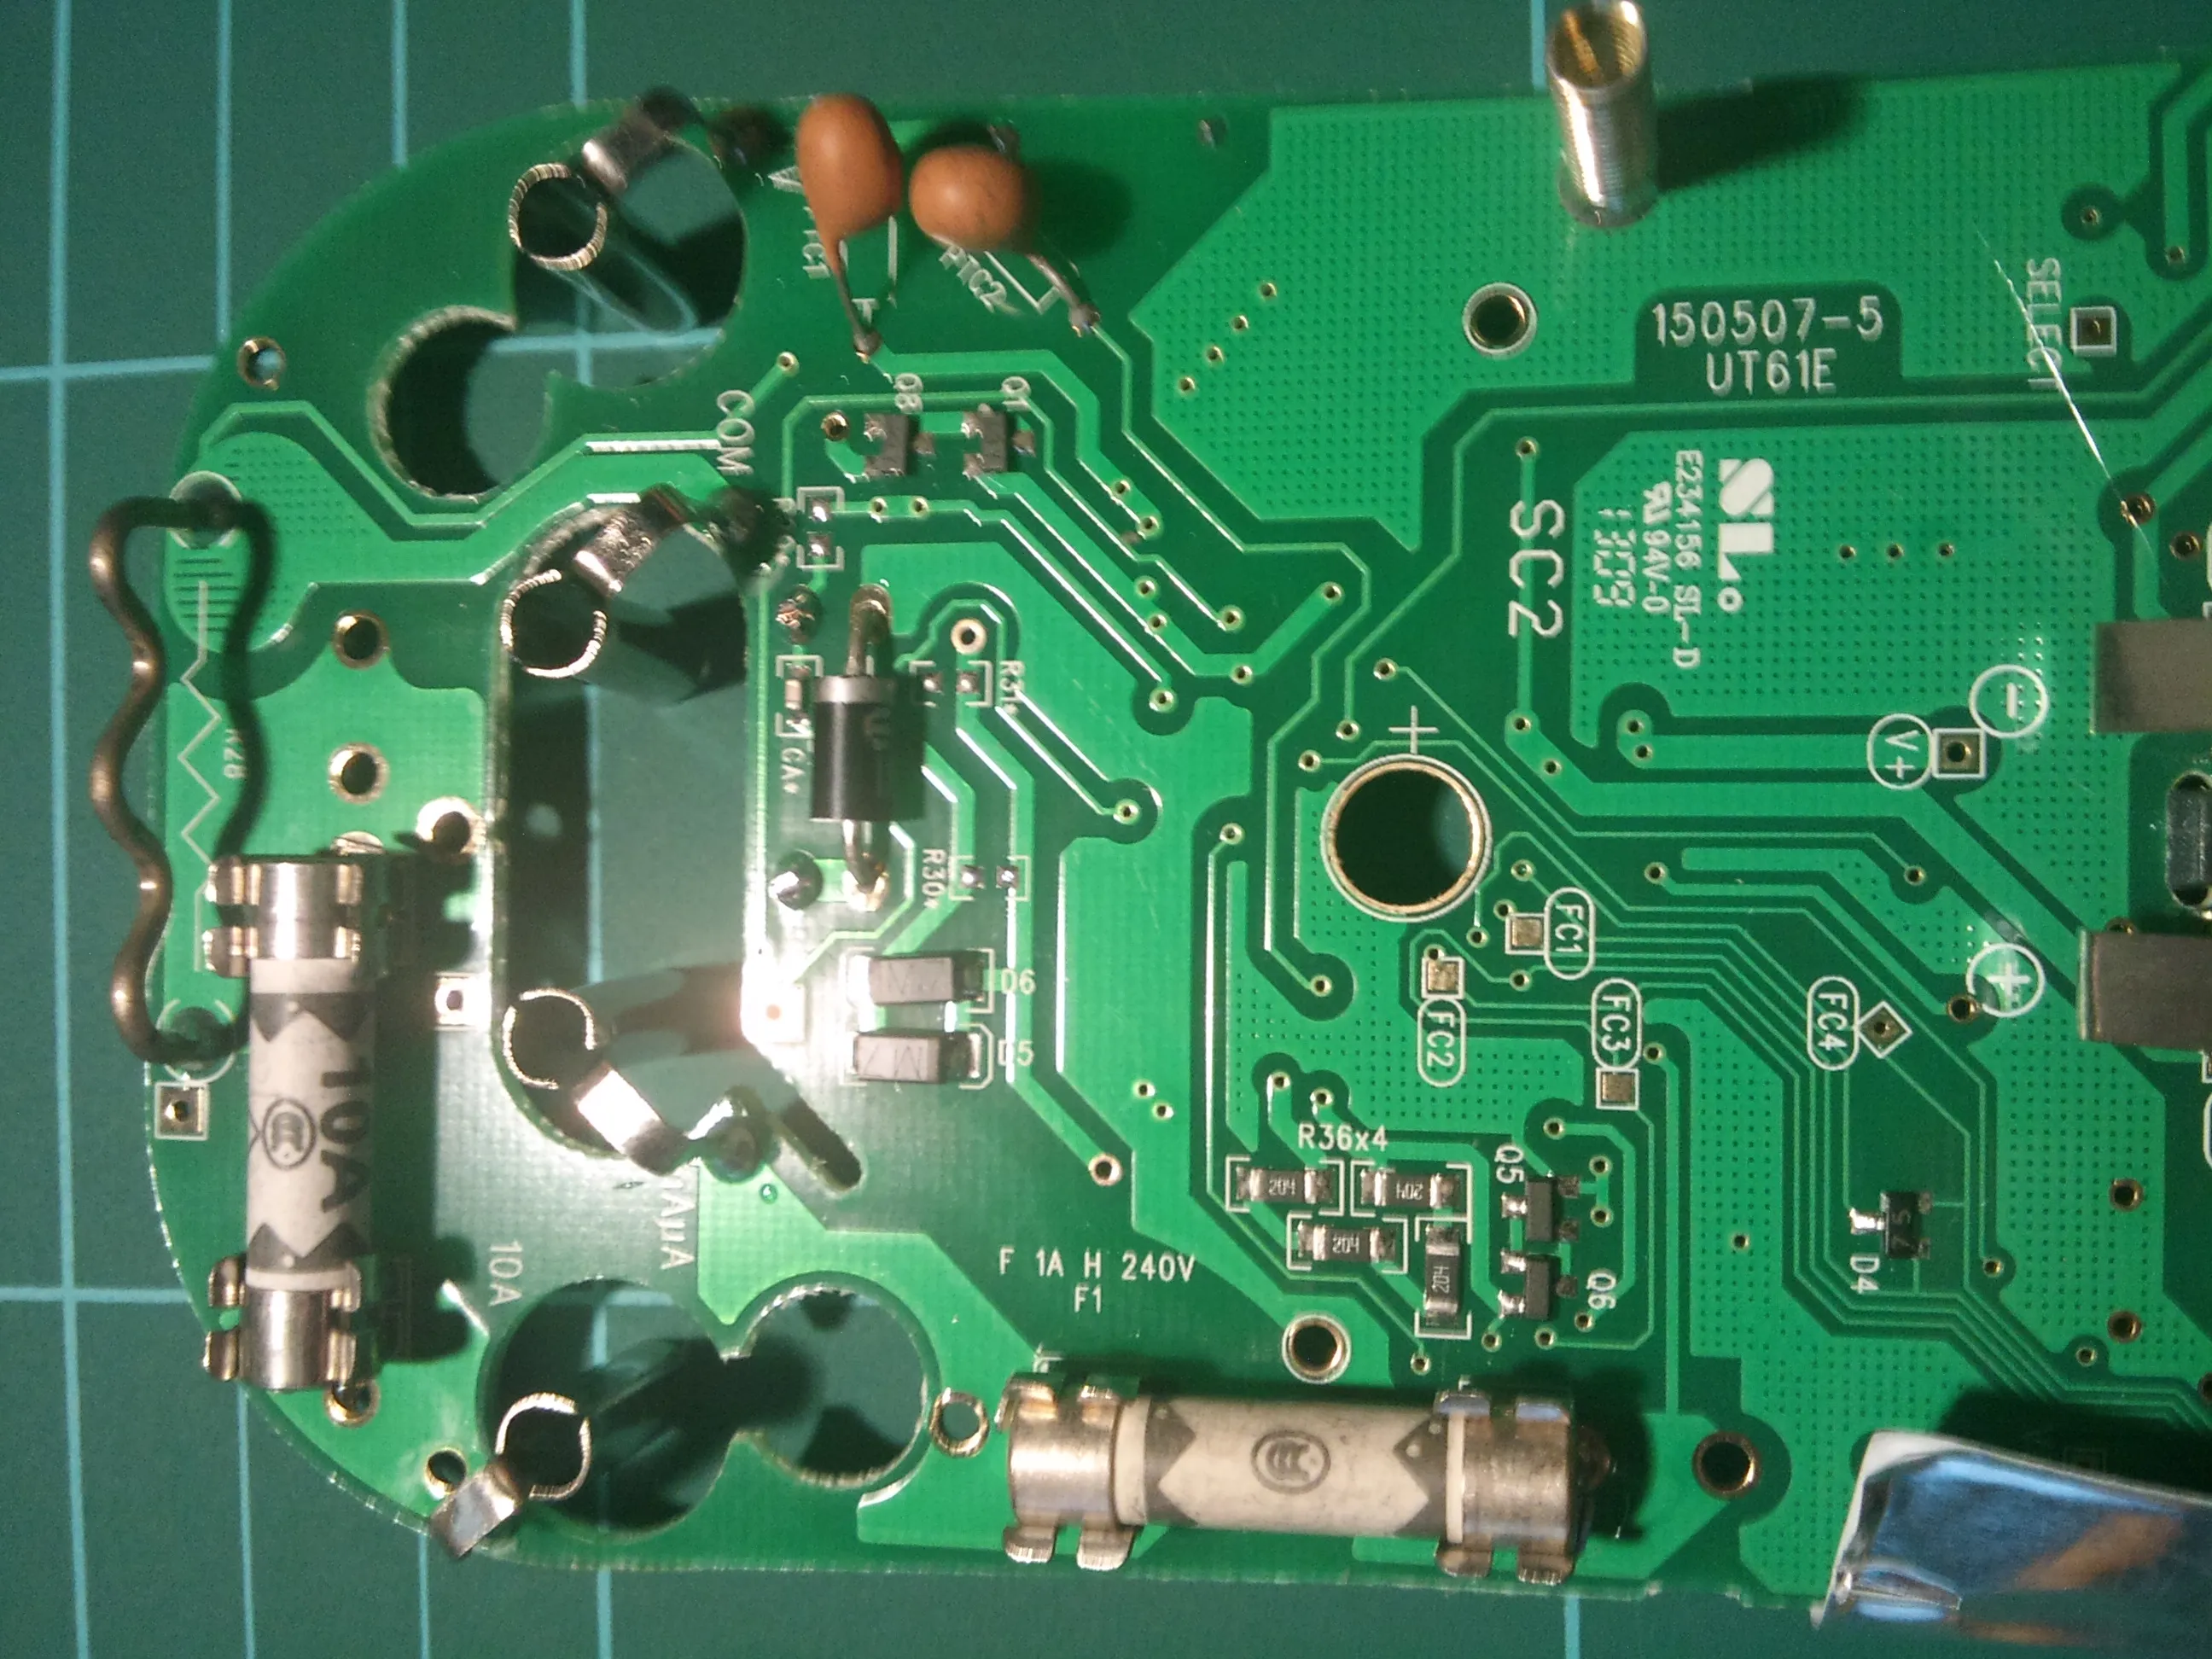
Ole hat mich in einem älteren Beitrag auf das Innenleben des “UNI-TREND UT61E Digital Multimeter” aufmerksam gemacht.
Ole suchte nach einer Möglichkeit die serielle Datenübertragung zu deaktivieren.
Ich schlug vor das Multimeter zu öffnen und nach einem Datenblatt des verwendeten IC’s zu suchen.
Das Multimeter besitzt einen Cyrustek ES51922P (P für Peak, Datenblatt ist verlinkt).
Dessen Funktionalität geht etwas über die angegebenen Features des UNI-TREND UT61E hinaus.
So könnte man durch kleinere Modifikationen auch noch Temperatur messen, das Multimeter kalibrieren oder als Frequenzzähler nutzen.
Da ich derzeit diese Funktionen nicht benötige, entschied ich mich erst einmal hier nichts zu modifizieren.
Aber vielleicht ist ja jemand Anderes auf der Suche nach genau diesen Features.
Hier noch ein paar Bilder der Innereien (man könnte sie fast zum Nachbau verwenden 😉).
PS: Die serielle Ausgabe ist durch das Ziehen von Pin 111 auf Masse permanent aktiviert und lässt sich auch nicht abschalten.
Höchstens das Durchtrennen der Leiterbahn um Pin 111 würde Abhilfe schaffen.
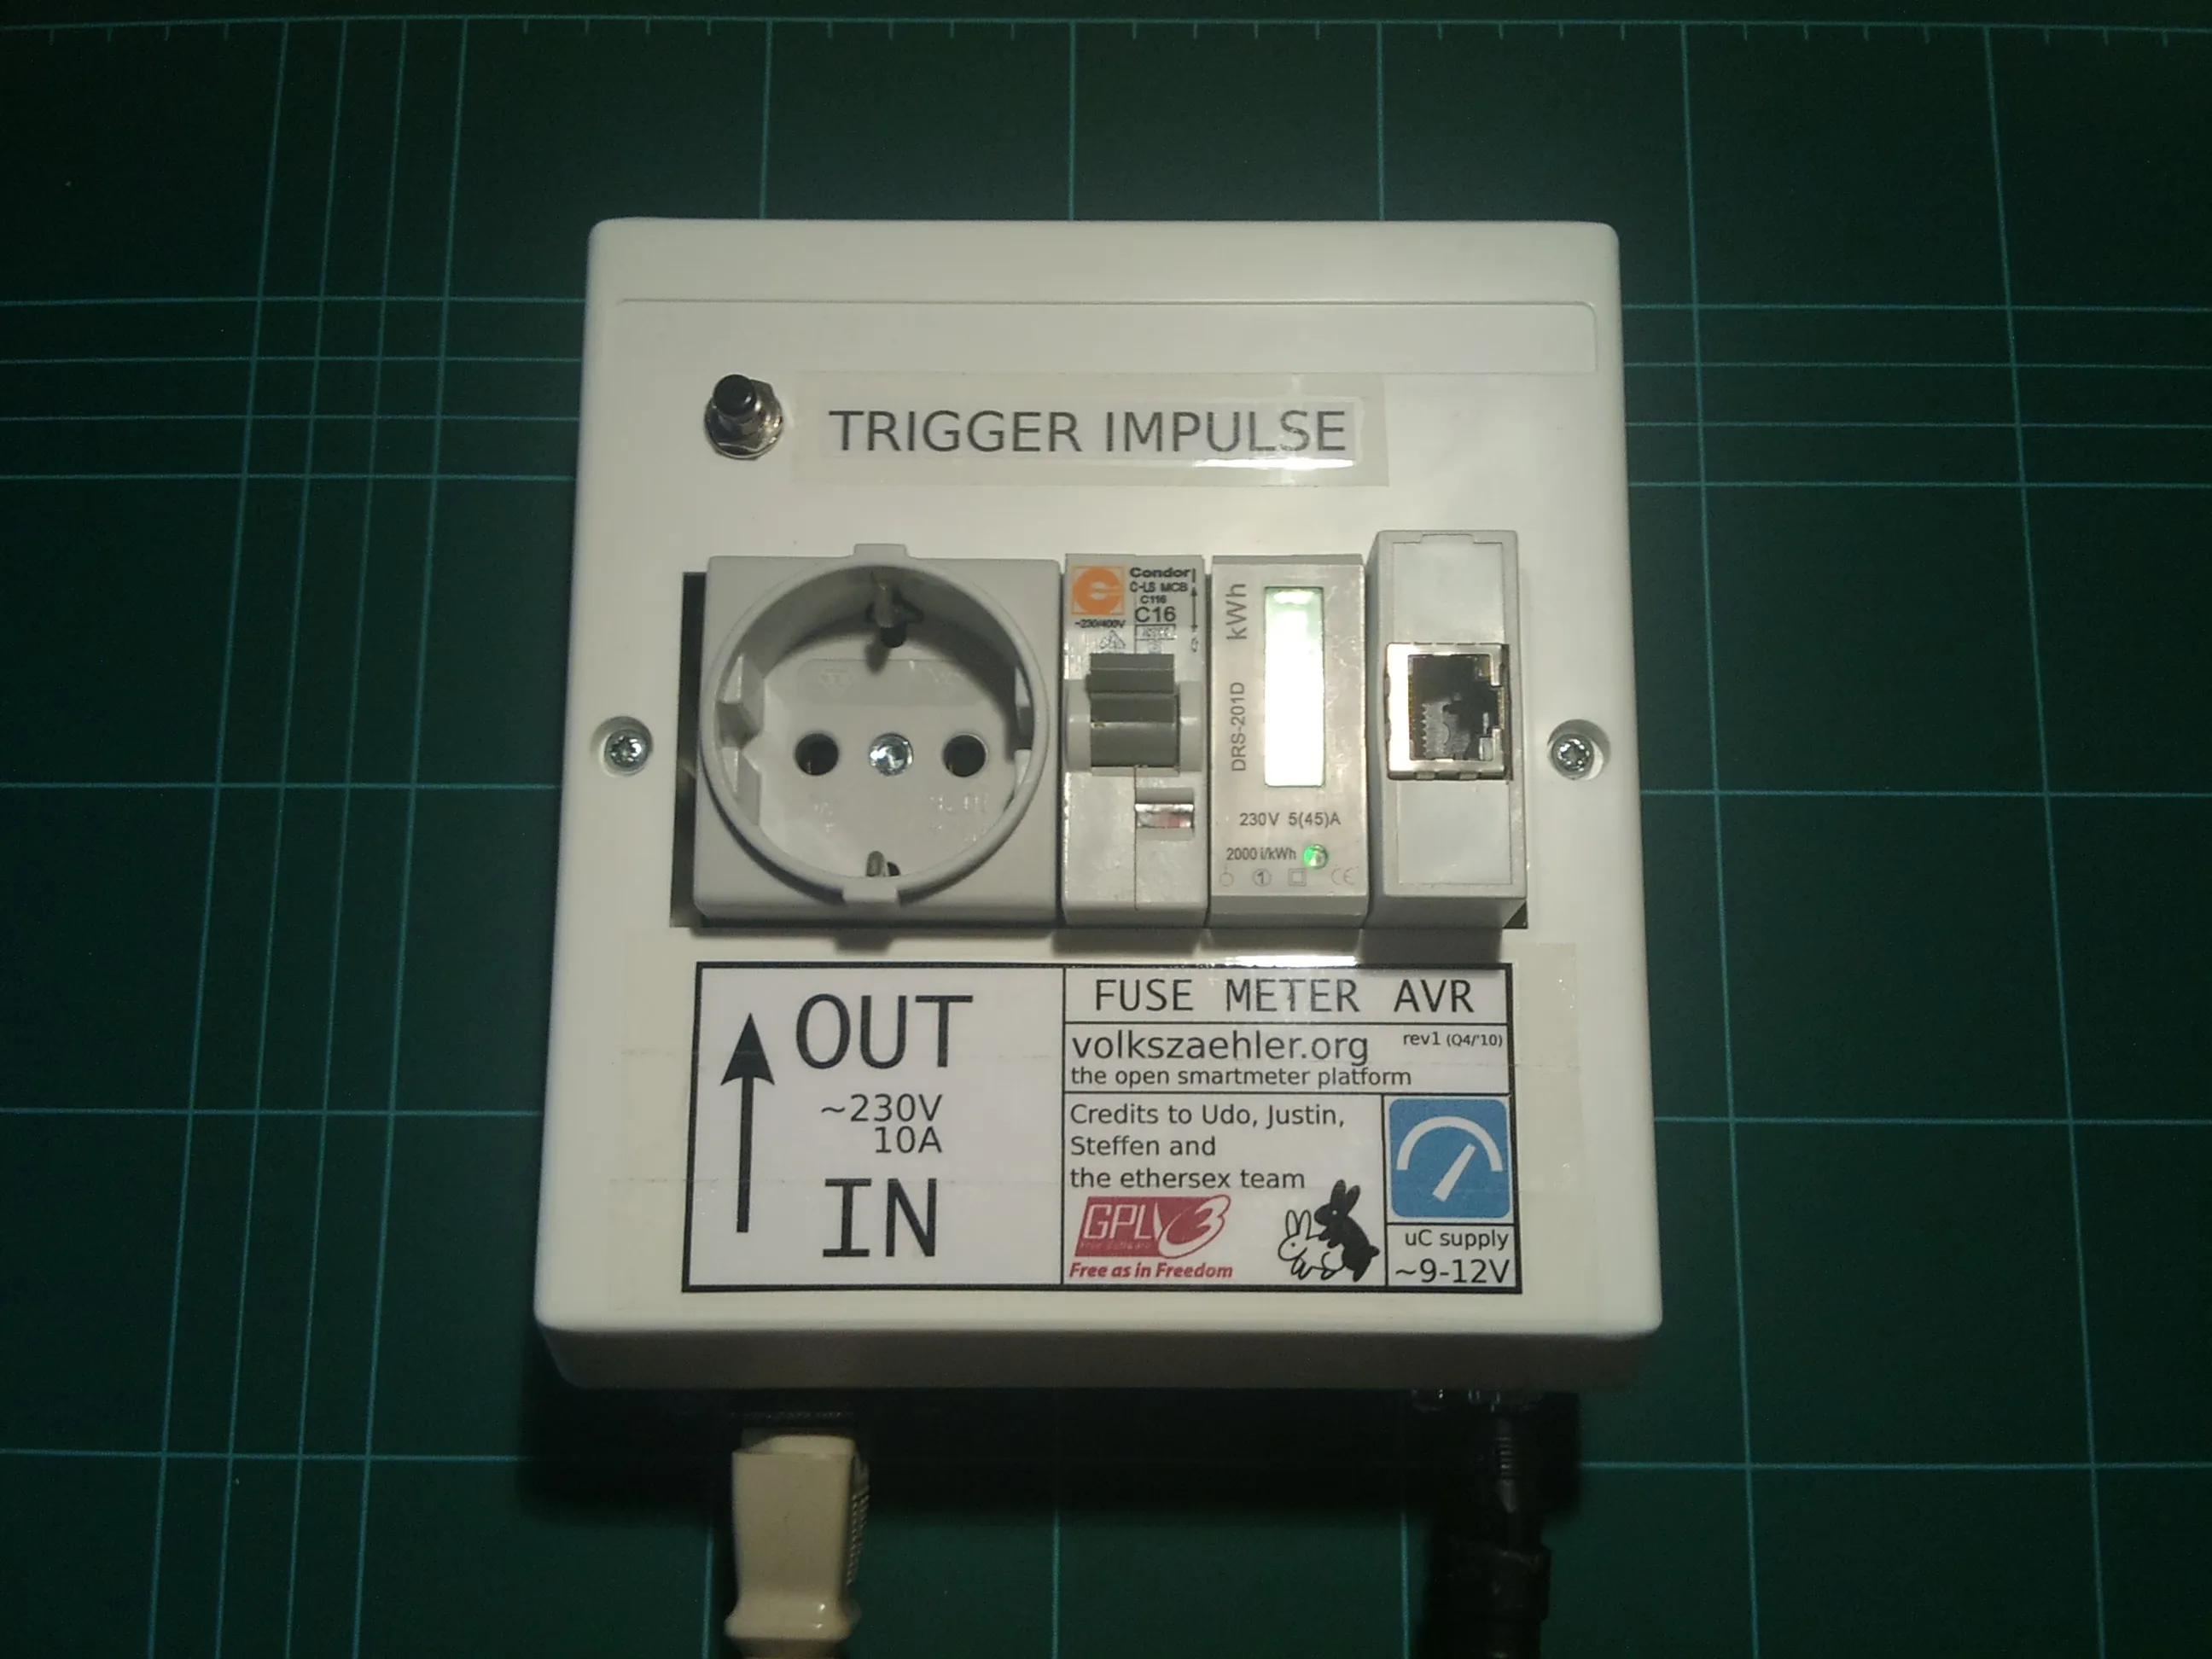
Das volkszaehler.org Projekt nähert sich mit großen Schritten seiner ersten stabilen Version und damit dem ersten Release.
Ich möchte hier nur einen kurzen Überblick über den aktuellen Stand geben.
Du kennst das Projekt noch gar nicht? Weißt du nicht, was Smart-Meter sind? Dann steigst du besser auf unsere Projekt-Website ein!
Für die Entwicklung am Projekt habe ich mir eine kleine Hutschienenbox gebaut.
Sie eignet sich perfekt für den mobilen Einsatz und zum Testen neuer Firmware und Funktionen.
Mal schnell den Verbrauch des eigenen Kühlschranks zu erfassen ist kein Problem.
Derzeit ist mein Schreibtisch an die Box angeschlossen und liefert so aktuelle Daten für die Demo Installation des Projektes.
Die Box enthält folgende Komponenten:
~230V Eingang über Kaltgerätestecker (geerdet, max. 10 Ampere)
~230V Ausgang über Schukostecker (geerdet, max. 16 Ampere)
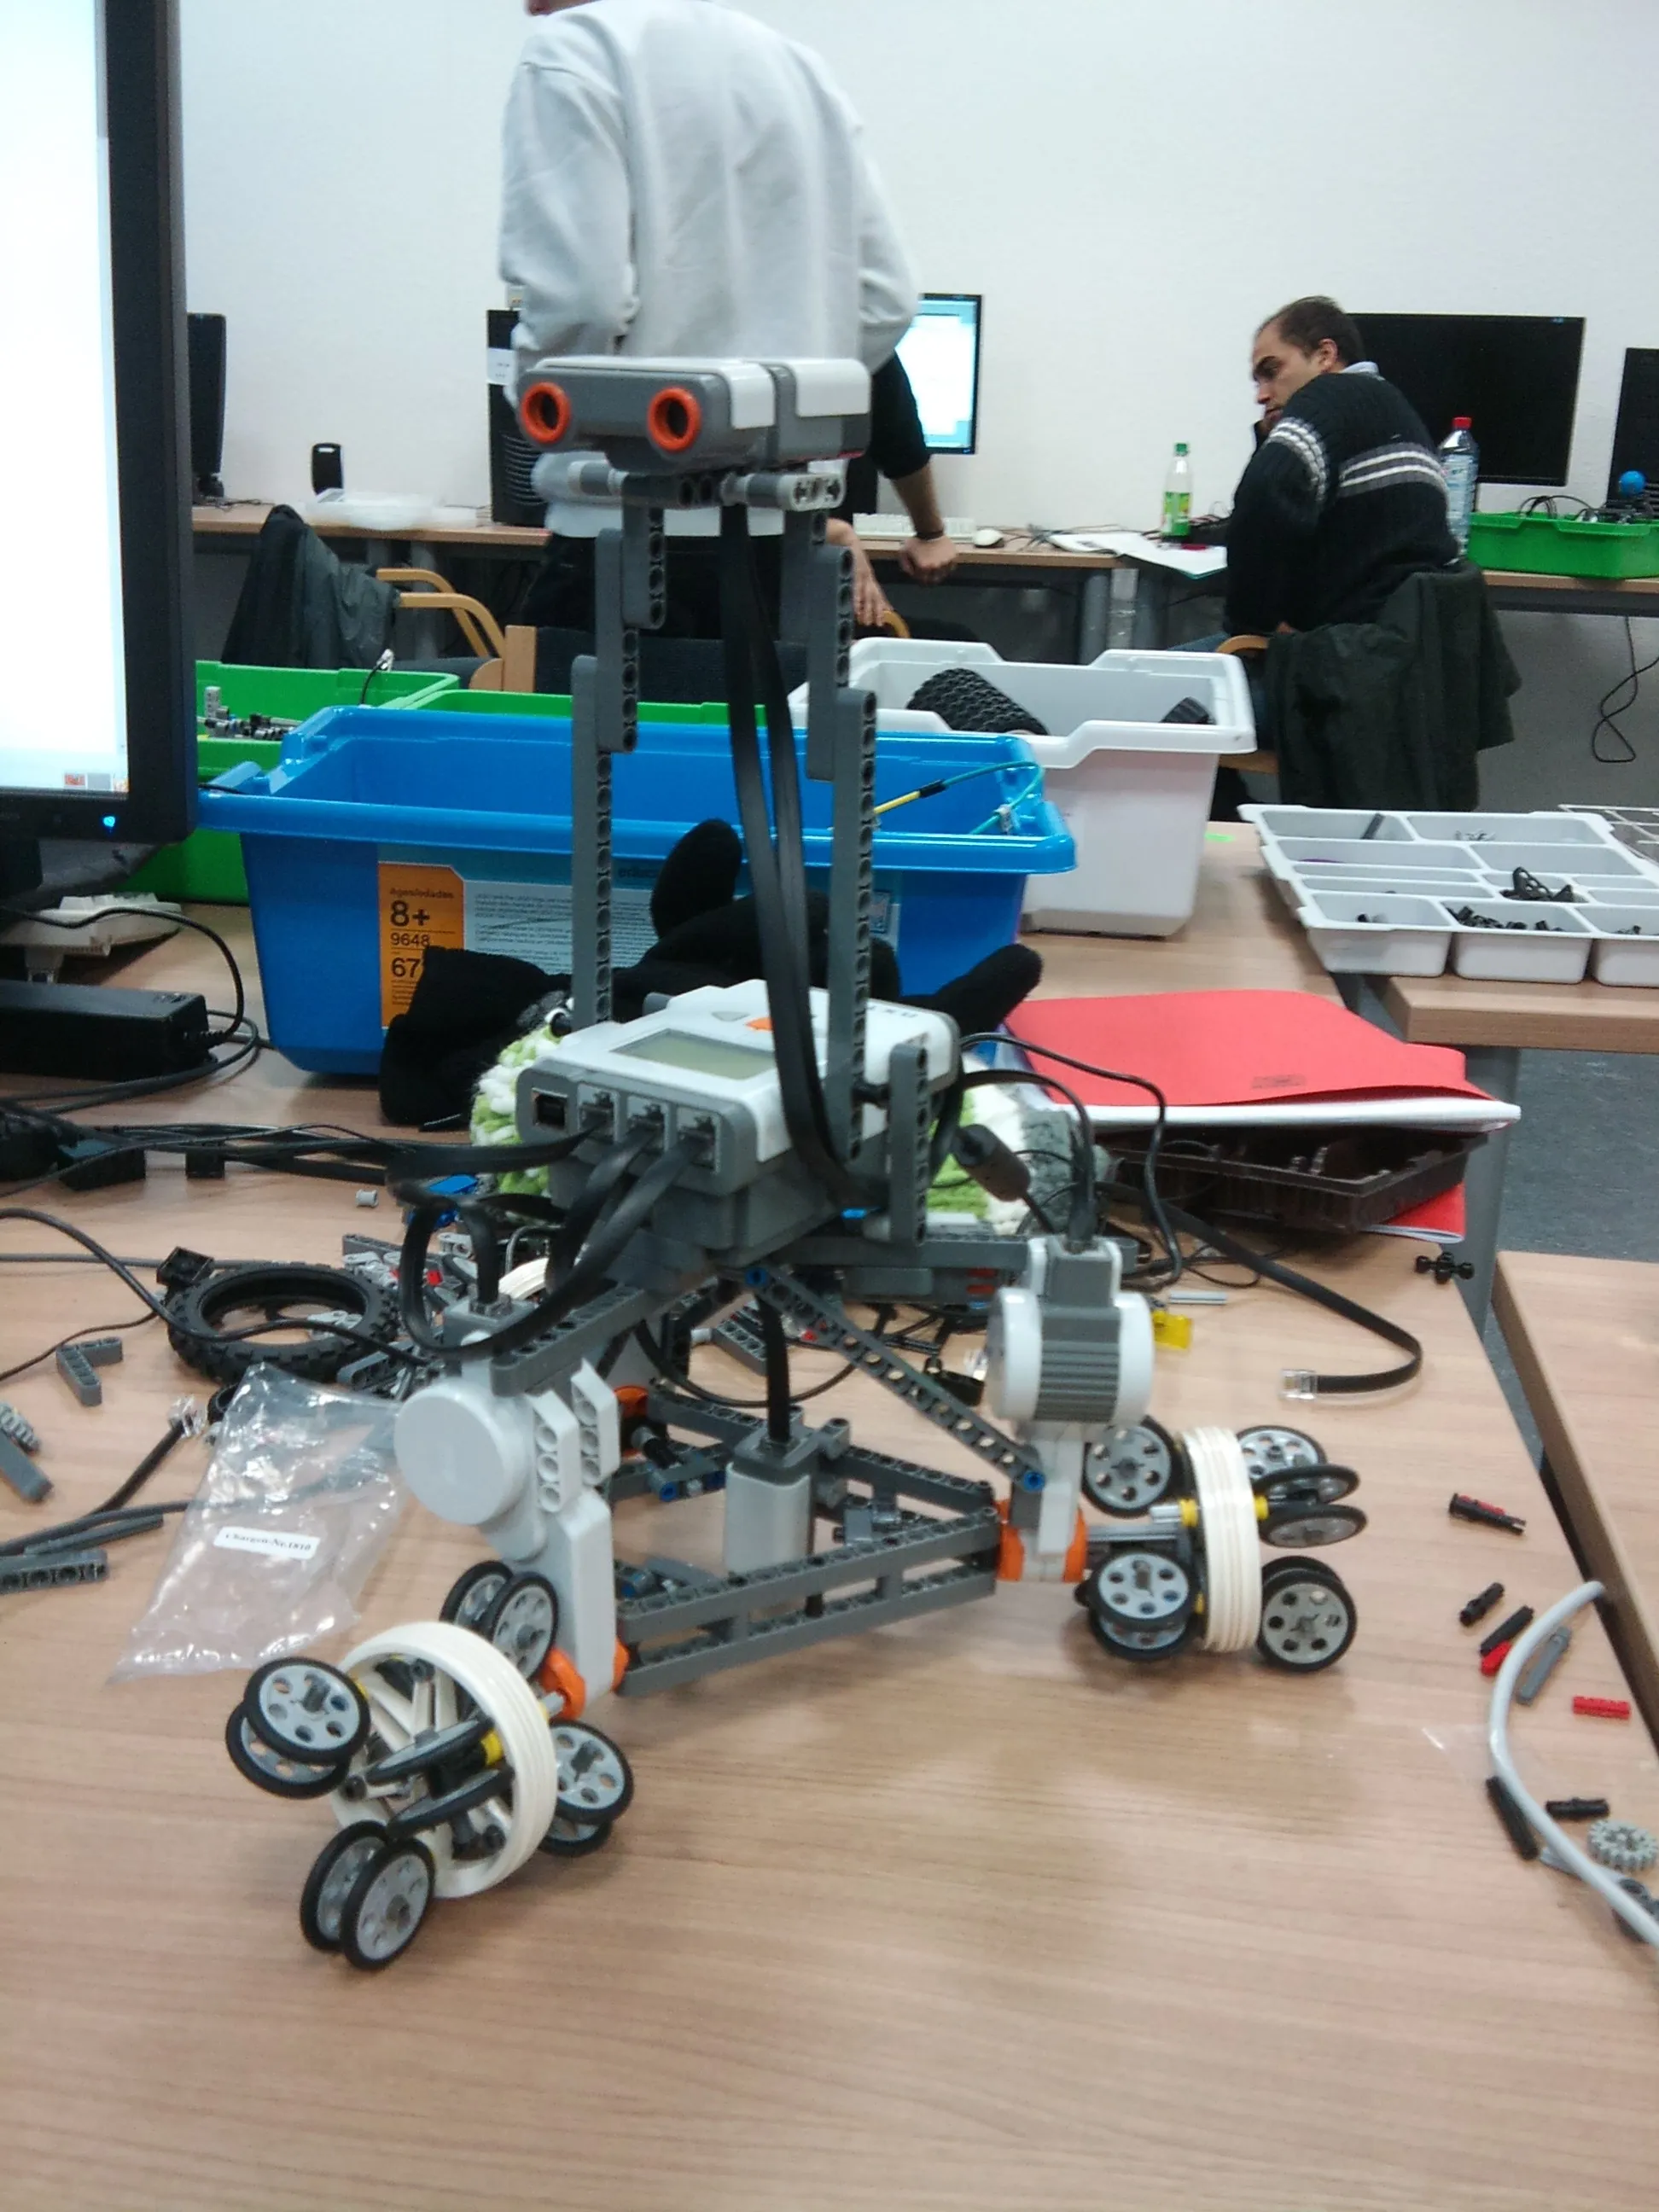
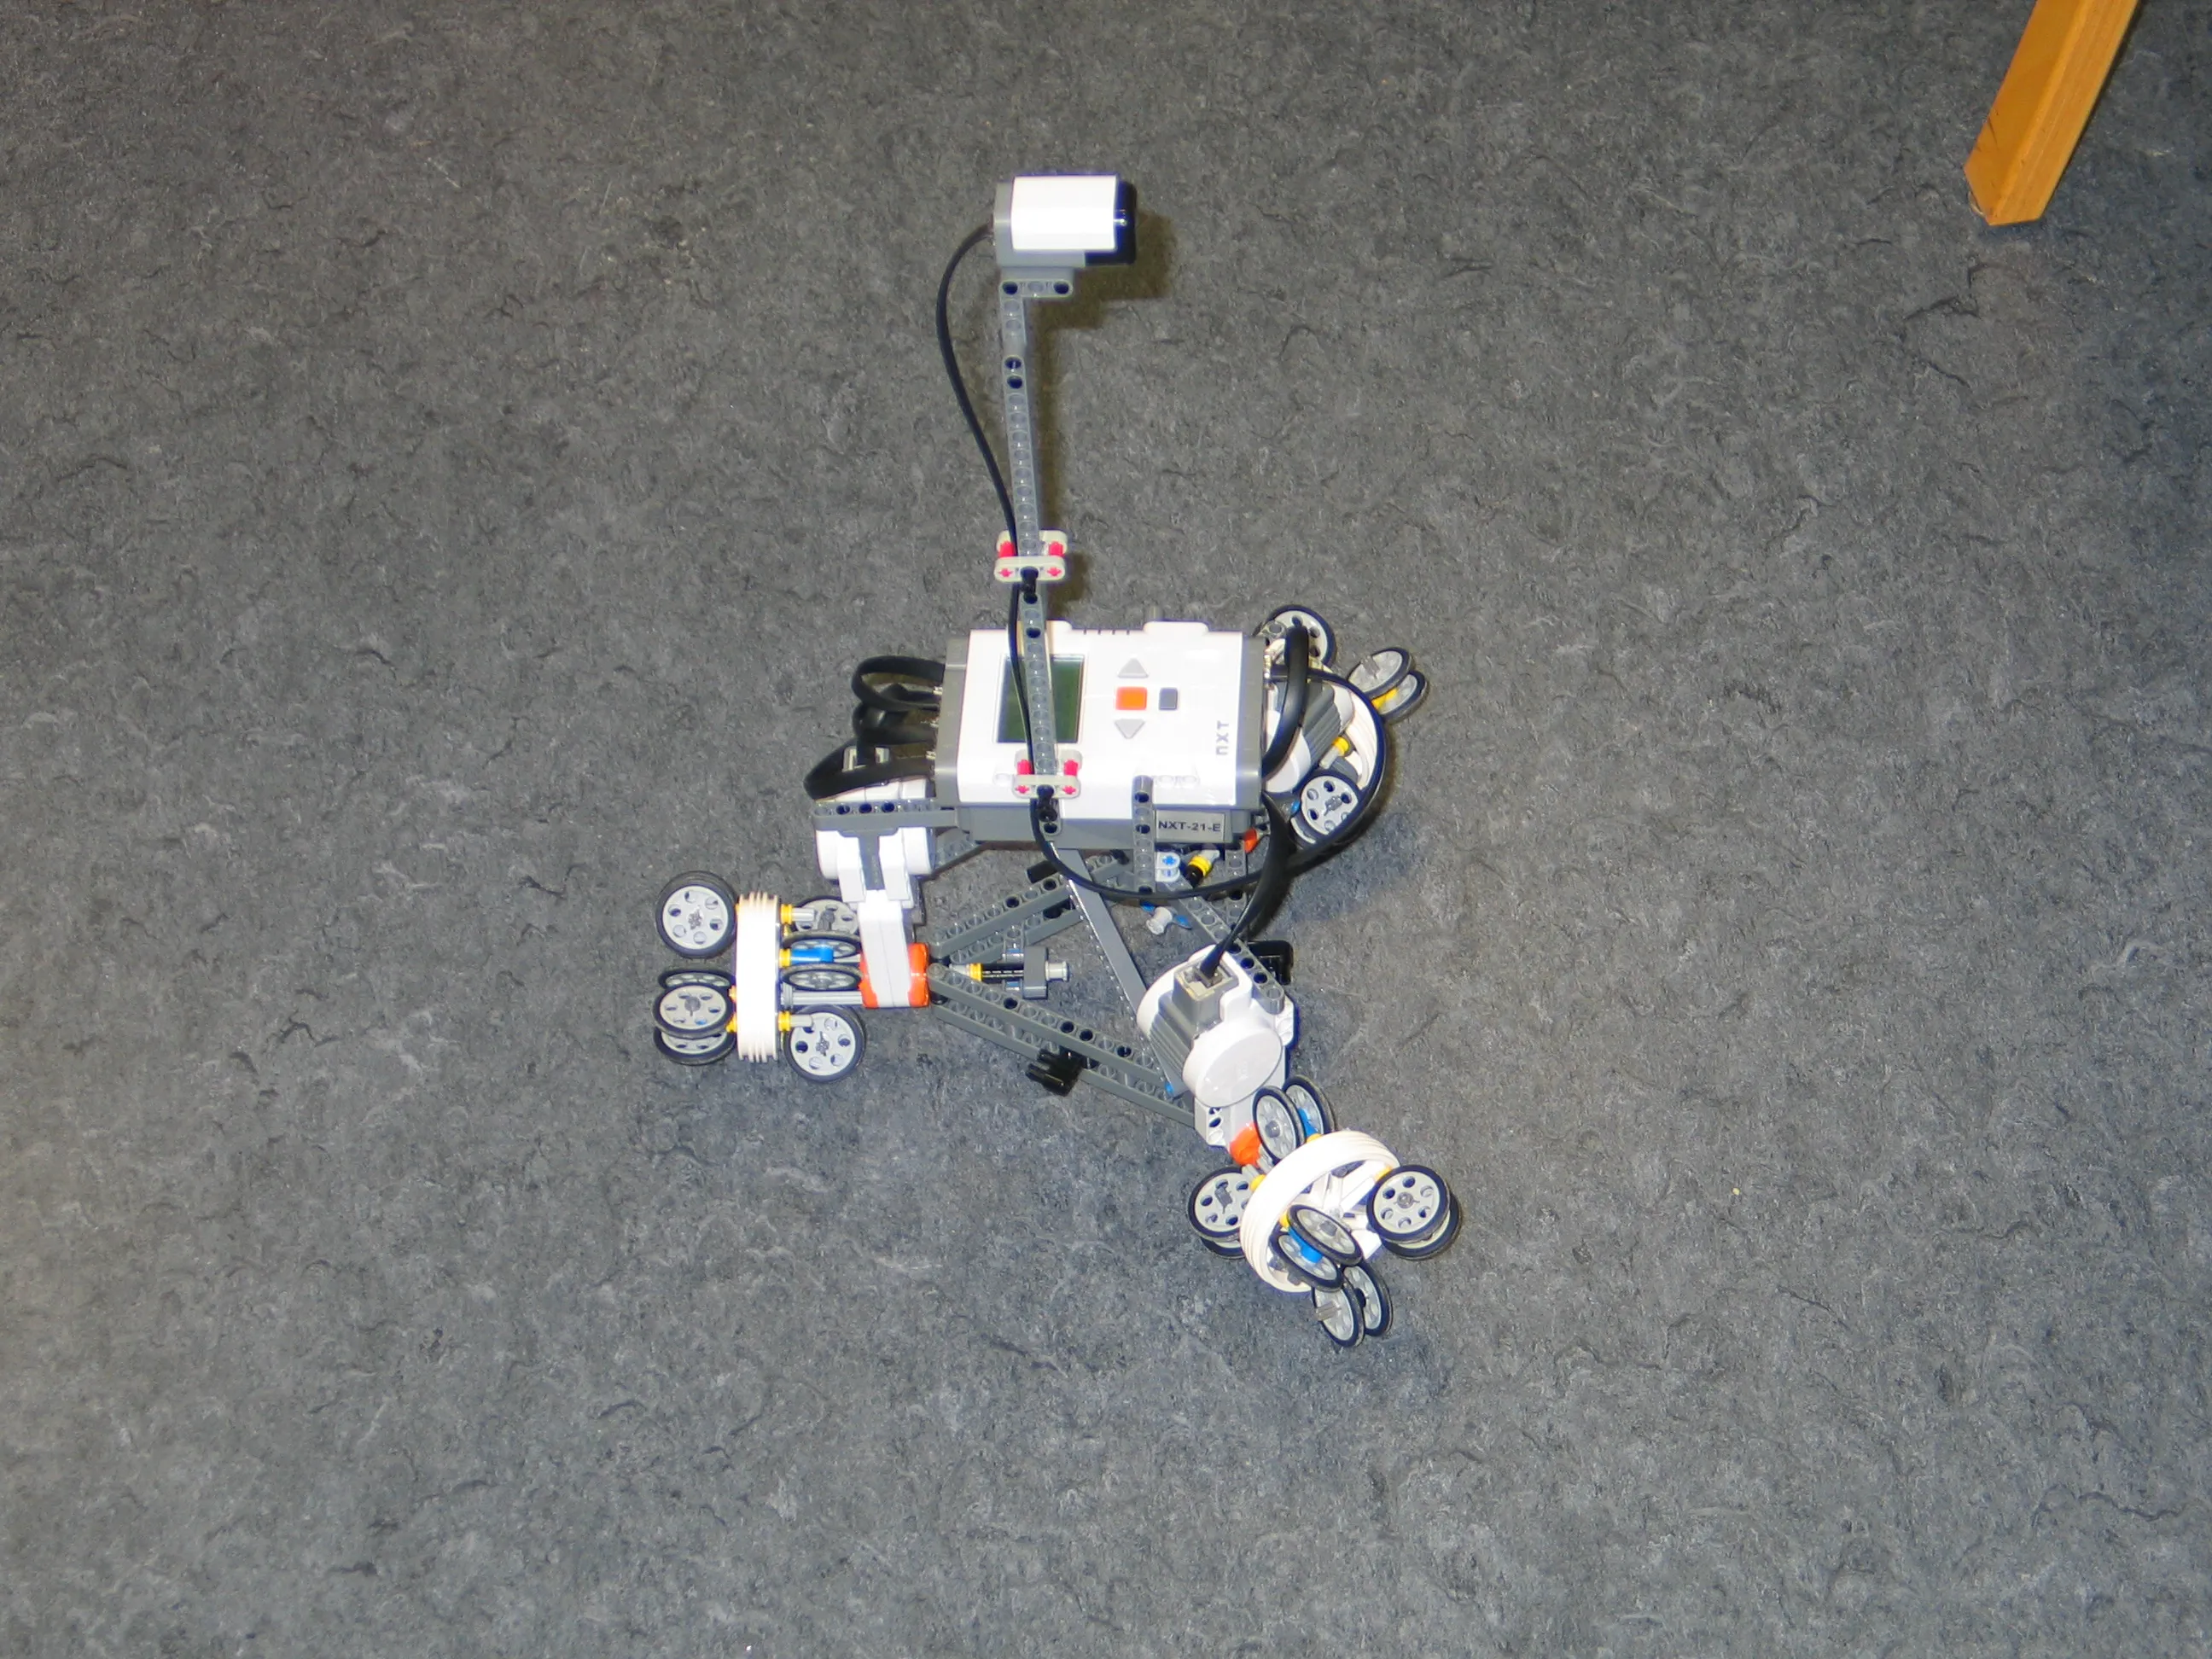
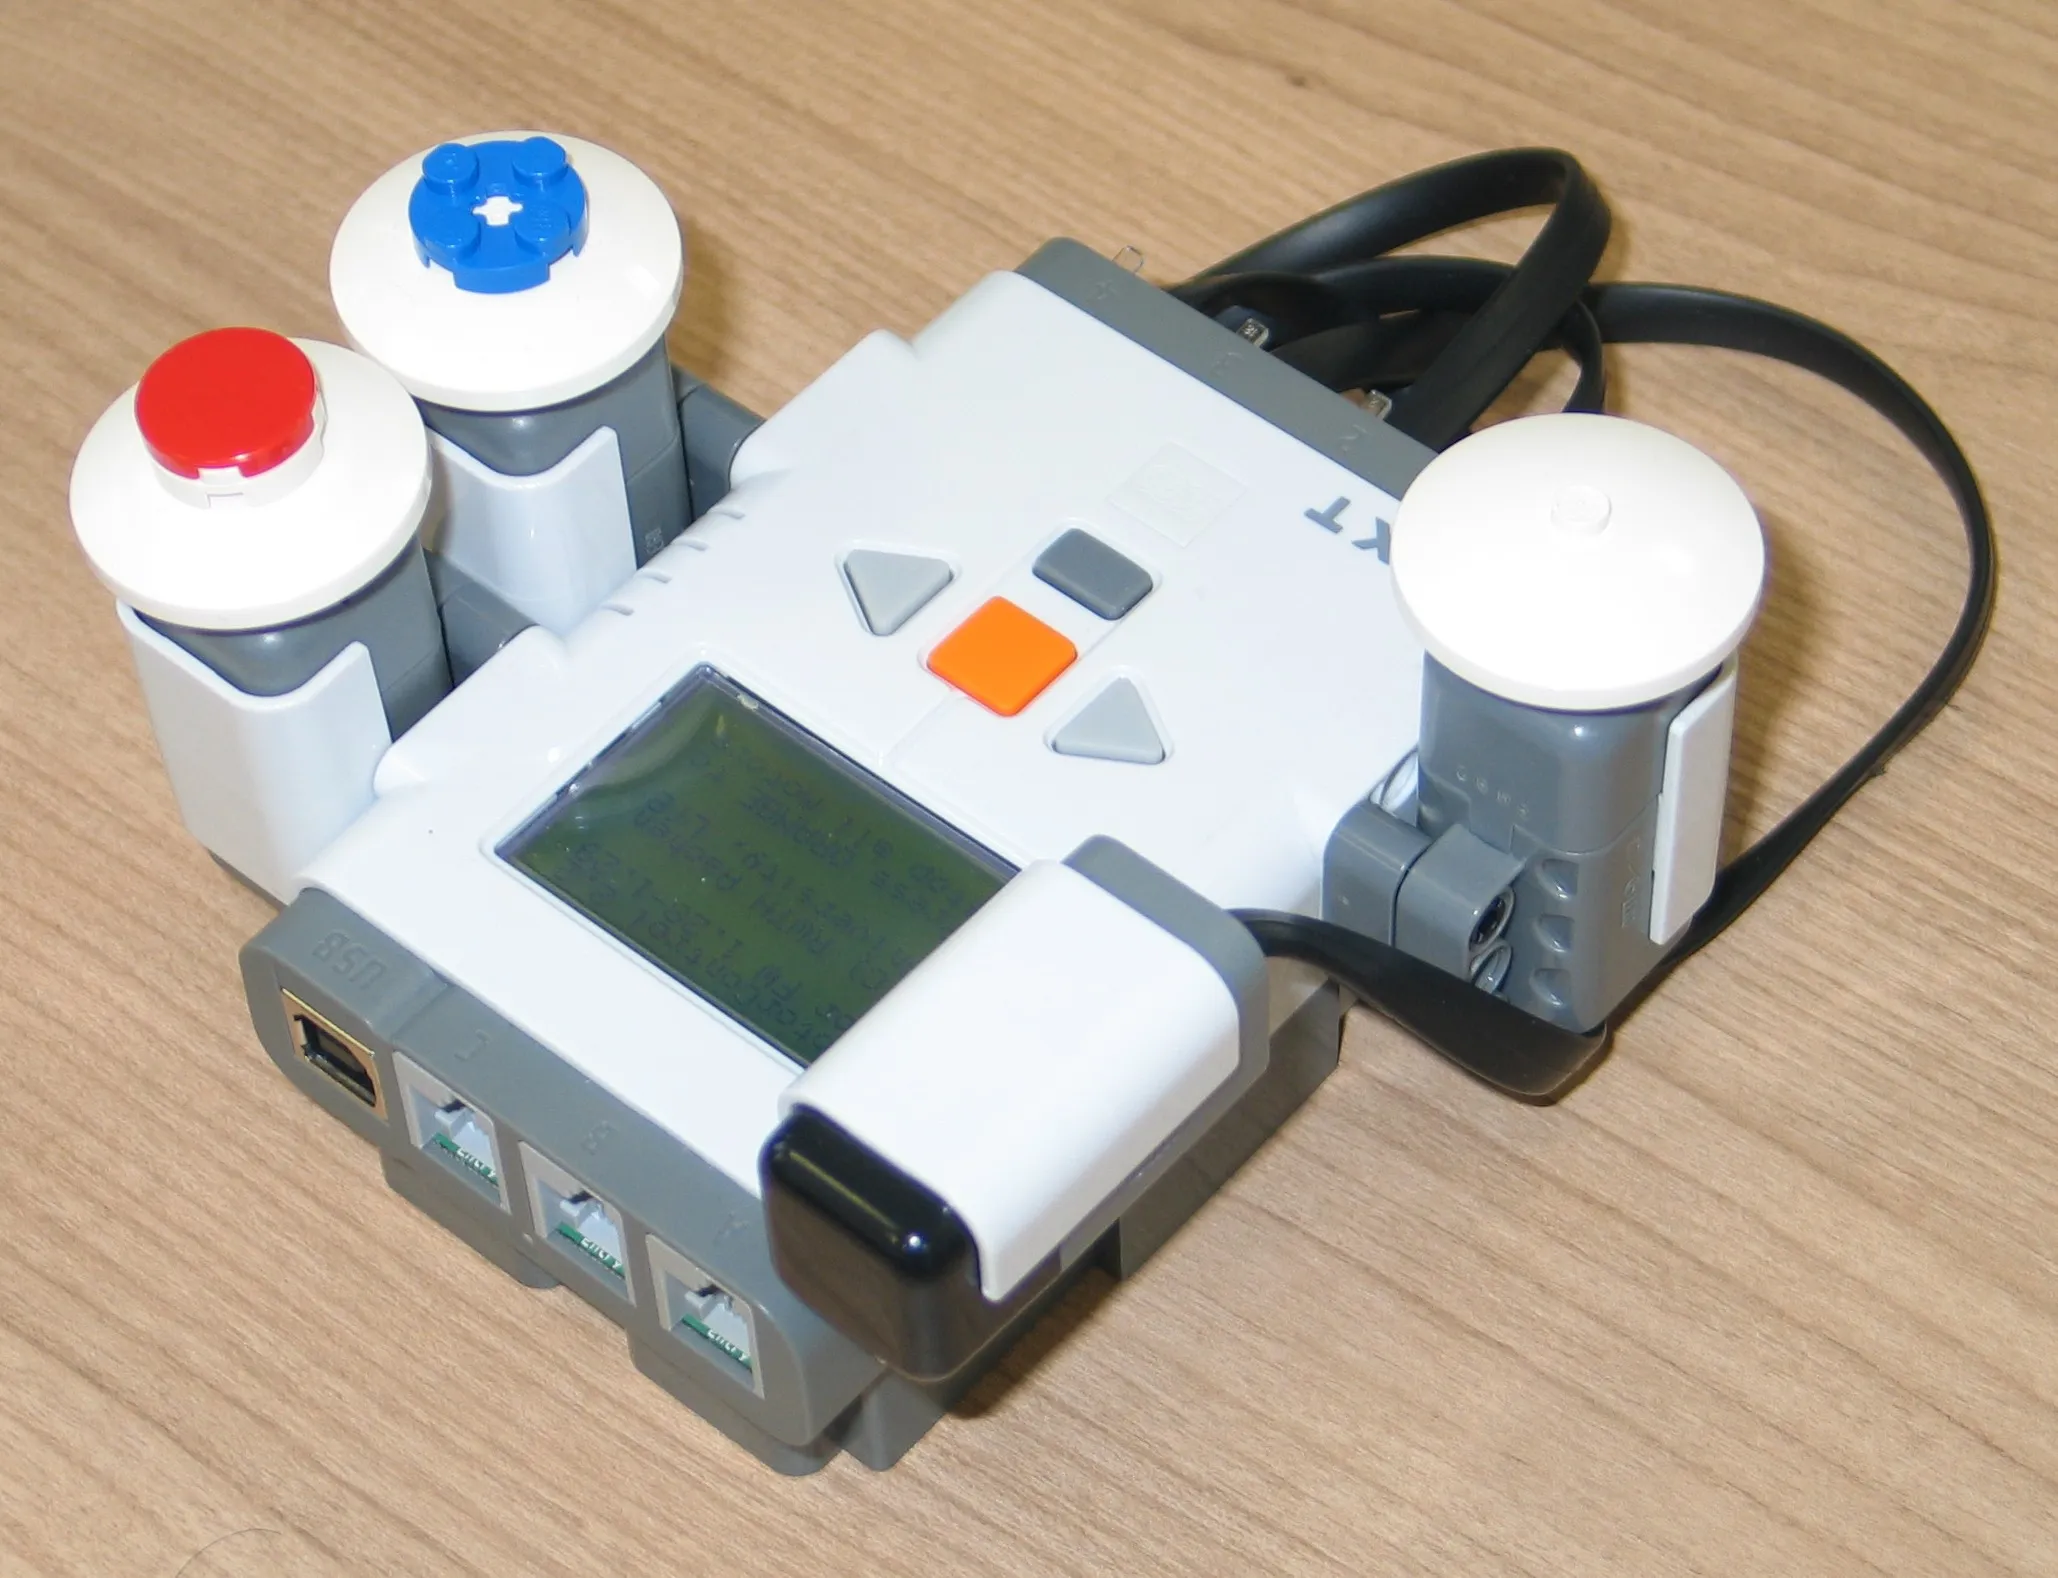
Während dieser Pflichtveranstaltung sollten wir die Lerninhalte der Vorlesung “Mathematische Methoden der Elektrotechnik” durch die Steuerung von LEGO Mindstorms NXT Robotern unter MATLAB vertiefen.
Das Projekt ist eine Pflichtveranstaltung im ersten Semester meines Studienganges (Elektrotechnik, Informationstechnik und Technische Informatik) und wird durch alle Lehrstühle unserer Fakultät als 10-tägige Blockveranstaltung vor Weihnachten durchgeführt.
Ich wurde dem Institut für vernetzte Systeme (MOBNETS) zugeteilt.
Etwas verwundert war ich dann am ersten Tag, als wir auf Englisch begrüßt wurden.
Aber naja, später werden wir vermutlich sowieso dazu gezwungen werden.
Während der ersten Woche lernten wir die eigens für das Projekt entwickelte “RWTH Mindstorms NXT-Toolbox” kennen und haben an einigen vorgegebenen Versuchen gearbeitet.
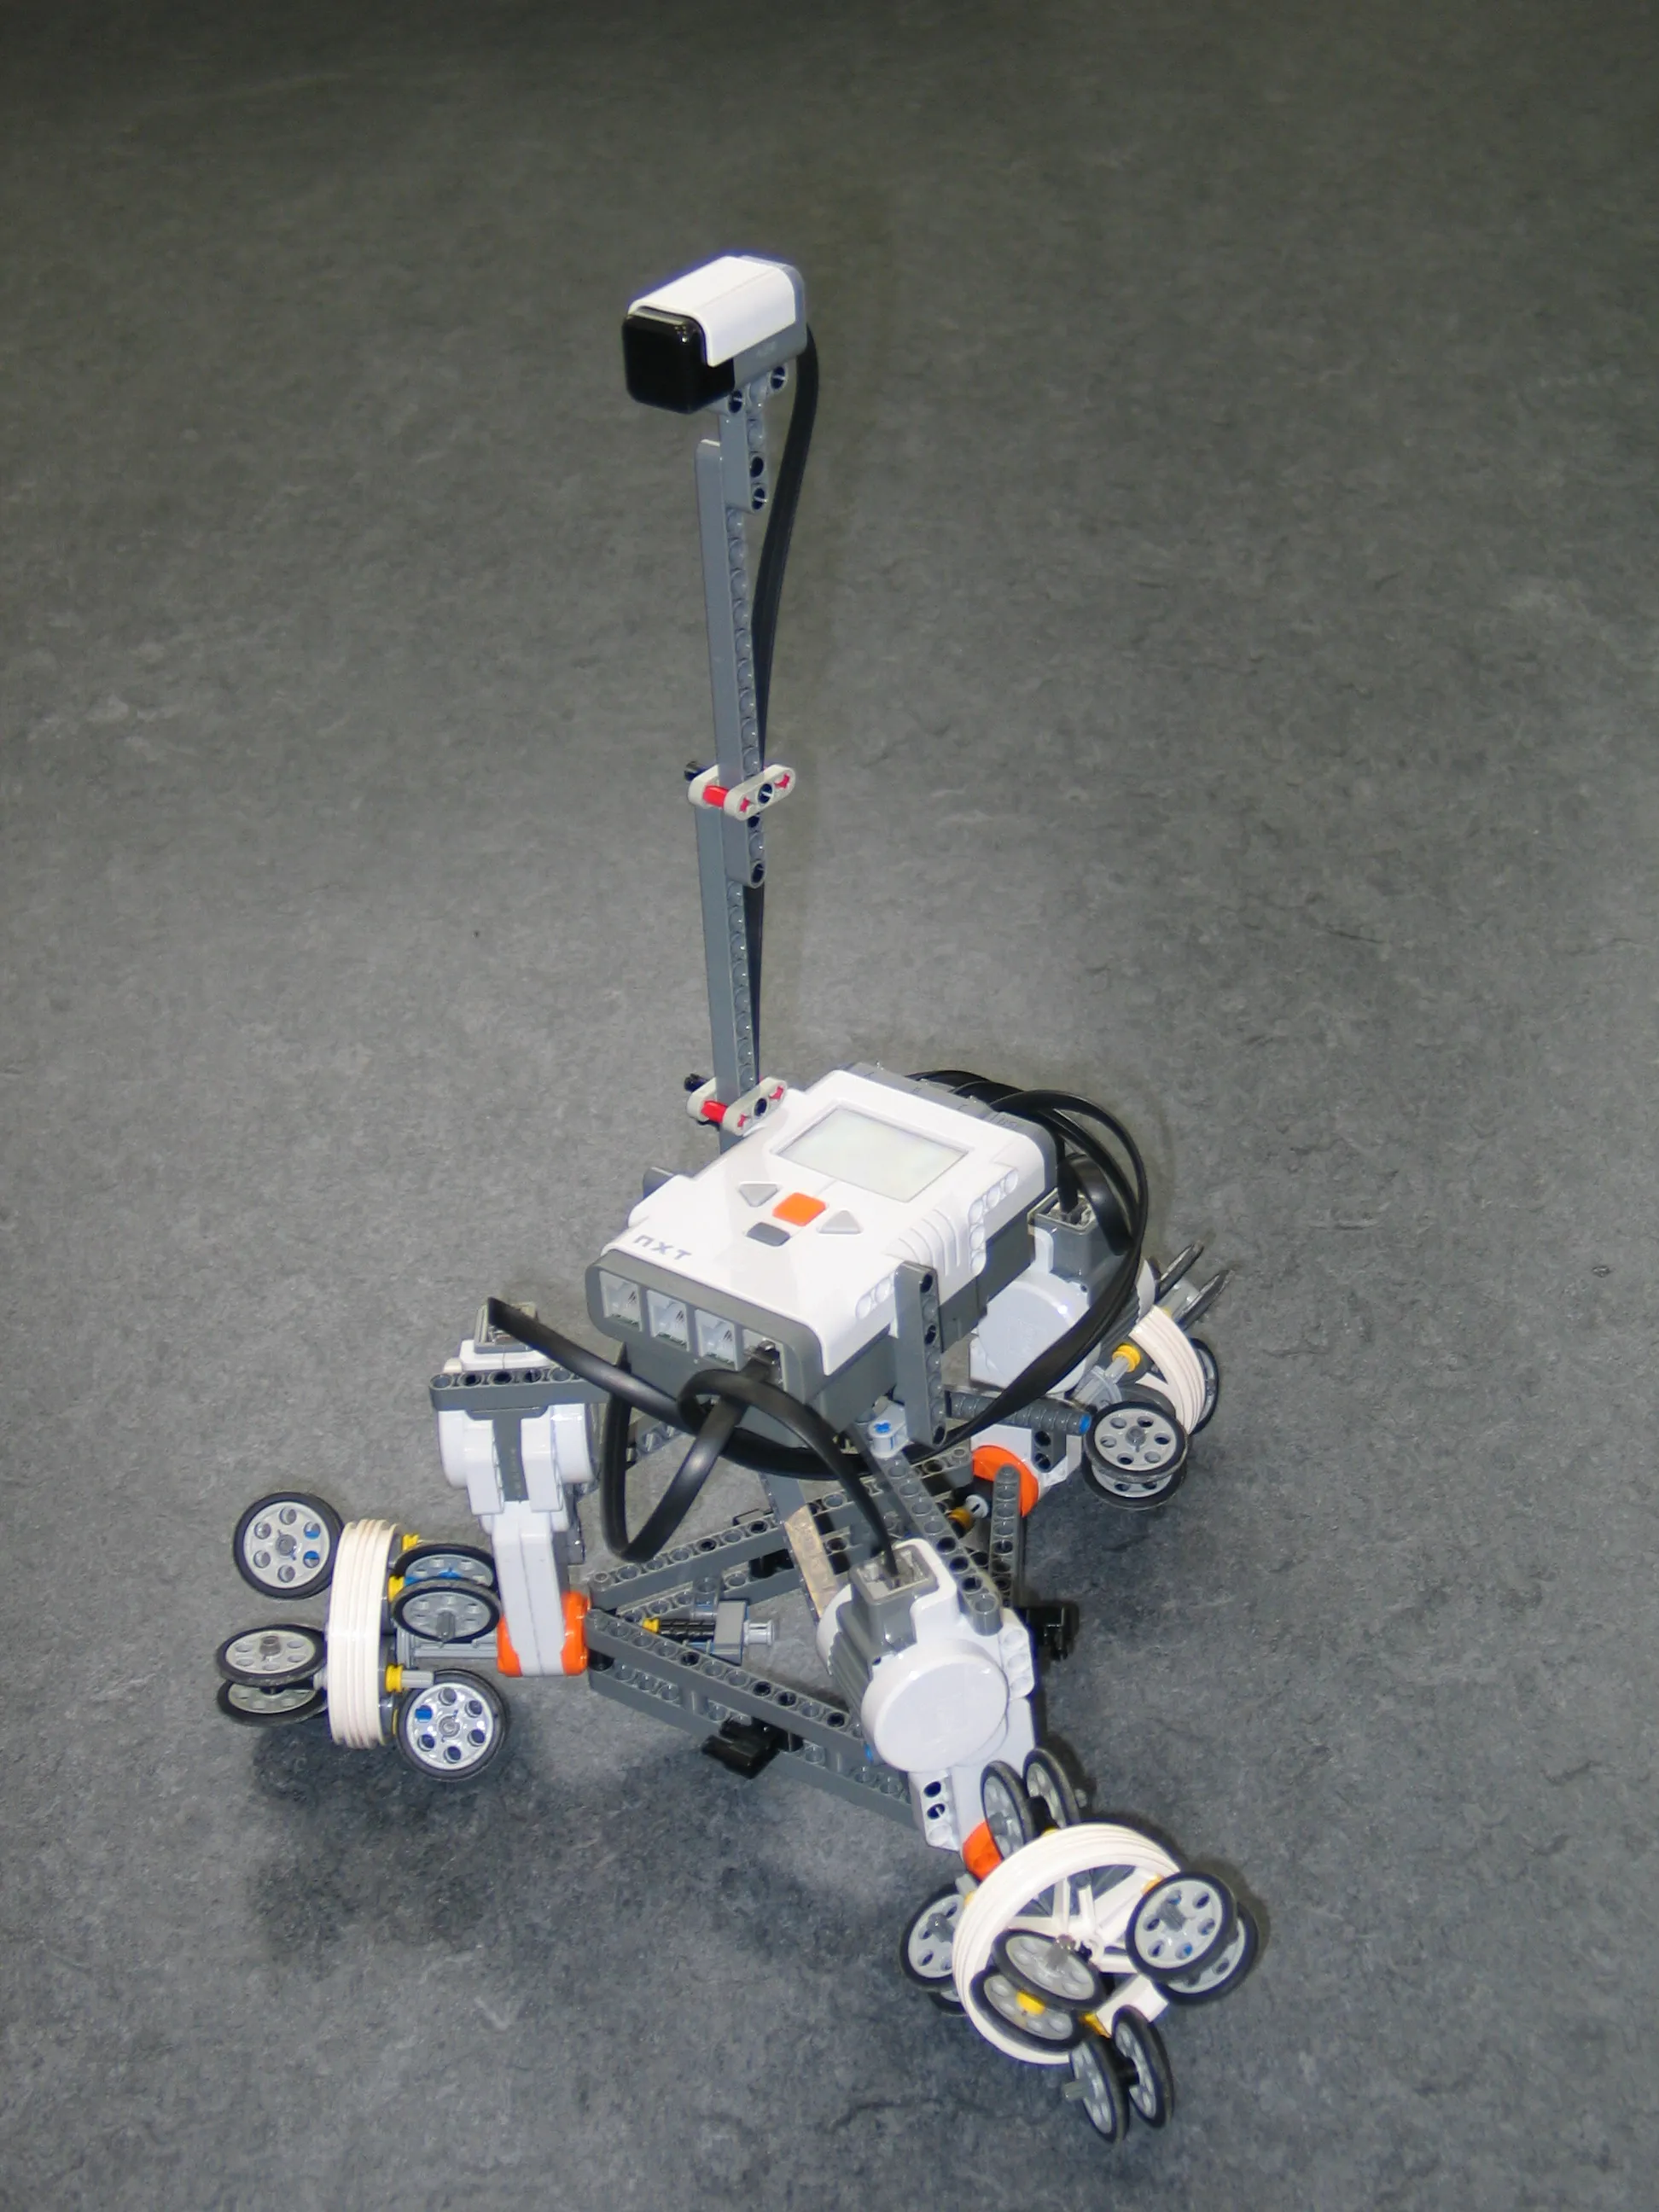
In der zweiten Hälfte des Projektes durften wir dann in einem Wahlversuch selber kreativ werden und einen eigenen Roboter konstruieren.
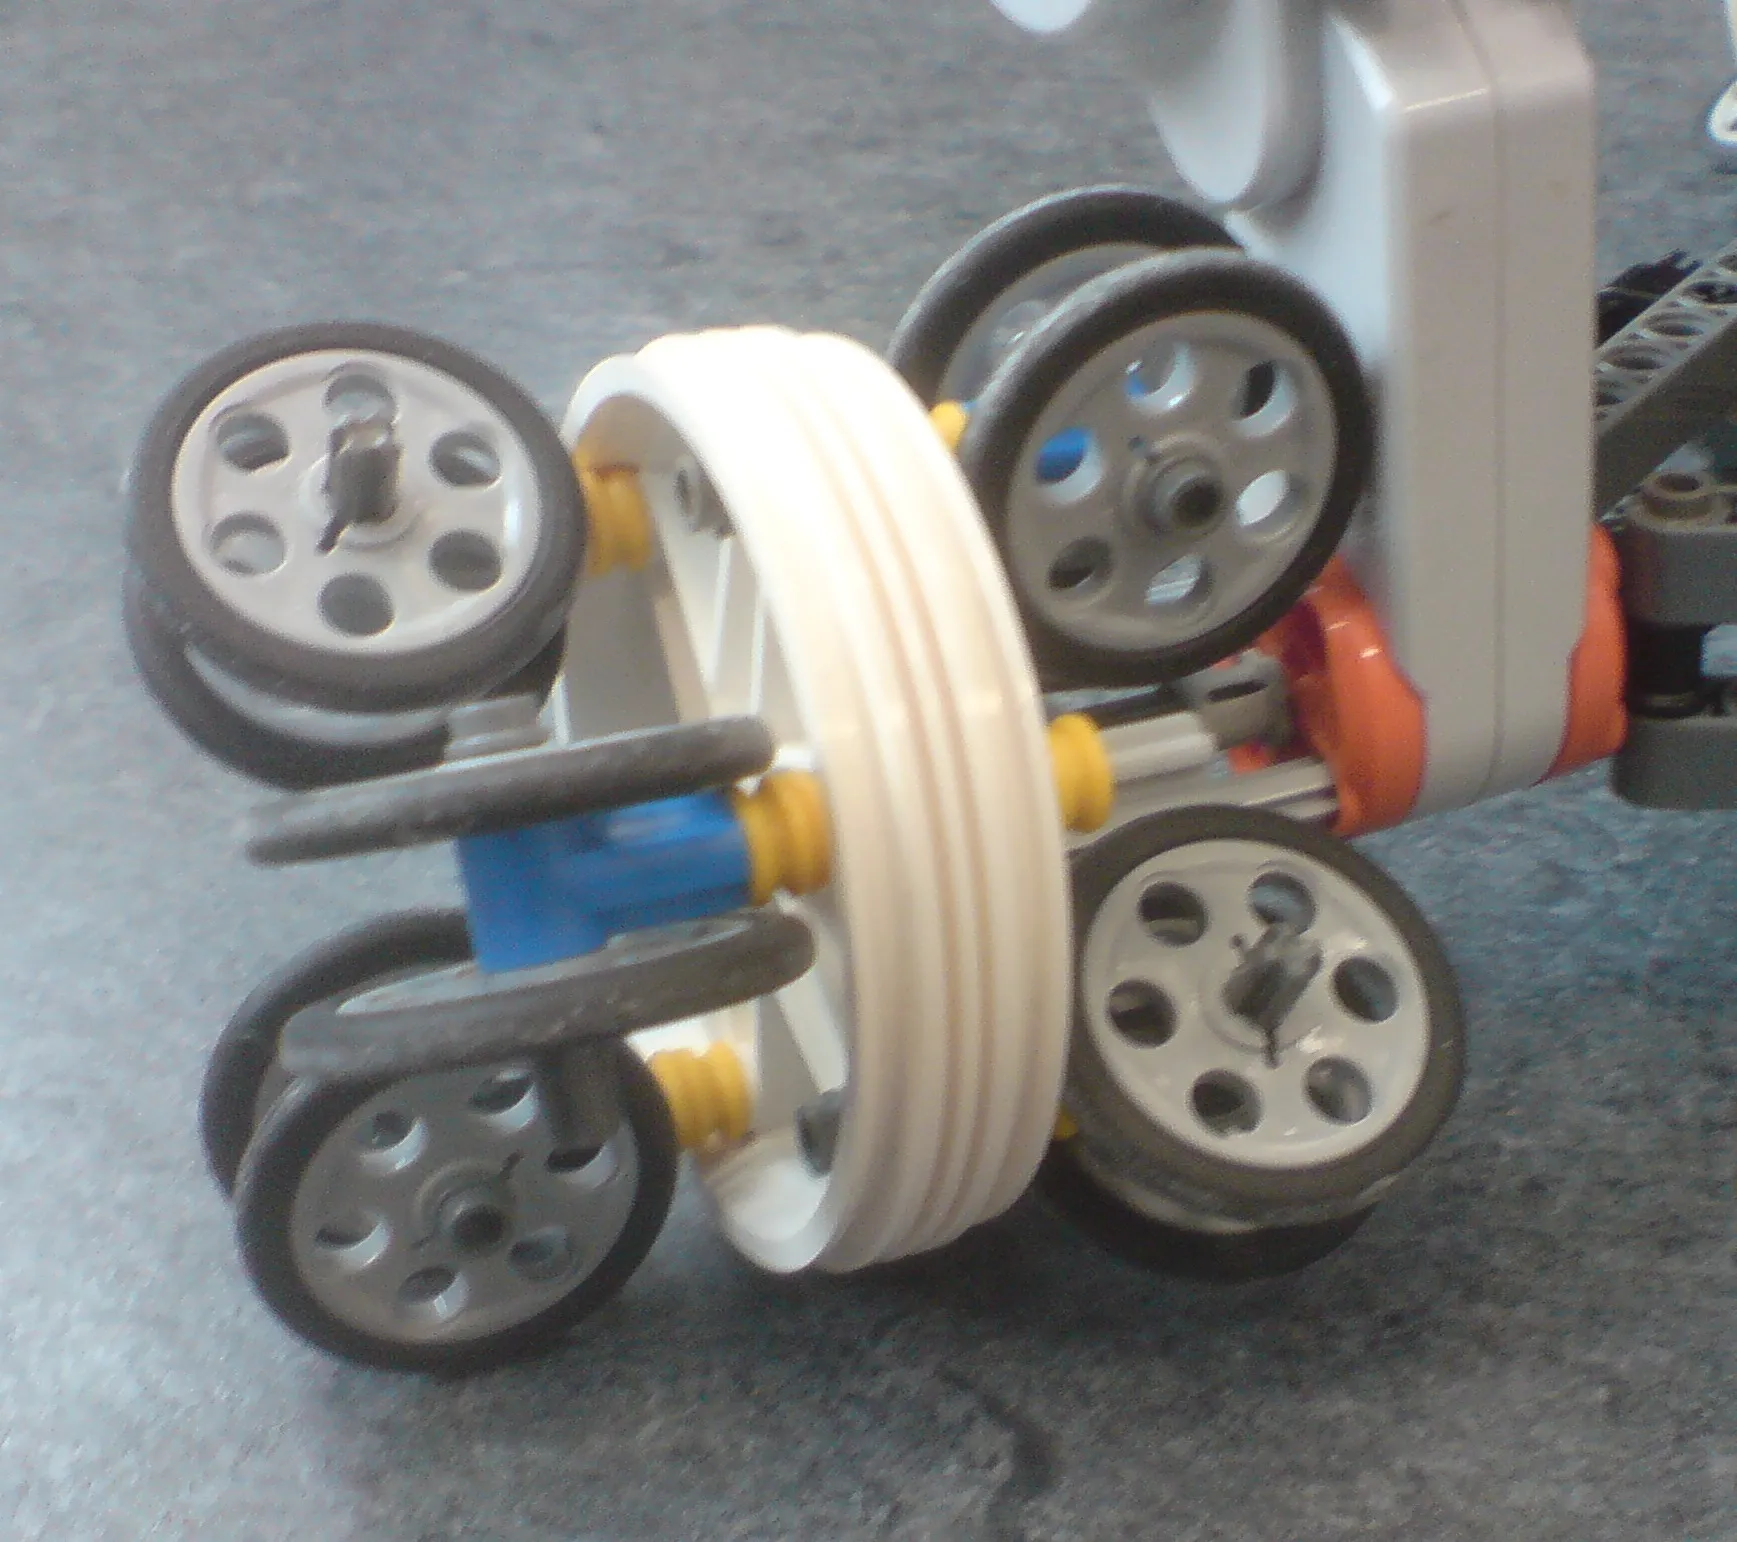
Meine beiden Kollegen und ich haben uns für einen Roboter mit omni-direktionalem Antrieb entschieden.
Das Prinzip dieses etwas außergewöhnlichen Antriebes wird im folgenden Video deutlich.
Die Konstruktion der “Omniwheels” war komplizierter als anfangs angenommen.
Dafür sind wir glücklicherweise recht schnell auf den nötigen Zusammenhang zwischen der Fahrtrichtung und den drei Motorgeschwindigkeiten gekommen.
Als Projektabschluss mussten alle Gruppen ihren Roboter präsentieren.
Unsere Präsentation gibt es hier:
In den letzten Jahren als Linux User hat sich bei mir eine kleine Toolbox aus der Bash (Bourne Again Shell) Skripten angesammelt.
Einige habe ich bereits in Blog-Posts vorgestellt.
Last time, I presented some code for visualizing your power consumption using the Fnordlicht modules.
Today, we continue the journey in a similar direction: I’ve written a small C program to control the modules according to the current audio volume.
The software monitors the audio signal of my system (Ubuntu 10.10 with Pulseaudio).
So you can dance to everything that can play audio 😄…
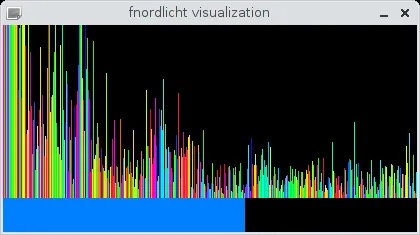
Update: As preparation for an upcoming exam, I added a Discrete Fourier Analysis (DFT).
Unfortunately, the serial bus is too slow to visualize the audio spectrogram in real time.
The bars are colored with their complex phase->hue (HSV) equivalent.
fnordlicht FFT Visualization.
The software uses libfn a C-library for controlling fnordlichts and is available at Codeberg: /stv0g/libfn/src/fnvum.c .
Ich benutze PulseAudio, um mich in die Soundkarte des Systems einzuklinken.
Das Programm tarnt sich als Recording-Tool.
Und kann dadurch den kompletten Audio-Output oder nur bestimmte Programme visualisieren.
Sogar das Mikrofon kann ich benutzen 😜.
PulseAudio liefert mir einen einfachen PCM Stream (44,1kHz Samplingrate, Mono & 16-Bit signed Integers).
Derzeit addiere ich immer nur x Werte dieses Byte Streams und mittele diese Summe dann über einen kurzen Zeitraum.
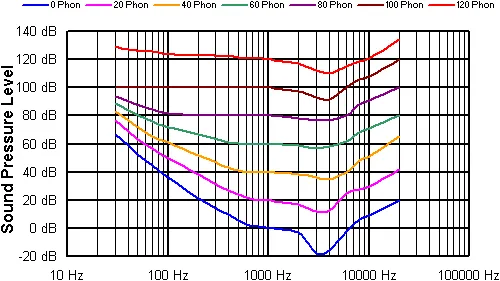
Geplant ist noch eine FFT-Analyse um die Amplituden verschiedener Frequenzen gemäß der “Ohrkurve”, der Empfindlichkeit des menschlichen Gehörs, gewichten zu können.
Der Schritt zur Spektraldarstellung (jedes meiner 10 fnordlichter als VU-Meter für ein bestimmtes Frequenzband) ist dann hoffentlich auch nicht mehr so weit.
Im Fraunhofer ITWM veranstaltete Mathias Dalheimer, Leiter des Projekts “mysmartgrid”, das erste deutsche BarCamp zu den Themen:
Smart Metering
Demand-Side Management
Home Automation
Home Displays
Von Freitag bis Samstag trafen sich etwa 25, teils internationale, Teilnehmer und diskutierten fleißig über das aktuelle Themenfeld.
Neben vielen neuen Gesichtern und interessanten Vorträgen bekamen wir auch die Möglichkeit uns das Gebäude und den Rechen-Cluster des ITWM zu besichtigen.
Ach, und hierbei möchte ich mich gleich bei Mathias für die Organisation und das Catering bedanken 😉 War super!
Für alle, die es dieses Jahr leider nicht nach Kaiserslautern geschafft haben, sei gesagt, dass dies sicherlich nicht die letzte Veranstaltung dieser Art gewesen ist.
Spätestens nächstes Jahr treffen wir uns sicherlich wieder.
Justin hat das gesamte Event als Timelapse-Video in 2 Minuten zusammengefasst:
Feedback und Ergebnisse dieses Wochenendes werden im Wiki gesammelt.
Vor ein paar Wochen bin ich auf das Projekt von Alexander Neumann aufmerksam geworden, um den Eingang neuer Mails, Nachrichten und meinen Stromverbrauch darzustellen.
Meine 10 Module waren schnell aufgebaut.
Sie bestehen aus je 3x3 LEDs (RGB) und einem ATMega8 Mikrocontroller, der die PWM-Ansteuerung und die Kommunikation über einen seriellen Bus übernimmt.
Leider gab es bisher nur keinen in Ruby geschriebenen Code zum Testen der Ansteuerung der Lichter über einen Rechner (/fd0/fnordlicht/tests ).
Daher ergriff ich die Gelegenheit und schrieb eine kleine C++-Bibliothek zur Ansteuerung der fnordlicht Module über die serielle Schnittstelle.
Die Bibliothek sowie ein Beispiel-Programm für die Linux-Konsole gibt es auf Codeberg: /stv0g/libfn .
Mit der Ethernet-RS232 Bridge von ethersex (Y-Port) konnte ich sogar die Ansteuerung über das Internet testen.
Dies wird auch von der Library unterstützt.
Mit meinen Eltern und meiner Schwester war ich im August 2010 für zwei Wochen in Island unterwegs.
Wir haben die Insel mit dem Auto umrundet und sind auch ins Hochland vorgedrungen.
Dabei haben wir viele tolle Wasserfälle, Geysire, Vulkane und Gletscher gesehen.
Natürlich durfte auch das obligatorische Bad in der heißen Quelle nicht fehlen.
Auf unserer zweiwöchigen Rundreise auf Islands Küste und durch das Hochland konnten wir unsere neue Kamera gleich mal richtig einsetzen.
12 GB belegten diese drei Panoramas, eine Handvoll HD-Filme und knapp 1500 Fotos aus denen ich hier mal die Top 80 herausgepickt habe.
Natürlich habe ich mir die Chance nicht entgehen lassen und auch ein paar Geocaches gesucht.
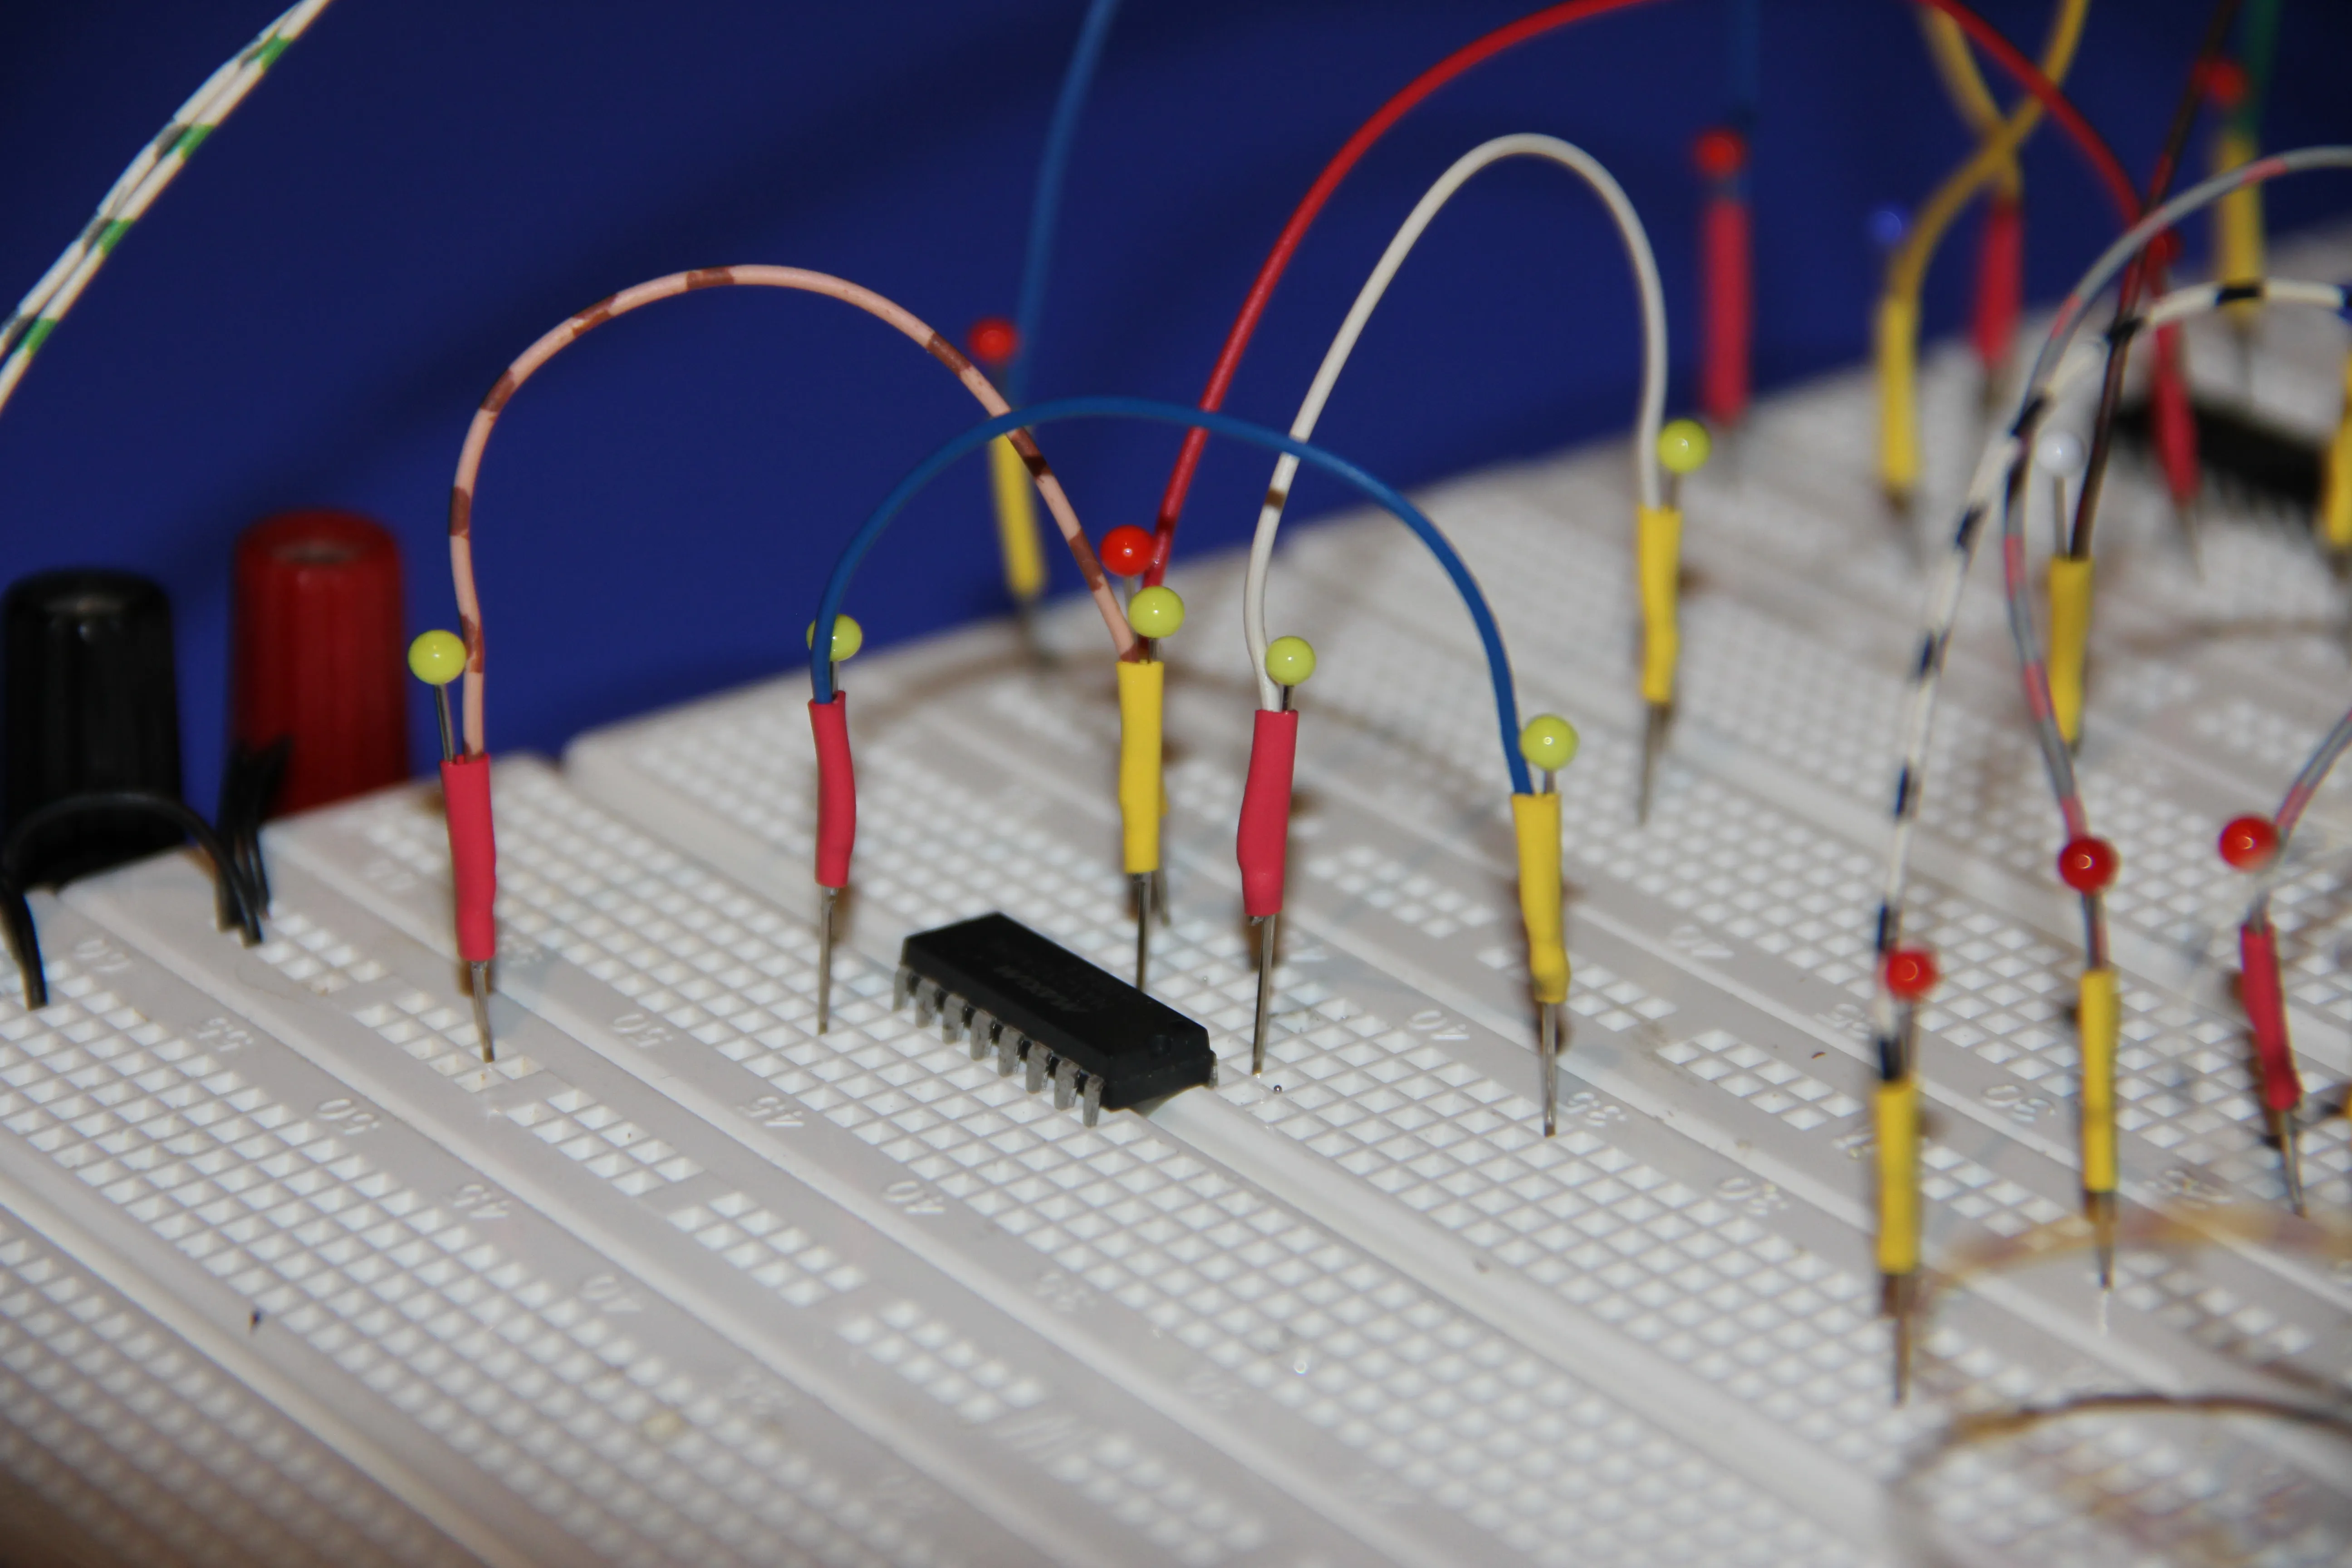
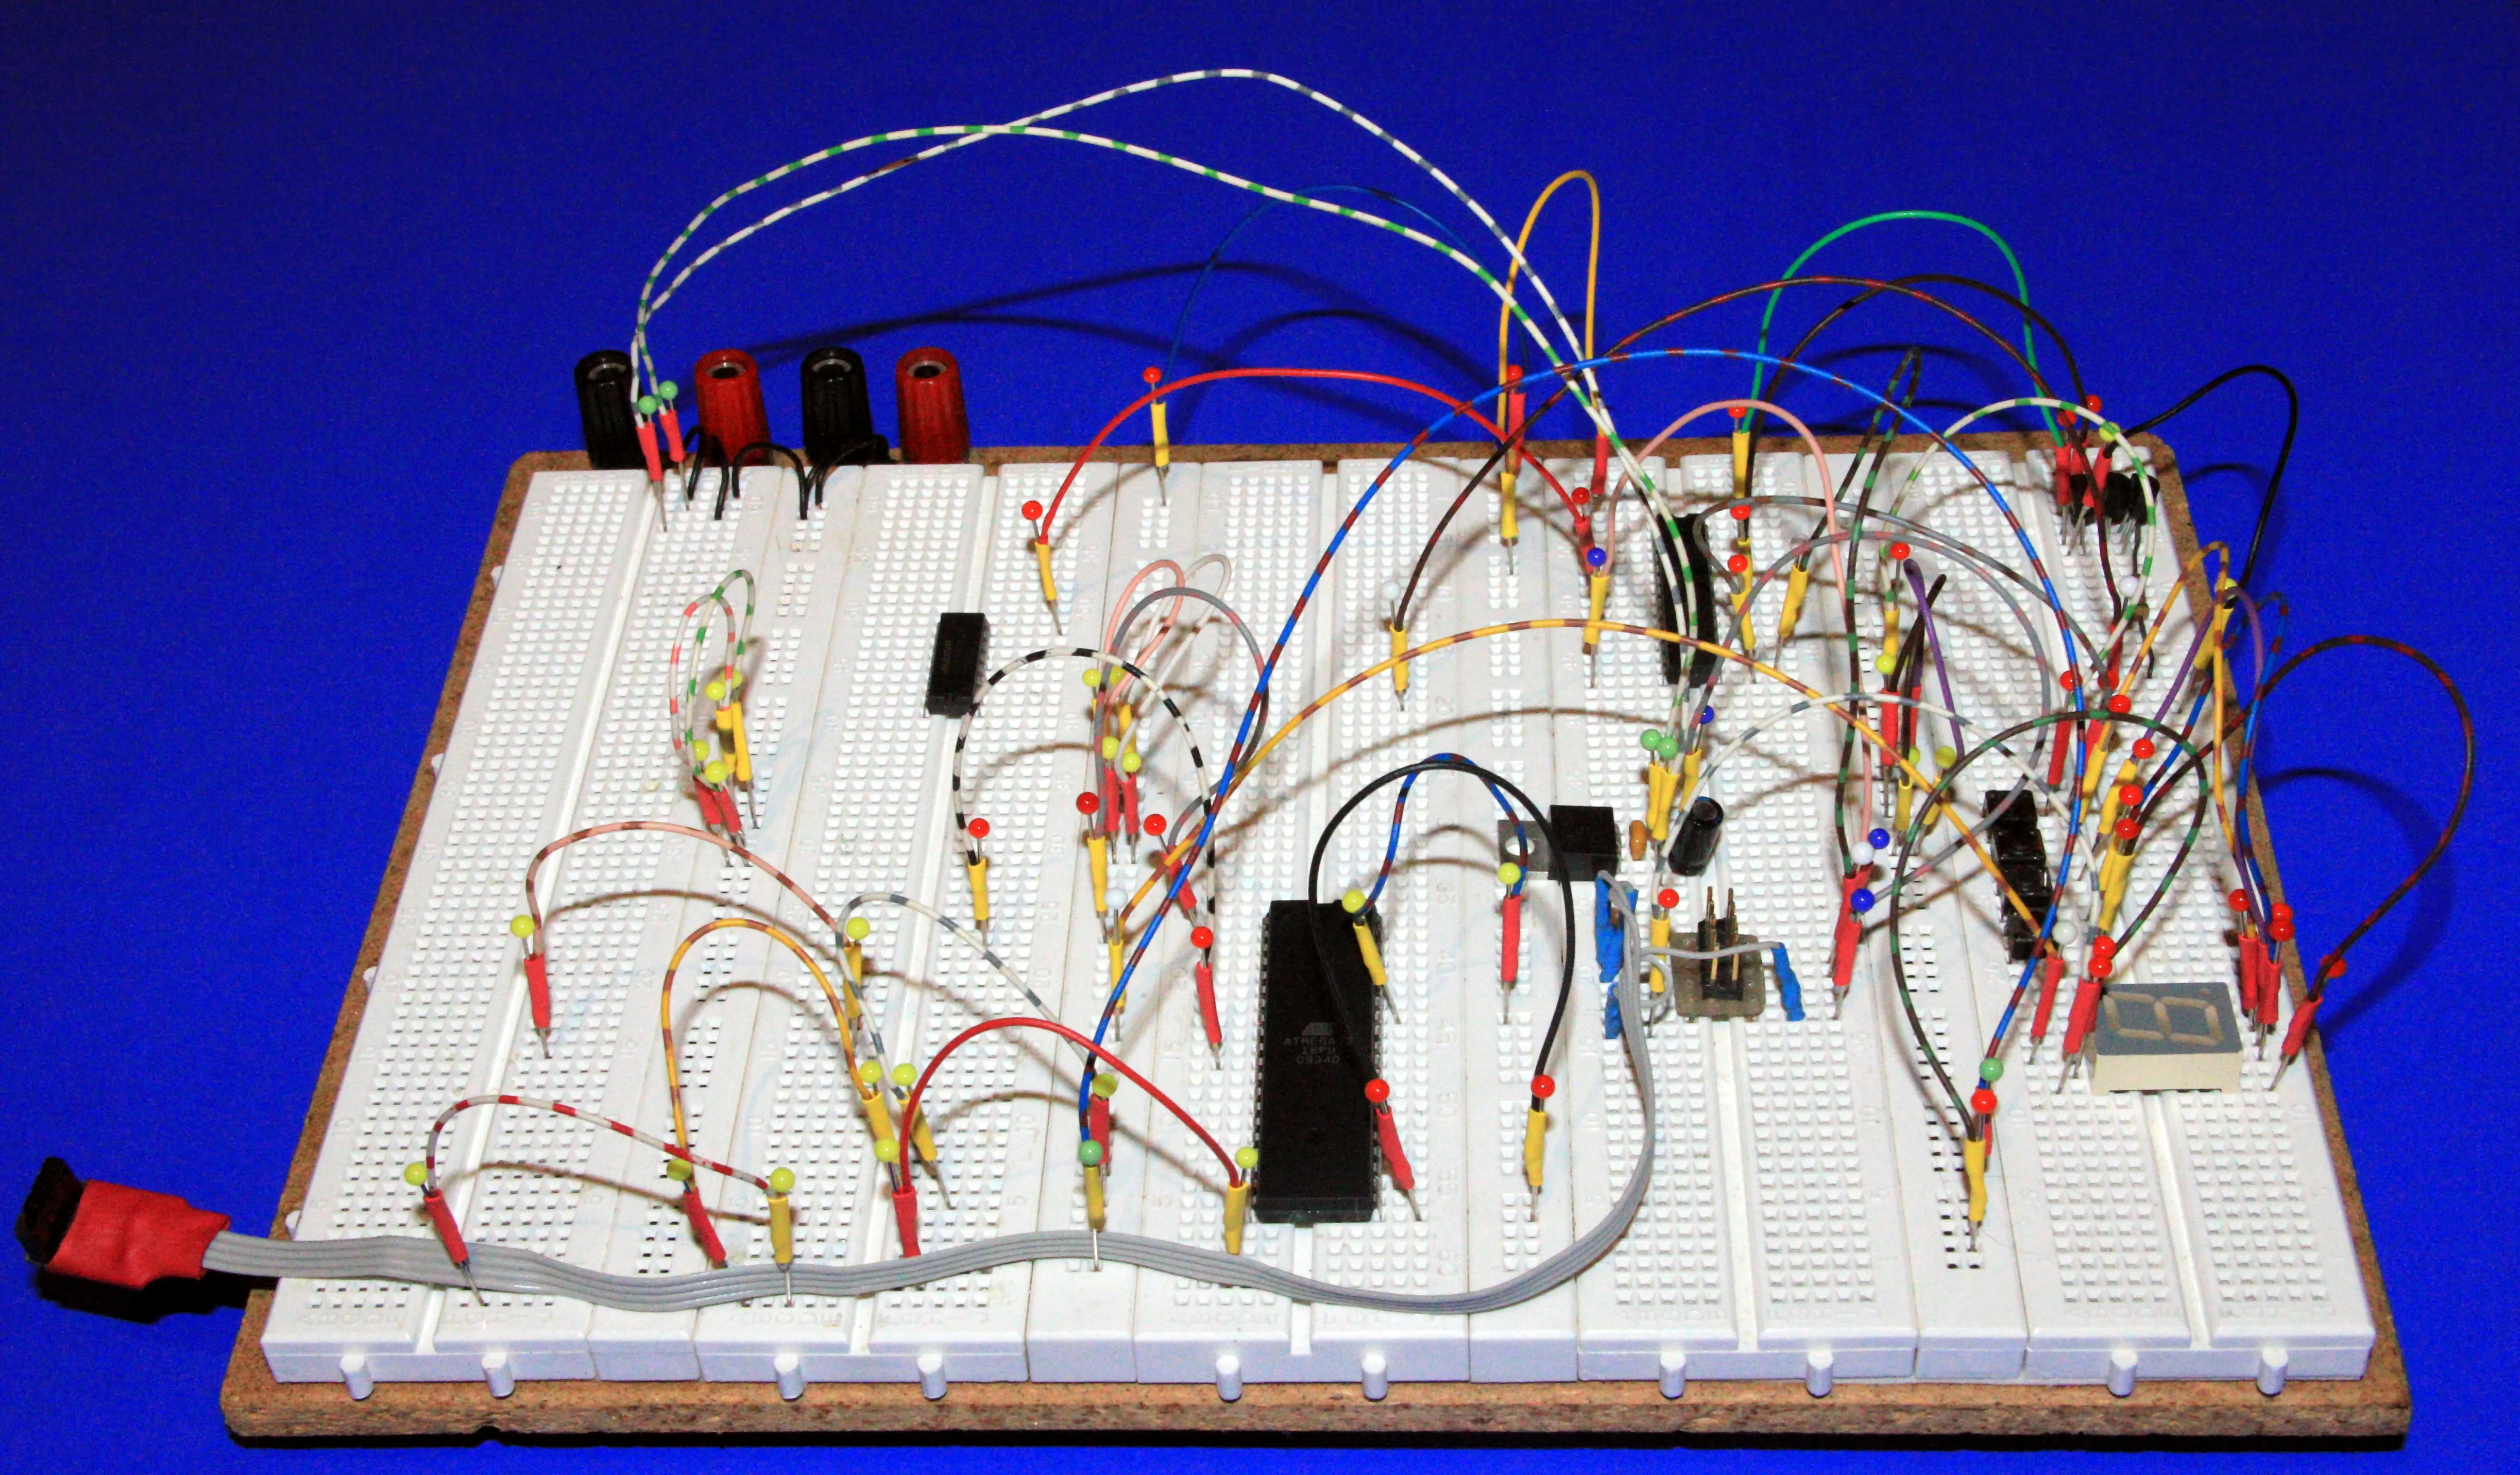
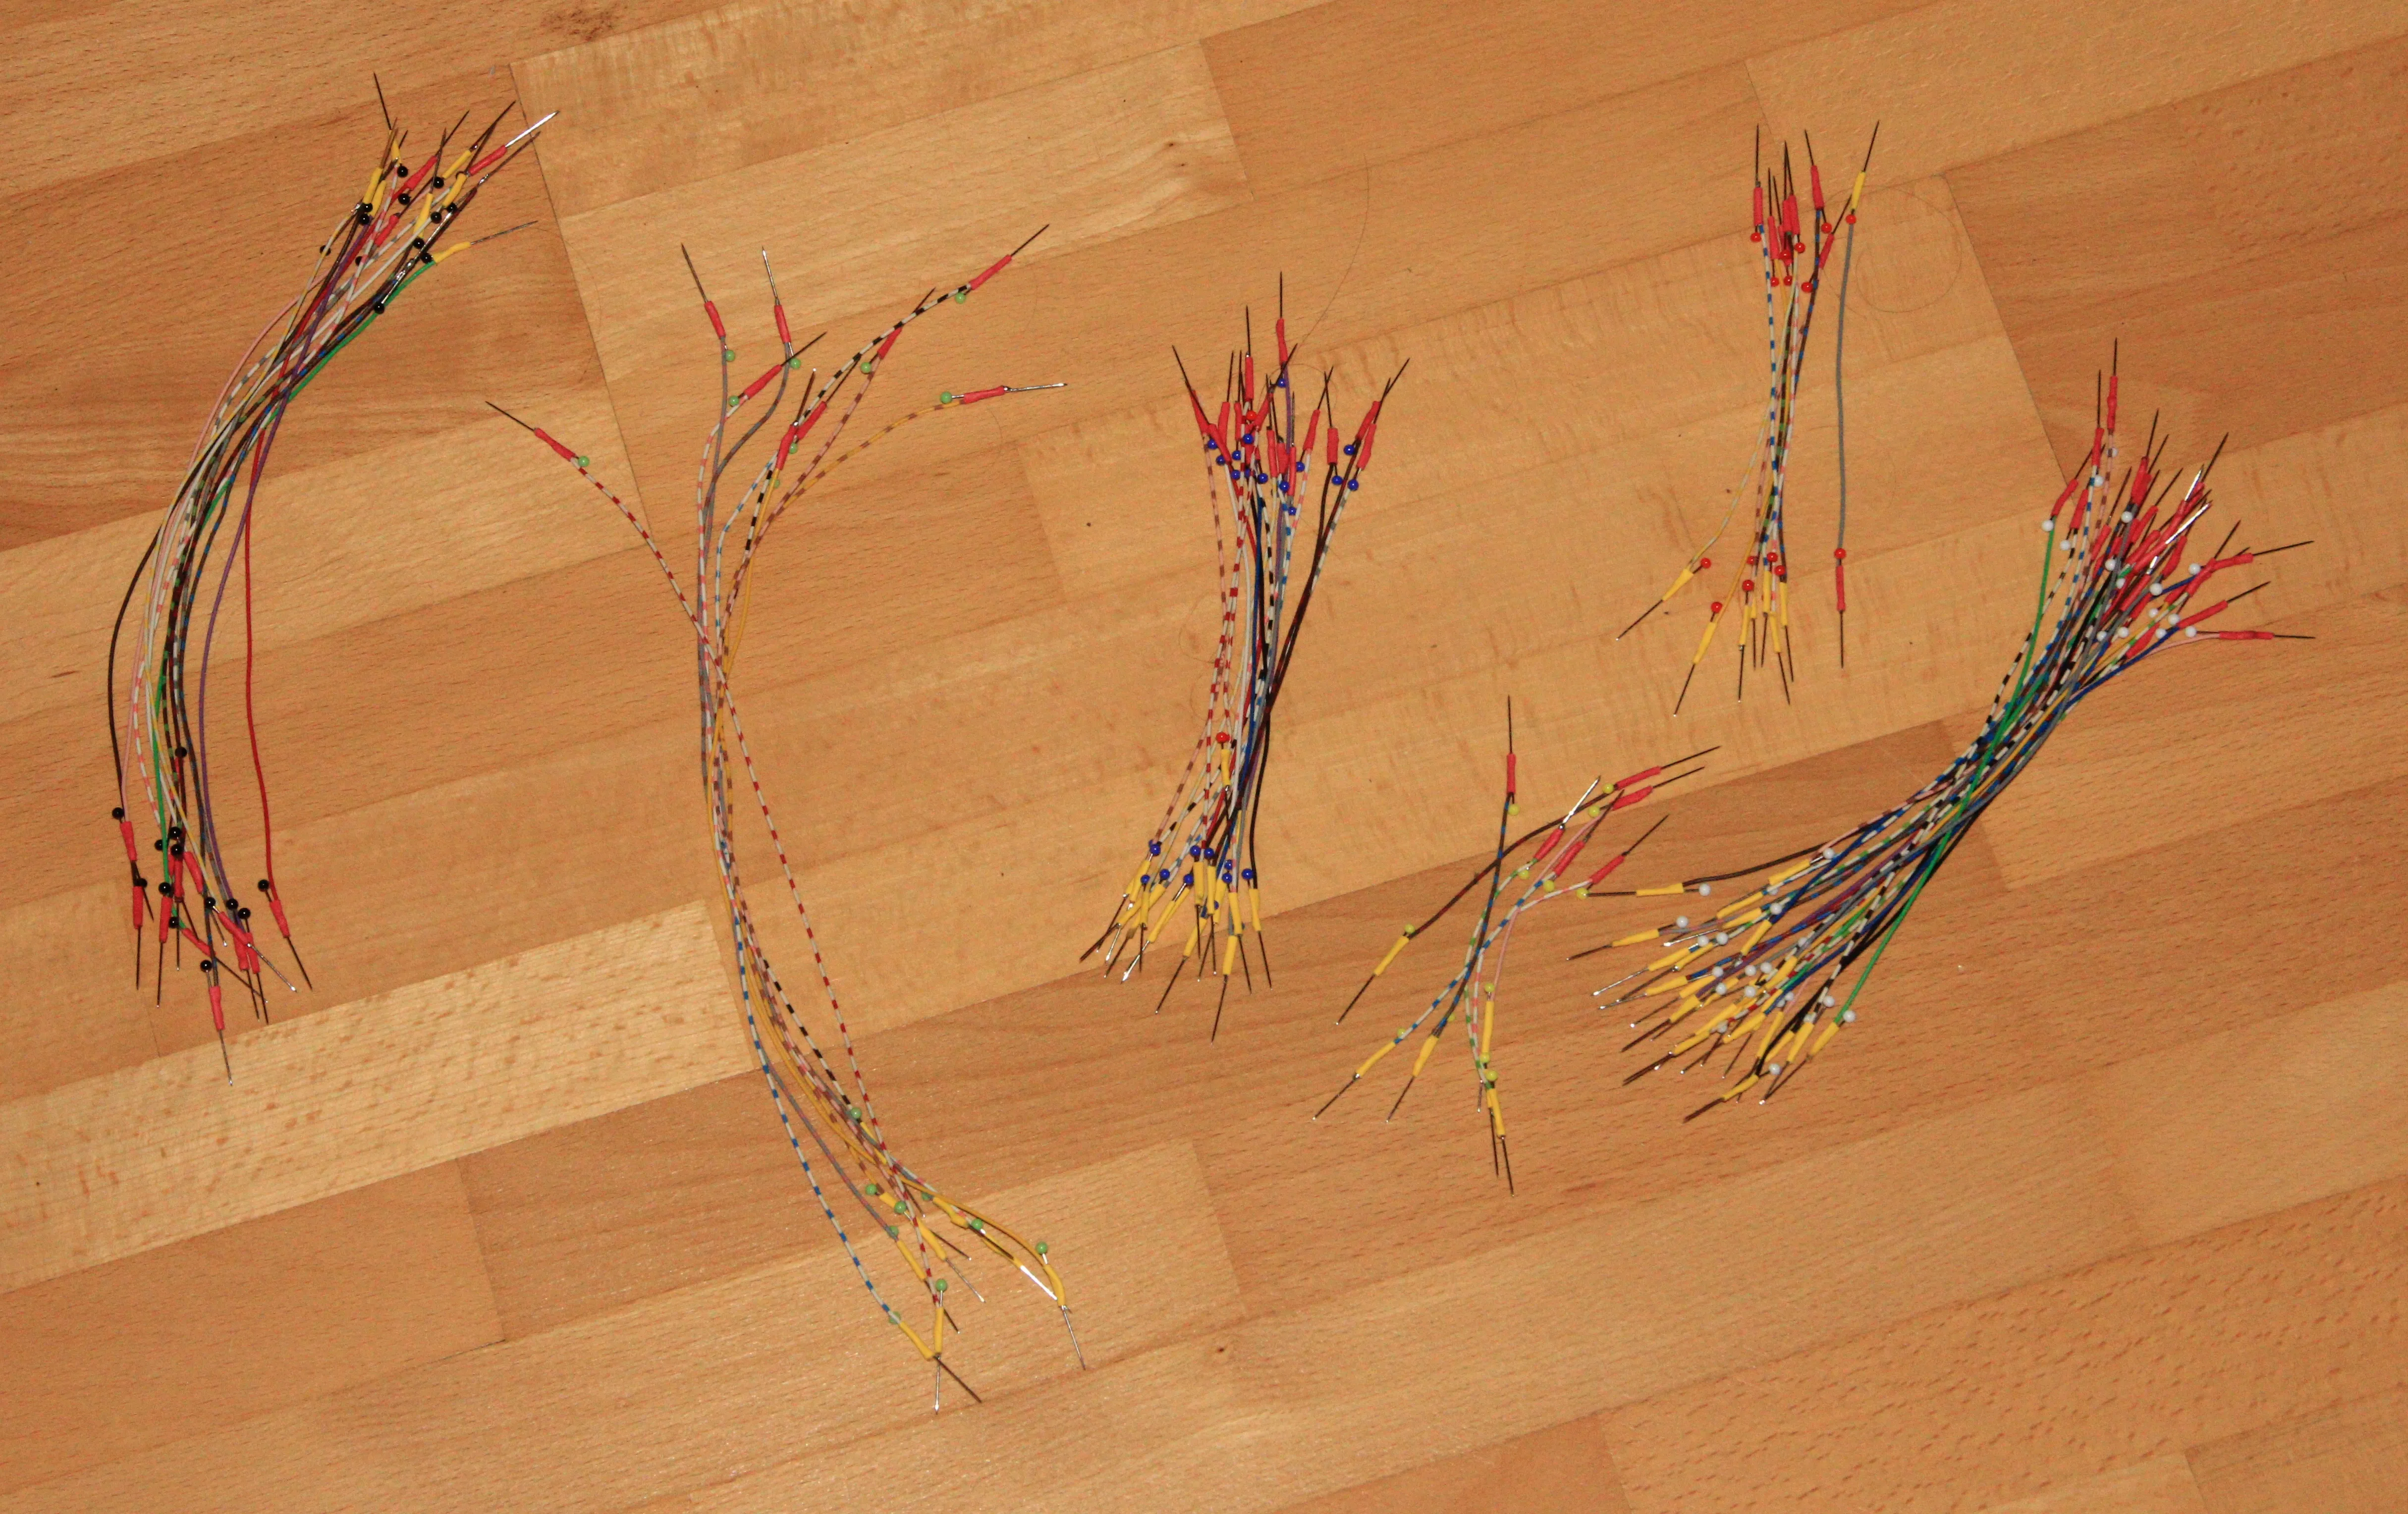
Meinen heutigen Tag habe ich damit verbracht Kabel für mein Steckbrett anzufertigen.
Ich war es leid mit zu dicken Drähten oder Klingeldraht zu hantieren.
Sie passen nicht, brechen ab oder lassen sich einfach nicht eindeutig voneinander unterscheiden.
So dauert das Aufbauen einer kleinen Schaltung auf dem Steckbrett ewig.
Schon länger habe ich nach einer Alternative gesucht.
Kommerzielle Angebote sind meist recht teuer und in Europa nur schwer zu beziehen.
Ich war auf der Suche nach einer günstigen und qualitativ hochwertigen Eigenbauvariante.
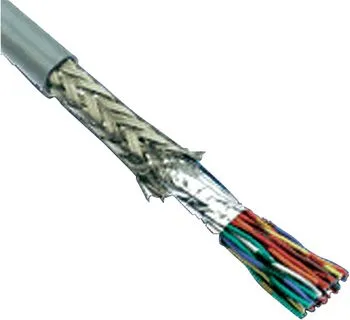
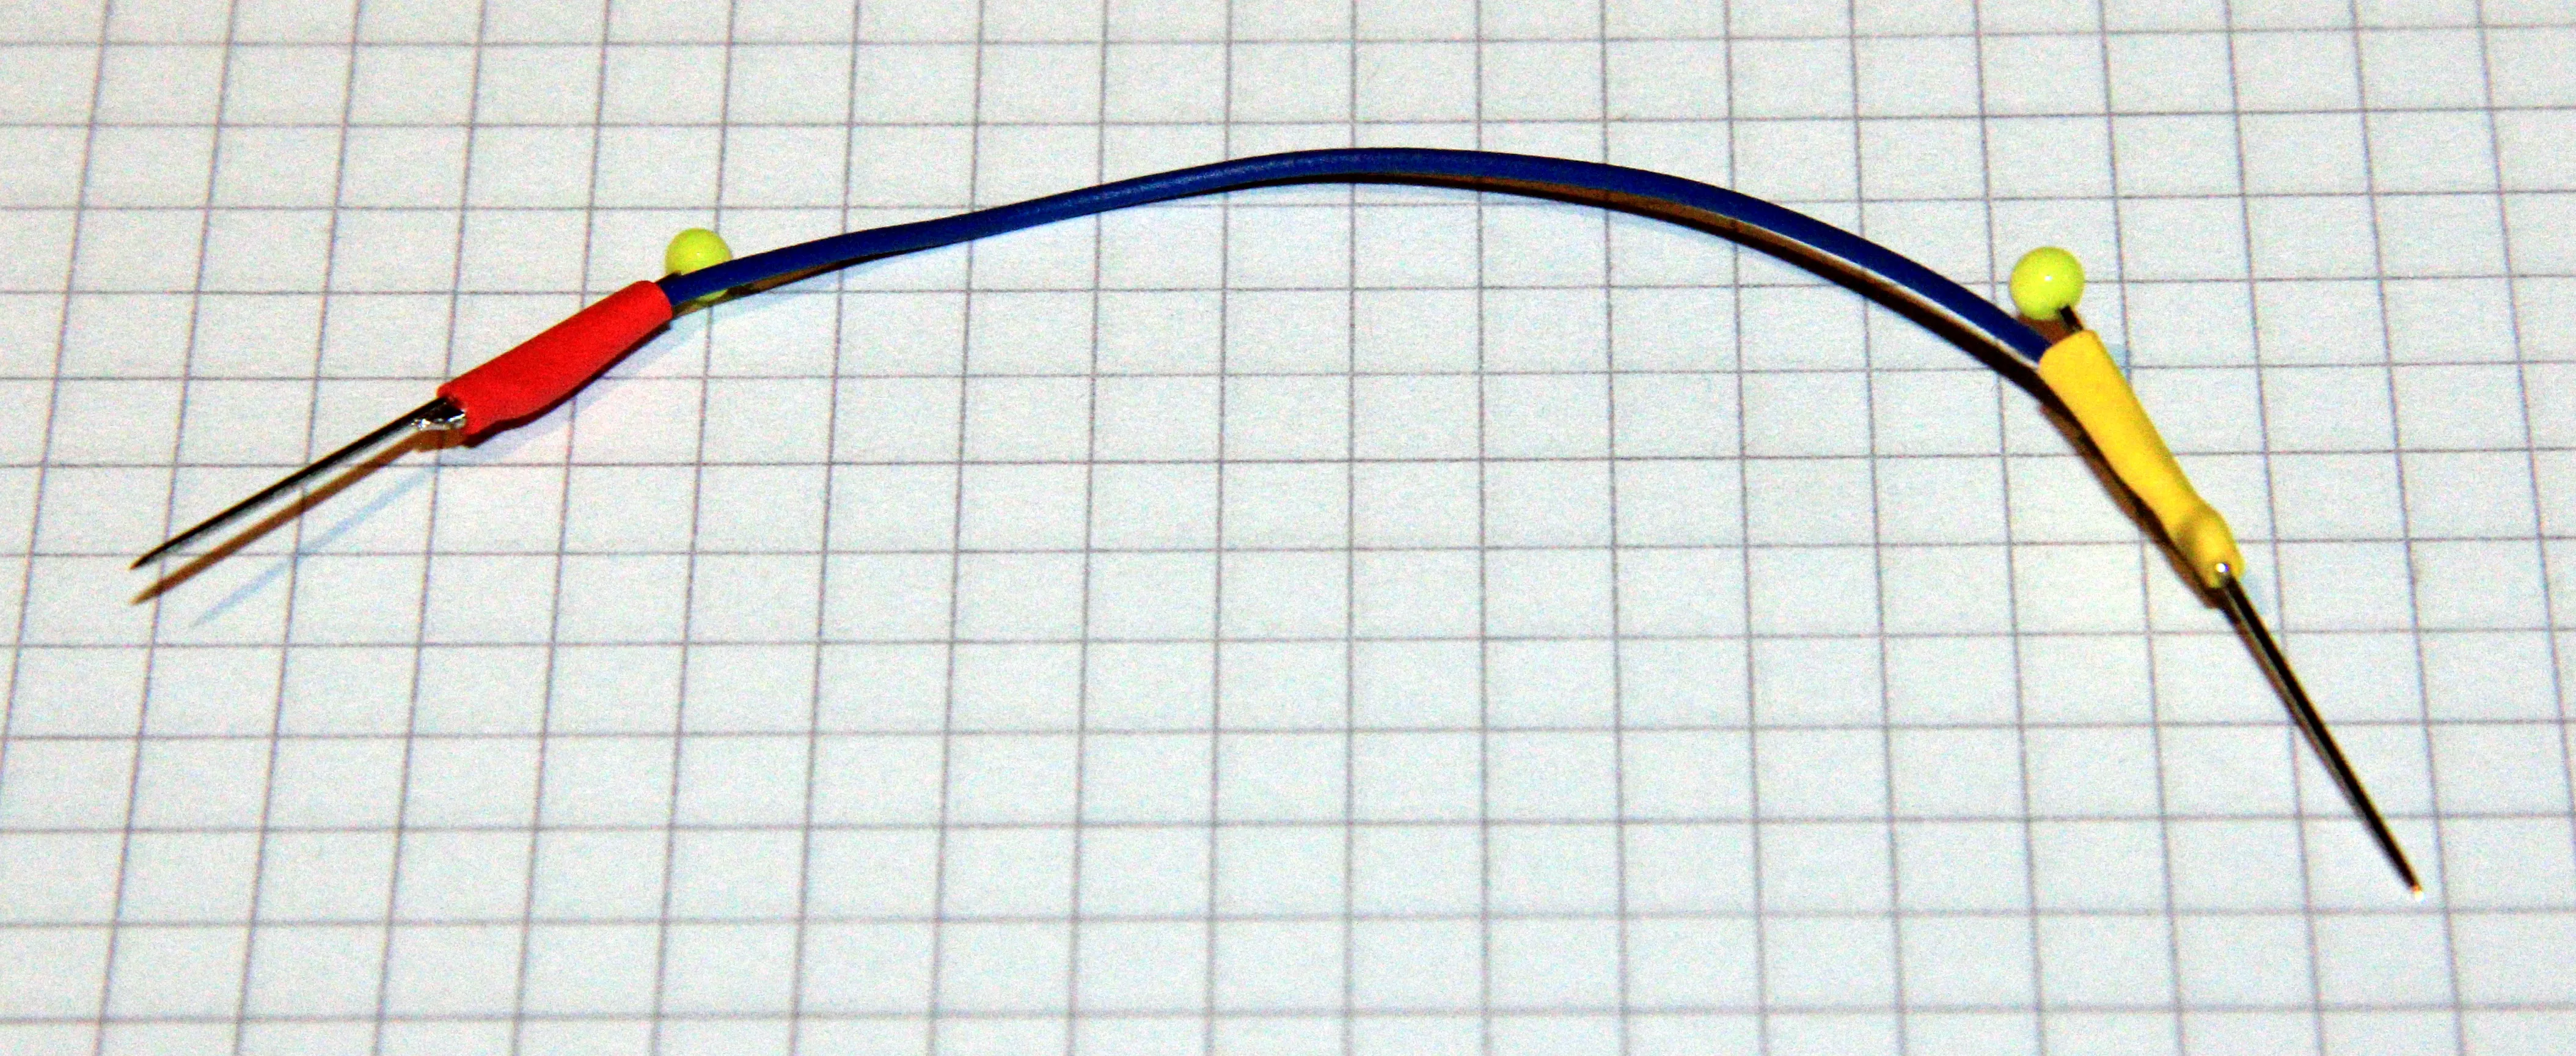
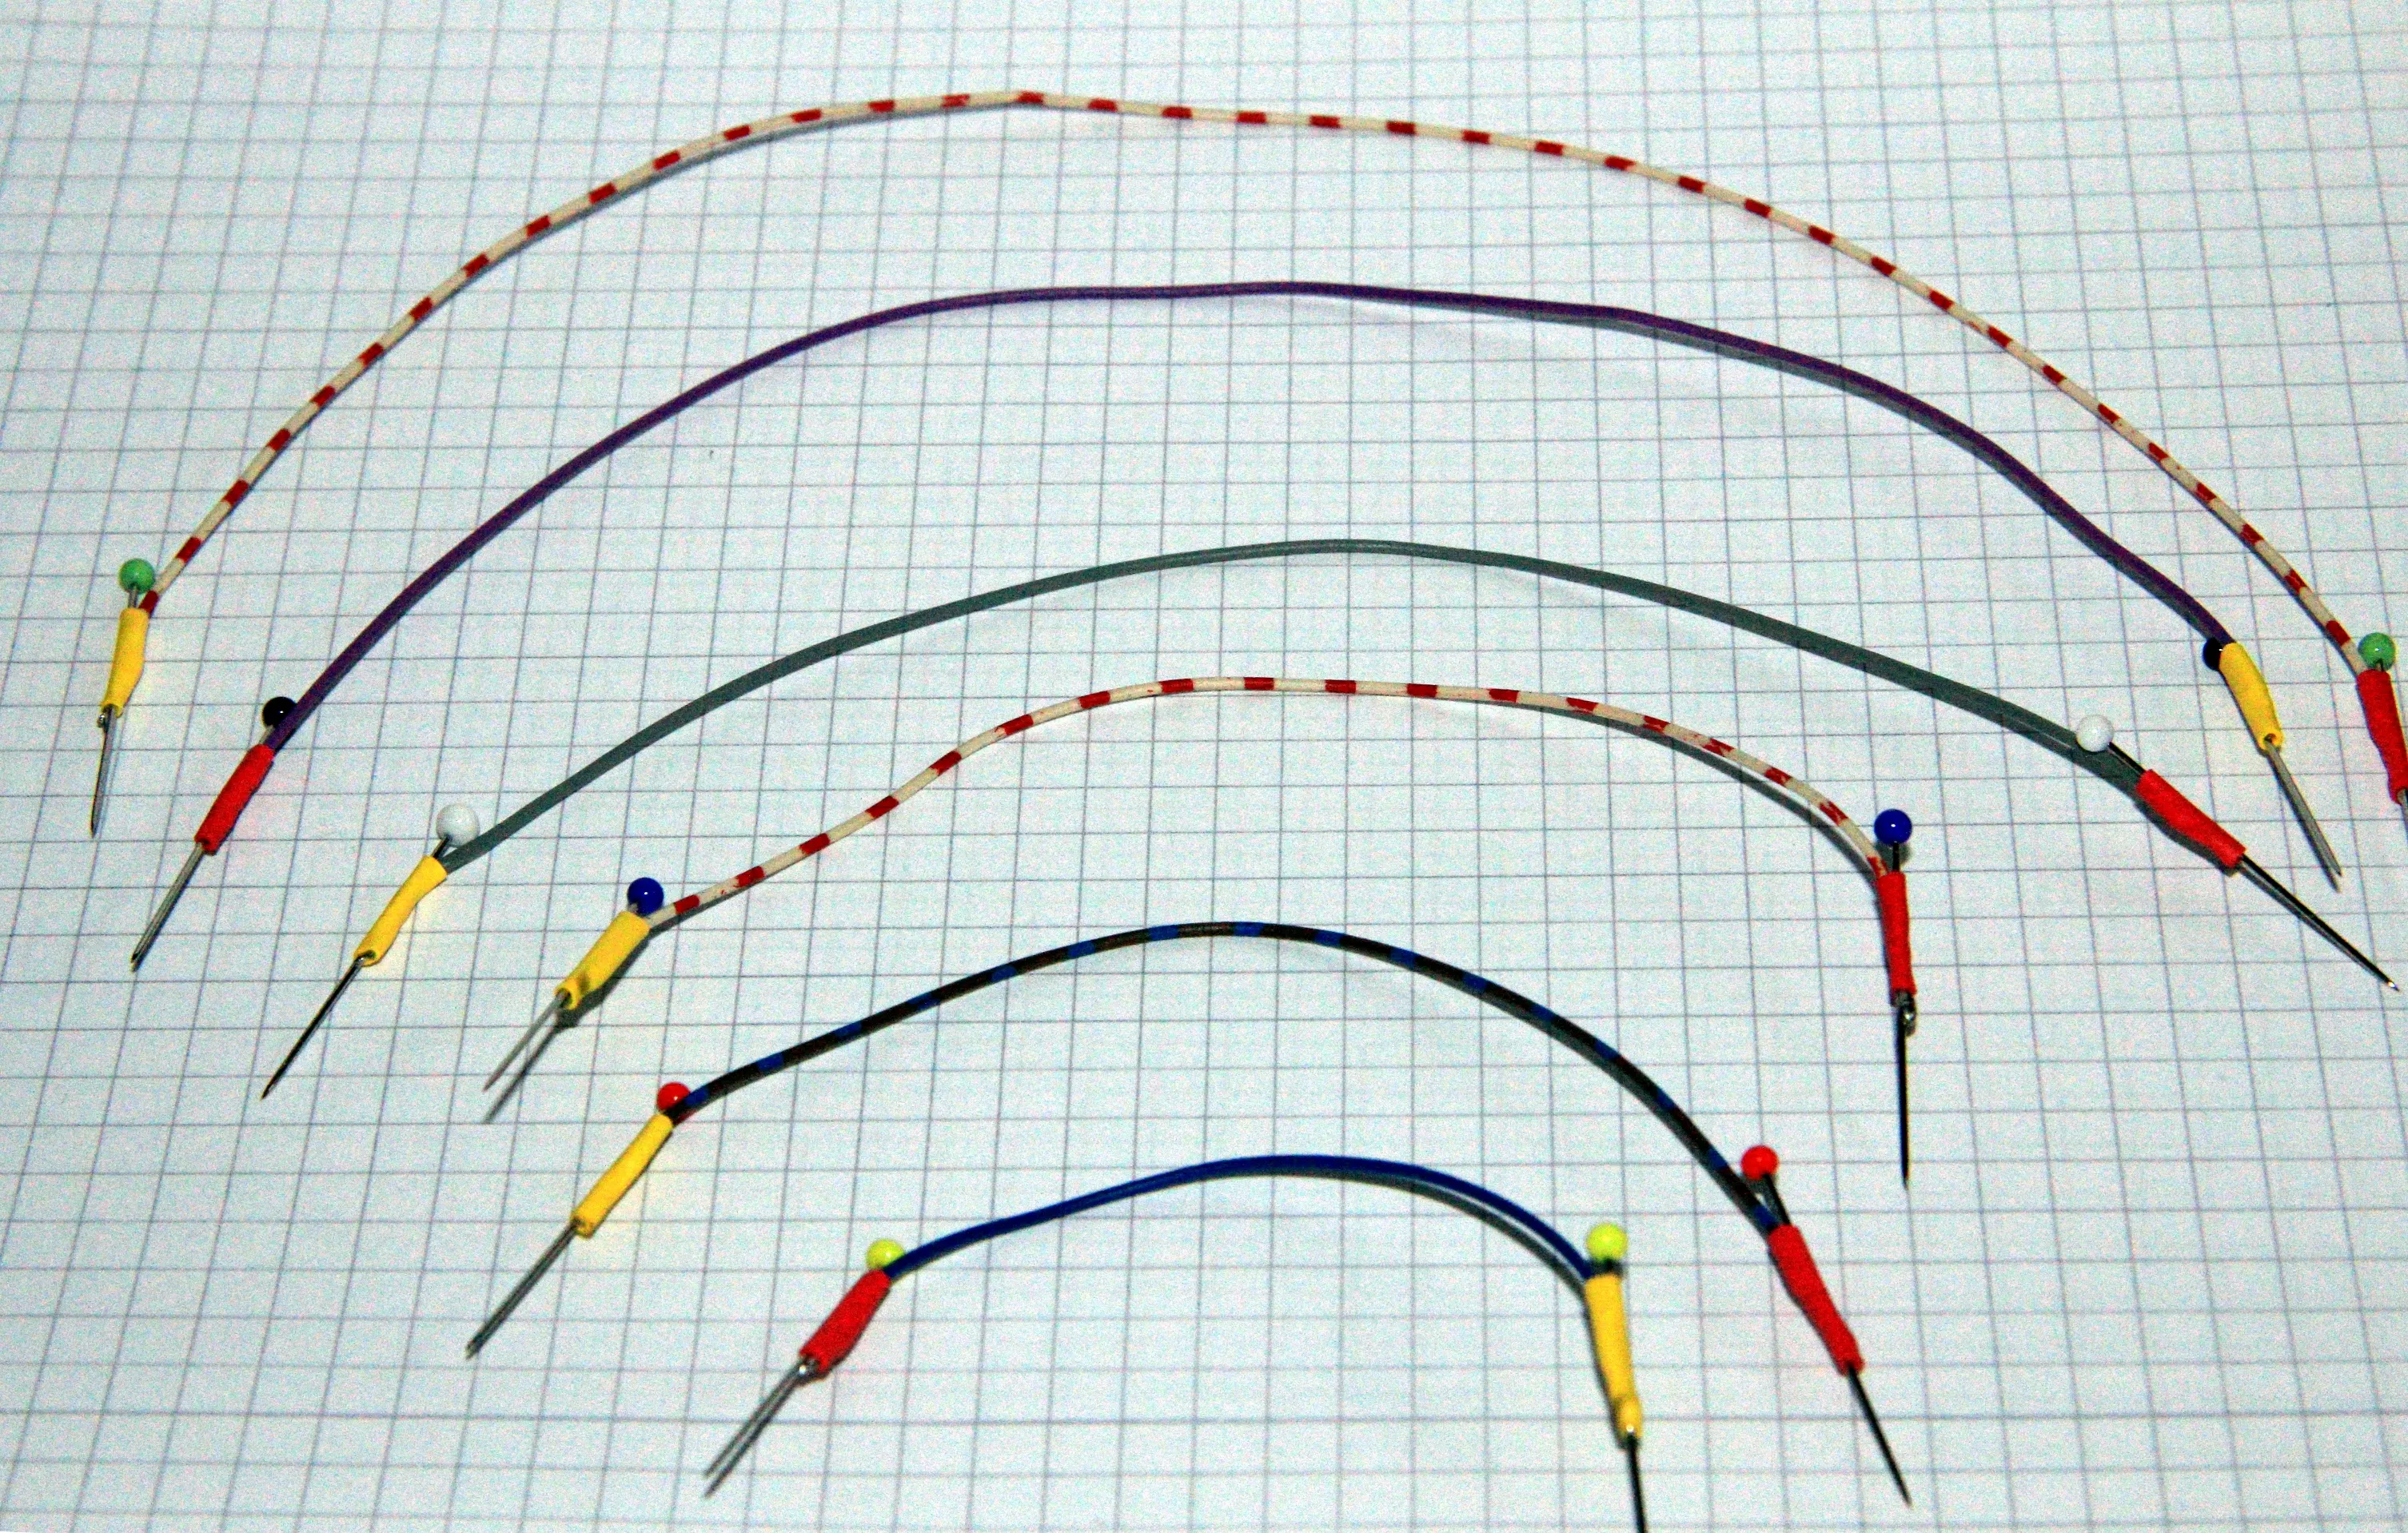
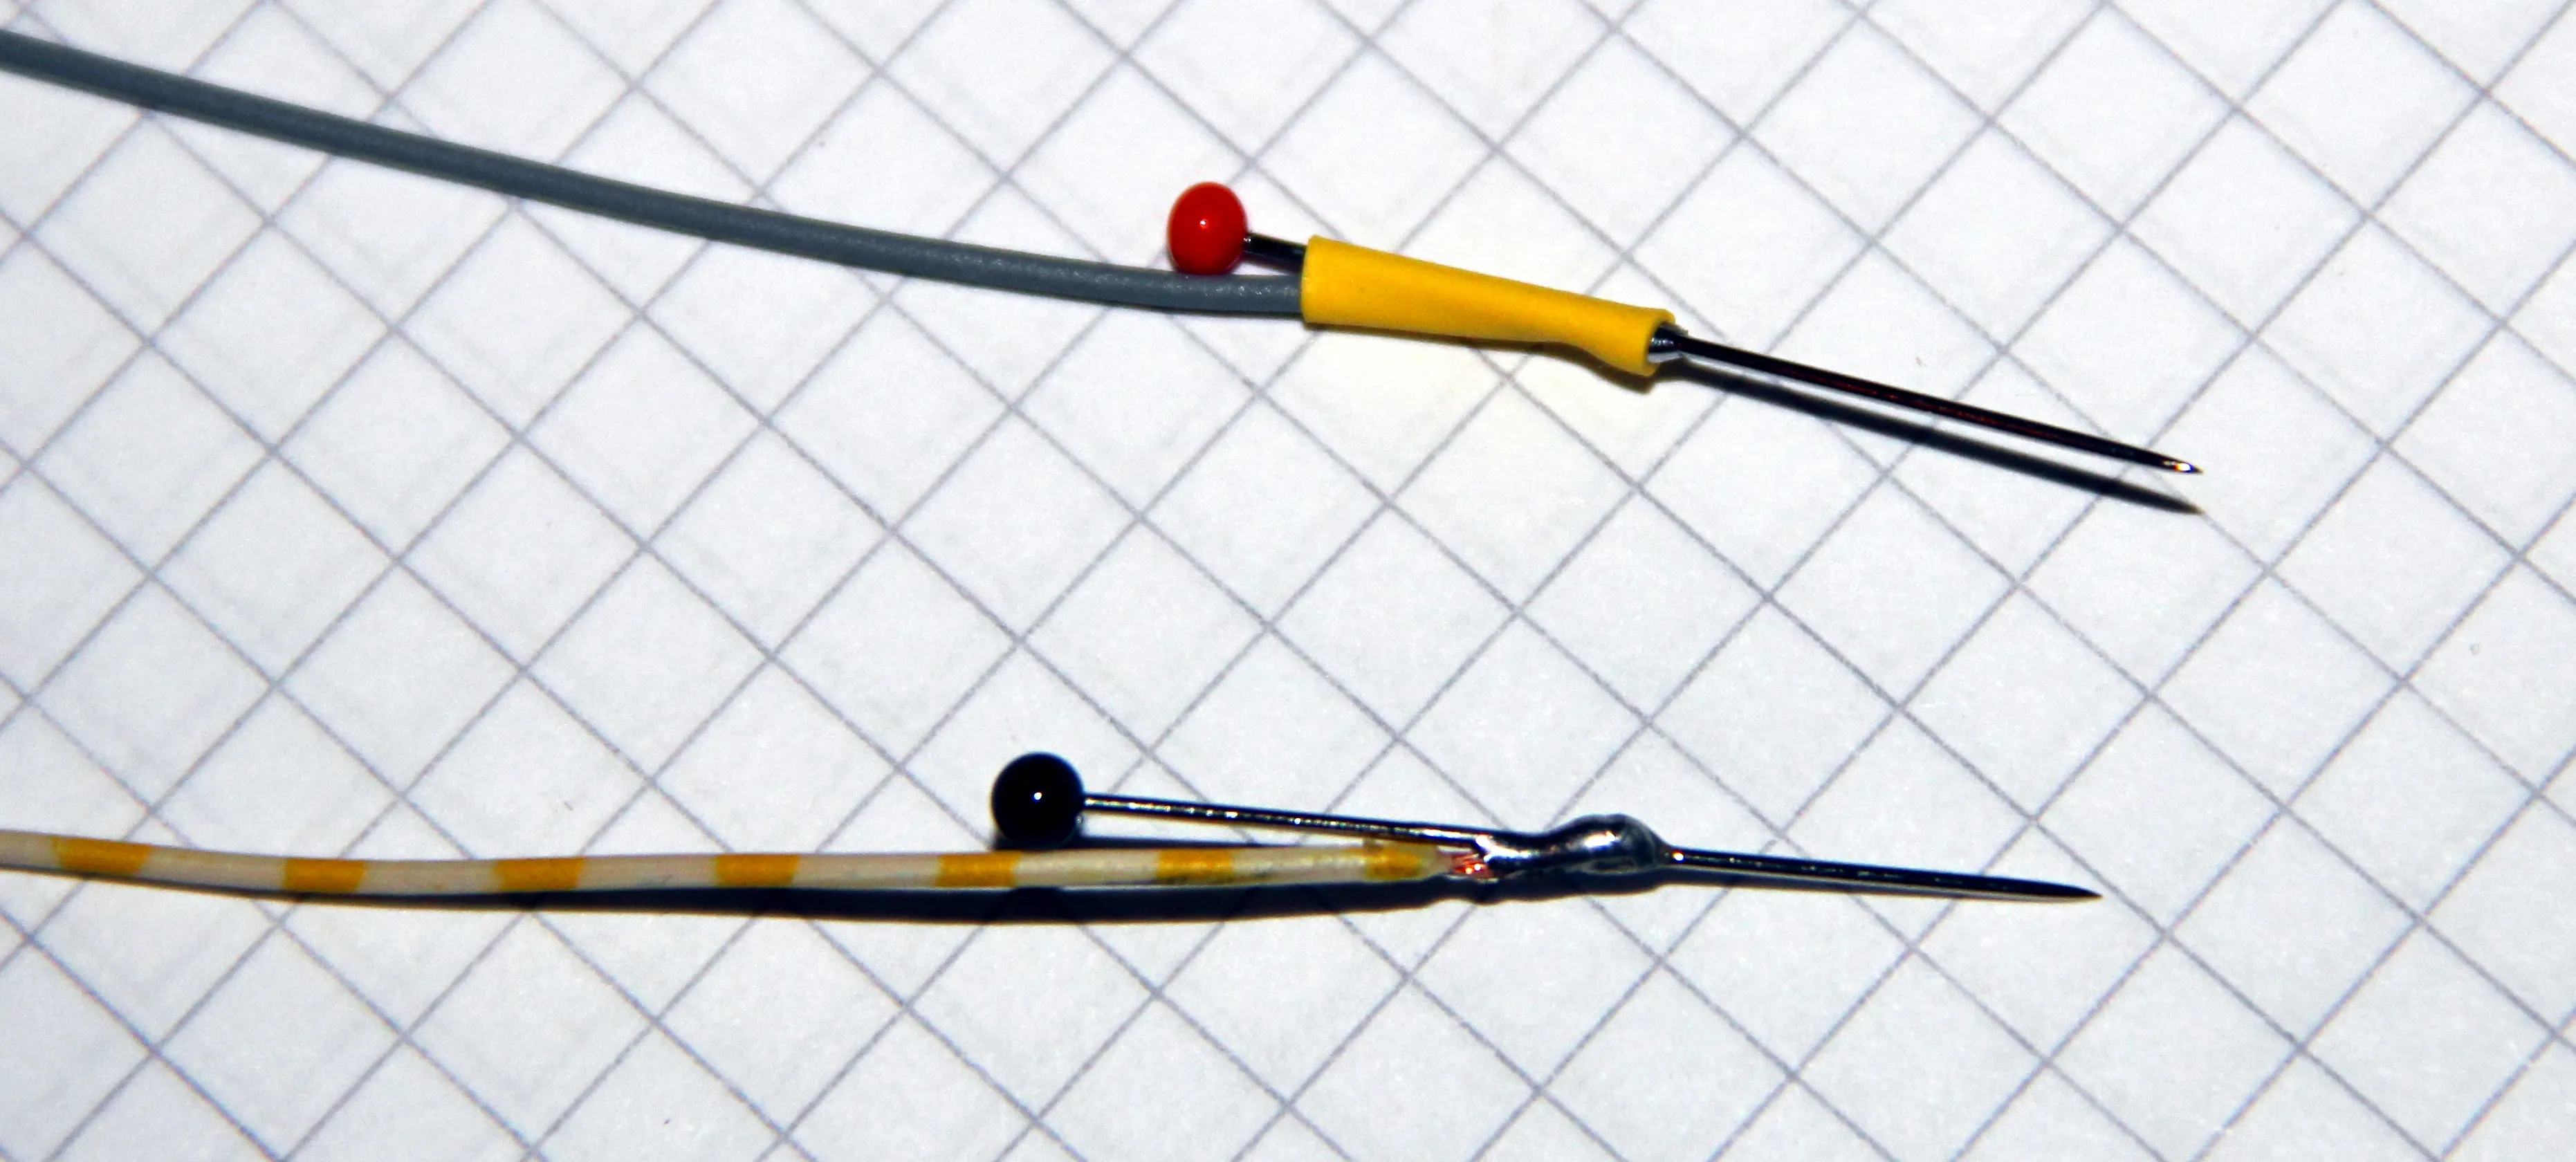
Meine Steckbrücken bestehen aus je zwei Stecknadeln mit farbigem Glaskopf und einer zwischen 7-25cm langen farbig codierten Ader einer LIYCY-Steuerleitung.
Die Adern der Steuerleitung sind farblich gut voneinander zu unterscheiden.
Sie werden einfach an die Stecknadeln gelötet und mit einem Stück Schrumpfschlauch gesichert.
Rundkabel Paarvers 36 Adern.
Es empfiehlt sich die Ader mittig auf der Nadel anzulöten.
So kann sie mit der Spitze einfach in das Steckbrett gesteckt und entfernt werden.
Der blanke Hals kann so gut zum Messen mit einer Messspitze oder Klemmprüfspitze genutzt werden.
Für etwa 120 Brücken mit verschiedenen Längen habe ich insgesamt etwa 5 Stunden gebraucht.
Zwei Tage noch! Dann habe ich mein freiwilliges ökologisches Jahr abgeschlossen.
Ich bin bereits dabei meinen Schreibtisch aufzuräumen, Sachen zu packen, die neuen FöJ’ler einzuarbeiten.
Micha hat sich bereits vor zwei Wochen nach Tarifa verabschiedet.
Für mich geht es dann Sonntag mit der Familie für zwei Wochen nach Island bevor ich in Aachen richtig mit Studium beginnen kann.
Nun aber zum eigentlichen Inhalt dieses Posts: gerade habe ich meinen Erfahrungsbericht über das FöJ fertig gestellt.
Diesen habe ich für das LVR geschrieben um mein Zeugnis zu bekommen 😉.
Es ist mal wieder mit acht Seiten etwas länger als geplant geworden.
Daher habe ich das ganze mal in ein PDF gepackt:
Ich schreibe hier etwas allgemein über das FöJ und meine persönlichen Erfahrungen, die ich während diesem Jahr gesammelt habe.
Vielleicht kann ich ja hier die Chance nutzen etwas Werbung für das FöJ zu machen.
Ich empfehle es jedem! Nutzt die Chance, beginnt nicht gleich zu studieren und macht lieber ein FöJ 😊.
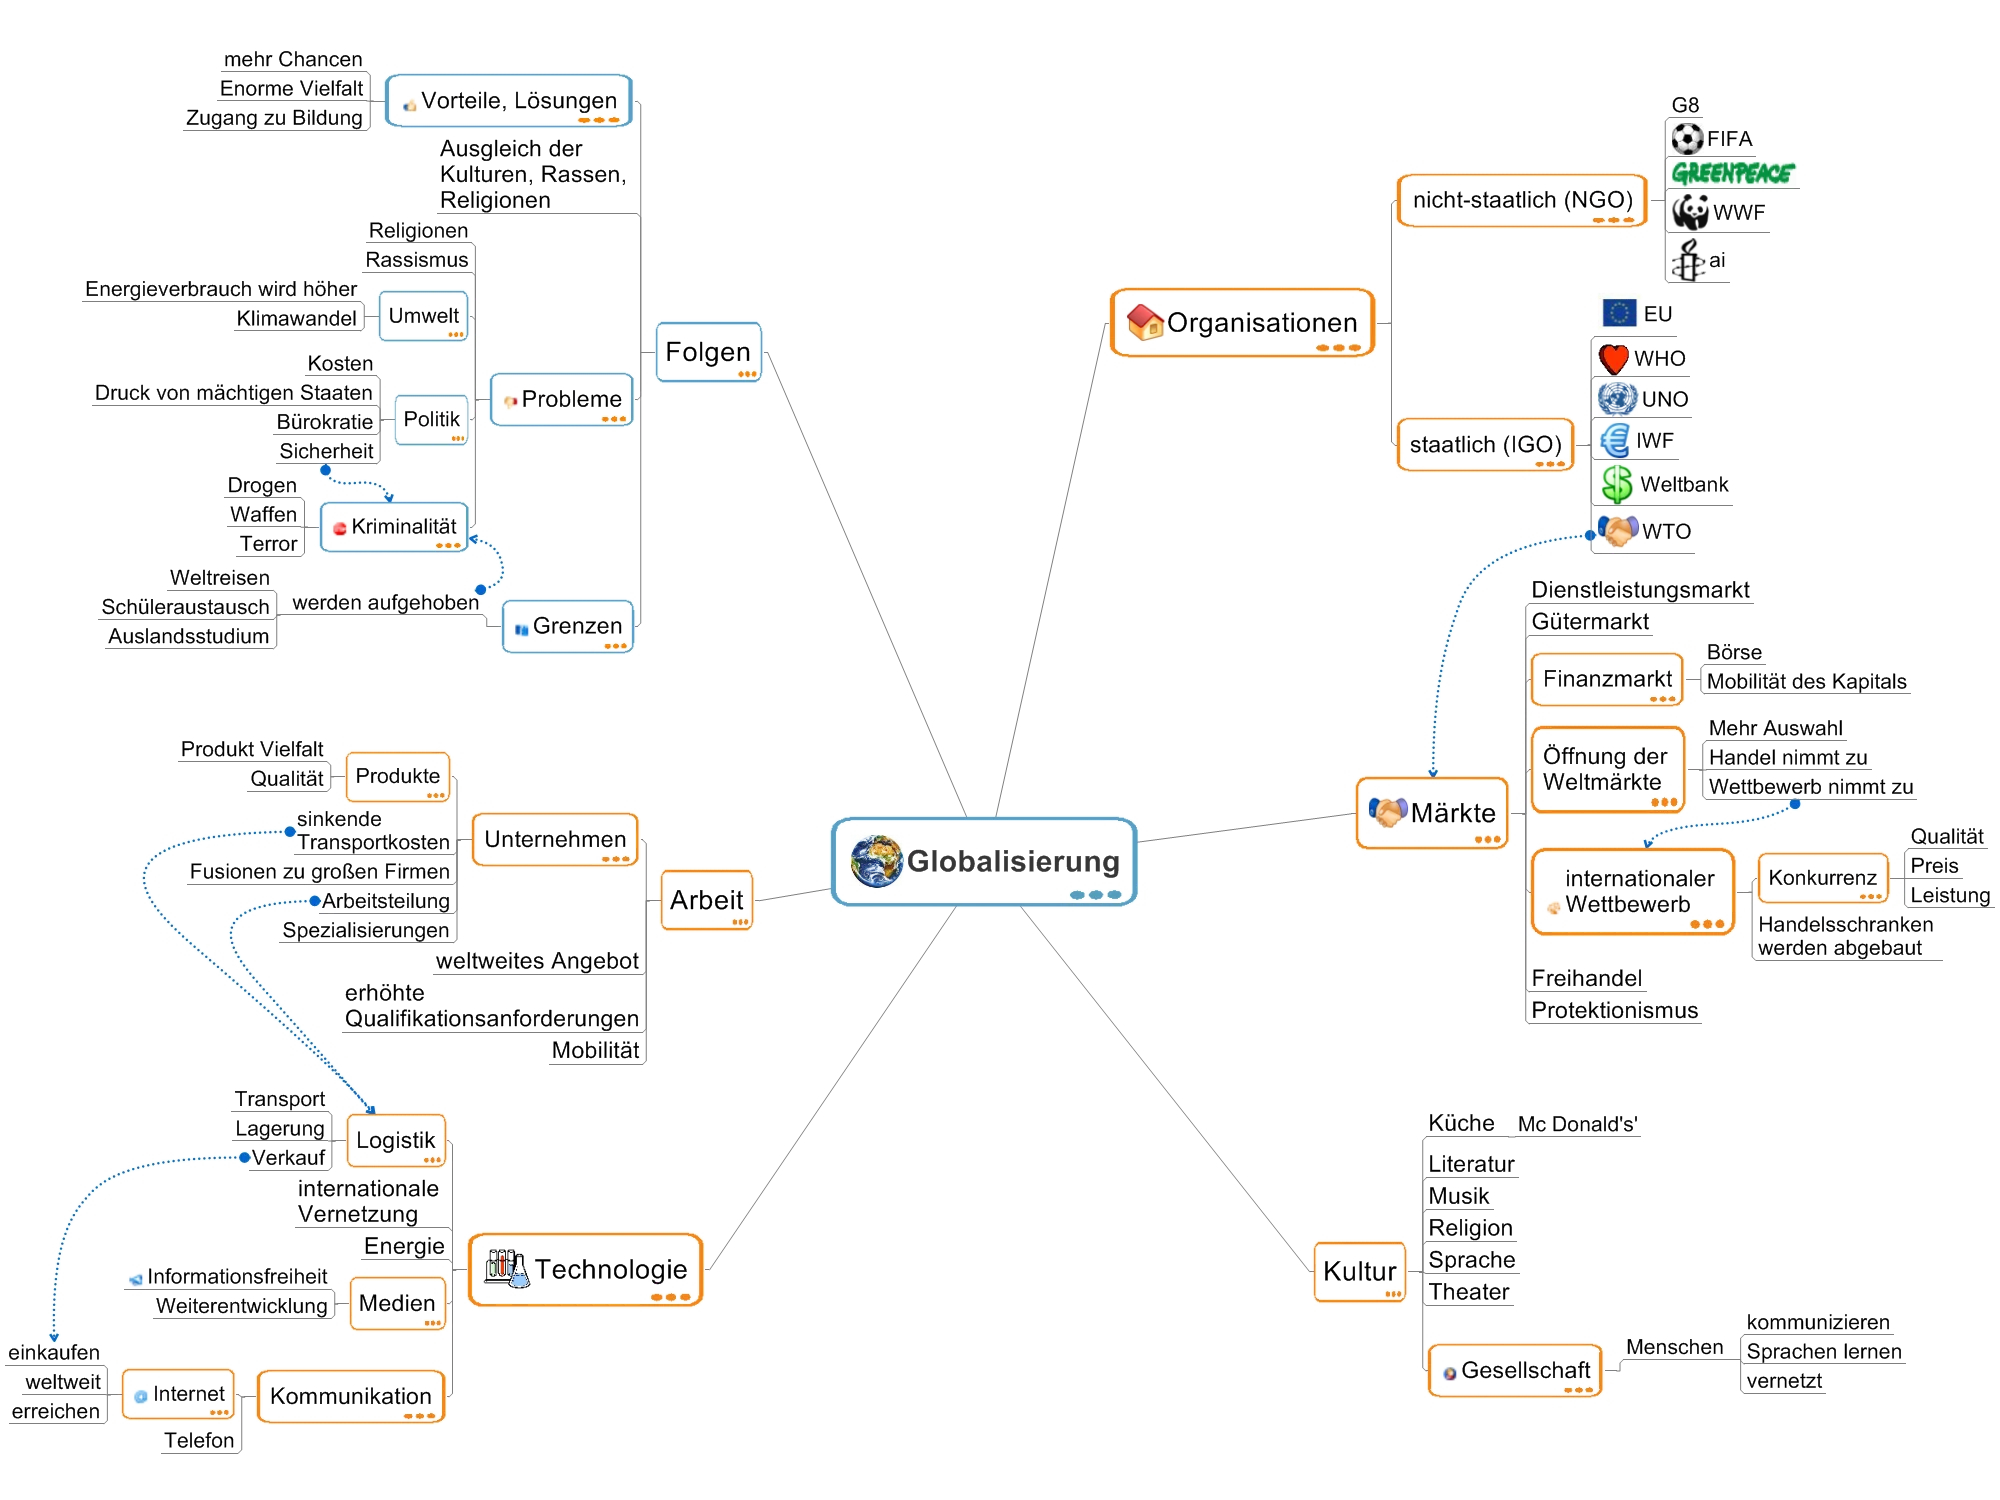
Diesem Problem widmete ich meinen Mini-Vortrag “Das Welternährungsproblem - Probleme, Lösungen und ein Ausblick”, den ich im Rahmen des letzten Seminars meines freiwilligen ökologischen Jahres gehalten habe.
Urban Gardening/Agriculture.
Den Inhalt dieses Vortrags habe ich direkt aus der Forschung abgeleitet.
Gutachten des TA-Projekts „Welchen Beitrag kann die Forschung zur Lösung des Welternährungsproblems leisten?” sowie einige Zusammenfassungen anderer Studien waren meine Quellen.
Das KATALYSE Institut, meine Einsatzstelle, hat für das TA-Projekt selbst ein Gutachten über den “globalen Ernährungswandel” verfasst
Hier habe ich mich auch etwas spezialisiert.
Mal ohne Wikipedia, Google & Co zu recherchieren kann ganz schön anstrengend sein.
Das Welternährungsproblem nimmt sich dem Problem der Verteilung und Produktion von lebenswichtigen Nahrungsmitteln an.
Dabei kann sowohl die Verteilung als auch die Produktion wieder in eine Vielzahl von Teilproblemen zerlegt werden:
Verteilung
globaler Ernährungswandel
Bevölkerungsentwicklung
Dominanz der Industriestaaten über die Rohstoffe der Entwicklungsländer
Jetzt schreibe ich mal wieder etwas über mich, diesen Blog und meine Zukunft 😉.
Bevor ich jedoch damit beginnen kann, muss ich erst einmal die Vergangenheit aufholen:
Mein freiwilliges ökologisches Jahr ist so gut wie vorbei. Ich komme gerade von meinem letzten Seminar in Overath. Nun habe ich nur noch zwei Wochen Arbeit in Köln vor mir.
Vor knapp vier Monaten habe ich eine neue WG gefunden und so langsam wird es endlich mal wieder etwas wärmer in Köln 😊.
Die SIGINT Konferenz 2010 war ein echter Knaller. Viel Neues kennen gelernt und neue Bekanntschaften geknüpft.
Ich war auf dem Hurricane in Scheeßel, dem c/o Pop und habe Phoenix live gesehen 😉. Endlich mal wieder etwas Musik in Köln 😉.
Ich habe mich entschieden an der RWTH Aachen Elektrotechnik, Kommunikationstechnik und Technische Informatik zu studieren und befinde mich gerade mitten in der Wohnungssuche.
volkszaehler.org ist ein freier Smart Meter (hier: intelligenter Stromzähler) im Selbstbau.
Die anfallenden Stromprofile bleiben dabei unter der Kontrolle des Nutzers.
Seit dem 1. Januar 2010 müssen Stromversorger ihren Kunden für Neubauten so genannte “intelligente Stromzähler” (Smart Meter) anbieten.
Der Kunde soll dadurch seinen Stromverbrauch analysieren und optimieren können.
Die dabei anfallenden Daten (“Stromverbrauchsprofil”) erlauben einen sehr detaillierten Einblick in den Tagesablauf des Nutzers (wann steht er auf? wann geht er ins Bett? wann kocht er? wie oft verwendet er seine Spülmaschine? verändert sich sein Verhalten? …).
Darum sollten die Daten ausschließlich für den Nutzer selbst zur Verfügung stehen - und das geht nur, wenn man sich den Smart Meter selbst baut.
Mit einem Materialeinsatz von etwa 100 €, etwas Geschick und Zeit lässt sich das mit Hilfe eines Standard-µC-Moduls aufbauen.
Auf der SIGINT 2010 konnte ich mir den Vortrag von Justin Otherguy über das noch recht junge Projekt anhören und fand anschließend die Gelegenheit mit ihm über das Projekt zu sprechen.
Schnell war für mich klar, dass ich hier helfen möchte.
Bisher gibt es nur einen funktionsfähigen Prototypen.
In den letzten Wochen habe ich mit ein paar weiteren Entwicklern begonnen den Code des Prototypen neu aufzubauen.
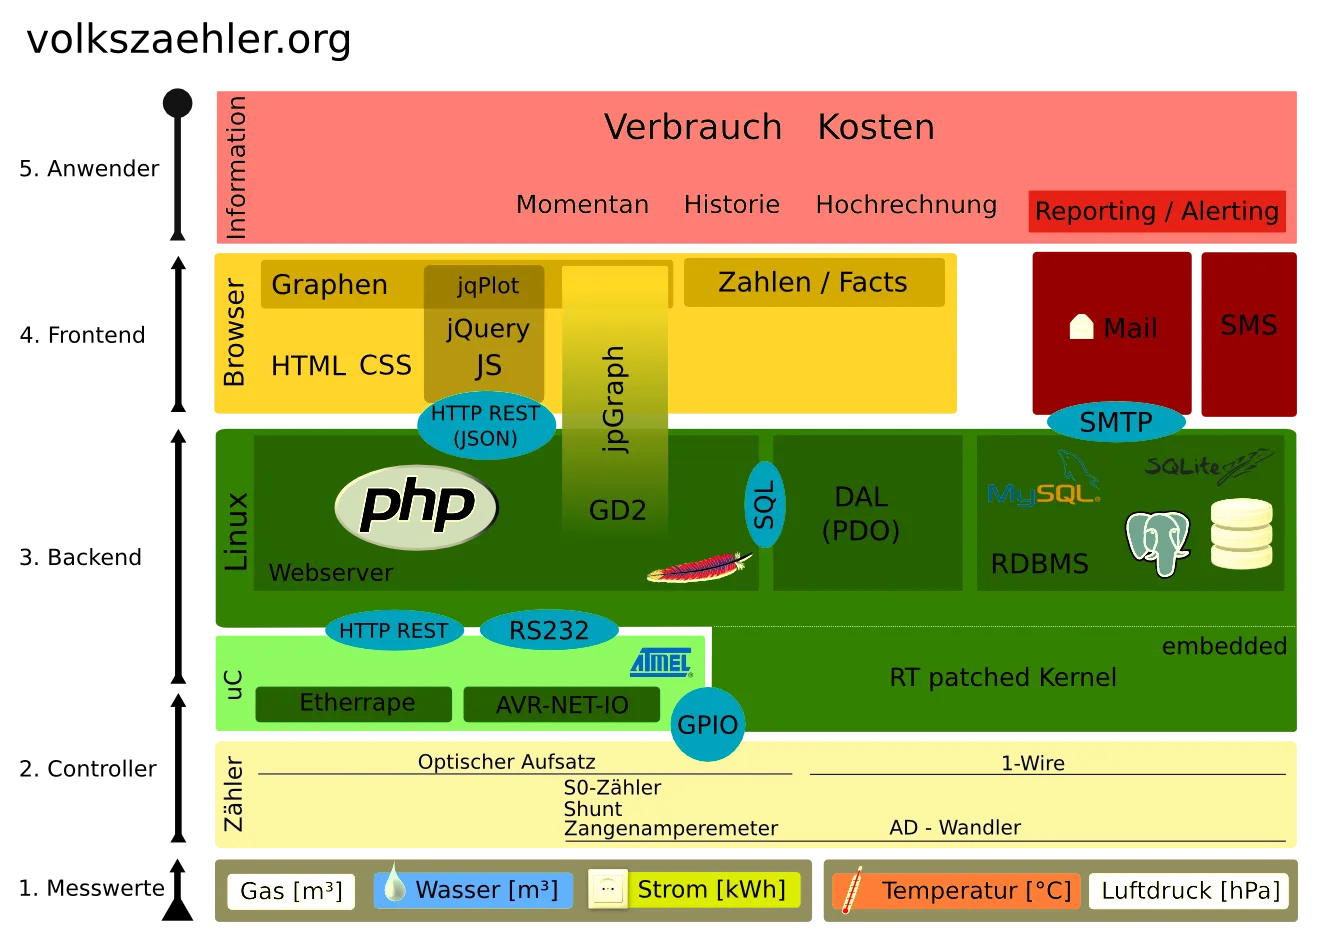
Die Architektur von volkszaehler.org ist dreigeteilt:
Die Controller und Sensor Ebene erfasst mithilfe eines Mikrocontrollers die Daten und leitet sie an den Backendserver weiter.
Der Backendserver besteht aus einem PHP-Skript und einer Datenbank. Hier werden die Daten weiter verarbeitet und ausgewertet. Er kommuniziert ausschließlich über eine standardisierte JSON API.
Das Frontend stellt die Daten für den Benutzer übersichtlich dar und ist für die Ausgabe der Analysen verantwortlich.
Systemübersicht volkszaehler.org.
Diese Darstellung verrät uns auch, dass nur der Stromverbrauch erfasst werden kann.
Geplant sind sämtliche Messgrößen (Temperatur, Luftdruck, Luftfeuchtigkeit, Strahlung, Niederschlag, …).
Bisher gibt es noch keine stabile, lauffähige Version des Quellcodes.
Im Wiki, der Mailing-Liste und im GitHub Repository (/volkszaehler/volkszaehler.org ) findet ihr weitere Informationen zu meinem neuen Projekt.
Wir freuen uns über jede Unterstützung 😊.
Besonders Entwickler mit PHP und JavaScript Kenntnissen wären hilfreich 😉.
Es läuft! Nachdem ich über Google & Co nicht weitergekommen bin, habe ich selber mal etwas experimentiert.
Die sonst üblichen Methoden über Wine, Cedega und CrossOver brachten mich leider nicht weiter.
Das Zauberwort lautet “VMWare Workstation”.
Erstaunlicherweise ist eine virtualisierte Maschine schnell genug um Traktor akzeptabel nutzen zu können.
Jedoch muss man bei internen Soundkarten mit einer höheren Latenz rechnen.
Mit meinem neuen Audio-Interface konnte ich die Latenz durch ASIO-Treiber und die direkte Anbindung per USB noch deutlich senken.
Der Anschluss über USB sorgt dafür, dass die Ansteuerung in der virtualisierten Maschine erfolgt.
Es ist kein Umweg mehr über das Linux Soundsystem (ALSA) nötig.
Es wird nur der Windows Treiber benötigt.
Um das ganze stabil nutzen zu können solltet ihr jedoch schon einen aktuellen Rechner mit ausreichend RAM (> 2GB) und mindestens zwei CPU-Kernen haben.
Für den Produktiveinsatz kann ich es nur bedingt empfehlen, da ich zwischenzeitlich ein paar Performance Probleme hatte und die Audio Wiedergabe kurzzeitig aussetzte.
Aber diesem Fall kann man natürlich auch mal Windows booten 🫤.
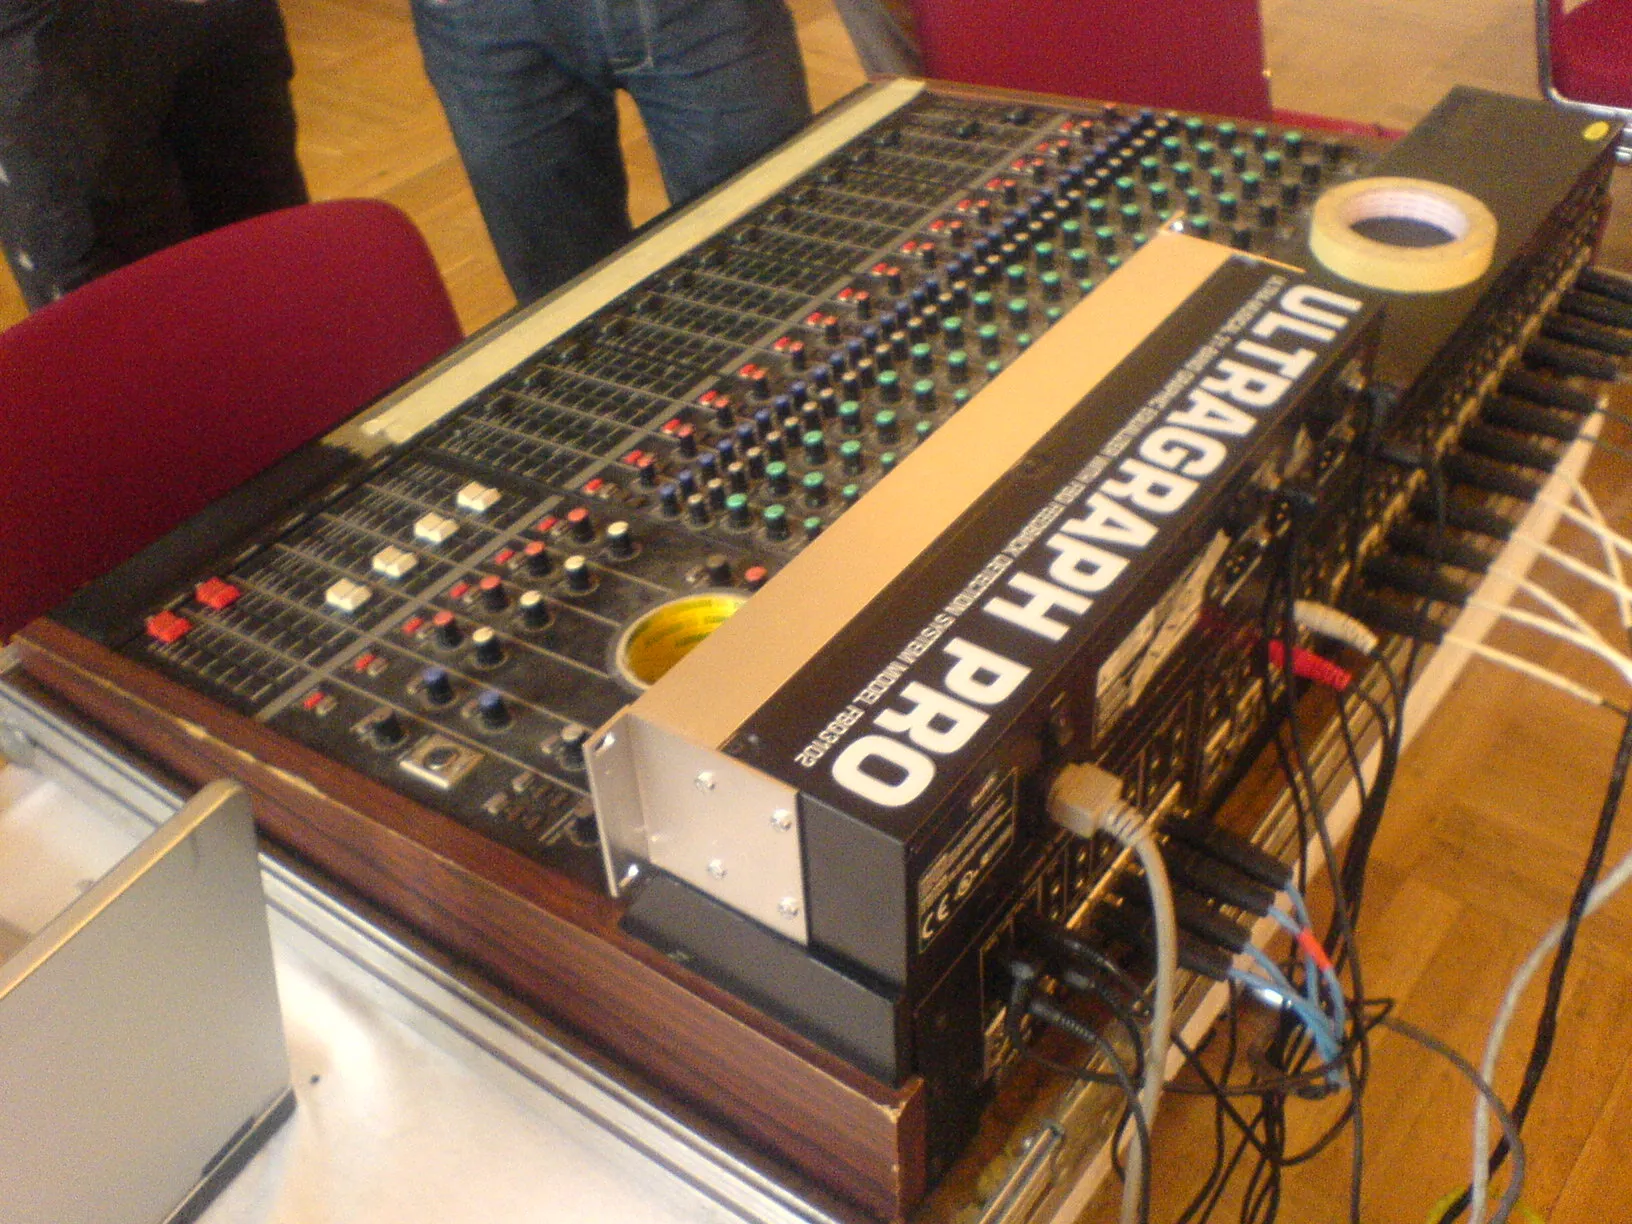
Musik ist meine Freizeitbeschäftigung.
Mittlerweile höre ich sie eigentlich in jeder Lebenslage.
Zuhause, beim Laufen, Fahrrad fahren, auf der Arbeit und in der Bahn.
Man könnte fast sagen ich bin süchtig geworden 🫤.
Die Qualität der Onboard-Soundkarte meines Dell Latitude ist einfach nur miserabel.
Von dem Mikrofon Eingang ganz zu schweigen.
Ganz klar hier muss was besseres her.
Vorne weg: ich habe das Terratec PHASE 26 USB und das Cakewalk UA-1G getestet und mich schließlich für das Terratec entschieden.
Meine Entscheidung habe ich nach keinem bestimmten Gesichtspunkt getroffen.
Hauptsächlich nutze ich das Interface aber zur Wiedergabe.
Vielleicht gibt es demnächst auch mal wieder einen Audiobeitrag von mir 😉.
Kriterien waren neben der Linux-Unterstützung ein digitaler Ausgang, ein Mikrofon- und Line-Eingang sowie herausragende Audioqualität.
Preislich habe ich mir eine Grenze von 100 € gesetzt.
Micha und Steffen haben, wie viele Bastler, im Laufe der Zeit viele kleine Tools entwickelt, die bei mehr oder weniger alltäglichen Problemen helfen.
Wir fanden, dass sie zu schade sind, um willkürlich verteilt auf verschiedenen Festplatten herumzuliegen und schließlich in Vergessenheit zu geraten.
Uns fehlte oft die Übersicht und eine angemessene Dokumentation.
Oder wir wollten bestimmte Projekte einfach nicht auf unseren eigenen Websites veröffentlichen.
Zusammen mit Micha besuchte ich Ende letzten Jahres das U23 des C4 in Köln.
Dort habe ich viel über die Techniken des Internets gelernt.
Unter anderem ging es hier auch um das Domain Name System, das für die Namensauflösung im Internet verantwortlich ist.
Mittlerweile betreibe ich einen eigenen DNS-Server für meine Domains (0l.de, steffenvogel.de, griesm.de & vogel.cc).
Zudem biete ich euch kostenloses DNS Hosting.
Gerne übernehme ich auch die DNS-Administration eurer Domains.
Jedoch könnt ihr sicherlich verstehen, dass ich euch dafür dann nichts garantieren kann.
Mit der Zeit habe ich ein Webinterface für den DNS Server Bind entwickelt auf das nun jeder Zugriff hat.
Ihr könnt eigene Subdomains registrieren, Records setzen und URL-Weiterleitungen einrichten.
Dynamisches DNS wird ebenso unterstützt.
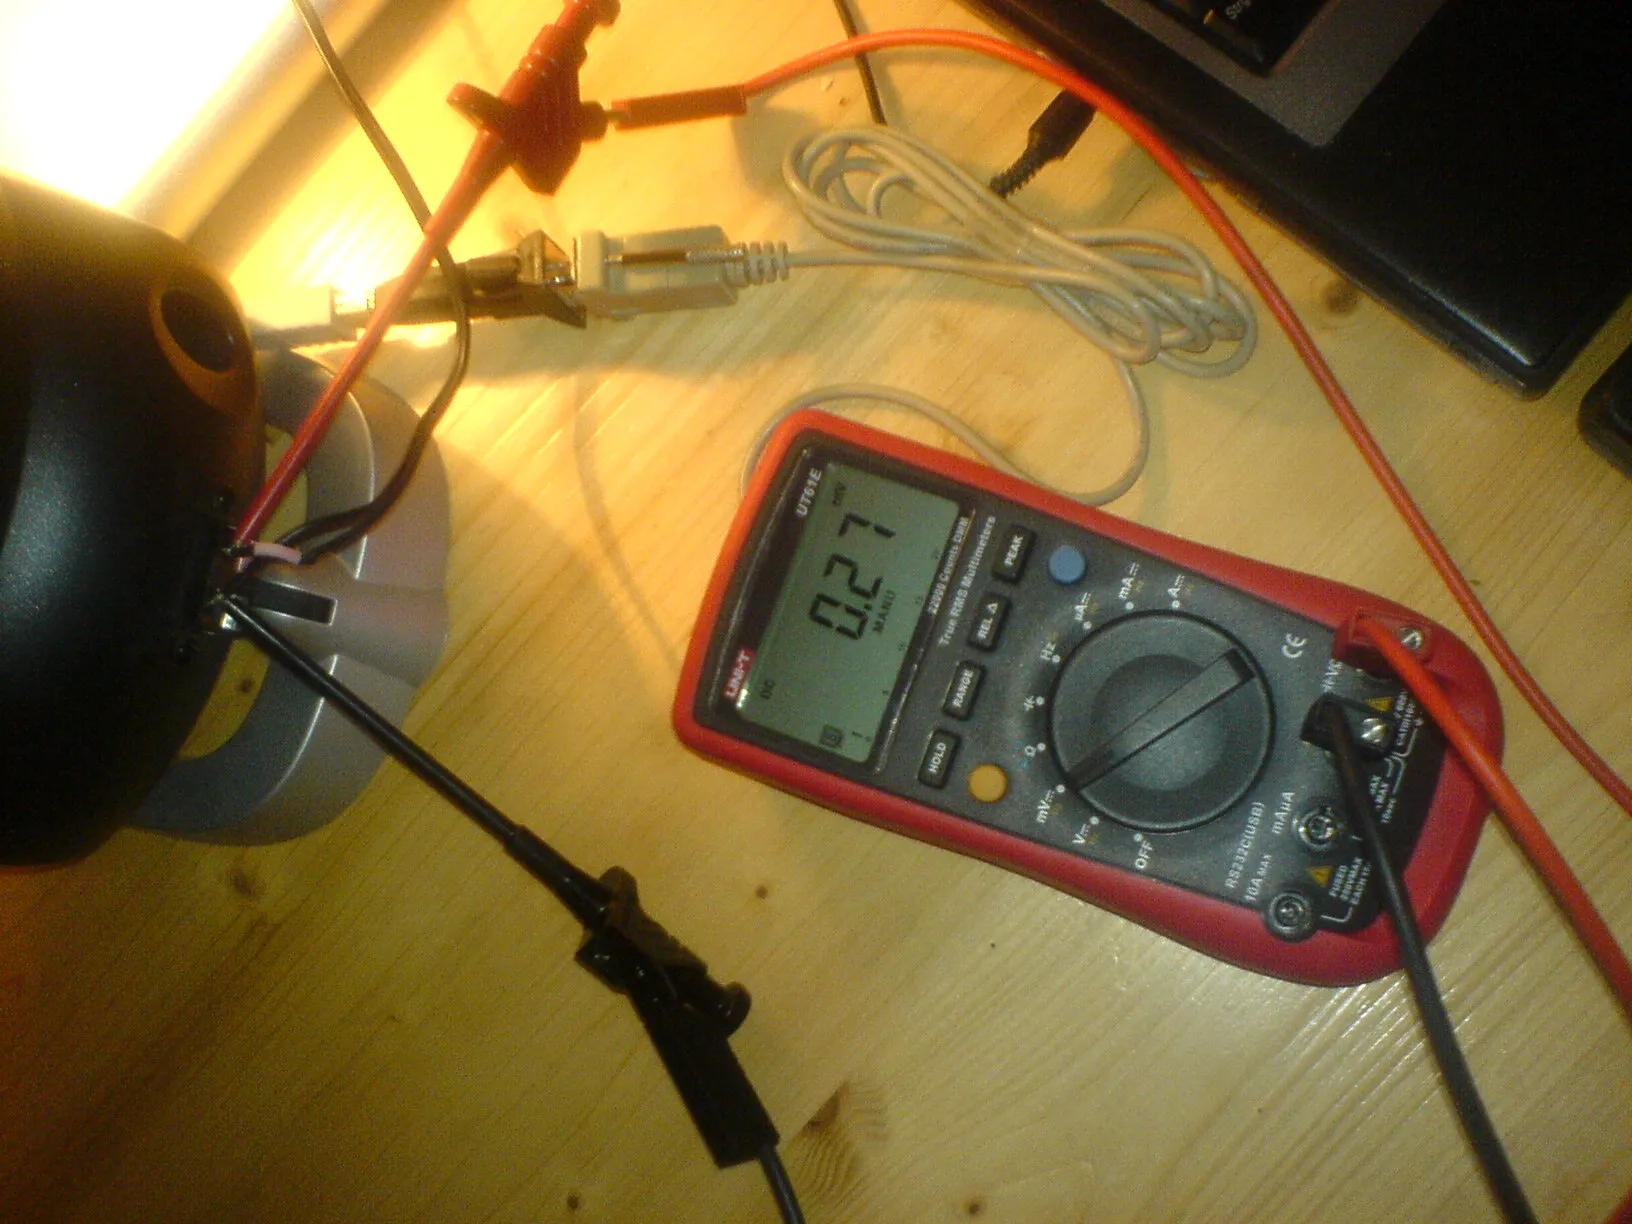
Seit ein paar Wochen habe ich nun mein neues Multimeter: ein UT61E von UNI-TREND.
Bisher bin ich rundum zufrieden damit.
Gekauft habe ich es über das Internet bei Pinsonne-Elektronik.
Lieferung und Bezahlung verlief schnell und problemlos.
Den Laden kann ich also nur weiterempfehlen.
Ein besonderes Highlight der neuen Messgeräte ist die RS232 Schnittstelle für die Auswertung am Rechner.
Über diese per Optokoppler isolierte Schnittstelle ist es möglich, aktuelle Messergebnisse am Rechner auszuwerten und weiterzuverarbeiten.
Leider haben die in China ansässigen Hersteller die Linux-Gemeinde aber mal wieder vergessen.
Nach einigen Recherchen und etlichen Stunden später habe ich es dann jedoch geschafft ein kleines Tool für Linux zu entwickeln, welches mir die Messergebnisse im CSV Format liefert.
In diesem Format kann ich sie nun in Open Office, MatLab und vielen anderen Programmen öffnen und auswerten.
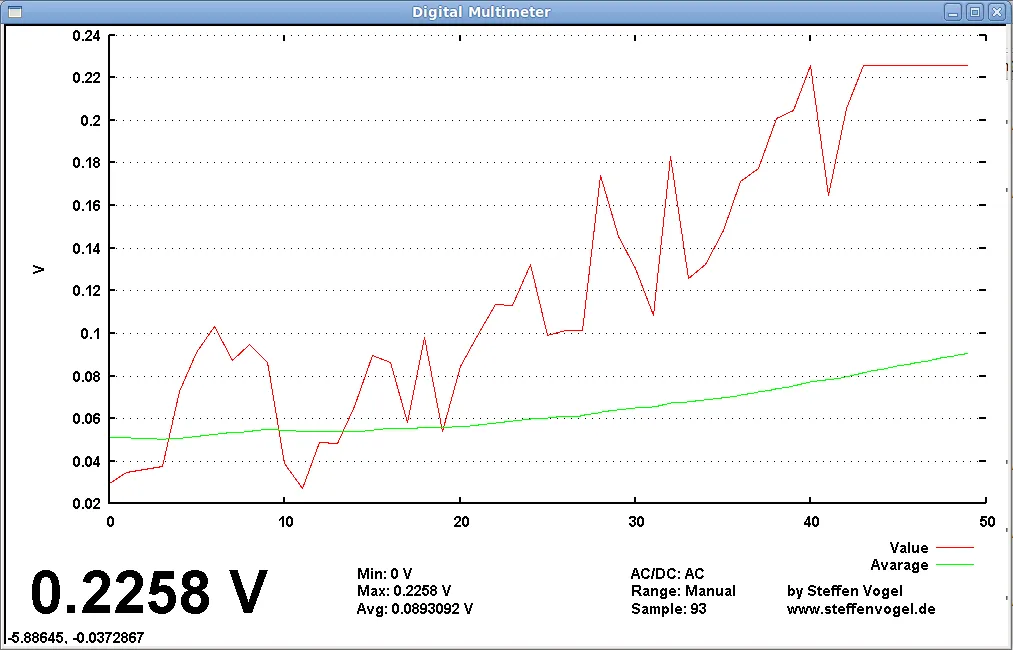
Als besonderes Gimmick habe ich auch noch ein kleines Script geschrieben, das mit Hilfe gnuplot Graphen der Messergebnisse zeichnet.
Diese werden dann 1-2 in der Sekunde aktualisiert.
Mit einem Oszilloskop ist das jedoch lange noch nicht vergleichbar.
Aber für Langzeit-Messungen durchaus sehr praktisch.
Die Live-Darstellung der Messergebnisse mit gnuplot.
Update: Ich habe das Datenblatt des verwendeten ICs gefunden.
Es enthält auch eine Spezifikation des seriellen Protokolls.
Hier geht es zum neuen Eintrag mit Bildern des Chips und der restlichen Platine.
Das Tool sowie das gnuplot Script habe ich hier in einem Archiv zusammengefasst:
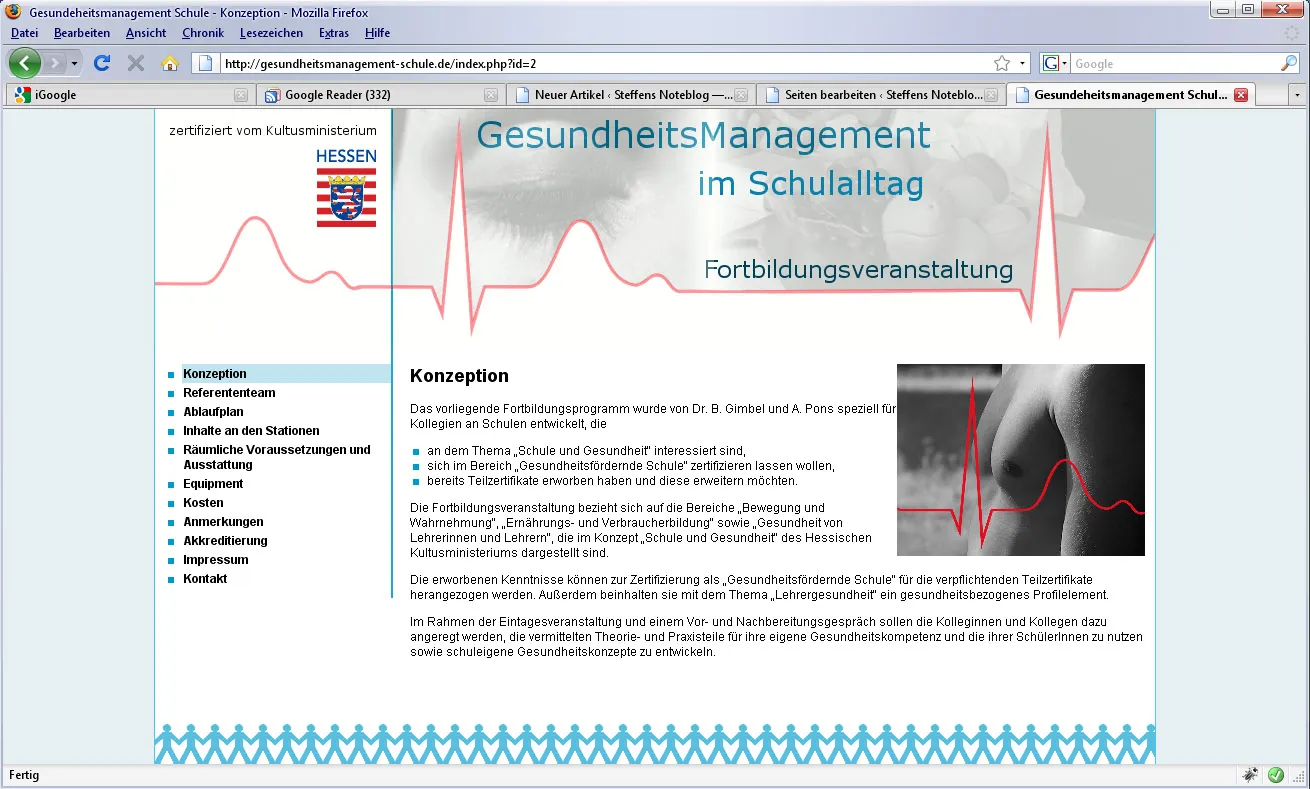
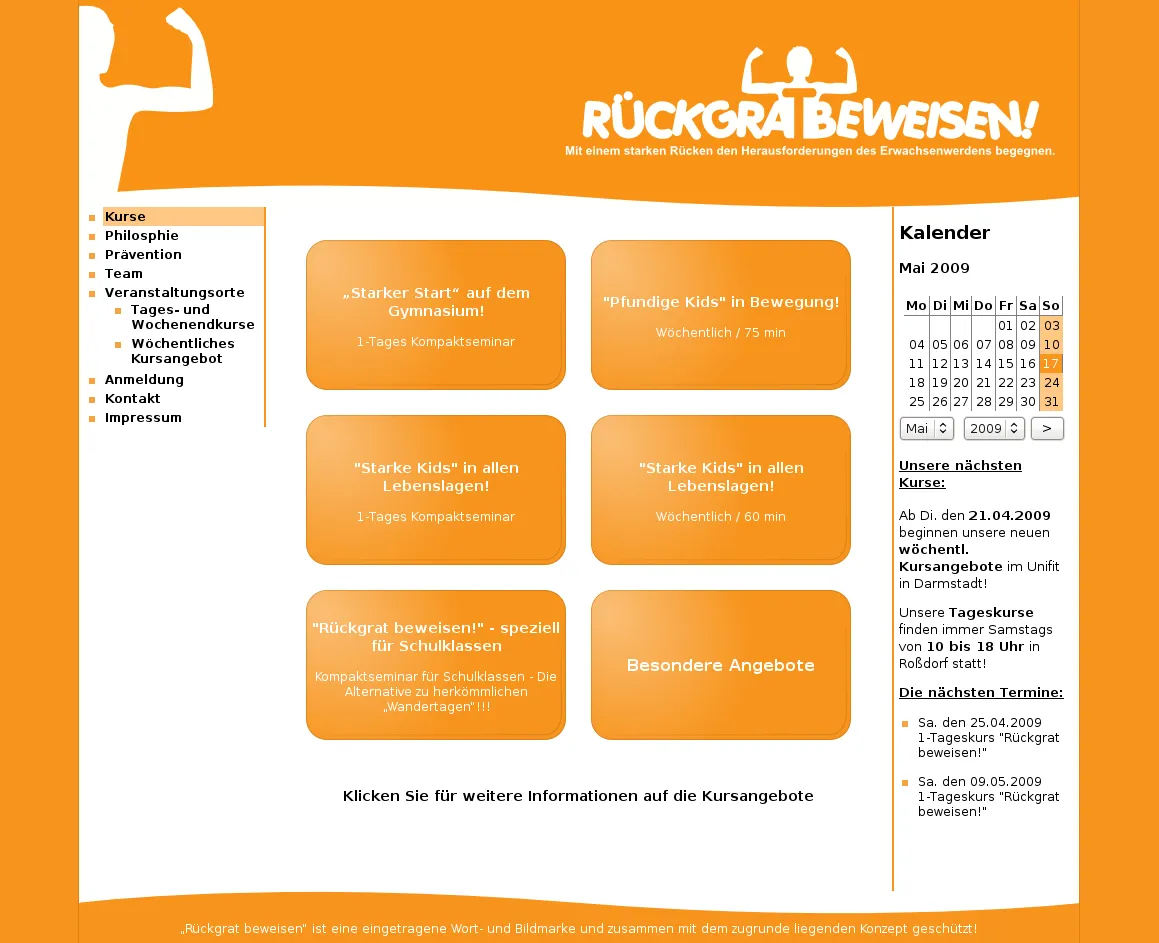
Heute freue ich mich euch einen weiteren Auftrag präsentieren zu dürfen, mit dem ich mein etwas knappes FÖJ Taschengeld aufbessern konnte 😋
Basierend auf der Website rueckgrat-beweisen.de, die ich für meinen ehemaligen Sportlehrer entworfen habe, ist nun eine weitere Website zum Thema Gesundheitsmanagement in Schulen entstanden.
Screenshot von gesundheitsmanagement-schule.de.
Das Design der Page wurde aufgrund einiger Fotos weitestgehend von mir selbstständig entworfen und umgesetzt.
Funktionell wurde die Seite recht einfach gehalten.
Es gibt die üblichen Funktionen zum Bearbeiten des Inhalts und ein Kontakt/Mail Formular.
Hierbei habe ich mich hauptsächlich auf den Quelltext von rueckgrat-beweisen.de gestützt und diesen weiterentwickelt.
Wie immer ist die Seite 100% selbst entwickelt und 100% W3C XHTML und CSS konform.
Zusätzlich zum Design und der Programmierung der Website habe ich auch die komplette Verwaltung des Web Spaces inklusive Domainumzug übernommen.
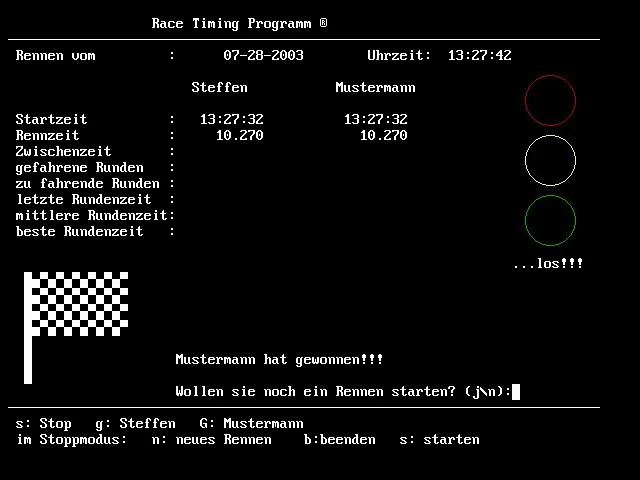
Unsere lustigste Beschäftigung auf dem Southside Festival 2009 war sicherlich Looping Louie ein Kinderspiel von MB.
Ziel des Spiels ist es seine eigenen Chips vor den Mitspielern und vor allem vor Louie zu verteidigen.
Louie sitzt in seinem batteriebetriebenen Flugzeug und versucht deine Chips vom Halter herunterzustoßen.
Wer als erstes alle seine Chips verloren hat muss/darf trinken.
Also ein typisches Trinkspiel 😜.
Aber ein kleines Video sagt bestimmt mehr als 1000 Worte:
Das Spiel gibt es mittlerweile ab circa 18 € bei Amazon.
Ich habe es noch nachträglich etwas optimiert.
Mit einem regelbaren und stabilisierten Stecker-Netzteil lässt sich so sogar die Geschwindigkeit von Louie regeln.
Von den, bei Batteriebetrieb, normalen 18 Umdrehungen/Minute konnte ich die Geschwindigkeit auf 55 Umdrehungen/Minute mit dem Stecker-Netzteil steigern.
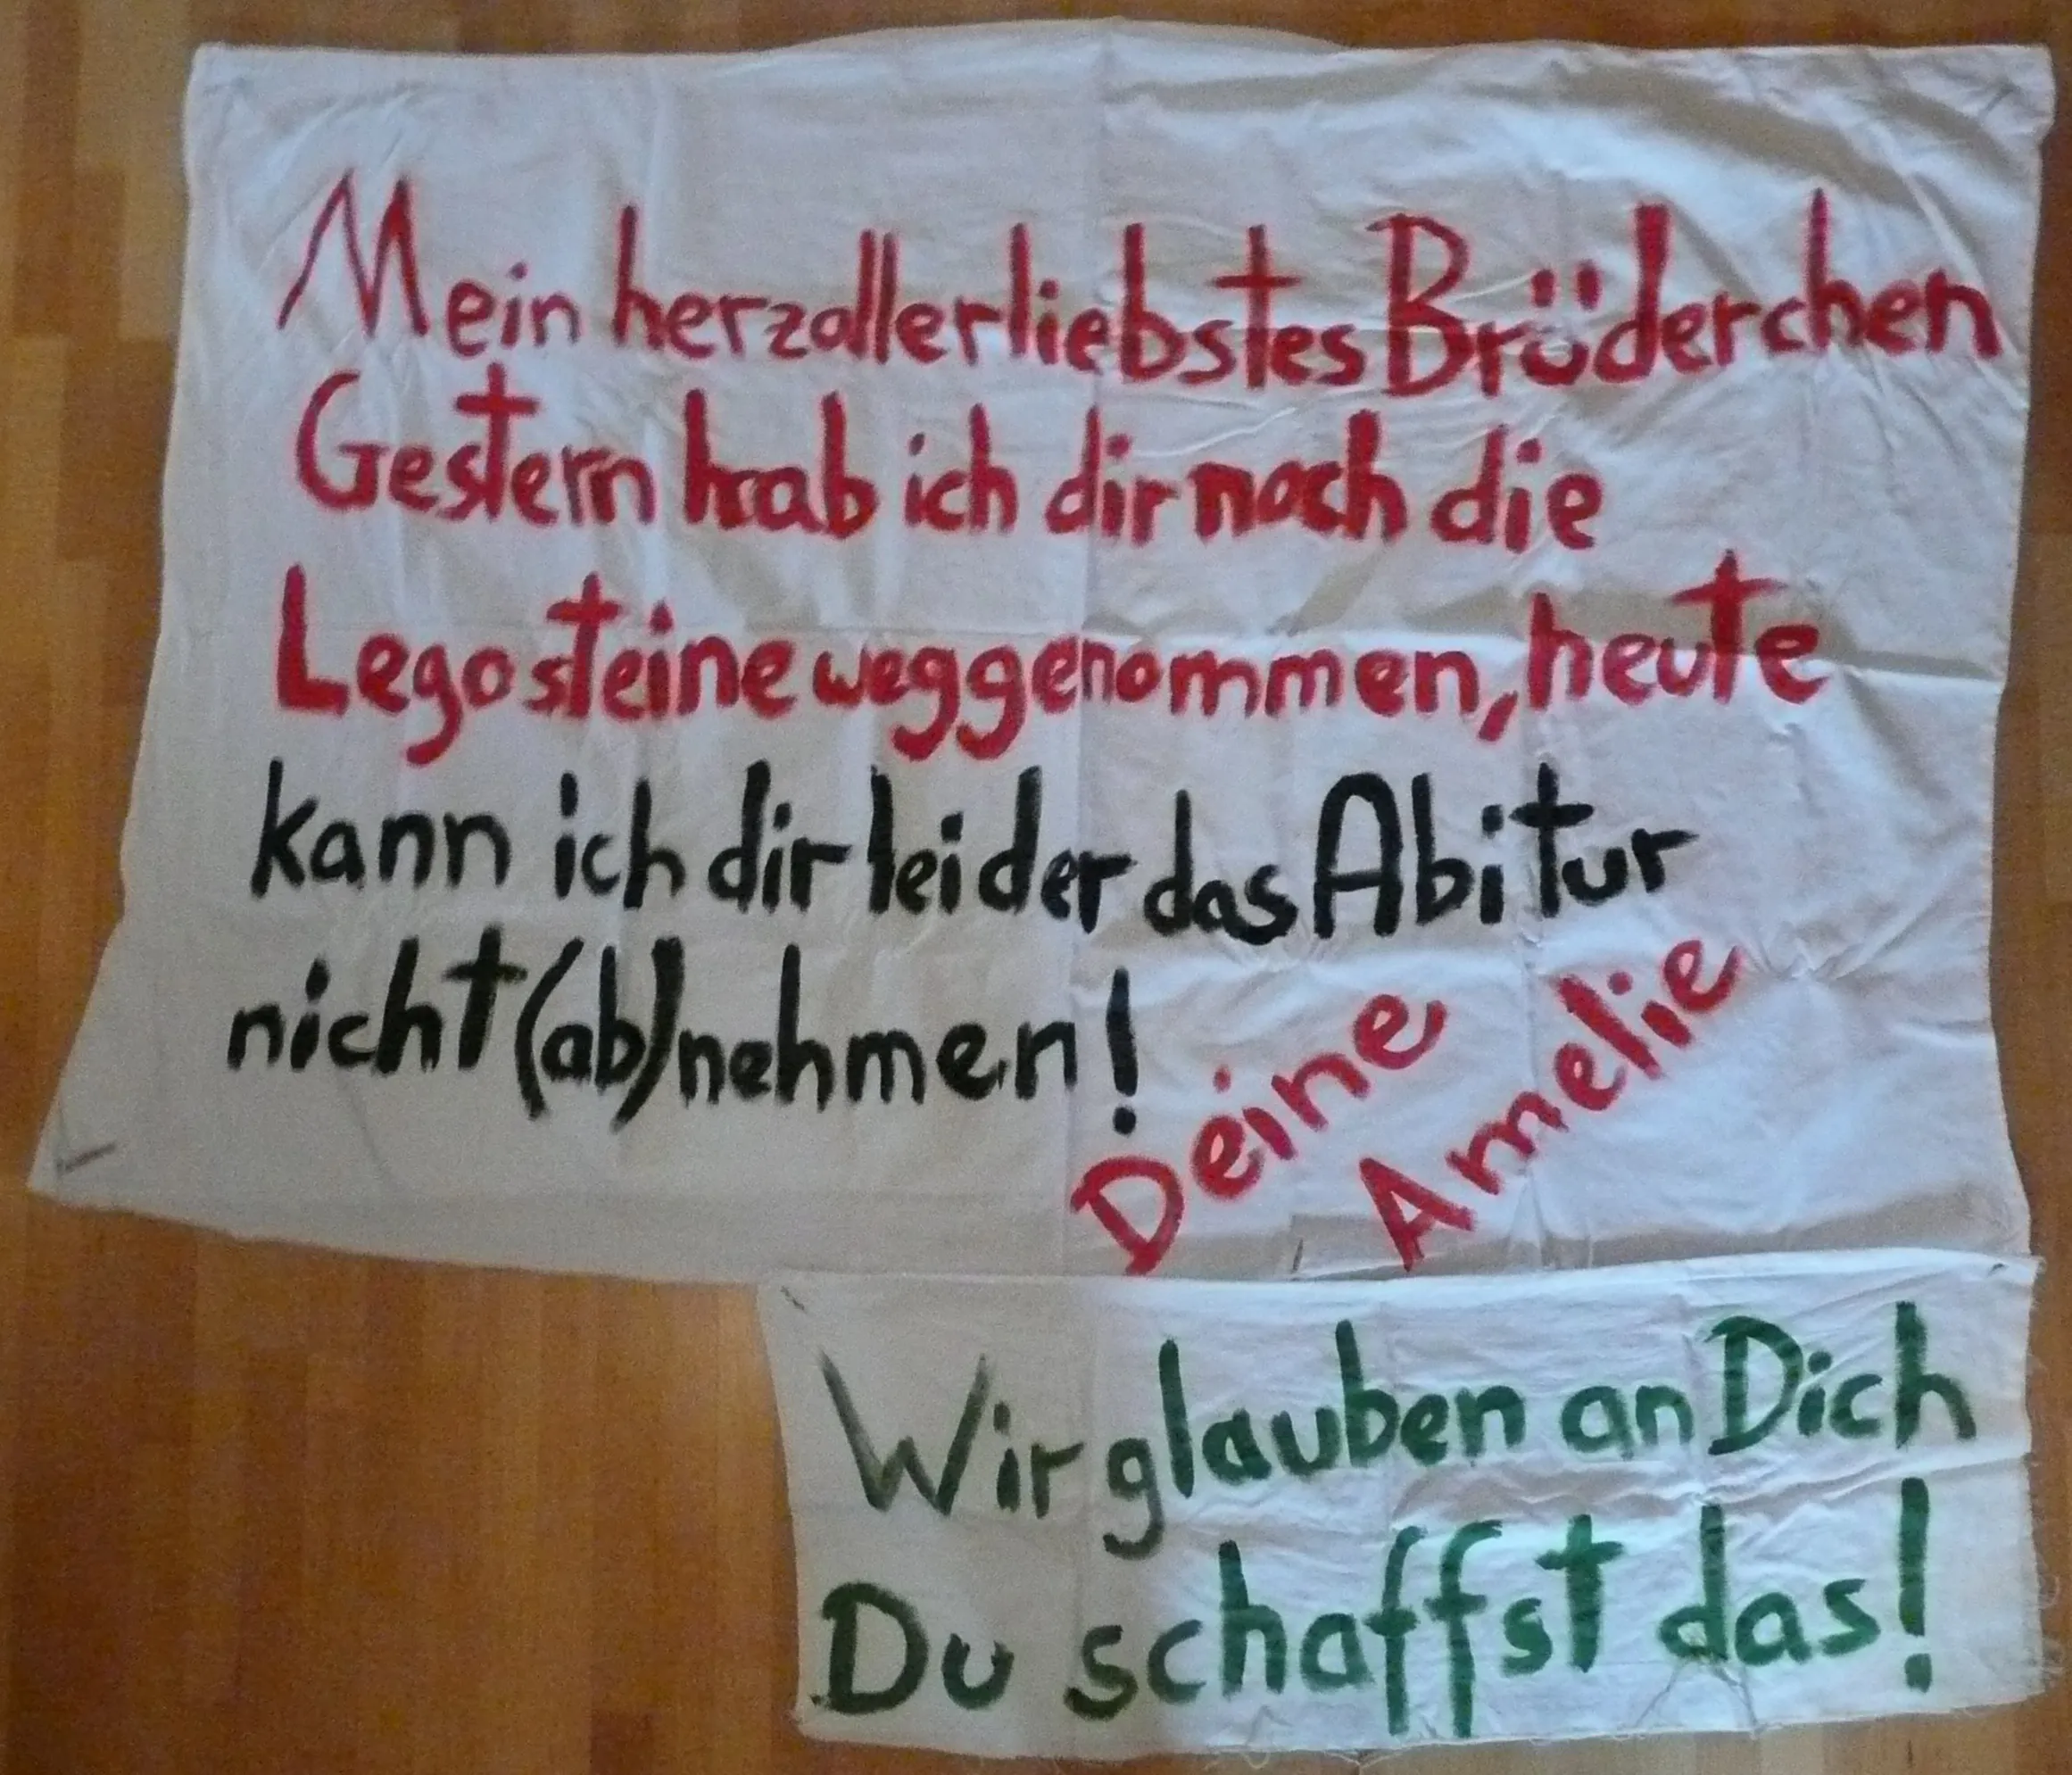
fand am 25. Mai 2009 unser Abischerz statt.
Wir haben unseren “Zuschauern” eine abwechslungsreiche Oscar Gewinnspiel Live-TV-Show geboten, die professionellen Shows in fast nichts nach stand.
Unsere Planungen begannen bereits Wochen zuvor.
In einem kleinen Team versuchten wir zunächst alles geheim zu halten, um den für einen Abischerz typischen Überraschungseffekt beizubehalten.
Ich persönlich war für Technik verantwortlich.
Mit zwei Live Leinwänden, 2 Kameras, einem Verfolger-Spot, einer komplett verdunkelten Bühne, einem erhöhten Laufsteg mit rotem Teppich und vielen weiteren technischen Details konnten wir das komplette Publikum begeistern.
Die dazu nötige technische Ausrüstung konnten wir uns von MKM-Showtechnik und dem LIO Theater ausleihen.
Mit unserem großzügigen Budget mussten wir an keiner Stelle sparen und konnten auf viele Details achten.
Um alles rechtzeitig bis zur zweiten Schulstunde aufgebaut zu haben, trafen wir uns bereits Mittwoch abends und zelteten in der Schule.
Wir bekamen eigentlich nur durchgängig gutes Feedback.
Sogar unser Direktor lobte uns während unseres Abiballes.
Mit dem besten Abischerz seit 1997 werden wir allen Lehrern und vielen Schülern hoffentlich lange in Erinnerung bleiben.
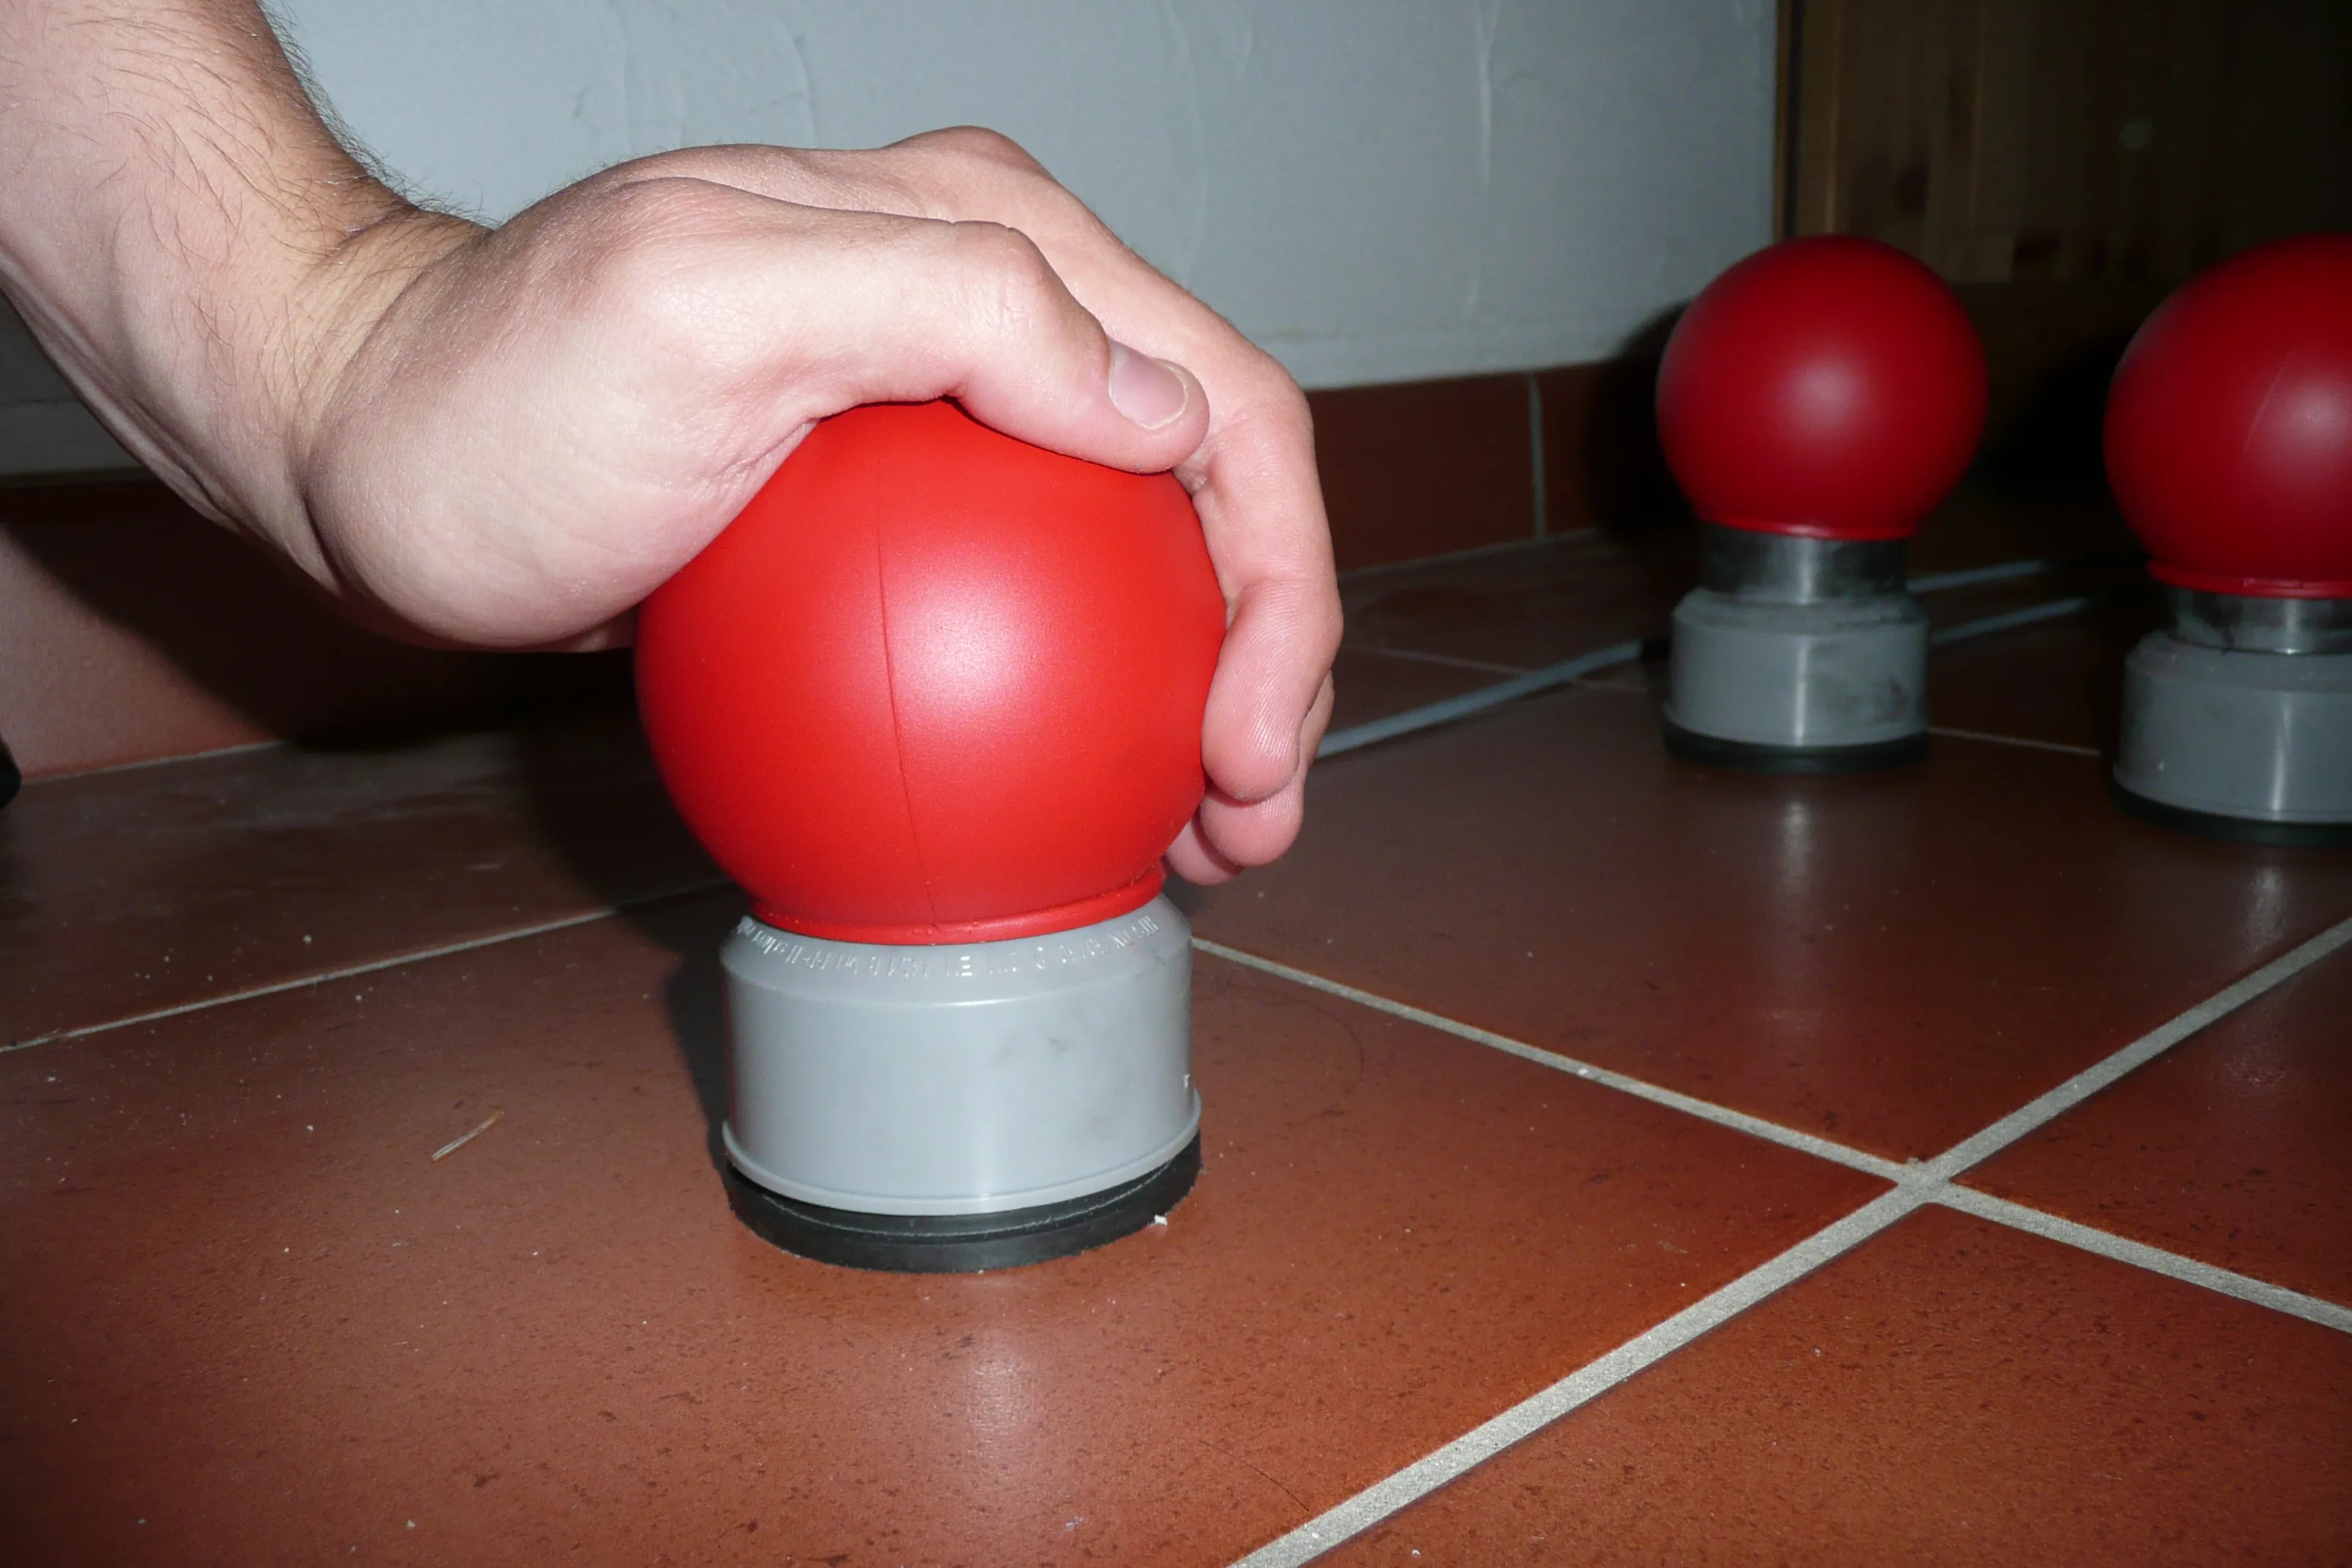
Für einige Spiele unseres Abi-Scherzes benötigten wir Buzzer wie man sie aus den TV-Shows “Schlag den Raab” oder “Familien Duell” kennt.
Als Techniker war es meine Aufgabe diese zu besorgen.
Schnell stellte ich fest, dass diese gewöhnlichen Buzzer, die eigentlich für den industriellen Einsatz bestimmt sind, für unseren Rahmen viel zu teuer waren.
Bei Preisen von circa 50 € pro Buzzer brauchten wir eine Alternative.
Ich entschied mich den kompletten Buzzer inklusive Elektronik selbst zu bauen.
Die Auswertung wird hierbei von einem Computer übernommen.
Die Buzzer simulieren eine USB-Tastatur mit nur einer Taste.
Dank des Projekts V-USB, ein Software-USB-Stack für Atmel AVR Mikrokontroller, der auch das USB-HID-Protokoll beherrscht, konnte die Platine recht übersichtlich gehalten werden.
Es wird nur ein TinyAVR45 und etwas “Vogelfutter” benötigt 😊.
Die Mikrokontroller-Firmware konnte ich leicht abgewandelt von Flip übernehmen.
Der Taster an sich besteht aus zwei Plastik-Muffen und einer Plastikkugel aus dem Bastelbedarf, die rot lackiert wurde.
Ein Stoßdämpfer aus dem Modellbau sorgt für die nötige Rückstellkraft.
Mittlerweile muss ich schon nicht mehr die Schulbank drücken.
Seit dem 15. Mai habe ich offiziell keinen Unterricht mehr, Seit dem 26.6 bin ich nicht mehr Schüler der LIO 😊.
Mit der Vergabe der Abiturzeugnisse am Abiball habe ich meine Schülerlaufbahn offiziell beendet.
Zu unserem Abi-Ball, den wir in der Darmstädter Orangerie feierten, kamen neben unseren Eltern, Geschwistern und Verwandten auch ein Teil unserer ehemaligen Lehrer.
Zu dieser “hoch offiziellen” Veranstaltung kamen wir natürlich alle schick im Anzug und Kleid.
Anschließend ging es noch bis in die Morgenstunden ins Stella.
Auftritte unseres Abi-Chores und der Abi-Band konnten das ansonsten durch Reden geprägte Programm auflockern.
Da der Abiball für einige mit Abschied verbunden ist, möchte ich an dieser Stelle noch an das nächste Ehemaligentreffen und eine Emailadresse verweisen.
Benedikt und Niko haben eine Email Adresse eingerichtet um den Kontakt im Jahrgang weiterhin aufrecht zu erhalten: lioabi2009@googlemail.com
Meine Abiturprüfungen verliefen weitestgehend nach Plan.
Montag begann es gemütlich mit einer dreistündigen Prüfung in meinem dritten Prüfungsfach, Deutsch.
Dienstag stand Physik auf dem Plan.
Nach vier Stunden, 18 Seiten, 1247 Wörtern (circa 200 mehr als in Deutsch) hatte ich ein deutlich besseres Gefühl als am Tag zuvor.
Freitag hätte ich mit Mathe eigentlich meine letzte schriftliche Prüfung haben sollen.
Leider freuten wir uns zu früh 🙁.
Aufgrund eines kleinen Fehlers in einer Grundkursaufgabe wurde das Abitur landesweit wiederholt.
Das hielt uns jedoch nicht davon ab in den Osterferien kräftig zu feiern 😊.
Schließlich konnten wir uns in der zweiten Matheklausur nur noch verbessern.
Glücklicherweise schaffte ich es dann noch ohne Vorbereitung mich nochmal um einen Punkt zu verbessern 😉.
Die beiden mündlichen Prüfungen in PW und Sport verliefen auch zufriedenstellend.
Mein erster Eindruck nach der PW war eher schlecht.
Hat sich dann aber nach der Sportprüfung und der Bekanntgabe der Prüfungsergebnisse gebessert.
Nachdem wir am 25. Mai unsere schriftlichen Noten und nun auch unsere mündlichen Noten bekommen haben, konnte ich mit dem Abinotenrechner von FMBjoern bereits meinen vorläufigen Abischnitt ausrechnen.
Wirklich sehr hilfreich 😉.
Bin dann leider doch nur bei 2.2 gelandet 🫤
Mir hätten nur noch 4 Punkte zum nächst besseren Schnitt gefehlt.
Alles in allem bin ich trotzdem sehr zufrieden und freue mich nun nie wieder die Schulbank drücken zu müssen.
Ja! Endlich habe ich eine Stelle für meinen Wehrdienstersatz gefunden.
Ab August werde ich für ein Jahr meinen Zivildienstersatz in einem Umweltinstitut in Köln ableisten.
Zusammen mit meinem Freund Micha, der bei der gleichen Einsatzstelle angenommen wurde, suchen wir nun zusammen eine WG in Köln.
Ich freue mich auf ein Jahr voller neuer Erfahrungen in einer der größten Städte Deutschlands 😉.
Leider sind dementsprechend auch die Mieten relativ teuer 🙁.
Unsere Einsatzstelle, die Katalyse e.V., liegt im Zentrum Kölns und ist zum Glück relativ gut erreichbar, sodass wir auch etwas außerhalb Kölns noch gut eine WG suchen können.
Nach diesem Jahr plane ich eigentlich wieder nach Darmstadt zurückkehren um dort dann mit meinem Studium beginnen zu können.
Wahrscheinlich werde ich Elektrotechnik und Informationstechnik an der TU Darmstadt studieren…
So das war jetzt aber genug von mir 😊.
Die nächsten Beiträge sind mal wieder etwas technischer 😜.
So ich möchte die Chance mal nutzen um etwas Werbung für das heutige Frühjahrskonzert der Darmstädter Schulen in der Orangerie zu machen.
Jährlich geben sechs Schulen aus Darmstadt dieses Konzert.
Wie jedes Jahr betreut die Justus-Liebig Schule die Tontechnik.
Nachdem wir heute bereits seit 8 Uhr hier mit dem Aufbauen beschäftigt waren, sind wir nun dabei die Proben zu begleiten.
Begleitet von den üblichen Problemen werden wir damit auch noch den ganzen Tag beschäftigt sein.
Planmäßig soll das Konzert um 19:30 Uhr beginnen.
Der Eintritt ist kostenlos.
Auch am Donnerstag werden wir wieder in der Orangerie im Einsatz sein.
Diesmal veranstaltet die LIO ihr Schulkonzert.
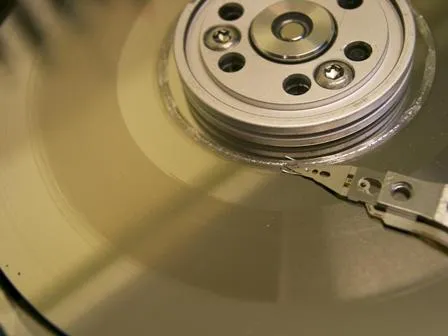
Vielleicht habt ihr es ja schon selber gemerkt, dass unser Server die letzte Woche nur sehr eingeschränkt verfügbar war.
Die Blogs von Micha und mir sowie die Website meines Handball Vereins waren nicht mehr erreichbar.
Schuld daran war ein Festplattencrash bei unserem Provider HostEurope.
Ausgerechnet die Festplatte unseres VPS gab am Morgen des 9. Mai 2009 den Geist auf 🙁.
Führt man sich vor Augen, dass im HE Rechenzentrum bis zu 24000 Server stehen können, die meist auch mal mit mehr als nur einer Festplatte bestückt sind, ist es wirklich ein verdammt großes Pech, das wir hatten.
Unser Provider setzte ohne sich vorher mit uns in Kontakt zu setzen den Server komplett auf.
Alle Daten und Einstellungen waren verloren.
Viel Arbeit liegt nun wieder vor uns.
Alles in allem also sehr ärgerlich.
Zwar hatten wir extra Backups gemacht, die dann aber nur lokal auf dem Server gesichert…
Nach diesem Vorfall werden wir uns noch einen zusätzlichen externen FTP zulegen.
Im letzten Halbjahr haben wir unsere komplette Informatiknote durch eine Präsentationsprüfung ersetzt.
Die Themen konnten wir uns weitestgehend selbst aussuchen.
Die sechs Schüler aus unserem Kurs teilten sich in drei Zweiergruppen auf, die jeweils 20 Minuten Zeit hatten ihr Thema vorzustellen.
Mit dem anschließenden Kolloquium war die Zeit für uns also alle knapp bemessen.
So musste ich mich mit meinem Teil wirklich sputen.
Unsere Präsentation kann man wirklich als sehr allgemeine und kurze Einführung in die KI verstehen.
Nach einer kurzen Definition der Begriffe Intelligenz und künstliche Intelligenz berichten wir kurz über die Geschichte der KI-Forschung und deren Anwendungsgebiete.
Anhand von einem Beispiel, der Particle Swarm Optimization, wollen wir einen kurzen Einblick in die vielfältigen Anwendungen von KI geben.
Ein kurzer philosophischer Ausblick in die Zukunft schließt die Präsentation ab.
Für die letzten Wochen unseres Musikunterrichts sollten wir wieder kleine Präsentationen rund um das Thema Musik, Künstler und Fans vorbereiten.
Bei der Themenwahl haben wir eine große Freiheit bekommen.
Wir entschieden uns für einen Vergleich zweier Bands der deutschen Castingshow “Popstars”.
Für den Vergleich wählten wir die jeweils erfolgreichste und nicht erfolgreichste Band der Show: die NoAngels und Room2012.
Ziel war es Gründe für die stark unterschiedliche Rezeption der Bands bei den Fans zu finden.
In der Präsentation gibt es zwei Folien, auf denen hier nur ein großes graues Fragezeichen zu sehen ist.
Hier haben wir zwei Videos der Bands eingebunden.
In diesem Blog Beitrag möchte ich euch eine weitere von mir erstellte Website und abgeschlossenen Auftrag vorstellen.
Diesmal ist es eine bewusst einfach gehaltene Seite für eine Rückenschule aus Darmstadt.
Den Auftrag habe ich von meinem ehemaligen Sport Lehrer aus dem Justus-Liebig-Gymnasium erhalten.
Die Website ist bis auf das Logo komplett von mir entwickelt und entworfen worden.
Natürlich wie gewohnt ohne Coldfusion oder andere ähnliche WYSIWYG Editoren.
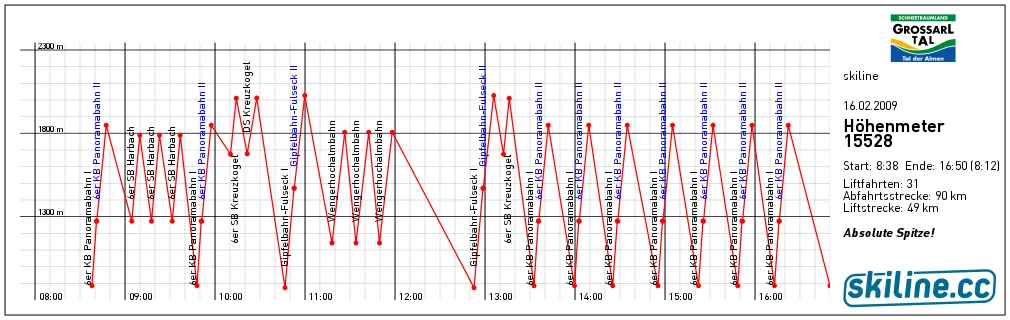
27515 Höhenmeter, 64 Liftfahrten, 162 km Abfahrten und 81 km im Lift habe ich die vergangene Woche bei sonnigem Wetter im Großarl Tal auf Skiern zurückgelegt.
Als Betreuer begleitete ich zusammen mit zwei anderen Schülern die achten Klassen der Justus-Liebig Schule.
Vor fünf Jahren war ich damals selber in der achten Klasse in Großarl.
Seitdem hat sich viel verändert.
Glücklicherweise meist zum Positiven.
Zehn Tage waren wir im Jugendgästehaus Schornhof untergebracht.
Neben dem Skifahren konnten wir die Zeit gut nutzen um uns auf unser Abitur vorzubereiten.
Aber nun zu dem eigentlichen Inhalt dieses Beitrags: skiline.cc ist ein Dienst der die Skipassdaten aus fast 75 Skigebieten sammelt und grafisch aufbereitet.
Jeder Skipass besitzt eine eindeutige ID, mit der man sich auf der Website von skiline.cc anmelden kann.
Jede Liftfahrt wird am Drehkreuz registriert und gespeichert.
Durch die Kombination von Zeit, Ort und Skipass ID kann skiline.cc dann Höhenprofile und Skirouten der einzelnen Skifahrer berechnen.
Fast schon mit einem Verkehrsleitsystem vergleichbar können die Betreiber so die Auslastung ihrer Skigebiete beobachten und entsprechend reagieren.
Präsentiert werden die Daten durch einfache Bilddateien.
Jeder Skitag wird mit einem Zeit/Höhen-Diagramm dargestellt.
Detailliertere Auswertungen (Ø Geschwindigkeiten, Tagesübergreifende Statistiken) sind leider nicht möglich.
Obwohl jedes Skigebiet in einer Karte verzeichnet ist, kann man sich leider nicht seine Skiroute in einer Karte anzeigen lassen 🙁.
Eine Integration von Projekten wie OpenPisteMap/OpenStreetMap wäre hier noch wünschenswert.
Leider wurde auf die Sicherheit weniger Wert gelegt.
Jeder der die ID eines Skipasses kennt, kann sich so im Internet dessen Tagesablauf anschauen.
Dies lässt sich auch nicht ohne weiteres verhindern.
Die Statistiken sind noch nicht einmal mit einem Passwort geschützt.
Eine Top 100 Liste der Skifahrer mit den meisten Höhenmetern rundet das Angebot ab.
Dieser Service ist ein Paradebeispiel für neue innovative Web 2.0 Dienste mit noch Potential in der Auswertung.
Schön, dass er (noch) kostenlos ist.
Skiline.cc Grafik. Leider habe ich nach unserem Servercrash meine original Bilder verloren. Hier ein kleiner Ersatz.
Mal wieder kann ich euch eine Arbeit vorstellen, die ich im Rahmen der Schule erarbeiten musste.
Diesmal handelt es sich um eine Hausarbeit die ich im Fach Geschichte als Klausurersatz leisten musste.
Thema ist die atomare Bewaffnung der BRD seit 1945.
Nun leider liegt mir Geschichte nicht so sehr.
Also habe ich es diesmal mit einer Hausarbeit anstatt der sonst fälligen Klausur versucht.
Mal sehen was bei rauskommen wird.
Abgabetermin ist erst morgen.
Vielleicht stößt meine Lehrerin so ja bei der Suche nach Plagiaten auf mein Original 😉.
Update: Und wie vermutet ist meine Lehrerin auf diesen Artikel gestoßen 😊.
Auf meine Hausarbeit habe ich 10 Punkte bekommen.
Bitte achtet auf die Lizenz im Footer der Seite.
Es wäre nicht das erste Mal, dass jemand meine Arbeit als seine ausgibt (und das sogar an meiner Schule 😊).
OpenStreetMap is a free editable map of the whole world.
It is made by people like you.
JOSM Editor.
So betitelt OpenStreetMap.org das eigene, Wikipedia-ähnliche Projekt.
OpenStreetMap hat es sich zum Ziel gesetzt, freie geographische Daten wie zum Beispiel Straßenkarten zu erstellen und allen zur Verfügung zu stellen.
Dieses Projekt wurde begonnen, weil so ziemlich alle Karten, von denen man glaubt, dass sie von jedem für alle Zwecke und kostenlos verwendbar sind, tatsächlich aus technischen und rechtlichen Gründen leider nur eingeschränkt nutzbar sind.
Dadurch wird verhindert, dass Leute diese Karten in kreativer und produktiver Weise einsetzen können.
OpenStreetMap möchte diesem unglücklichen Zustand abhelfen.
Das Projekt besitzt ein sehr umfangreiches Wiki.
Es hat mir bei meinen ersten Schritten viel geholfen.
Im IRC Channel #osm-de auf irc.oftc.net wird einem auch oft gerne geholfen.
Wie auch bei Wikipedia kann jeder dazu beitragen.
So habe ich meine durchs Mountainbiken und Geocachen gewonnen GPS Tracks (Spuren) in das Projekt eingefügt und damit das Kartenmaterial in meinem Heimatort Griesheim verbessert:
Animierter GPS Track.
Um die gewonnen GPS-Daten auch im Browser, auf dem GPS oder im Navigationssystem nutzen zu können, müssen sie jedoch noch in die OSM-Datenbank eingearbeitet werden.
An regnerischen Tagen kann man auch auf das Erfassen der GPS Tracks verzichten und von frei verfügbaren Karten abzeichnen.
Dazu werden Mapping Programme wie Potlatch oder JOSM benötigt.
Mit ihnen ist es möglich, die GPS-Daten mithilfe von Luftbildern in das OSM-Format zu vektorisieren.
Ein Screenshot von JOSM ist ganz oben zu sehen.
Jeden Mittwoch werden dann aus den Vektordaten die Karten berechnet, die man über die Website von OSM betrachten kann.
Dies sieht dann etwa so aus:
Gerenderte Map.
Die OSM Daten liegen in einem offenen Format vor.
Jeder kann sie für seine Verwendungszwecke benutzen.
Vielleicht gelingt es mir ja mal meinen TSP Algorithmus mit den OSM Daten zu testen 😊.
Es gibt sogar schon einige routing-fähige Navigationsprogramme.
Alleine in Griesheim gibt es neben mir noch 6 andere Mapper, Tendenz steigend.
Bereits nächstes Jahr rechnet man damit Deutschland flächendeckend erfasst zu haben.
Oft mit einer besseren Qualität als die Konkurrenten Tele Atlas und NavTeq.
Dies zeigt auch der Vergleich zwischen Google Maps (welches Tele Atlas Daten benutzt) und OSM.
OpenStreetMap maps are licensed under the Creative Commons CC-BY-SA license:
Der TetraBot soll sich effektiv und schnell bewegen können.
Das gelingt ihm am besten durch einen Omnidirektionalen Antrieb.
Dieser basiert auf speziellen Rädern, den “Allseitenrädern“, die ich euch hier vorstellen werde.
Die dafür nötigen Servos habe ich in einem anderen Beitrag bereits gemoddet.
Raul Rojas and Alexander Gloye Förster verfassten auch eine wissenschaftliche Arbeit zum omni-direktionalen Antrieb.
Kommerzielle Omniwheels gibt es hier: www.omniwheel.com.
Preislich liegen sie aber nicht in meinem Bereich und sind wegen der hohen Portokosten auch gleich ausgeschieden…
Also hab ich mich selber ans Werk gemacht.
Preislich bin ich mit meiner Variante bei ca 10 € für alle vier Räder gelandet.
Heute hab ich es letztendlich doch geschafft das SNES Controller 2 USB Projekt (/raphnet/4nes4snes ) von Raphaël Assénat nachzubauen.
Nach einem erfolglosen Anlauf (ich hab wohl den MCU beim Löten zerstört) musste ich nochmal komplett von vorne beginnen 🫤.
SNES Controller mit USB Port.
Es können bis zu vier SNES oder NES Kontroller auf einmal mit dem Rechner verbunden werden.
Vor etwa einem Jahr baute ich bereits das Gehäuse und versah die Kontroller mit neuen Steckern.
Damals benutzte ich aber noch den LPT Port um die Kontroller abzufragen.
Mein neuer Laptop besitzt aber nur noch USB Ports.
Also musste ich das ganze etwas umfunktionieren.
Also noch einmal das Breadboard ausgepackt, der Mikrocontroller programmiert und wieder ein schönes Layout für meine Lochrasterplatine entworfen.
Diesmal aber mit IC-Sockel für den kleinen ATMega8.
Dieses Projekt kommt ohne einen extra Wandler-IC für die USB Verbindung aus und besteht deshalb nur aus einer Handvoll Bauteilen.
Es wurde V-USB eine Software USB Implementierung von Objective Development eingesetzt.
SNES Controller USB Platine.
Die angeschlossenen SNES Kontroller gibt es günstig bei eBay.
Vor etwa einem Monat berichtete ich euch bereits vom passiven Abhören mit einem Wiretap.
Damals nutzte ich zwei RJ-45 Buchsen, die ich entsprechend durchkontaktiert hatte.
Unterstellt man einem Hacker nun böswillige Absichten.
Ist es für ihn nötig unerkannt zu bleiben.
Ein Unterbrechen der Netzwerkverkabelung, wenn auch nur für Sekunden, würde ihn verraten.
Eine unterbrechungsfreie Variante dieser Sniffing-Technik lässt sich also nur ohne das Umstecken oder Durchtrennen von Kabeln realisieren.
Hier stieß ich auf eine in der Ethernet-Verkabelung sehr verbreitete Technik: Die Schneid- und Klemmtechnik.
Auch unter der Abkürzung LSA bekannt.
LSA steht für “löt-, schraub- und abisolierfreie Technik”. Sie kommt meist in Patchfeldern oder Netzwerkdosen zum Einsatz.
Lasst euch nicht von der Farbmarkierung irritieren. Es handelt sich um ein etwas älteres Kabel mit einer eher seltenerer Kodierung: IEC 189 und IEC 708.
Auf dem Bild kann man oben das angezapfte Twisted-Pair Kabel erkennen.
Es wurde nicht durchtrennt.
Sondern lediglich von seiner Isolierung und Abschirmung befreit.
Es werden nur die Aderpaare 2 (Pin 3,6) & 3 (Pin 1,2) benötigt.
Diese werden über den oberen LSA-Verbinder gelegt und können nun vom unteren entsprechend abgegriffen werden (siehe unten-rechts auf dem Bild).
Ich habe diese Technik erfolgreich getestet.
Während ich live über mein Streaming-Client Internetradio hörte zapfte ich das Kabel an.
Und konnte mit Wireshark den Netzwerkverkehr mitlesen.
Jedoch sollte man die Kabellängen möglichst gering halten.
Bei größeren Entfernungen (> 8m) brach die Verbindung teilweise ab.
Für unser derzeitiges Musikthema sollten wir einen Radiobeitrag zum Thema Jazz produzieren.
Bastian Hauk und ich entschieden uns erst für den Jazz im dritten Reich.
Nach einigen Recherchen spezialisierten wir uns auf die Swing-Jugend.
Zeitzeugen zu finden war schwer.
Schließlich stießen wir auf den Swing-Experten und Zeitzeugen Günter Discher, der früher in Hamburg selbst Teil der Swing Jugend war.
Leider haben wir keinen Interview-Partner gefunden und mussten so auf vorhandene Interviews auf CDs ausweichen.
Insgesamt hat unser Kurs etwa 6 Interviews produziert, die wir nun an andere Schulen schicken wollen.
Wenn rechtlich alles in Ordnung ist werden die Beiträge auch von Radio Darmstadt gesendet 😊.
This is my first English blog post.
Excuse me for my hopefully not so bad English 😊.
During my reverse engineering on the Terratec Noxon 2 Audio I had to sniff the network traffic between the Noxon and the Internet.
First, I just sniffed the wireless traffic with a simple ARP spoofing attack in my switched network.
But I couldn’t be sure whether I sniffed the whole traffic or if I just missed some internal traffic in my network.
After some internet research, I decided to build my own passive Ethernet tap to do a MITM (man-in-the-middle) attack.
Anlässlich meines 8000. “gescrobbelten” Tracks auf www.last.fm habe ich mich entschlossen mal etwas über dieses Social-Music Netzwerk zu berichten.
Mein Last.fm Profil vom 9. September 2008.
Last.fm auf dem Noxon 2 Audio.
Die Philosophie und der Aufbau von Last.fm ist in Wikipedia näher beschrieben.
Meistens höre ich die Radio Streams von Last.fm über mein Terratec Noxon 2 Audio.
Dieser Hardware Audiostreaming Client bietet standardmäßig keine Möglichkeit das proprietäre Streamingformat von Last.fm wiederzugeben.
Dazu ist eigentlich der Last.fm Player nötig.
Dieser ist für diverse Plattformen verfügbar (Mac, Linux, iPhone und Windows).
Nachdem ich mich im vorherigen Beitrag über die Verwendung des Noxon’s als Last.fm Client ausgelassen habe, werde ich mich diesmal tiefer in die Interna des Streaming Clients wagen.
Genauer geht es um das Ersetzen/Erweitern der vTuner Stations Liste und das Hinzufügen eigener Services in das “My NOXON” beziehungsweise “Podcasts” Menü.
In 13/1 wird im Englisch Grundkurs Australien als Themenschwerpunkt vorgeschrieben.
Jedem unseres Englischkurses wurde in Kleingruppen ein australischer Staat beziehungsweise “Territory” zugeteilt, den er präsentieren sollte.
Wir (Jonas und ich) entschieden uns für Victoria.
Jonas hatte durch Verwandte in dieser Gegend ein paar Bilder und Informationen besorgen können.
Außerdem setzten wir einen Schwerpunkt auf Melbourne mit seiner Kultur und Infrastruktur.
In den letzten vier Wochen war ich viel unterwegs.
Zunächst verbrachte ich zwei Wochen in Spanien, genauer gesagt in Andalusien.
Direkt im Anschluss ging es weiter nach Grönland, wo ich eine Woche mit dem Schiff entlang der Westküste Grönlands unterwegs war.
In diesem Blogbeitrag möchte ich über diese Reisen berichten und außerdem einen Ausblick auf mein nächstes Projekt im Bereich Robotik geben.
Mein nun 30. Artikel ist das Resultat einer Idee aus meinem Spanien-Urlaub.
Es handelt sich um einen etwas anderen Login Prompt, der bei weitem nicht die nötige Sicherheit für kritische Anwendungen bietet, dafür aber von jedem “Insider” ohne vorherige Absprache zu lösen sein sollte.
Eigentlich ohne jeden Verwendungszweck hab ich einfach mal los entwickelt.
Rein rechnerisch müsste es 2^9 = 512 verschiedene Kombinationen geben.
Nehmt euch mal ne halbe Stunde Zeit und probiert alle Kombinationen aus .
Viel Spaß beim drauf los probieren.
Ich will euch mal keine weiteren Hinweise geben.
Keine Angst! Es gibt einfachere Methoden.
Jeder, der es schafft, hat die Kombination auch schon einmal gesehen.
Für meine morgige Informatik-Klausur habe ich mich mal wieder an C++ gewagt um einen Algorithmus zu implementieren.
Die Hauptthemen der Klausur werden das n-Damen-Problem und das Josephus Problem sein.
JS, PHP & CSS Frontend.
Für das n-Damen-Problem habe ich eine iterative Backtracking-Implementation in C++ geschrieben.
Zudem ist es auch mein erstes funktionsfähiges und komplexeres C++ Programm 😉.
Um euch meine Ergebnisse zeigen zu können, habe ich mich bei der PHP, JS & CSS Version meines Freundes Micha bedient und sie leicht angepasst.
Das PHP-Script ruft über den Backtick-Operator das C++ Programm auf und stellt es anschließend mit JS und CSS dar.
Um den Server zu schonen habe ich die maximale Feldgröße auf 13 beschränkt.
Das sind zumindest schon mal fünf Damen mehr als bei der PHP-Version.
Ohne die Beschränkung sind auch Problemgrößen bis 16 in einem angemessenen Zeitrahmen zu bewältigen.
An den Weltrekord (25 Damen) komme ich jedoch noch nicht 😉.
In den vergangenen Osterferien habe ich jeden Tag um die Ankunft meines neuen Laptops gefiebert.
Als er dann sechs Tage verfrüht bei mir auf dem Tisch lag, freute ich mich riesig.
Hier ein Kompliment an Dell.
Diese pessimistische Lieferzeiteinschätzung ist wirklich eine gute Marketingstrategie.
Meine ersten Erfahrungen mit dem D630 unter Debian Etch waren grauenvoll.
Anfangs lief gar nichts.
Erst nach mehreren Stunden konnte ich die wichtigsten Komponenten zum Laufen bringen.
Meine Rettung war die neue LTS (Long Term Support) Version von Ubuntu, Hardy Heron, die fast zeitgleich mit dem Eintreffen meines Laptops veröffentlicht wurde.
Zu Ubuntu gibt es nicht viel zu sagen: Es läuft einfach alles!
Und das nach circa 20-minütiger Installation, ohne weitere Konfiguration.
Im zweiten Halbjahr der zwölften Klasse wurde unsere Musik-Klausur durch eine Präsentation zum Thema Filmmusik ersetzt.
Ich behandelte die Musik zum Film “The Sting” (USA 1973), den ich ein paar Wochen zuvor im Ersten gesehen hatte.
Scott Joplin komponierte große Teile der Filmmusik im “Rag Time”-Stil.
In der Präsentation gehe ich näher auf diese spezielle Form ein und analysiere den “Entertainer” von Scott Joplin.
Ein weiterer Schwerpunkt liegt auf der Synthese von Musik und dem bewegten Bild (leider aufgrund der fehlenden Ausschnitte nicht nachvollziehbar).
Joplin komponierte auch den bekannten Titelsong “The Entertainer” des Films (siehe Video).
Für den Film wurden einige Stücke an den Film angepasst (adaptiert).
Glücklicherweise habe ich ihn auch aufgezeichnet und konnte so einige Filmausschnitte in die Präsentation einbauen, welche ich leider aus Rechts- und Ressourcengründen nicht online veröffentlichen kann.
Diese sind in der Präsentation durch ein großes graues ”?” ersetzt worden.
Eigentlich warte ich ja immer noch auf die WordPress Version 2.5, die ursprünglich für den 10.3.08 angekündigt wurde.
Nachdem bis heute noch keine neue Version veröffentlicht wurde, habe ich mich dazu entschieden meinen Blog erst einmal auf die aktuellste stabile Version zu aktualisieren.
Einige Plugins benötigten ebenfalls ein Update.
Drei neue Plugins gibt es nun auch für mein Blog-System:
Google Analyticator
Search Unleashed
Sociable
Und hier noch der altbekannte Rest:
AdSense Manager
Akismet
All in One SEO Pack
Get Recent Comments
Google XML Sitemaps
Link Indication
Viper’s Video Quicktags
WP-Syntax
Das Plugin WordPress Database Backup werde ich demnächst durch eine systemweite Backup Lösung ersetzen.
Eigentlich bin ich gerade sehr zufrieden mit dem Blog-System.
Vielleicht werde ich deswegen das Upgrade auf 2.5 etwas verzögern, bis es einigermaßen Bug-free und stabil ist.
InteractivePHP ist ein kleines Experiment mit PHP, GD & Javascript.
Dabei habe ich versucht mit PHP & GD animierte Bilder zu erstellen.
Das Generieren von animierten GIFs mit GD ist kompliziert und langsam.
Das Generieren eines einzelnen Frames ist dagegen denkbar einfach.
InteractivePHP besteht aus zwei Komponenten:
Dem Bild, das mit PHP & GD immer dynamisch generiert wird. Per GET wird dem Bild-Script die aktuelle Position der Animation mitgeteilt.
Der Oberfläche, die mit HTML und Javascript das animierte Bild anzeigt und mit einem Timer das Bild alle paar Millisekunden neu lädt.
In der Oberfläche habe ich einige Slider implementiert.
Mit diesen kann man den Text drehen und verschieben.
Da ich leider noch sehnsüchtig auf mein Notebook warte, verbringe ich die Zeit damit, mich über es zu informieren:
Dell Portables POST Bitmap Update Program soll es laut Dell ermöglichen die Dell-Werbung, die beim Booten angezeigt wird, zu entfernen und durch ein eigenes Bild zu ersetzen:
The POST Bitmap Update Program allows you to replace the image that is displayed during the Power-On Self Test (POST) of your Dell Portable computer.
By default, the image displayed during POST is the Dell logo.
This image can be replaced by a specially formatted image loaded into non-volatile memory (NVRAM) using SPLASH.EXE.
The image remains in memory even when power has been removed from the system.
The image which is loaded into NVRAM must be in bitmap (.bmp) format.
The image can be no larger than 640 pixels wide by 480 pixels high and must use 16 colors.
Juhu, endlich sind wieder Ferien. Also wieder mehr Zeit zum Cachen.
Cachen? Ja Geocachen, eines meiner Hobbies.
Meine Caching-Saison wurde am Donnerstag, leider zeitgleich mit meinem Geburtstag, mit dem “GrünDönerstag” eingeleitet.
Wie letztes Jahr veranstalteten auch die Darmstädter Geocacher wieder ein Event zum Gründonnerstag.
Durch das Wortspiel hat man sich deutschlandweit geeinigt am Gründonnerstag Döner essen zu gehen.
So haben sich in allen größeren Deutschen Geocaching-Metropolen die Geocacher zum gemeinsamen Essen & Cachen getroffen.
In Darmstadt hat man wie letztes Jahr wieder das “Ye BaBam Ye” als gemeinsamen Treffpunkt gewählt.
Gründönerstag 2008.
Auf dem Foto bin ich übrigens auch zu sehen.
Leider nicht sehr schön getroffen 🙁.
Weitere Bilder gibt es in BlueGerbil’s Album!
Lange habe ich nun schon darauf hingefiebert.
Schließlich war es doch ein wenig ernüchternd.
Meinen Führerschein hab ich schon, bin aber bisher noch nicht alleine gefahren 🙁.
Ansonsten hat sich auch nicht viel geändert.
Zugegebenermaßen hatte ich das auch nicht erwartet.
Bank, Versicherung & Verwandte stehen Schlange…
Nur das Wetter spielt dieses Jahr etwas verrückt.
Bei uns schneit es täglich, und das in Hessen während Ostern!
Dafür gibt es diesmal ein fettes Geburtstagsgeschenk:
Dell Latitude D630.
Nach einigen Recherchen habe ich mich schließlich für einen Dell Latitude D630, und gegen ein Modell der Inspiron Serie, entschieden.
Mein Vater besitzt ein ähnliches Modell als Dienst-Notebook.
So fiel mir die Entscheidung etwas leichter.
Einige dürften das Problem gut genug kennen: Viele File Hoster begrenzen den Download Traffic einer IP auf wenige hundert Megabytes pro Tag.
Um diese Begrenzung zu umgehen bedarf es einer neuen IP.
Hier zeigt sich der wohl einzige Vorteil der dynamischen IP-Adressen für Privatkunden.
Die begrenzte Verfügbarkeit von IP Adressen zwingt die Access Provider die IP Adressen dynamisch aus einem Pool an die Router zu verteilen.
Bei einem erzwungenen Reconnect ändert sich die IP Adresse dann mindestens jeden Tag einmal.
Diese Dauer ist aber nur nach oben begrenzt.
Prinzipiell wäre es möglich seine IP Adresse jede 10 Minuten zu ändern.
Oder wenn das Download Limit des File Hosters erreicht wurde.
Dazu bedarf es normalerweise ein paar Klicks im Admin Menü des Routers.
Für das “Arcor-DSL WLAN-Modem 100” hinter dem sich ein Zyxel Prestige HW660 verbirgt habe ich folgendes Bash Script geschrieben.
Im Mathematik-Leistungskurs haben wir uns für einen Grafischen Taschenrechner (GTR) von Casio entschieden.
Die wesentlichen Features des FX 9750G Plus sind auf der Herstellerseite aufgelistet.
Die für mich interessanteste Neuerung war die Möglichkeit den GTR über ein Kabel an den Rechner anzuschließen.
Mit dem Kabel ist es möglich alle Ergebnisse, Graphen und Programme zu überspielen.
Das sonst sehr umständliche Eingeben von Programmen und Spielen wird nun zum Kinderspiel.
Im Internet gibt es bereits zahlreiche Sammlungen von GTR-Programmen.
Unter www.lio-underground.de.vu ist seit einigen Monaten die erste offizielle Website der LIO-Schülervertretung online.
Die zuerst statische HTML-Seite wurde durch Micha und mich durch ein dynamisches Content Management System mit Forum ersetzt.
Die neue Website basiert auf Clansphere.
Micha hat mit seinen Kenntnissen als Hauptentwickler von Clansphere das System an die Bedürfnisse der SV angepasst.
Auf der neuen Seite soll über neue Projekte der SV informiert werden.
Mit dem Forum soll das Diskutieren über die aktuellen Schulthemen ermöglicht werden.
Vielleicht bildet sich ja auch mal eine kleine Schulcommunity.
Für die Zukunft haben wir uns das Integrieren des Vertretungsplans in die Seite vorgenommen.
Leider müssen dafür noch einige Hindernisse überwunden werden.
Seit ein paar Wochen ist die neue Website der Handballabteilung des TuS Griesheims online.
Nach etwa einem halben Jahr Entwicklungszeit habe ich das Grundgerüst der Seite komplett neu implementiert.
Das Content Management System (CMS) der Vorgängerseite stellte sich als zu komplex dar und sollte durch ein einfaches und intuitives System ersetzt werden.
Die Website stellt grundlegende Informationen über die Abteilung und die Mannschaften sowie liefert aktuelle Ergebnisse und Berichte.
Mein Ziel war es ein selbstständiges System zu entwickeln, welches den Admin entlastet.
So werden zum Beispiel zu Saisonende alle Berichte der vergangenen Saison archiviert.
Eine interessante Funktion ist auch die Synchronisierung der Spielpläne und Ergebnisse aus externen Datenquellen.
Oder auch z.B. die Fotogalerie, welche die Bilder automatisch in verschiedenen Größen generiert.
Besucher der Seite können bestimmte Beiträge kommentieren oder sich im Gästebuch verewigen.
Wie letztes Jahr habe ich wieder eine TF1-Senderlogo-Animation für das Team der LIO der 12. Klasse designt.
Dazu musste ich sogar mal wieder Windows reaktivieren um 3ds Max benutzen zu können.
Diesmal gab es eine Weihnachtssendung des Senders.
Also musste es etwas weihnachtlicher werden:
Die Präsentation ist eine Einführung in das Thema der Brennstoffzelle.
Ich hielt sie als Abschluss zum Themenkomplex der Elektrolyse, der in der elften Klasse in Chemie behandelt wird.
Die Präsentation war wohl meine bisher beste und längste Präsentation.
Ich wurde mit 15 Punkten bewertet und mit lautstarkem Applaus und Anerkennung belohnt.
Die Präsentation dauert etwas mehr als eine Stunde.
Die anschließende Diskussion noch mal etwa eine Viertelstunde.
Über meinen Vater bekam ich zwei Elektrodenplatten einer Brennstoffzelle, mit denen ich die Funktionsweise sehr schön erklären konnte.
Auch die Vorbereitung auf die Präsentation hat richtig Spaß gemacht.
Vor einiger Zeit, als ich noch aktiver DVBViewer User war, habe ich dort an einem Dokumentationswettbewerb teilgenommen.
Dieser wurde von Steffen Klausing ausgerichtet.
Damals habe ich sogar gewonnen.
Leider wohl nur wegen der Tatsache, dass ich der einzige Teilnehmer war.
Aber schon wegen des Gewinns (eine Flasche Whisky) hat sich die Mühe gelohnt.
Leider wurden meine beiden Artikel nie veröffentlicht 🙁.
Vielleicht lag es an ihrer Qualität? Oder ich habe den geforderten Artikeltyp verfehlt.
Ursprünglich hätten die eingesendeten Artikel auf www.dvbviewerfaq.de veröffentlicht werden sollen.
Trotzdem möchte ich sie wenigstens über meinen Blog veröffentlichen.
In DVBViewer - IR FAQ beschreibe ich den Aufbau eines Infrarotempfängers für den Rechner und dessen Konfiguration.
Und in DVBViewer - LCD FAQ zeige ich wie man ein Dot-Matrix LCD an den Rechner anschließt und konfiguriert.
Hier könnte auch noch meine jaLCDs Config für dich interessant sein.
Beide Artikel sind schon etwa ein Jahr alt und deswegen vielleicht nicht mehr auf dem aktuellsten Stand.
Zu den Zeiten, als Windows noch mein bevorzugtes OS war, benutzte ich regelmäßig den DVBViewer.
Der DVBViewer ist ein Programm zum Ansteuern von DVB Hardware.
Es unterstützt sämtliche DVB Karten mit BDA-Treiber, Technotrend Karten und schon einige HDTV Karten.
Besonders auf die Aufnahmeplanung und Verwaltung wird sehr viel Wert gelegt.
Dabei bleiben leider die Grundfunktionen eines Media Centers etwas auf der Strecke (Dafür wurde die Software eigentlich ja auch nicht entwickelt).
Zwei große Vorteile des DVBViewers sind dessen Plugin-Unterstützung und die wirklich große Community.
Der DVBViewer wird von einem kleinen Team von Entwicklern als Closed Source Projekt entwickelt und ist für 15 € als Download auf der DVBViewer Website (http://www.dvbviewer.info) zu erhalten.
Als Windows-Nutzer war ich regelmäßig im Forum aktiv und habe beim Aufspüren von Fehlern und dem Unterstützen neuer User geholfen.
Leider basiert die Software sehr auf den Windows-eigenen DirectShow-Filtern.
Eine Portierung zu Linux ist deswegen praktisch unmöglich.
So musste ich durch meinen Wechsel zu Ubuntu Linux leider eine andere Software benutzen.
Noch heute vermisse ich den DVBViewer 😊.
Aber nun endlich zu meiner jaLCDs Konfiguration: Wie schon vorhin erwähnt, besitzt der DVBViewer eine Plugin-Schnittstelle.
Für Dot-Matrix LCDs gibt es ein Plugin für die Anbindung an jaLCDs.
Die Standardkonfiguration des Plugins ist sehr einfach gehalten und schöpft nicht die Möglichkeiten von jaLCDs voll aus.
Nachdem in der Community mehrmals einige Ansätze aufgetaucht sind, habe ich mich entschlossen, selber einen Versuch zu wagen.
Beim Aufräumen sind mir gerade meine ersten Zeilen Code auf den Mauszeiger gefallen.
In der fünften Klasse begann ich mit Quick Basic meine ersten Programmiererfahrungen zu sammeln.
Meine erste Zeile dürfte wohl ein einfaches beep gewesen sein.
Danach ließ es mich nicht mehr so schnell los und ich schrieb zahlreiche kleine Programme in Quick Basic.
So war mein erstes umfangreicheres Programm eine Lichtorgel, die über den LPT-Port eine Relais-Karte ansteuerte und zahlreiche vorprogrammierte Abläufe wiedergab.
Zum Entwickeln habe ich mir ein kleines LPT LED Modul gebastelt:
Mein zweites Projekt war ein Programm zum Erfassen von Rundenzeiten.
Anfangs benutzte ich es für meine Carrera Bahn dann für mein RC-Car.
Je nachdem wurde die Zeit per Laserlichtschranke oder per Reed-Relais gemessen.
Anfangs wurden die Signale über eine umgebaute Tastatur eingelesen.
Später habe ich dann schließlich den COM-Port verwendet.
Das Programm wird teilweise noch heute für die Carrera Bahn benutzt und wird deswegen manchmal auch noch weiterentwickelt.
Die gemessenen Zeiten werden auf dem Bildschirm ausgegeben und zusätzlich in eine Datei geschrieben.
Auch eine Ampel ist integriert.
Diese kann ihre Signale auch akustisch und über den LPT-Port ausgeben.
Mit der entsprechenden Relais-Karte von der Lichtorgel lässt sich so eine größere Ampel realisieren.
In der elften Klasse sollten wir eine Präsentation über die demographische Entwicklung Deutschlands halten.
Diese wurde durch ein themenverwandtes Essay ergänzt.
Als Abschluss des Informatik Grundkurses der elften Klasse möchte ich hier nun unsere Implementierung eines 2D Autorennspiels in Delphi vorstellen.
Anfangs bestand die Aufgabenstellung darin ein eindimensionales Rennspiel zu entwickeln, bei dem der Spieler mit den schnelleren Fingern gewinnt.
Also quasi ein einfaches Geschicklichkeitsspiel.
Anfangs sind wir daher nur auf einer Linie gefahren.
Aber wer hätte es gedacht? Nach einer Zeit wurde das ziemlich langweilig.
Und da wir noch genügend Zeit hatten, strukturierten wir unseren Code grundlegend neu und fügten die Simulation von Beschleunigung und Verzögerung hinzu.
Screenshot des 2D Autorennens.
Trotzdem sind wir noch nicht über die erste Dimension hinausgekommen.
Nachdem nach der vierten Doppelstunde immer noch nicht alle fertig waren und wir schon dabei waren Extras und Cheats einzubauen, habe ich mich dann entschlossen in die zweite Dimension zu gehen.
Die kleine Physik-Engine behielten wir bei und fügten die Möglichkeit hinzu die Autos zu lenken.
Aber nun hatten wir ein Problem: wie wird die nun zwei-dimensionale Strecke begrenzt?
Eine Strecke mit Canvas Objekten zu zeichnen war uns zu aufwendig und auch nicht gerade sehr schön.
Wir bedienten uns daher einer Technik die auch als “Colorcoding” bekannt ist: verschiedene Farben in einer Bitmap markieren, fahrbaren Bereich und Barrieren.
Einen Rundenzähler und eine Konfigurationsdatei rundeten schließlich das Projekt ab.
Color Coding der Fahrbahn.
Wir legten diesmal viel Wert auf die objektorientierte Entwicklung des Codes, da dies das aktuelle Unterrichtsthema ist.
Ein Frontend für die Einstellungen sparten wir uns, um uns mehr auf die “Physik” konzentrieren zu können.
Die Einbindung eines INI-Files lernte ich nebenbei auch noch.
Das Autorennprogramm ist also als Gegenstück zum Potenzübungsprogramm zu sehen.
Hierbei legten wir mehr Wert auf ein schönes GUI mit Hilfe und Installer.
Ihr könnt den Quellcode gerne für eure Projekte weiterverwenden.
Ich bitte jedoch um einen kurzen Kommentar und einen Hinweis im GUI, Danke
Im Rahmen unseres Informatikunterrichts in der zehnten Klasse wurde unsere Leistung durch eine Projektarbeit bewertet.
In kleinen Gruppen arbeiteten wir an jeweils unterschiedlichen Projekten.
Das Potenzübungsprogramm war unser erstes kleines Delphi-Projekt.
Wir steckten unsere ganze Motivation hinein und fügten sogar eine Hilfe mit Bildern und einen Installer hinzu.
Wir teilten unsere Gruppe in Programmierung, Packaging und Dokumentation auf 😉.
Jeder hatte ja seine eigenen Vorlieben und Fachgebiete.
Das Hauptprogramm.
Die Aufgabenstellung bestand darin, ein kleines Potenzübungsprogramm zu entwickeln, welches beim Lernen der Potenzregeln helfen sollte.
Wir fügten eine Fehlerkorrektur, einen Webkampfmodus mit Onlineranking hinzu (ist leider nicht mehr online).
Wir legten viel Wert auf eine intuitive und schnelle Bedienung.
Das Programm ist komplett über die Tastatur bedienbar.
Der User bekommt eine akustische Rückmeldung seines Ergebnisses und abschließend eine statistische Auswertung seiner Übung.
Hier wurde nichts vergessen.
Mit dem Projekt lernten wir alle Möglichkeiten von Delphi kennen.
Und natürlich mussten wir fast alle Features und Gimmicks (App-Icon, Hilfe, etc) einmal ausprobieren.
Also unser Programm ist eine “Eierlegende Wollmilchsau” und daher wohl auch eher eine Art Machbarkeitsstudie, um unseren lieben Informatiklehrer zu beeindrucken 😉.
Ihr könnt den Quellcode gerne für eure Projekte weiterverwenden.
Bitte beachtet jedoch die GPL.
Hier will ich jetzt mein Kryptex vorstellen, welches ihr gerne als Cachebehälter verwenden dürft.
Später wird hier auch noch eine Bauanleitung zu finden sein.
Nun fragt ihr euch vielleicht warum der ganze Aufwand?
Grundsätzlich ging es mir nur darum, ob es möglich ist ein eigenes Kryptex zu basteln.
Inspiriert wurde ich von diesen Designer Kryptexen: https://www.cryptex.org.
Dabei kam ich dann auch sehr schnell auf die Idee das Kryptex als Geocachebehälter zu verwenden und den Code einfach in das Rätsel einzubauen.
Von dieser Idee war ich so begeistert, dass ich sofort in den Baumarkt gerannt bin und die billigsten Materialien für einen ersten Versuch gekauft habe.
Die Materialien die ich schließlich auch verbaut habe kosten nur um die 3 bis 4 €.
Also wirklich um die hundert Mal billiger als die käuflich zu erwerbenden.
Tja, mich hat es mal wieder nicht lange bei meiner alten Website gehalten.
Der Hauptgrund dafür dürfte wohl die umständliche Handhabung des Inhalts über den Quelltext gewesen sein.
Ich hoffe nun mit dem Blog endgültig eine Informationsplattform für mich gefunden zu haben.
Ich will hier versuchen nützliche Informationen, Tipps, Tricks und Erfahrungen aus meinem Alltag zu veröffentlichen.
Auf der Suche nach der richtigen Blog-Software habe ich mich einfach mal von anderen Blogs inspirieren lassen.
Viele von ihnen ähneln sich sehr 🙁.
Teilweise wird auch der Inhalt stur von anderen Seiten kopiert ohne einen Verweis einzufügen.
Das halte ich für ziemlich rücksichtslos und unsinnig.
Deshalb werde ich nicht über Themen berichten, die schon in zig anderen Blogs vor mir behandelt wurden.
Ich möchte einzigartig sein und mich mit informativen und einzigartigen Beiträgen von der Blogosphäre abheben.
Mein Ziel ist es nicht viele Beiträge zu schreiben oder meinen Blog als Tagebuch zu missbrauchen.
Ich will auch keine Community hinter einem Blog aufbauen wie es in anderen großen Blogs gemacht wird.
Jedes Mal wenn ich im Internet zu einer bestimmten Problemstellung nicht fündig werde, wird es einen neuen Beitrag geben.
Also auf ein neues.
Ich hoffe euch mit meinen Beiträgen weiterhelfen zu können…